A new Amazon MCF (Multi-Channel Fulfillment) shipping integration lets merchants fulfill website orders directly from their Amazon FBA inventory. Paid orders are automatically sent to Amazon for fulfillment, and shipment status, tracking details, and stock levels are synchronized back to the site. Configuration Amazon MCF is available as a new Type when creating a shipping option in Ecommerce > Shipping Options > + Create New. As with other integrated shipping providers, selecting it hides the Price field and displays the integration settings: • Client ID / Client Secret - Selling Partner API (SP-API) application credentials used for authorization • Refresh Token - access key generated by the merchant in Amazon Seller Central • Merchant Email - email address that receives fulfillment notifications • Shipping Provider Services - delivery speeds to offer: Standard, Expedited, Priority, Scheduled, Next Day • Sandbox - enables the Amazon test environment • Check Connection - verifies the connection and displays its status Shopping cart Customers see each enabled delivery speed as a separate shipping option. Options are displayed only when the delivery country and currency match and a price can be calculated for the cart. The speed selected by the customer is saved on the order and determines the Amazon shipping speed. The options are rendered through the existing shipping_options and shippingProviderFields components, so no site template changes are required. Order fulfillment • Orders are automatically sent to Amazon when their status changes to Paid. • In the admin panel, the order shows the fulfillment state (pending, submitted, shipped, or error) and the Amazon order number. • Tracking numbers and tracking URLs are saved to the standard order fields. If Amazon splits an order into several packages, all tracking numbers are listed together. • When Amazon ships the order, its status automatically changes to Shipped. Fulfillment status emails are then sent to the customer, with tracking details, and to the merchant through the standard order status workflow. • Amazon requires a recipient phone number, so it is taken from the customer's CRM data. If no phone number is available, the merchant receives a warning. Background synchronization Status and tracking Statuses and tracking details for orders sent to Amazon are updated every 15–30 minutes. As a result, the Shipped email may be sent up to approximately 30 minutes after the actual shipment. Inventory sync An optional setting enables stock synchronization. When enabled, FBA inventory levels are pulled to the site every 15–30 minutes for products with an Amazon SKU. Amazon does not provide real-time stock events, so stock levels may briefly differ between sales channels, such as the website and an Amazon store.
RSS Feeds (Internal & External)
Custom Modules
A new RSS Feeds section has been added under Content > RSS Feeds. Administrators can publish site content as RSS feeds and display third-party feeds on their websites. The section has two tabs: Internal Feeds and External Feeds. Feeds can be enabled or disabled, previewed, and duplicated. Feed names must be unique, and both lists can be sorted by Name, Status, and Last Updated. Internal feeds An internal feed publishes content from a single source module (Blogs, Events, a custom module, etc.) at a permanent URL. The URL serves valid RSS 2.0, and the feed updates automatically. • Only published public content is included. Disabled, expired, and secured items are excluded. • Items are sorted by Release Date (newest first), or by ID if the module's Release Date field is disabled. • Limit defaults to 100 items. 0 removes the limit, and a warning is shown for values above 500. • Update Frequency controls how often the feed is rebuilt: Many times a day (approximately every 4 hours, default), Once a day, or Several times a week. Changes to the feed settings or layout are applied immediately. • The feed URL can be any path ending in .rss or .xml. It must not conflict with existing pages, items, or redirects. Disabled feeds return a 404 error. • If a rebuild fails, for example, because of an error in a custom layout, the feed keeps serving its last working version, and the error is shown in the feed list. • A module selected as a feed source cannot be deleted until the related feeds are deleted or switched to a different source. External feeds An external feed connects a third-party feed in RSS 0.91 / 1.0 / 2.0, Atom, or JSON Feed format and displays its content on the site. • The fetched feed is normalized and saved as a physical .xml or .rss file at the specified File Path in the File Manager, with up to 500 entries. Pages read only from this file and never request the external source during rendering. • On each successful update, the file is fully rebuilt from the current source content. Entries removed from the source also disappear from the file. • Parsing is strict, with no auto-correction. An invalid feed is marked with an error status, and the admin panel shows parser details, including the reason and position. • If the source is invalid, unavailable, or too slow, the existing file is not overwritten. The last successful version remains on the site. Security External content is treated as untrusted and cleaned before saving: • Scripts, iframes, event handlers, inline styles, and other executable content are removed. • Only basic formatting, links (HTTP/HTTPS only, with rel="nofollow noopener" enforced), and images (HTTPS only) are kept. • Liquid in external content is escaped and not executed. • Requests to external sources are limited by response size (10 MB) and timeout. Liquid component Feeds can be output on site pages using the new rssFeed component: • source - feed name • layout - layout name • source_type - external feeds only: sourceUrl or filePath • limit - number of entries to output (default: 10) • collectionVariable - stores the feed data in a variable for custom rendering The Components panel now includes an RSS Feeds item with Internal Feed and External Feed options. These let you configure the parameters and copy the generated code. Plans and limits RSS Feeds are available on the Business and Pro content plans: • Business - up to 5 internal and 5 external feeds • Pro - up to 15 internal and 15 external feeds Open API Full CRUD (list, get, create, update, delete) is available for both internal and external feeds. The same validations and plan limits apply as in the admin panel. Responses include the feed status, last updated date, and last build error details. New Liquid filters Three new Liquid filters have been added for generating valid XML and RSS output: • rfc822_date - formats a date in the RFC 822 format required by RSS, always using the English locale, for example, Tue, 21 Jul 2026 10:00:00 +0000 • xml_escape - escapes the &, <, >, ", and ' characters • cdata - safely wraps HTML content in <![CDATA[...]]>
Secrets Manager
Admin Panel
A new Secrets Manager section has been added under Settings > Secrets Manager and is available on all plans. It stores credentials for external integrations, such as API keys and tokens, in groups of name–value fields. • Template types - When creating a group, selecting Slack, WhatsApp, or Telegram pre-fills the typical fields for that integration. Custom starts with one empty field. • Hidden values - Fields marked as Hide Value are masked, showing only the last 4 characters. • Access control - The section has dedicated Can View, Can Create, Can Edit, and Can Delete permissions in Admin User Roles. Revealing and copying full values requires Can Edit.
Sign in with Google
Admin Panel · WebinOne Portal
Google has been added as an authentication option in the WebinOne Portal. A new Continue with Google button on the Login and Register pages lets users sign up or sign in with their Google account in a single flow. How it works • On the first sign-in with Google, a new portal account is created automatically. • On later sign-ins, the user is logged into their existing account. • If an account with the same email already exists, the user confirms their password once to link it with Google. After that, they can sign in with Google directly.
Improvements4
Admin UI/UX Refinements
Admin Panel · UI/UX · WebinOne Portal
A round of interface improvements has been applied across the admin panel to make everyday work cleaner and more predictable. Buttons, labels, and controls now look and behave consistently on every screen, so actions are easier to recognize and find. Related actions are grouped together to reduce clutter, and field labels use clearer, more consistent wording. Forms, dropdowns, and filters now follow a single unified style. Order details The order detail experience has been refreshed across the edit form and the Payments, Products, and Form Submission tabs: • Edit Details - Editing order details now opens on a separate page with breadcrumb navigation, a two-column field layout, and clearer field labels. • Payments - The Deferred Order Payment button has been replaced with a compact ⋮ actions menu next to + Create Offline Payment, with the same options as before. Amount labels have also been refined. • Products - A new SKU Code column has been added between Product and Units. • Form Submission - The tab has been reorganized into clear Form Info and Submitted Data sections. Ecommerce settings • Inventory is now enabled with a toggle that reveals its related settings, replacing the previous checkbox. • Add All US State Tax Rates has been moved from the toolbar to the main page. It now asks for confirmation before adding the 50 state tax entries, and existing rates are not duplicated.
Open API - External API Credentials
Open API
New Open API (v2 Admin) endpoints have been added for managing External API Credentials, bringing the existing admin functionality to the Open API. The endpoints support all authentication types (None, Basic, API Key, and OAuth2) with the same validation as in the admin panel. The endpoints are available on the Pro plan only. The corresponding scope is disabled by default for newly created API Applications. Endpoints • GET /api/v2/admin/external-api-credentials - list credentials with filtering (Where), ordering (Order_By), and pagination (Offset, Limit) • GET /api/v2/admin/external-api-credentials/{id} - get a single credential • POST /api/v2/admin/external-api-credentials - create a credential • PUT /api/v2/admin/external-api-credentials/{id} - update a credential • DELETE /api/v2/admin/external-api-credentials/{id} - delete a credential Authentication fields Each credential has a Name, a unique Alias, and an AuthType, along with the fields required for its authentication type: • Basic - UserName, Password • API Key - ApiKeyName, ApiKeyValue, ApiKeyType (Header or Query) • OAuth2 - ClientId, ClientSecret, TokenUrl (must be a valid URL), and optional Scopes On save, fields that do not belong to the selected AuthType are cleared. This also applies when the authentication type is changed.
Order Detail Redesign
CRM
A round of interface improvements has been applied across the admin panel to make everyday work cleaner and more predictable. Buttons, labels, and controls now look and behave consistently on every screen, so actions are easier to recognize and find. Related actions are grouped together to reduce clutter, and field labels use clearer, more consistent wording. Forms, dropdowns, and filters now follow a single unified style. Order details The order detail experience has been refreshed across the edit form and the Payments, Products, and Form Submission tabs: • Edit Details - Editing order details now opens on a separate page with breadcrumb navigation, a two-column field layout, and clearer field labels. • Payments - The Deferred Order Payment button has been replaced with a compact ⋮ actions menu next to + Create Offline Payment, with the same options as before. Amount labels have also been refined. • Products - A new SKU Code column has been added between Product and Units. • Form Submission - The tab has been reorganized into clear Form Info and Submitted Data sections. Ecommerce settings • Inventory is now enabled with a toggle that reveals its related settings, replacing the previous checkbox. • Add All US State Tax Rates has been moved from the toolbar to the main page. It now asks for confirmation before adding the 50 state tax entries, and existing rates are not duplicated.
Site Suspension for Non-Payment
WebinOne Portal
Sites with unpaid subscriptions are now suspended automatically. When a renewal payment fails, the site moves through defined stages: Grace Period, Soft Suspend, and Hard Suspend. Each step comes with on-site banners and email notifications. If the invoice remains unpaid, the subscription is canceled and the site is moved to Trial, then removed following the existing trial deletion flow. Admin access remains available throughout all stages, and the admin panel shows a payment banner. If direct billing is enabled for the site, the banner links to billing; otherwise, it asks the user to contact their service provider. Paying the outstanding invoice at any stage before cancellation instantly restores the site to Active. Timeline The countdown starts from the first failed payment attempt and is not reset by later failed retries. Automatic payment retries continue until the subscription is canceled. • Day 1 - Grace Period - the website works without restrictions. • Day 8 - Soft Suspend - a payment notice banner is shown in the website header. • Day 15 - Hard Suspend - a full-page payment notice is shown on the website. • Day 22 - Trial - the subscription is canceled through the standard cancellation procedure, and the portal shows a countdown until deletion. • Day 52 - Deleted - the site is removed following the existing trial deletion flow. Partners receive an email notification at each stage. Site owners do not receive emails and see only the banners. Payment and recovery • Updating the payment method at any stage before Trial triggers an immediate retry of the open invoice. • Paying the open invoice during the Grace Period or Suspend stages instantly restores the site to Active. Suspended days are not compensated, and the next billing date does not change. • A site in Trial returns to Active with a new subscription. Domains need to be reconnected manually. • Deleted sites can be restored to Trial through a support request within 180 days. Sites upgraded from v6.11 to v7+ When a site is upgraded from v6.11 to v7+, its subscription is canceled. Previously, these sites kept full functionality indefinitely. This period is now limited: • Days 1–30 - Post-Upgrade Period - the site works as before. • Day 30 - Trial - the site becomes a regular trial site, and the portal shows a countdown in the Expires In column. • Day 60 - Deleted - the site is removed like any other trial site. For sites upgraded before this release, the countdown starts from the release date. A new subscription during the Post-Upgrade Period instantly restores the site to Active, and its domains stay connected. During Trial, domains need to be reconnected manually after subscribing. Partners receive reminder emails on days 1, 7, 14, and 30, which replace the previous upgraded-site notifications.
Bug fixes4
Ecommerce
Fixed an issue where the product Url value returned by Liquid components was not updated after the product’s catalog was moved into another catalog.
Events
Fixed an issue where deleting a contact with event bookings corrupted event allocations, allowing events to be booked beyond their capacity. Now only the deleted contact’s allocations are removed.
Email and notifications
Fixed an issue where the {{request}} object was not available in system and form emails, such as workflow notifications sent after a form submission.
Portal
Fixed an error when saving settings for v6.11 sites. Settings available for legacy sites, including site name, country, time zone, and other options, are now saved correctly.
10 updates
New features1
Submit Showcase in Portal
WebinOne Portal
A new Submit Showcase section has been added to the WebinOne Portal, allowing users to feature one of their live sites as a case study on webinone.com/cms-web-design-showcase. Through a guided two-step flow, users select an eligible live site, describe their project, and submit it for review. After the team reviews the submission and adds images, the case study is published on webinone.com. Submission flow Start page The section opens with a short description and a + SUBMIT NEW button. The button is active only when the user has at least one site in Live status; otherwise it is disabled, since only live sites are eligible for submission. Step 1 – Choose Live Site The user selects one of their live sites from a dropdown (sorted alphabetically). Trial sites are not eligible and must be activated first. The NEXT button remains disabled until a site is selected. Step 2 – Project Details The selected site is displayed with its name and clickable URL, along with a CHANGE button to return to site selection. The form includes the following required fields: • Hero Quote – shown as the headline of the published case study • Project Type – Created from scratch or Migrated from other CMSs • Platform Features Used – multiselect of platform capabilities (Blog, CRM, Custom modules, Events, Ecommerce, and more) • Four narrative questions covering: • The Challenge • The Game-Changer • The Build Process • Final Quote
Quick entry after site activation The showcase flow can also be started directly from the site activation success page. In this case, the user lands on Step 2 with the newly activated live site already preselected.
Improvements4
Admin and Portal UI/UX Improvements
Admin Panel · UI/UX · WebinOne Portal
A round of interface refinements has been applied across the admin panel and portal to improve navigation clarity, visual consistency, and overall user experience. Key improvements • Clearer parent–child screen relationships Linked settings screens now show explicit navigation direction between each other. The parent screen displays a link such as Also edit: Blog Post Settings →, while the child screen shows Part of: ← Blog Settings, making the hierarchy and navigation direction immediately obvious. • Updated admin icons All admin panel icons have been updated to a new, refreshed version. • Sort chips on module item lists Sort chips now display correctly in their default state on module item list views. • Reworked site activation steps Steps 3–4 of the site activation flow have been redesigned for a smoother activation experience. • Improved loading animations List loading animations across the admin panel have been refined. • Unified visual style Buttons, links, and animations have been unified to a single consistent style across the admin panel and portal.
Liquid Components Performance Optimizations
Liquid
A series of under-the-hood optimizations has been applied to the parsing and rendering of Liquid module components. Component parsing is now noticeably faster, reducing page render times and improving overall responsiveness — especially on pages containing multiple or complex components. No changes to component syntax or behavior are required. All existing components benefit from the improvements automatically.
Security Enhancements
Infrastructure
A set of platform-wide security improvements has been implemented as part of ongoing system hardening and preparation for upcoming compliance certifications. These changes strengthen the overall security posture of the platform and lay the groundwork for meeting industry certification standards.
System Status Page in Portal
WebinOne Portal
A new System Status page has been added to the WebinOne Portal, allowing users to view the current status of the platform and its services in one place. The page also includes a subscription form, so users can opt in to receive status updates and incident notifications directly from the platform.
Bug fixes5
Admin panel
• Fixed the display of inline notes in the OSE and admin panel — long text is no longer truncated and now wraps correctly. • Fixed an issue where system pages not available on the current plan were still accessible. Such pages are now disabled and return a 404 error.
Module items
• Fixed an issue where special characters (such as ( or )) entered in a module item name were carried over into the URL, causing an Invalid URL error on save.
URL redirects
• Fixed an issue where destination URLs containing query parameters were rejected when adding URL redirects, both manually and via XLSX import. This validation was introduced by mistake and has been removed. Previously saved redirects with parameters were not affected and continue to work as before.
Portal
• Fixed an issue where payment reminder notifications were sent for free partner sites after site migration. • Fixed an issue where the number of landing pages could not be changed in the Multisite extension after site migration.
Open API
• Fixed an issue and added validation preventing items from different modules from being linked in a parent–child relationship. • Fixed an issue where an incorrect ID was substituted when an empty or invalid value was provided for LayoutId. The same issue was fixed for TemplateId. • Fixed an issue with populating and displaying the SKUCode field. • Added validation for incorrect values in the Author, Categories, and Tags fields.
20 updates
New features2
Advanced Multi-Level Sorting in Liquid Components
Liquid
A new orderBy parameter has been added to Liquid module components, providing advanced multi-level sorting with independent sort directions per field. It is the sorting counterpart to the existing where parameter and complements the current sortBy, which continues to work unchanged. Example usage: Key capabilities JSON-based multi-level sorting:orderBy accepts a JSON array of single-key objects, where the key is the field name and the value is the sort direction ("ASC" or "DESC"). The order of objects in the array defines sorting priority – the first entry is the primary sort, subsequent entries act as tiebreakers. Supported fields: Any top-level module property can be used, including id, Name, url, releaseDate, weighting, DnDOrder, and custom properties. Spaces in custom property names are removed, consistent with sortBy. Liquid variables: Liquid variables are supported inside the orderBy value, matching the behavior of the where parameter. Deterministic order:id ASC is automatically appended as a final tiebreaker to guarantee a stable order across requests, correct pagination, and consistent drag-and-drop behavior. Case-insensitive string sorting: String sorting is case-insensitive and uses invariant culture (e.g., Apple, banana, Zebra are sorted in that order). NULL / empty handling: NULL and empty values follow the same rules as the existing sortBy parameter. Compatibility with sortBy and weighting • sortBy continues to work unchanged. • When both sortBy and orderBy are provided, orderBy takes priority and sortBy is ignored, matching the where vs filterBy behavior. • weighting: true – if weighting is not present in orderBy, it is automatically prepended as the first field, preserving current sortBy behavior. If weighting is explicitly listed in orderBy, the explicit position is respected and no auto-prepend is applied. weighting: false disables auto-prepending. Component Manager (UI) A new Advanced Sorting option has been added to the Sort Type dropdown in the component form. Selecting it replaces the simple sortBy selector with a text field for entering the orderBy JSON value, mirroring the pattern used by filterBy / where. Basic client-side validation ensures the input is valid JSON containing an array of single-key objects. Validation and error handling • Invalid JSON in orderBy – the component returns an empty result and an error is logged (same behavior as where with invalid JSON). • Unknown field name – the entry is skipped, remaining fields are still applied, and an error is logged. • Invalid direction value (not ASC / DESC) – falls back to ASC and an error is logged. • Empty array (orderBy: '[]') – treated as if the parameter were not provided; falls back to sortBy or the default sort. Open API The same orderBy sorting logic is supported in the corresponding Open API endpoints.
Braintree Payment Gateway Integration
Ecommerce
Braintree has been added as a new payment gateway, allowing customers to pay by card through Braintree alongside the existing payment options. Merchants can configure Braintree in the payment gateway settings and offer it as a payment method at checkout.
Improvements11
Admin Menu Custom Module: Edit Settings Link
Custom Modules · UI/UX
A quick-access icon has been added next to modules in the admin sidebar, providing direct navigation to a module’s configuration screens without having to open the item view first. This significantly speeds up navigation for modules with a large number of items. Behavior Direct links to module configuration. Hovering over a module in the sidebar reveals the 3-dot icon next to the module name. Clicking the 3-dot icon opens a dropdown with direct links to: • Settings • Property Management • On-Site Editor • Layouts • Table • Default Follow-up Emails Non-intrusive UI: The icon appears only on hover and is hidden in the default state. When it appears, the module name gently blurs behind it rather than being truncated or shifted, so both the icon and the module name remain readable and recognizable. Interaction • Clicking the icon opens the quick-access dropdown. • Clicking the module name still opens the module as before.
Clearer Search Indexing Actions
SEO · UI/UX
Bulk search indexing actions for module items have been reworked to be clearer, more predictable, and to provide visible feedback while running. Previously, when a partner triggered a bulk indexing action, the operation ran in the background with no indication that anything was happening, and the existing Enable / Disable labels did not clearly convey what the actions actually did. Renamed bulk actions • Enable all module items for search engines → Index all existing items • Disable all module items for search engines → Remove all existing items from index Confirmation before running Both actions now open a confirmation popup that clarifies their scope: This applies to items that exist right now. New items follow your Search Engines default in Item Settings. The popup provides BACK and INDEX ALL / REMOVE ALL buttons, depending on the selected action. Background process indicator While a bulk indexing operation is running, a blinking dot appears on the notification bell icon in the header, following the same pattern already used for import and export operations. The indicator persists when navigating away from the page or switching to a different module and disappears only when the process completes. Updated Item Settings labels Existing options in Item Settings have been renamed for consistency and clarity: Site Search • Enable new items in site search → Index new items in site search • Disable new items in site search → Don't index new items in site search Search Engines • Allow indexing of new items → Index new items • Prevent indexing of new items → Don't index new items
Open API for Property Management
Open API
New Open API endpoints have been added for managing a module’s Property Management configuration, allowing sections and their field layouts to be created, updated, and retrieved programmatically. This complements the recently introduced Property Management admin functionality and enables external systems to configure module item editor structure via API. New endpoints Get all propertiesGET /api/v2/admin/modules/{id}/property-management/all-properties Returns all available properties for the module, grouped by type (system, custom). Get visible propertiesGET /api/v2/admin/modules/{id}/property-management/visible-properties Returns the current visible-properties layout: sections with their fields, widths, order, notes, and allowed admin role IDs. Create sectionPOST /api/v2/admin/modules/{id}/property-management/section Creates a new section and assigns the specified fields, layout, and role permissions. Update sectionPUT /api/v2/admin/modules/{id}/property-management/section Updates a section’s name, notes, weight, field composition, layout, and role permissions. Delete sectionDELETE /api/v2/admin/modules/{id}/property-management/section/{alias} Removes a section.
Open API for Tags
Open API
New Open API endpoints have been added for managing module tags, exposing the same functionality that was previously available only through the internal admin API. Integrations using an app token can now read and modify module tags programmatically, alongside the existing Module Properties endpoints. New endpoints Get tagsGET /api/v2/admin/modules/{id}/tags Returns the list of tags for the module. Create tagPOST /api/v2/admin/modules/{id}/tags Body: { "Tag": "sale(new)" } Adds a new tag and returns the updated list. Edit tagPUT /api/v2/admin/modules/{id}/tags Body: { "OldTag": "promo", "NewTag": "sale" } Renames a tag and returns the updated list. Reorder tagsPUT /api/v2/admin/modules/{id}/tags-reshuffle Body: ["promo", "news"] Reorders the tags according to the provided sequence. Delete tagDELETE /api/v2/admin/modules/{id}/tags/{tag} Removes the specified tag and returns the updated list.
Property Management Grid Layout and Wide-Screen Adaptation
Custom Modules · UI/UX
The Property Management page has been reworked to make section and field layout configuration clearer, more granular, and better suited to wide monitors. Sections and fields are now arranged on a 12-column grid — the same layout system already used in the analytics dashboard — replacing the previous abstract width options with column-based sizing and predictable wrapping. Key improvements Granular property width: The previous three width options (OneThird / Half / Full) have been replaced with column-based widths from col3 to col12, giving administrators finer control over form layout. Own Row / Shared Row: Allows a property to occupy its own row on the grid without being resized to full width — useful when a property should stand alone visually while adjacent properties wrap to the next row. Responsive collapse: When the screen width drops below the threshold, all sections and fields collapse into a single column. Configured widths are ignored in this mode. Wide-screen support: Maximum content width has been increased for large screens. The overall content area scales up to approximately 2400px, and sections on the item edit page scale up to approximately 1500px. Edit groups now scale proportionally to screen size instead of staying fixed. 12-column grid: Sections and their properties are now placed on a 12-column grid, with automatic wrapping when two adjacent items exceed the available width. The wrapping behavior matches the analytics dashboard. Configurable section width: Section width can be set from col3 to col12. If two adjacent sections do not fit on one row, the second wraps to the next row. The default section width is col10. Live preview: A new preview action shows how the item Create / Edit form will look with the current Property Management configuration — field types, their actual widths, and section placement — without leaving the Property Management page. Updated property context menu: The context menu for a property inside a section is now: • Edit • Mandatory • Own Row / Shared Row • Move To All Properties Move To All Properties: Renames the previous Disable action. The behavior is unchanged — the property is removed from the editor layout — but the new label reflects the actual mechanics: the property returns to the All Properties column and can be dragged back into a section at any time. Clearer selected vs. hover state: When multi-selecting properties for drag-and-drop, the selected state is now visually distinct from the hover state, making it easy to see which fields are included in the selection. Enable for Visible Properties enabled by default: The Enable for Visible Properties checkbox is now checked by default when creating a new property, removing an extra click for the typical use case.
Resizable Toolbars
UI/UX
Toolbars across the system can now be resized, letting users expand or shrink them to fit their needs.
Support International (Unicode) Characters in URL Paths
General · Pages and Templates
Non-Latin characters (Cyrillic, Chinese, Arabic, and others) are now fully supported in module and page URLs. Previously, such characters were automatically replaced with underscores by the URL field validation, which prevented partners from building sites with locale-native URL paths. The behavior is now unified with the module URL editor, which already supported Unicode input partially. Example of supported URLs: • https://www.example.com/zh/示例-測試頁面 • https://www.example.com/ar/مثال-صفحة Behavior Decoded storage: URLs are always stored in decoded, human-readable form (e.g., /cn/碧乐璧-马来西亚). This is the single canonical representation of the resource. Encoded and decoded requests: Incoming requests are accepted in both encoded and decoded formats and resolve to the same resource. This eliminates canonical URL duplication: • /cn/碧乐璧-马来西亚 → resource X • /cn/%E7%A2%A7%E4%B9%90... → resource X (same) Sitemap: URLs in the sitemap are generated in encoded form (e.g., %E7%A2%A7%E4%B9%90...) to ensure maximum compatibility with search engines and external crawlers. FTP uploads: The same rules apply to file names uploaded via FTP: non-Latin characters are preserved instead of being sanitized to underscores, aligned with the updated URL handling. Scope • Module URLs • Page URLs • File names uploaded via FTP
Tooltips and Links Standardization
Admin Panel · UI/UX
The appearance and behavior of tooltips and links have been standardized across the system to provide a more consistent user experience.
Trial Site Lifecycle and Expiration
General · Infrastructure · WebinOne Portal
A defined lifespan has been introduced for trial sites. Each trial site now has an expiration date, after which the site is automatically removed. Before removal, a backup is always created and retained for 180 days, allowing recovery on request. Lifespan rules • Every trial site has a lifespan of 6 months from its creation date. • If a live site is downgraded to a trial after subscription cancellation, its lifespan is shortened to 30 days, after which the site is removed. • Before removal, a backup of the trial site is created and retained for 180 days. The following sites are exempt from automatic expiration and are never removed by this mechanism: • Live sites • Template sites • Trial sites migrated from v6.11 to v7 Notifications 30 days before deletion: A notification email is sent to the owner 30 days before a trial site is deleted. Portal display An Expires in column has been added to the trial sites list, showing the number of days remaining until deletion. The column supports sorting and includes a tooltip: How long this trial site will remain accessible. When the period ends, the site is permanently removed unless a subscription is activated. Site copying • Copying a trial site produces a copy with the same number of remaining days as the original (e.g., 40 days remaining on the original → 40 days remaining on the copy). • Copying a live or template site starts a new 6-month lifespan for the copied site. Restoration after deletion • The first restoration of a site is free; subsequent restorations of the same site are paid. • A restored site is given a lifespan of 1 month, after which it follows the standard flow (backup retained 30 days, then removal). • If the original URL is still available, it is reused; otherwise, a numeric suffix (-1, -2, … -N) is appended. • The restoration confirmation is sent to the customer by the support team. Migration of existing trial sites Existing trial sites that already exceed the new 6-month limit — or have fewer than 30 days left under the new policy — cannot honor the standard "30-day advance email" rule. To address this, a one-time migration is performed at release: • Trial sites older than 6 months (or older than 30 days since subscription cancellation) receive a deletion date of release date + 30 days. • Trial sites with less than 30 days remaining under the new policy have their deletion date extended so that exactly 30 days remain from release. • All migrated sites receive a 30-day grace period from the release date, including sites that would already be expired under the new rules. • After the grace period, migrated sites follow the standard flow: backup created → site removed.
Unified Table View with Saved Views
Admin Panel · UI/UX
The module item list has been reworked to provide a single, consistent control panel for search, filtering, sorting, pagination, and view switching. The list toolbar has been simplified, filters are grouped under one control, and a new Saved Views feature allows any combination of filters and sorting to be saved and reused. Unified control panel The previously separate controls above the table have been consolidated into a single row containing search, FILTER BY, SORT BY, and the view switcher. Search: The search field now spans the full width of the control panel, with the search icon on the right. The pagination that previously sat next to search has been removed from this row. Filter by: A single FILTER BY control opens a dropdown grouping all list filters: • View – defaults to All • Expired State – defaults to All • Last Updated – new filter with options: All, Today, Yesterday, Last 7 days, Last 30 days, Custom range. Selecting Custom range allows the user to define an arbitrary date range. The dropdown includes RESET and APPLY buttons. Applied filters and the active sort are displayed as removable chips below the search field, along with Clear All and Save View actions. Each chip can be removed individually via its close icon. Chip format: • Filter chips: <Field>: <Value> ✕ (e.g., Last Updated: Last 7 days ✕). • Sort chip: Sort by: <Field> (<Direction>) (e.g., Sort by: Name (Asc)). Sort by: A new SORT BY control has been added next to FILTER BY. Its dropdown provides a radio field selector (Name, URL, Template, Release Date), a Direction section (Ascending ↑ / Descending ↓), and RESET / APPLY buttons. Inline sorting by clicking a column header remains available and is fully synchronized with the SORT BY control – both act on the same underlying sort state. View switcher: The three view-switch icons are preserved and moved into the control panel, to the right of SORT BY. If a module has only one available view, the switcher is hidden. Pagination: The duplicated top pagination has been removed. Pagination and Items per page are now shown only below the table. Saved Views • Save View – a modal with a View Name field and BACK / SAVE buttons, opened from the chip row. Saves the current filter and sort combination as a named view. • Saved Views – a dropdown in the control panel listing all saved views, with a check mark next to the active one and a Manage Saved Views entry at the bottom. Selecting a view immediately applies its filters and sorting. • Manage Saved Views – a right-side panel listing all saved views, each with its name and a delete icon, with CANCEL / SAVE actions. Empty state When the list contains no items, the control panel (search, filters, sorting, view switcher, and pagination) is hidden entirely. Only the page header, header actions, and a "Nothing here yet." placeholder are shown. Available header actions in the empty state: • For modules and comments: Configure, plus a “⋯” menu with Import, Export, and other module actions. • For other table views: only the “⋯” menu.
Weighting Management Through Drag And Drop
Custom Modules
Module items can now be manually ordered through drag-and-drop, powered by a new system property Enable drag and drop order (internally exposed as DnDOrder). Once enabled on a module, administrators can visually reorder items on the item list and consume the resulting order in Liquid components and the On-Site Editor. Setup A new system property, Enable drag and drop order, has been added to the All Properties (System) list in Property Management. It can be moved into Visible Properties like any other system field. The internal field name and Liquid alias is DnDOrder. Manual Order in the item list Sort by → Manual Order: A new Manual Order checkbox has been added at the bottom of the Sort by popup, alongside the existing options (Name / URL / Template / Release Date + Ascending / Descending). When enabled, sorting by DnDOrder is applied as the primary sort key on top of the selected secondary field. The popup keeps the standard Reset / Apply actions. Drag-and-drop mode: When Manual Order is active, the item list enters DnD mode: • A drag handle appears on the left of each row; row selection checkboxes are hidden. • Dragging swaps the DnDOrder values of the two involved items (A ↔ B). Other items are not shifted. • The bulk action Move to trash selected in the toolbar is replaced by a Reweigh action. Manual Order is available only in List view. Reweigh Reweigh reassigns sequential values (1, 2, 3, …) to all items in the module – not only those visible on the current page – based on the current table sort order. Existing DnDOrder values are overwritten. The action opens a confirmation popup: • Title:Reweigh DnD Order? • Body:Sequential values (1, 2, 3, …) will be assigned to all items in the module based on the current table sort. Existing DnD Order values will be overwritten. • Buttons:Cancel / Reweigh Sorting logic When items are sorted by DnDOrder: • Primary key:DnDOrder • Secondary keys: (used for ties, e.g. multiple items with 0) name → releaseDate → create date Empty DnDOrder values are treated as 0 and appear at the top when sorting ascending. Editing DnDOrder values DnDOrder behaves as a standard property and can be edited through: • Drag-and-drop in the item list • Reweigh for bulk initialization or resequencing • Export → Excel editing → Import • The item detail page • The frontend item create / update form Liquid support DnDOrder is a supported value for sortBy and is exposed on items as 0. Example: On-Site Editor Drag-and-drop reordering in the OSE requires all of the following: • Enable drag and drop order is enabled on the module. • The Liquid component uses sortBy: "DnDOrder". • The layout includes the required data-cms_ose_dnd attribute. Edge cases • Duplicating an item resets DnDOrder on the duplicate to 0, regardless of the original’s value. The duplicate can be repositioned manually or included in the next Reweigh. • Disabling Enable drag and drop order does not delete existing DnDOrder values – they are preserved in case the property is re-enabled later. • If all items have DnDOrder = 0, dragging visually appears to do nothing (0 ↔ 0 swaps). A single Reweigh initializes proper values. Implementation checklist To enable drag-and-drop ordering end-to-end on a module: • Enable Enable drag and drop order on the module. • Run Reweigh DnD Order once to initialize DnDOrder values. • Set sortBy: "DnDOrder" in the relevant Liquid layouts. • Add data-cms_ose_dnd attribute. Without these steps, DnD reordering in the OSE will not take effect.
Other updates2
1) Quick Access to Module Settings from the Admin Menu
A quick-access icon has been added next to modules in the admin sidebar, providing direct navigation to a module’s configuration screens without having to open the item view first. This significantly speeds up navigation for modules with a large number of items. Behavior Direct links to module configuration. Hovering over a module in the sidebar reveals the 3-dot icon next to the module name. Clicking the 3-dot icon opens a dropdown with direct links to: • Settings • Property Management • On-Site Editor • Layouts • Table • Default Follow-up Emails Non-intrusive UI: The icon appears only on hover and is hidden in the default state. When it appears, the module name gently blurs behind it rather than being truncated or shifted, so both the icon and the module name remain readable and recognizable. Interaction • Clicking the icon opens the quick-access dropdown. • Clicking the module name still opens the module as before.
7) Toolbox Standardization
Right-side toolboxes used across the platform have been standardized into three fixed sizes – small, medium, and large – and now adapt to screen width. Previously, the toolbox width was inconsistent between sections: on 1920px screens some toolboxes were unnecessarily wide, while others were too narrow and caused inner tables to overflow. Behavior Fixed toolbox sizes: Toolboxes now use one of three defined sizes (small / medium / large), assigned per section based on its content. Screen-width breakpoint: The breakpoint is set at exactly 1920px (inclusive): • Below 1920px – the smaller toolbox size is used. • At 1920px and wider – the larger toolbox size is used for sections containing tables and for the File Manager.
Bug fixes5
Modules
• Fixed an issue on the module items list view where column visibility for Expiration Date and Release Date did not follow their state in Visible Properties. The columns are now correctly available when the fields are added to or hidden from Visible Properties. • Fixed an issue where importing module items with custom properties did not follow the same behavior as system fields. The import logic is now consistent for both: • Column present and filled – values are replaced • Column present and empty – values are cleared • Column not present – existing values remain unchanged
• Fixed an issue on the Business plan where a random detail layout was selected as default when a module had multiple detail layouts configured.
File Manager
• Fixed an issue where file icons shifted and jittered while scrolling. • Renamed the Move to trash selected button to Move Selected to Trash.
Forms
• The Update Account Form now supports changing the contact’s email. Behavior depends on the Enable email verification flow checkbox in MISC Settings – when enabled, a confirmation email is sent to the new address; when disabled, the email is updated immediately after form submission.
WYSIWYG editor
• Fixed an issue where saving via keyboard shortcut did not work.
Open API
• Fixed an incorrect field description in the Contacts endpoints (documentation and Swagger). The Type field is now correctly documented as accepting the "Consumer" / "Wholesaler" enum values, replacing the previous misleading integer description.
14 updates
New features2
Decimal Number Support for Custom Properties
Custom Modules
A new Decimal Number custom property type has been added, allowing fractional values to be stored and processed in module items. Previously, the Number custom property supported integer values only; Decimal Number extends this capability to decimal values such as 1.5, 0.75, or 10.25. The existing Number property remains unchanged and continues to support integer values only. Key capabilities • Flexible decimal input: Decimal values can be entered using either a dot (.) or a comma (,) as the decimal separator. After saving, the value is automatically normalized and displayed according to the configured country/locale format, consistent with the behavior of system product fields such as Weight, Width, Height, and Depth. • Admin panel support: The new Decimal Number type is available when creating or editing custom properties in the admin panel. • Open API support: Open API endpoints accept and return decimal values for properties of type Decimal Number. • Import / Export support: Decimal values are fully supported when importing and exporting module item data. • Frontend item forms: Create and edit (draft) item forms rendered on the frontend support decimal input for Decimal Number properties using a standard numeric input. Example: <div> <label>{Name}</label> <input type="number" name="prop_{Name}" step="0.01" value=""></div>
Self-service Site Transferring
WebinOne Portal
A new Transfer Sites section has been introduced in the WebinOne Portal, allowing any Free User, Associate, Partner, or Partner Agency reseller to transfer one or more sites to another reseller account. The functionality covers the entire flow — from creating a transfer request, through receiver confirmation and Stripe payment, to scheduled execution and post-transfer history. Key capabilities • Transfer Sites section: A dedicated menu item with Outgoing, Incoming, and History tabs is available to portal owners. A badge highlights active requests that require attention. • Transfer request: A request can include one or more sites and is created through a guided wizard covering site selection, receiver, fee payer, subscription handling (Keep / Cancel), and transfer time (Immediately / Off-hours). Unfinished requests are saved as Draft and can be resumed at any time. The receiver can accept, decline, or modify the request through a limited Change Request flow. • Payment: Each transfer is charged at a fixed rate of $100 per site, paid by either the sender or the receiver via Stripe Checkout, depending on the selected Fee Payer. • Transfer execution: Sites are transferred sequentially after payment. Off-hours transfers run within the 00:00–06:00 window in the data center's local time to minimize downtime. Aggregated and per-site progress is displayed on the request detail page. • Status history & notifications: Every request maintains an immutable chronological log of status transitions, available from the request page. Email notifications are sent to the sender and receiver at all key events (request created, accepted, updated, declined, completed). Constraints • A site can participate in only one active transfer request at a time. • Transfers are allowed only within the same data center region. • A request expires automatically after 7 days without confirmation. • Once paid, a request can no longer be edited.
Improvements6
Advanced Cleanup Rules Builder with Structured Condition System
CRM · Custom Modules
The Data Cleanup Rules functionality (both Auto Cleanup and Manual Cleanup) has been redesigned to use a flexible, structured condition builder. Fixed presets such as Created more than 30 days ago or Last login for 90 days have been replaced with a universal system that allows administrators to combine condition types and parameters dynamically. This removes hardcoded time intervals, unifies the condition structure across all entities, and makes cleanup configuration scalable for future condition types. New condition structure Each condition group is now composed of: • Condition Type – the attribute being evaluated (e.g., Creation date, Last updated, Status) • Condition – the comparison operator (e.g., Older than, Within last, Has order) • Dynamic parameters – value, period, multiselect options, or date range, depending on the selected type Logic rules • AND is applied between different Condition Types • OR is applied within multiselect values of a single Condition • Records with an active recurring subscription remain protected and cannot be removed Manual Cleanup – Specific period Manual Cleanup additionally supports a 'Specific period' option for date-based conditions (Creation date, Last updated, Last login), providing a date range picker (from – to). This option is not available in Auto Cleanup. Exceptions Exceptions have been migrated to the same structured model. The previous "Items and records with active recurring subscriptions" exception has been removed and replaced with a permanent system note: Contacts with active recurring subscriptions are always protected and cannot be removed. The same logical condition cannot be selected simultaneously in 'Conditions' and 'Exceptions'.
New Focus for Basic, Plus, and Max Ecommerce Plans
Ecommerce · Pricing & Plans
The Basic, Plus, and Max ecommerce plans have been restructured to better align with current customer needs. Several features have been moved down across plan tiers, expanding the value of the Basic and Plus plans, while the Max plan is temporarily withdrawn from the available plan options. Plan pricing remains unchanged and no new plans have been introduced. See the updated plan overview at webinone.com/new-pricing. What changed Basic plan The following features, previously available only from the Plus plan, are now included in the Basic plan: • Attributes • Inventory Management • Gift Vouchers • Discount Codes Plus plan The following features, previously available only on the Max plan, are now included in the Plus plan: • Wholesale Pricing • Custom Order Statuses • Shipping options (Shipping Integrations) Max plan The Max plan has been temporarily removed from the list of plans available when creating a new site. New sites are now created on Content Pro and Ecommerce Plus plans.
Open API Support for CRM Contact Billing Fields
Open API
The CRM Contacts Open API endpoints now support billing address fields in both request and response payloads, allowing external systems to read and update contact billing details through the API in line with the data already available in the admin panel. Updated Endpoints • GET /api/v2/admin/contacts • POST /api/v2/admin/contacts • GET /api/v2/admin/contacts/{id} • PUT /api/v2/admin/contacts/{id} Newly Supported Fields • BillingAddress • BillingCity • BillingState • BillingZipCode • BillingCountry
Order Customer Snapshot and Independence from Contacts
CRM
Orders are now self-contained and no longer depend on the existence of their associated contact. When an order is created, a customer snapshot (email, first name, last name, billing address) is saved directly on the order, alongside the existing shipping snapshot. If the contact is later deleted, the order remains intact and displays safely-masked customer data. Contact deletion behavior The MemberId field on orders is now nullable and is automatically set to NULL when the related contact is deleted. The order itself, including its snapshot, is preserved. Masked Responses for Deleted Contacts For orders with a deleted contact, standard API and UI responses return masked values: • Email – a***@gmail.com • First / Last name – J***n / S***w (three asterisks between the first and last character) • Billing and Shipping address – fully masked as *** New admin permission – Can View Customer Snapshot Data • Enabled – the ‘Reveal Data’ button is shown on the order and the admin can disclose the original snapshot values. • Disabled – the button is hidden and the data-reveal endpoint returns 403 Forbidden. List, Detail, and Search Behavior • Orders are listed regardless of whether the related contact still exists. If the contact exists, current contact data is shown; otherwise the masked snapshot is shown. • The order detail page remains fully functional when MemberId is NULL. • In the Trash, orders with deleted contacts are shown using the masked snapshot, and data reveal is not available. • The order list now exposes two search fields per customer attribute (live contact data and snapshot data). With the Can View Customer Snapshot Data permission, search runs across both (OR); without it, only live contact data is searched. Export Snapshot fields for deleted contacts are always exported in masked form, regardless of the exporting user's permissions. Revealing original values through export is not allowed. Open API • A dedicated GET endpoint has been introduced for retrieving an order's customer snapshot. • A new Open API scope CrmOrdersSnapshot - read has been added; the snapshot endpoint is accessible only to clients with this scope. Restoring Orders from Trash If the original contact still exists, the order is re-linked to that contact. If the contact has been deleted but a snapshot is available, the order is restored with MemberId = NULL and continues to use the snapshot. Deleted contacts and related entities are not recreated.
Orders Trash Management with Restore and Retention
CRM · UI/UX
A new Trash section has been added to the Orders area of the admin panel. Deleted orders are now temporarily stored in the Trash, where administrators can restore them or remove them permanently. This prevents accidental data loss and provides a controlled retention window for deleted records. Access A button has been added in the Orders section to open the Trash as a separate screen. From the Trash, administrators can return to the main Orders list at any time. Trash List View • Displays the list of deleted orders with standard pagination and search. • The following features are intentionally not available in the Trash: • Order details page navigation • Create order button • Import button • Export button
Available Actions • Restore: Returns the order to the main Orders list and restores it to an active state. • Delete permanently: Removes the order and all related data (payments, order lines, and other dependent records) with no possibility of recovery. A global Delete all action is also available, which permanently clears all orders from the Trash. All permanent deletion actions require explicit confirmation. Retention Orders are stored in the Trash for up to 90 days. After this period, they are automatically and permanently deleted, along with all related entities. The retention countdown starts from the moment the order is moved to the Trash; a dedicated field on the order entity stores the move-to-trash date and time used for this calculation. Open API The Trash management endpoints have been added to the Open API specification and documented in Swagger.
VAT Invoice Number Generation for Orders Without Gaps
CRM
A dedicated VAT Invoice Number has been introduced for orders, providing a strictly sequential, gap-free numbering stream that complies with EU VAT requirements. The existing Invoice Number continues to operate unchanged as an external reference for payment system integrations. Behavior • VATInvoiceNumber is generated only after an order has been successfully paid. • It uses its own sequential numbering with no gaps and is immutable once assigned. Attempting to regenerate the VAT invoice number for an order returns an error. • InvoiceNumber continues to serve as the external payment reference, with its existing logic unchanged. • VATInvoiceNumber is treated as the legally significant invoice number. The sequence counter is initialized from the maximum existing invoice value to ensure no duplicates are produced for newly generated VAT invoice numbers.
Bug fixes6
Portal
• Added SVG image support in portal branding.
Admin panel
• Fixed a duplicate Workflows entry in the admin role permissions list.
Email and notifications
• Fixed an issue where file links in emails contained an extra //, resulting in URLs such as //_form_submissions/12345/.
Modules
• Fixed an issue where applying a template from the item list via Apply Template updated only the frontend output but not the OSE. • Custom properties are now exported in alphabetical order in module item exports. • Added support for bulk-moving custom properties using CTRL / CMD selection. • Fixed an issue where admin users could not see editable fields on the module item details page.
WYSIWYG editor
• Fixed an issue where files uploaded via the WYSIWYG editor were placed in the root of File Manager instead of the selected folder. • Fixed an issue where links and configured indentation were lost when switching between WYSIWYG and code view.
File Manager
• Fixed an issue where files could be created without a file extension.
11 updates
New features2
Property Management (Layout Builder)
Admin Panel · Custom Modules · UI/UX
Property Management (Layout Builder) A new Property Management system has been introduced to control how fields are structured and displayed in the module item editor. Administrators can now define which fields are visible, group them into sections, and configure their layout – improving the editing experience and reducing UI clutter. Property Management replaces the previous flat editor structure and becomes the default mechanism for rendering fields in the admin when viewing the Create / Edit Item screens. Key Capabilities • Field Visibility Control: Administrators can choose which system or custom properties appear in the module item editor. Fields that are not included in the layout are only visually removed from the editor UI without being deleted from the system.
• Section-Based Field Organization: Fields can be grouped into logical sections to improve navigation and usability for content editors. Administrators can create, rename, reorder, and delete sections as needed. Sections are also added to the Admin User Role permissions for the module, so different admin users can have different access levels to individual sections. When generating Create/Edit form code for frontend submission of items, input fields will also be grouped and ordered to honour the Property Management configuration, along with section headings. However, all fields will be included in the form code with non-visible properties placed in a section titled “Other”.
• Flexible Field Layout: Each field can be configured with a width in the editor layout: • One third (33%)
• One half (50%)
• Full width (100%)
Fields are rendered within a responsive 3-column grid and automatically wrap to the next row when needed.
• Required Field Configuration: Fields can be marked as required directly in Property Management. Required fields must be filled in before an item can be saved. The Name and URL fields remain mandatory by default.
Property Types Property Management supports both: • System Properties – built-in platform fields used in module item editing
• Custom Properties – user-defined fields created for a module
Both property types can be added to sections and configured using the same layout controls. Editor Structure • Available Properties: Displays properties that are not currently used in the editor layout. Fields can be dragged from this list into sections.
• Visible Properties: Defines the actual structure of the module item editor. Only properties placed here are rendered in the editor UI.
• Search: Allows administrators to quickly locate properties across both available and visible lists.
Default Section A mandatory Item Settings section is always present and cannot be removed. It always contains the required Name and URL fields. Conditional System Sections Some system sections become available only when specific functionality is enabled. For example, enabling bookings allows the Event Properties section to appear in the editor layout. Improved Item Editor Experience • Only selected fields are displayed in the editor.
• Fields are organized into configurable sections.
• Section order, field order, and layout follow the configuration.
• Unused fields are removed from the interface.
This results in a cleaner, more structured editing experience for administrators and content editors. Migration All existing modules are automatically migrated to Property Management. After migration, module item editors render fields exclusively through this new configuration system.
Stripe Elements
Ecommerce
Stripe Elements A new Stripe Elements payment gateway has been added, enabling secure payment processing with new payment methods and an enhanced level of visual customization. Supported Payment Methods • Card
• Link
• Apple Pay
• Google Pay
Additional payment methods will be gradually introduced in future updates. Stripe Elements supports the Stripe Appearance, allowing partners to style payment fields to match their website design. This includes default themes, customization of colors, typography, spacing, and input states.
Improvements3
Improved Admin User Roles Management
Admin Panel · UI/UX
Improved Admin User Roles Management The Admin User Roles screen has been redesigned to provide a more structured and scalable way to manage permissions. The new interface introduces a clearer hierarchy, improved naming consistency, and enhanced filtering tools to make role configuration easier for administrators, especially in projects with many modules and permissions. Key Improvements Hierarchical Permission Structure Permissions are now organized into a clear hierarchy: • Section → Module → Actions
This structure improves readability and helps administrators quickly understand how permissions are grouped. Aggregated Permission States Top-level checkboxes now reflect the state of their child permissions: • Checked – all permissions enabled
• Unchecked – all permissions disabled
• Indeterminate – only some permissions enabled
Improved Search and Filtering The screen now includes tools to quickly locate permissions: • Search – find permissions by module name
• Permission Status Filter – view all, enabled, or disabled permissions
• Section Filter – narrow permissions by functional area
Migration All existing roles have been automatically migrated to the new structure to preserve current access levels while applying the updated permission system.
Improved Module Settings Structure
Admin Panel · Custom Modules · UI/UX
Improved Module Settings Structure The Settings tab at the module level has been redesigned to clearly separate module configuration from item editor structure. What Changed Previously, module behavior settings were mixed with field configuration in the Properties area. With this update, all module-level and item-behavior settings are now organized in a dedicated Settings tab, while field layout and visibility are managed exclusively through Property Management. Clear Separation of Responsibilities • Property Management (previously Properties) now controls the structure of the item editor (fields, sections, layout).
• Settings now contain all module-level configuration and item behavior options.
Improved Settings Organization Module settings are now grouped into structured sections, including: • Module settings
• Item settings
• Site user permissions
• Extension settings
• Advanced settings
This improves navigation and makes it easier for administrators to locate and configure module behavior. Migration Existing modules have been automatically migrated so that all module and item behavior settings previously located in Properties are now available in the Settings tab.
Portal Branding Rework
UI/UX · WebinOne Portal
Portal Branding Rework The Branding page (Portal > Settings > BRANDING tab) has been redesigned to provide a cleaner and more structured configuration experience. Simplified Background Image Logic The previous None / Custom selection for the background image has been removed. The field now follows a simpler behavior: • If a custom image is uploaded – it is displayed on the login page.
• If no image is uploaded – no background image is applied.
Default Branding Fallback If logo fields are left empty, the system automatically displays the default WebinOne branding in the preview. Improved Layout Branding settings are now displayed in a clearer card-based layout with a live preview, making it easier to understand how branding assets will appear.
Bug fixes6
General
Admin Panel • Fixed an issue when filtering comments in the admin panel.
• Fixed duplicate contacts appearing when synchronizing data via custom reports.
• Fixed an issue with importing module items when the URL field contained a trailing space.
• Removed the limitation of 50 landing page names in the Member Areas dropdown field.
Email and Notifications
• Fixed an issue when sending a test autoresponder email.
Extensions
• Fixed a pagination issue in the Advanced AI Search extension component.
System Settings
• Fixed the date format display in cleanup rules.
• Fixed an issue where cleanup rules were not displayed correctly in the admin menu.
File Manager
• Fixed an issue where the bottom action bar overlapped the last lines of files in the File Manager.
Modules
• Fixed an issue when quickly saving module item changes using keyboard shortcuts.
• Fixed an issue where resetting the form layout to the default did not work.
5 updates
New features2
Automated Data Cleanup and Deletion Rules for CRM and Module Items
CRM · Custom Modules
Overview A new Data Cleanup Rules section under Settings provides a structured and automated way to manage data retention across CRM records and module items. It enables both scheduled (automatic) and on-demand (manual) cleanup, with strict safeguards to prevent accidental deletion of critical data. Navigation A new menu item has been added: Settings → Data Cleanup Rules (located before Website Backup) Tabs • Auto Cleanup • Manual Cleanup • History Auto Cleanup Auto Cleanup allows you to define scheduled rules that automatically delete records matching specific conditions. Rule Management • Create new cleanup rules • Edit existing rules • Delete rules The rules list displays: • Name • Type (CRM Records or Module Items) • Status (Enabled or Disabled) • Actions (Edit, Delete) Rule Configuration • Name • Type (CRM Records or Module Items) • Entity (e.g. Contacts, Form Submissions, Orders, Pages, custom modules) • Cleanup Scopes – multiple conditions combined with AND logic • Exceptions – conditions that exclude records from deletion • Frequency (Daily, Weekly, Monthly) • Scheduled day and time (executed in the site’s timezone) • Enable • Editor (auto-filled with the creator or last editor) Confirmation safeguard: When enabling a rule, a mandatory confirmation popup requires explicit acknowledgment that deletion is permanent and irreversible. Logic Overview • All selected Cleanup Scopes must be met for a record to qualify. • Where dropdown values are available (e.g. form name, event name, categories, tags), selected values use OR logic. • Exceptions also use AND logic. • Records matching all Exception conditions are excluded from deletion. • The UI prevents selecting the same condition in both Cleanup Scopes and Exceptions. Manual Cleanup Manual Cleanup allows one-time cleanup operations using the same filtering logic as Auto Cleanup, without scheduling. Filtering Available filters: • Type • Entity • Cleanup Scopes • Exceptions Results Table After filtering, a paginated table displays matching records. Columns depend on the selected entity (e.g. contact details, order status, module item metadata). Actions • Delete Selected • Delete All • Export (optional, before deletion) A confirmation popup is always shown before deletion, with an option to export data. History The History tab provides full visibility into cleanup activity. Retention Cleanup logs are stored for 90 days and are automatically removed afterward. Log Details • Date • Rule name (linked for Auto Cleanup, empty for Manual Cleanup) • Editor • Type (CRM Records or Module Items) • Cleanup type (Auto or Manual) • Number of deleted records • Status (Success or Failed) • Actions (Preview, Export) Default sorting is by Date (newest first). Preview • Total number of deleted records • Up to the first 50 records. If more than 50 records were deleted, a message indicates that additional data is available via export. Export Exports provide an Excel file with summarized information about all deleted records. Global Rules and Safeguards • Deletion is always permanent — there is no recycle bin or restore option. • Records with active recurring subscriptions: • Cannot be deleted • Do not appear in Manual Cleanup results • Are excluded from Auto Cleanup • Are always protected by a mandatory, non-removable exception
Role-based Access Control Admin permissions include: • Can View • Can Create • Can Edit • Can Delete Availability Data Cleanup Rules are available on the Business and Pro plans.
Subscription Reminders Report
Analytics
Overview A new Reports tab has been added to the Reminders section, providing full visibility into reminder delivery performance. It complements the existing reminder management flow with historical data, analytics, and export capabilities. Reminders Structure The Reminders section now includes two tabs: • Notifications - Existing functionality for managing reminders, including listing, creating, editing, and deleting reminder rules. • Reports - Delivery history, advanced filtering, visual analytics, and data export. Reports: History and Analytics The Reports tab allows switching between a table view and a chart view. Data accuracy: All data reflects the subscription and member state at the moment the email was sent, ensuring historically accurate reporting. Table View • Displays the full history of sent reminders • Supports filtering, sorting, and pagination • Allows selecting the number of rows per page Columns • Reminder Name • Reminder Type • Item Name • Item Renewal Date • Member Email • Member State • Sending Date • Send Status • Subscription Status Email Data Preview Each row includes access to the full email content, which opens in a popup and includes: • Email Name • Email Subject • From Email • From Name • Email Body The popup can be closed by clicking outside or using the Cancel button. Chart View The chart aggregates reminder delivery data and displays: • Total sent • Success • Failed Supported Time Ranges • 7 days (default) • 14 days • 28 days • 30 days • Custom range Filters (Reports Tab) All filters can be applied simultaneously. Toolbar Actions • Filter – apply selected filters • Reset – clear all filters • Cancel – close the filter toolbar Available Filters • Send Status (Sent, Failed, New, Pending) • Reminder Type (Forms, Events, Products, Member Areas) • Reminder Name (multiple select dropdown) • Date Period (Min Date / Max Date) • Subscription Status (Active, Canceled, Incomplete, Incomplete Expired, Past Due, Trialing, Unpaid) • Member Email (searchable, multiple select) • Member State (searchable, multiple select) Export • Available in the Reports tab • Format: CSV • Exports only data matching the currently applied filters Analytics and Dashboard Integration Analytics Charts • Total sent • Success • Failed Supported time ranges match those in Reports, with 7 days as the default. Dashboard Widget • Displays the same metrics (Total, Success, Failed) • Default period: last 7 days From the Analytics chart, a “View more details” action links directly to Reminders → Reports for deeper analysis.
Improvements1
Upgraded Sites Notifications
WebinOne Portal
Overview Automated notifications have been introduced for live sites migrated from 6.11 to WebinOne 7+ that remain unpaid. The system ensures partners receive timely reminders until the subscription is resolved. Notification Timeline • Day 1 after migration: Initial upgrade notification is sent. • Day 7 after migration: Payment reminder is sent. • Day 14 after migration: Follow-up reminder is sent if the subscription is still unpaid. • Day 30 after migration: A 30-day unpaid subscription notice is sent. Recurring Notifications For partner sites that remain unpaid more than 30 days after migration, reminder notifications are sent every 14 days following the 30-day notice. These notifications continue automatically until the site subscription is paid.
Other updates1
FTP - path and single host rework
Single SFTP Host FTP (SFTP) connection settings have been simplified and unified to reduce configuration complexity and improve consistency across regions. A single, universal SFTP host is now used for all connections, replacing region-specific hosts (NA, AU, EU): • sftp.trialsite.co This host applies globally, regardless of the site’s region. Updated Root Path The SFTP file structure has been standardized. The root path is now set to /, removing the need for region- or site-specific directory paths and simplifying FTP client configuration.
Bug fixes1
General
Portal • Fixed file upload and download issues when working with projects inside TeamOne services. • Fixed an issue in plan customization where checkboxes were unintentionally disabled after saving. Authentication and Access • Fixed an issue causing prolonged authentication times when logging into the admin panel. • Fixed a login issue in the admin panel on sites with active domain redirects (www / non-www). • Fixed an issue where admin users could not access Extensions after upgrading a site to version 7+. CRM and Data • Fixed duplicate values appearing in the CRMContacts component. • Fixed an issue in custom reports where the Pending Collection value was not displayed. • Fixed an issue when filtering comments in the admin. Email and Integrations • Fixed an issue when renaming a Mailchimp mailing list that had already been imported into the admin panel. • Fixed an issue with unsubscribing contacts in Mailchimp and synchronizing the unsubscribe status back to the admin panel. • Renamed tabs in email notification emails for improved clarity. Ecommerce and Events • Fixed an issue with importing events on sites without ecommerce enabled. File Manager • Fixed an issue where the cart was displayed incorrectly on mobile devices and tablets. • Fixed slow typing performance when editing files larger than 5,000 lines. Payments • Renamed the Bambora payment gateway to Worldline.
9 updates
New features2
Advanced Site Search
Extensions
Advanced AI Search introduces a new AI-powered, context-aware search engine that works across multiple modules. It supports advanced semantic indexing and provides flexible configuration options for partners, making it a complete end-to-end semantic search system designed for scalability and deep customization. Settings • Partners can configure API access required for vector generation and semantic search execution. An OpenAI API Key is required. • Features include the ability to save, update, and delete the API key. You can register for an OpenAI account here: https://auth.openai.com/create-account and generate an API key within the account settings. The cost of embeddings is charged based on OpenAI’s pricing. Full pricing table here: https://platform.openai.com/docs/pricing#embeddings WebinOne is using the text-embedding-3-large model: https://platform.openai.com/docs/models/text-embedding-3-large Multi Module Searches • List View• A Create New button for creating a configuration. • A table displaying Name, Alias, Created Date and actions (Edit and Delete).
• Detail View• Displays Name and auto-generated Alias fields. • A Searchable Modules block that allows adding/removing modules (Pages, Blogs, Custom Modules, etc.). • On save, vectors are created or removed according to the selected modules. • Regenerate Vectors link is provided for full vector regeneration.
Advanced Settings • A powerful configuration layer allows defining which properties are indexed and how they contribute to scoring. • Defaults include searchable properties such as Name and Description, with the option to add up to 6 additional properties (shared across all modules). • Supported property types include: • Checkbox List • Dropdown List • Radio List • String • Multiline
• System searchable Properties • Name • Url Slug • Description • Site Search Keywords
• Ability to remove properties from search. Score Weight • Total weight = 100%. • Weights distributed manually or by sliders. • Removing a property redistributes weight proportionally across all remaining ones. • Final rounding is applied to the last property. • Newly added properties start with 0%; their weight is subtracted from the next property (except the last, which subtracts from the previous). Validation • Properties used in search cannot be renamed, deleted, or changed type until removed from advanced search: “Can't delete or update property because it is used in advanced search settings.” Per-Property Main/Context Weighting Each property has an internal weight breakdown to improve semantic relevance. • Each property (Name, Description, Property 1, etc.) has a global weight (within 100%). • Inside the property, weight is split into Main and Context (sum = 100%). Advanced Search Form • Modules can be individually configured for semantic search using a module-specific search component and toolbar form. • The advanced search form is located under Custom Modules → Search Forms → [[Advanced Search Form Code]]. Automatic Vector Generation • Vectors are automatically generated for newly created or imported module items, ensuring up-to-date semantic indexing. New Liquid Component: advanced_site_search • This component provides front-end access to advanced semantic search results. • It opens a second toolbar under Advanced AI Search with new fields: • semanticQuery – text query for vector search • minScore – a number from 0 to 1 (default 0.5) • type – should be set to "advanced_site_search"
Role-Based Access Control • Fine-grained permissions for managing Advanced AI Search, including: • Can View • Can Create • Can Edit • Can Delete
• Additional module-level permissions include: • Can View Module Advanced AI Search • Can Edit Module Advanced AI Search
Partner Site Templates
WebinOne Portal
Partners can now mark any eligible trial site as a template using the new Mark as Template action in the trial sites list. Once converted, the site is displayed with a template indicator and becomes accessible in the Templates view, where the Create from Template action is available. Note that templates cannot be converted back to trial sites and cannot go live; their status is permanently shown as Template. Filtering • A new Type filter has been added to switch between: • All • Sites • Templates
Template settings Each template includes a new Template tab in Settings with an upload field for a preview image. The guidelines for the preview image are: • Maximum resolution: 1000×1000 px • Maximum file size: 10 MB When creating a new site, available templates are sorted in the following order: • Blank template • Partner templates (owned by the partner) • Other WebinOne templates Partner tier limits • The number of templates partners can create depends on their reseller tier: • Agency Partner – 10 • Partner – 5 • Associate – 3 • Free User – 0 (Free users do not see the Mark as Template action)
When the limit is reached, the button becomes inactive.
Improvements3
Add SEO Fields to Front-End Module Item Forms
Custom Modules
Front-end editing capabilities have been extended with full access to SEO configuration. SEO fields from the SEO tab are now available in item management forms, allowing editors to manage key SEO settings directly from the website interface. What’s new • The following forms now support SEO fields: • Create Item Form • Update Item Form • Update Item's Draft Form
Edit access for the following SEO-related fields is now available from the front end: • MetaTitle • MetaDescription • ShowPageForSearchEngines • CanonicalLink • SocialMetaTags • SeoPriority • EnableAMP • AMPContent • OpenGraphProperties.title • OpenGraphProperties.type • OpenGraphProperties.url • OpenGraphProperties.locale • OpenGraphProperties.image
Recurring Subscriptions Reminder Improvements
Emails
Recurring subscription reminders have been upgraded to support multi-step reminder flows, more flexible targeting, and clearer filtering by subscription state. This improvement makes it easier to configure sequences and tailor reminders to specific subscription statuses. • Multiple reminders per entity (Member Areas / Forms / Events / Products)• Previously, a single recurring subscription could be attached to only one reminder configuration. • Now you can attach the same entity to multiple reminders (e.g. 30 days and 10 days before the end date) and build multi-step reminder sequences for the same member area, event, form, or product.
• "All items" checkbox behavior• The checkbox has been redesigned to be independent from manual item selection. • When enabled, the reminder applies to all current and future items within the selected category: • Member Areas – all member areas with Paid Access. • Forms / Events / Products – all items with a recurring type other than “None”.
• New delivery time logic• Reminder scheduling has been unified with follow-up logic and now uses three core fields: • Delivery Time – numeric input. • Delivery Type – dropdown with options: • days before • days after • hours before • hours after
• Date Field – dropdown with the base reference date, defaulting to Subscription End Date (with future extensions planned).
Update SEO Rendering Logic for Dynamic Fields
SEO
The SEO rendering engine has been updated to support conditional output based on whether SEO fields are populated. This ensures clean, predictable rendering and prevents blank SEO tags on pages. Key capabilities • Regex-based value detection – all SEO fields now use the same regex logic previously applied to SEOTitle, ensuring consistent evaluation of whether a field is considered “filled”. • Unified behavior across all SEO fields – the same validation workflow applies to every SEO-related property. Updated logic • If SEO fields are filled – render the SEO meta element and its value. • If SEO fields are filled and the corresponding custom/hardcoded meta element also exists – the custom element overrides the SEO fields and is rendered instead. Fields using the new logic • MetaTitle • MetaDescription • CanonicalLink • OpenGraphProperties.title • OpenGraphProperties.type • OpenGraphProperties.url • OpenGraphProperties.locale • OpenGraphProperties.image
Other updates3
Advanced AI Search (beta)
Advanced AI Search introduces a new AI-powered, context-aware search engine that works across multiple modules. It supports advanced semantic indexing and provides flexible configuration options for partners, making it a complete end-to-end semantic search system designed for scalability and deep customization. Settings • Partners can configure API access required for vector generation and semantic search execution. An OpenAI API Key is required. • Features include the ability to save, update, and delete the API key. You can register for an OpenAI account here: https://auth.openai.com/create-account and generate an API key within the account settings. The cost of embeddings is charged based on OpenAI’s pricing. Full pricing table here: https://platform.openai.com/docs/pricing#embeddings WebinOne is using the text-embedding-3-large model: https://platform.openai.com/docs/models/text-embedding-3-large Multi Module Searches • List View• A Create New button for creating a configuration. • A table displaying Name, Alias, Created Date and actions (Edit and Delete).
• Detail View• Displays Name and auto-generated Alias fields. • A Searchable Modules block that allows adding/removing modules (Pages, Blogs, Custom Modules, etc.). • On save, vectors are created or removed according to the selected modules. • Regenerate Vectors link is provided for full vector regeneration.
Advanced Settings • A powerful configuration layer allows defining which properties are indexed and how they contribute to scoring. • Defaults include searchable properties such as Name and Description, with the option to add up to 6 additional properties (shared across all modules). • Supported property types include: • Checkbox List • Dropdown List • Radio List • String • Multiline
• System searchable Properties • Name • Url Slug • Description • Site Search Keywords
• Ability to remove properties from search. Score Weight • Total weight = 100%. • Weights distributed manually or by sliders. • Removing a property redistributes weight proportionally across all remaining ones. • Final rounding is applied to the last property. • Newly added properties start with 0%; their weight is subtracted from the next property (except the last, which subtracts from the previous). Validation • Properties used in search cannot be renamed, deleted, or changed type until removed from advanced search: “Can't delete or update property because it is used in advanced search settings.” Per-Property Main/Context Weighting Each property has an internal weight breakdown to improve semantic relevance. • Each property (Name, Description, Property 1, etc.) has a global weight (within 100%). • Inside the property, weight is split into Main and Context (sum = 100%). Advanced Search Form • Modules can be individually configured for semantic search using a module-specific search component and toolbar form. • The advanced search form is located under Custom Modules → Search Forms → [[Advanced Search Form Code]]. Automatic Vector Generation • Vectors are automatically generated for newly created or imported module items, ensuring up-to-date semantic indexing. New Liquid Component: advanced_site_search • This component provides front-end access to advanced semantic search results. • It opens a second toolbar under Advanced AI Search with new fields: • semanticQuery – text query for vector search • minScore – a number from 0 to 1 (default 0.5) • type – should be set to "advanced_site_search"
Role-Based Access Control • Fine-grained permissions for managing Advanced AI Search, including: • Can View • Can Create • Can Edit • Can Delete
• Additional module-level permissions include: • Can View Module Advanced AI Search • Can Edit Module Advanced AI Search
Activation Page Summary (UI improvement)
The Activation Summary has been updated to provide clearer and more informative extension details for users. • Displays the number of email accounts and the total mailbox storage directly in the extensions list. • Shows the number of Multisite starter pages included. • In the Manage Extensions toolbox, pricing labels for Email Accounts and Multisite have been updated to: Starting ${price}/mo for clearer expectation-setting.
Added Zapier Invite Link to Extension Description (UI improvement)
The Zapier extension description now includes a direct invite link and activation notice. This update improves onboarding clarity and reduces setup friction for users, ensuring that Zapier can be enabled effectively. • The following text has been added to the Zapier extension details: • To use this Zapier integration, first accept the invite: [Get your invite here]. • Please note: this Zapier integration will only work after your WebinOne subscription is paid and active.
Bug fixes1
General
• The link to Advanced Backup settings in the Portal has been corrected – it no longer redirects to the trial sites list. • A display issue in Copilot has been resolved where the last line of code in the editor was hidden when viewing history. • The test email functionality in the Admin Panel has been adjusted to generate the correct URL.
6 updates
New features1
External API Credentials
Liquid · Open API
A new External API Credentials section under Settings → External API Credentials provides a secure, centralized way to store and reuse credentials across multiple integrations. Combined with the new api_request component, it enables fully managed, authenticated communication with external services. Key capabilities: • Centralized credential storage – create reusable authentication profiles referenced by alias. • Supported auth types: None, Basic, API Key, OAuth2. • Role-based access control – granular permissions for View, Create, Edit, and Delete per admin user role. API Request Execution The new api_request component lets you make authenticated HTTP requests directly in your templates, using credentials stored in External API Credentials. Example usage {% component type:"api_request", method:"GET", url:"https://example.com/api", auth:"my_alias", body:"{ "limit": 10 }", headers:"{ "header name": "header value" }", layout:"", collectionVariable:"result" %} Highlights: • Added API Request to the Components menu. • Supports GET, POST, PUT, PATCH methods. • Returns parsed JSON data assignable to a variable through collectionVariable. • Optional layout parameter allows templating of API responses. Availability: Both External API Credentials and API Request are available in the Pro plan.
Improvements4
API Application Scopes
Open API
Add support for API scope management based on Swagger specifications. In API Applications → SCOPES, scopes are now grouped by API type (Admin v1, Admin v2 and Frontend v2) with searchable, collapsible lists and per-entity permissions (Read, Write, Delete). Scopes are automatically generated from API paths following the pattern v2__ (e.g., v2_contacts_read, v2_orders_write). If permissions are missing, an error message is triggered: • “The request is not authorized. Missing required scope: <scope>.” This update improves API access control, making it clearer and easier to manage granular permissions across admin and frontend integrations.
HMAC Signature for Outgoing Webhooks
Open API
Add support for optional HMAC-SHA256 signing of outgoing webhooks to ensure authenticity and data integrity. To enable signing, append the ?sk= parameter (or a custom secret) to the External URL field; for example: /api/webhook?sk=. When enabled, each webhook request includes timestamp, event name, and signature headers generated with the provided secret, allowing the receiver to verify that the payload is authentic and unmodified.
Open API type for server-side, mobile app
Open API
Add Type selection to API Applications to distinguish between Server-to-Server and iOS integrations. A new Type field (available on create and edit) defines the application’s usage context: • Server-to-Server – default option, requires no additional fields. • iOS – displays BundleId and TeamId fields for app identification. iOS applications are verified through their associated keys, ensuring secure and authentic integration between the mobile app and the Open API.
Special Characters in File Names
Improve file upload and rendering to ensure images with special characters or spaces in file names display correctly across both the admin and front end. File names are now normalized during upload (invalid characters replaced with -) and properly URL-encoded when rendered to prevent broken paths. Examples: • emoji🔥.png → emoji-.png → /emoji%F0%9F%94%A5.png • file name.png → file-name.png → /file%20name.png • imag#e.png → imag-e.png → /imag%23e.png • multi space.png → multi---space.png → /multi%20%20%20space.png This ensures consistent image display and eliminates broken links caused by unsupported characters.
Bug fixes1
General
The following issues have been resolved: • Shipping integrations – Australia Post: Fixed an issue where entering a ZIP code on the shopping cart caused an error with the Australia Post integration. • Portal – file upload: Resolved a problem that prevented file uploads in project chat when no text message was included. • On-Site Editor – multiple data source: Fixed an issue where the Multiple Data Source property could not be populated correctly through the On-Site Editor. • File Manager – quick code editing: Corrected a bug where the cursor jumped back to the first line after editing a file in quick-view mode. • Events – follow-up email sending: Fixed an error that blocked follow-up notification emails from being sent for events. • Products – import process: Resolved a problem with product import on sites where feature sets didn’t match the columns in the uploaded Excel file. • Member Activity Tracking – clear button: Added a Clear Activity button that allows admins to manually reset tracked member activity data. • Email templates – test email sending: Fixed an issue where the selected email template was not applied when sending a test email. • Portal – bell notifications: Resolved an incorrect alert that appeared in the portal about an expired paid extension. • Shipping options – disabled feature visibility: Fixed an issue where disabled shipping options were still displayed in the shopping cart. • System emails – delivery options reset: Fixed a bug where delivery option settings for system emails were reset after editing files via FTP. • Mailing lists – deletion error: Resolved an internal error that occurred when deleting imported mailing lists from the admin panel. • Module items – list filtering: Fixed filtering behavior for module items by Expired State to ensure accurate list results. • Security – nonce attribute for analytics: Fixed an issue where the nonce attribute was not applied to Google Analytics scripts, improving compliance and security consistency.
10 updates
New features2
Multiple Datasource Property
Custom Modules
A new option has been added to Data Source properties, allowing multiple values to be selected instead of just one. This makes properties more flexible and better suited for scenarios where multiple related items should be stored together. What’s new • Added a “Multiple” checkbox for Data Source custom properties. • When enabled: • Users can select multiple Data Source items. • The property value is stored as an array (with item ID, Name, and URL).
UX /UI Improvement - System Emails And Autoresponders Test Button
Emails · UI/UX
A new "Send Test Email" button has been added across all types of system and autoresponder emails, making it easier to preview messages before sending them to real contacts. What’s new • The "Send Test Email" button is now available in the bottom action bar for: • System emails • Workflow, follow-up, abandoned cart, and reminder emails • Autoresponders (including module-based ones)
• The button appears only after the email content has been saved. • Clicking it sends the email to the selected address exactly as it is in the template, with sample test data substituted where needed.
Improvements6
Code Editor in Full Screen Mode
Code Editor
The built-in code editor can now be expanded to full screen, giving developers more space and focus when working with code. What’s new • Added an option to toggle the code editor into full screen mode.
Control Auto-Generated SEO Content
SEO
You can now control whether SEO metadata tags are auto-added when values are set in the items SEO settings, or only taken from your custom page or template code. This gives developers and SEO specialists more flexibility in managing search-optimized metadata. What’s new • Added a new checkbox setting: "Auto-generate SEO Content" (located in 'Settings' > 'SEO'). • Default value: Enabled (True). • When enabled, SEO meta tags are added automatically (current behavior). • When disabled, auto-generation is skipped, and only manually defined SEO metadata in the site code is used.
Extend DateTime Field Support in Form Fields
Forms
The DateTime field in forms now supports both date and time selection, making it more flexible for scheduling and time-specific submissions. What’s new • DateTime field upgrade: previously worked as a simple Date field, now supports full date + time input. • Added a new Date only checkbox in Form Builder: • Enabled → renders <input type="date">. • Disabled → renders <input type="datetime-local">.
For more info, see the HTML specs for the differences between 'datetime-local' and 'date' input types.
Liquid File List Access
Liquid
The feature previously called API (File system) has been renamed and repositioned to make its purpose clearer and more accessible. What’s new • Renamed: API (File system) → Liquid file list access. • Plan change: moved from PRO to BUSINESS plan. • Functionality: Partners can output system file lists directly through Liquid. • More info: Liquid file list access is now available on the BUSINESS plan
Mailchimp Full CRM Sync, Existing Mailing List Sync, Double Opt-in And Subscription Status
Emails · Marketing
This release introduces major updates to mailing list management, Mailchimp synchronization, and email content editing, giving you more control, flexibility, and clarity when working with subscribers. What’s new Mailchimp list import • New Import from Mailchimp action with a dropdown to select lists (showing subscriber counts). • Mailing lists view now includes a Subscribers column with counts from Mailchimp. General settings for mailing lists • Added in the 'General Settings' section with two options: • Email opt-in method (Double opt-in / Single opt-in) – stored per list and applied only to new subscribers. • Tags management – view tags, add via popup, and store them with each list.
Subscription status sync • CRM status changes (subscribed/unsubscribed) are now synced with Mailchimp. Mailchimp sync tab • New 'Mailchimp Sync' tab for comparing and aligning audiences. • Options to sync manually (in addition to auto-sync every 24h). • Contact mismatch resolution with per-field radio buttons or bulk apply from CRM/Mailchimp. • Visual highlighting of differences and per-contact sync actions. Tag synchronization and bulk management • Tags now sync on subscribe/unsubscribe events. • Bulk add/remove tags for selected contacts via toolbar. Mailing lists field in Form Builder • Mailing lists remain available as a default user field. • Displayed as checkboxes inside forms, with related tags shown under each list. • Selected lists and tags are saved and visible in user profiles.
WYSIWYG Editor for All Admin Code Editors
WYSIWYG Editor
A WYSIWYG (visual) editor is now available across all admin code editors, making it easier to create and format content. What’s new • Enabled WYSIWYG mode in all admin code editors.
Other updates1
Multiple Data Source property
A new option has been added to Data Source properties, allowing multiple values to be selected instead of just one. This makes properties more flexible and better suited for scenarios where multiple related items should be stored together. What’s new • Added a “Multiple” checkbox for Data Source custom properties. • When enabled: • Users can select multiple Data Source items. • The property value is stored as an array (with item ID, Name, and URL).
Bug fixes1
General
The following bugs have been fixed: • Fixed the removal of expired extensions after the trial period. • Fixed uploading folders (with files) via FTP. • Fixed reversed forloop.rindex and forloop.rindex0 values (0-based now starts at 0; 1-based at 1). • Fixed HiddenValidator: it now trims spaces in name and capitalizes the following word. • Fixed incorrect redirect URL in the Portal after changing the billing cycle via PayPal. • Fixed the Prices tab not showing for events on the Pro plan. • Fixed login creating a 30-day member cookie when “Remember Me” is unchecked – it now expires after 24 hours. • Fixed an issue preventing workflow deletion on Business and Starter plans. • Fixed the error message when deleting an admin user who owns a non-shareable custom report. • Fixed API error when creating a custom module item with Disable detail layout enabled. • Fixed Admin list-view sorting resetting to A–Z on navigation – the chosen sort now persists. • Fixed searchScope filtering: multiple conditions are again combined with AND. • Fixed in the On-Site Editor, clicking Add item with the toolbar closed no longer reopens the toolbar. • Fixed in the On-Site Editor, when adding an item with the toolbar closed, the Content field no longer collapses. • Fixed in the On-Site Editor, multiline fields no longer expand to full screen height.
7 updates
New features2
AgentOne - Design Parser
Converts Figma designs into ready-to-use HTML/CSS/JS code in just a few clicks — no manual coding required. Simply design your layout in Figma as usual; the parser automatically reads your layers, frames, and components. It generates clean HTML, responsive CSS (using Tailwind 4.1), and lightweight JS, ready for development or publishing. Works instantly, making it easy to go from design to working webpage in minutes. Great for landing pages, home screens, UI mockups, and more — no need to rebuild layouts manually. It is built to understand common naming conventions and structure, so well-prepared designs are transformed more accurately. Recommendations for best results • Use keywords in layer names: • e.g., icon, ico, logo, bg, or background • Examples: insta-icon, dentist-icon, header-bg --> Helps the parser treat them as single assets instead of raw SVG vector sets.
• Name the main frame using home or landing: • Examples: home screen, landing page --> The parser uses this to generate the main index.html.
• Keep Figma designs structured, with clean layers and components.
• Avoid excessive repetition or duplicated frames for more accurate parsing.
What’s new • ~50% faster CSS generation
• Now outputs Tailwind 4.1 code using the Vite Build Tool
• Improved background image handling: now uses bg-[url()] classes instead of absolutely-positioned <img> elements
Implements finished HTML/CSS/JS projects into WebinOne components, ready to publish with no extra setup needed. Implementor can be used in three ways • One-click from Design Parser – if the generated code is ready, you can send it directly to Implementor via the “To Implementor” button.
• After code review and edits – make any necessary changes to the Design Parser output, then repackage it as a .zip and upload it manually to Implementor.
• Using your own project – upload any valid HTML/CSS/JS project following the structure above to generate a working WebinOne site.
How it works • Simply upload a .zip file containing your project. • Include your main HTML files and asset folders like JS, CSS, fonts, and images.
• No configuration or cleanup required – the system automatically maps your files into WebinOne components and structure.
Limit • Supports archives up to 300 MB.
Ideal for turning design output into a real, editable, and publishable website on the WebinOne platform, quickly and seamlessly.
Improvements4
Implement WebP ImageProcessor Plugin
General · Image Processor
The ImageProcessor now includes built-in support for WebP images via a new plugin. What’s new • Added WebP plugin to the ImageProcessor toolset
• Enables handling, optimizing, and serving .webp files natively
• Improves image compression and performance across supported browsers
This update helps ensure modern image standards are fully supported, making websites faster and more efficient, especially for mobile users.
New System Order Statuses
Ecommerce
New post-purchase order statuses have been added for improved tracking and clarity in order management. • Return Requested – indicates that the customer has initiated a return.
• Partially Refunded – reflects a refund applied to part of the order.
• Refunded – shows that the full order amount has been refunded.
These statuses enhance transparency in the order lifecycle and help both merchants and customers better understand the state of each transaction.
Open API v2
Open API
Expands the Open API with new endpoints, providing developers with greater control over integrations, site data, and automation workflows. Supports the creation of more efficient and intelligent connections with external tools. • MENUS
• SNIPPETS
• FORMS
• MEMBER AREAS
• WORKFLOWS
• EMAILS
• EMAIL TEMPLATES
• SYSTEM EMAILS
• ADVANCED CRM GROUPS
• ORDER STATUSES
• ECOMMERCE SETTINGS
• SYSTEM PAGES
• ADMIN MENU CONFIGURATOR
• URL REDIRECTS
• URL REWRITES
• ADMIN USERS
• ADMIN USER ROLES
• PAYMENT GATEWAYS
Option To Index Custom Fields
Custom Modules
A new setting now allows you to include or exclude custom fields from Site Search indexing, giving you more control over what content is searchable on your website. What’s new • Added a checkbox in Custom Properties settings labeled: Enable for Site Search
• Available for the following field types: • Lists — Checkbox / Dropdown / Radio
• Single Line (Text)
• Multiline (Text)
• Media
When the checkbox is enabled: • The field is included in the search index
• Site Search will return results based on the field’s content
When disabled: • The field is excluded from indexing and search results
This update gives you flexible indexing control so that only relevant custom data contributes to on-site search — helping deliver more accurate and useful results to users.
Bug fixes1
General
• Mailbox password reset in the Portal now works correctly and applies a new password as expected.
• Media files (e.g., .mov, .mp4, .webm) no longer trigger 500 errors; they are now served properly on the frontend.
• Invalid admin logins no longer lead to a 404 page. Users now see a proper error message when entering an incorrect email.
• Admin user invitations now function as intended; new admin users can be invited without issues.
• The Back button on module item pages now behaves consistently across tabs such as Settings and SEO, returning to the correct folder every time.
• Sorting blog posts no longer affects the entire blog module; post-level sorting is now applied correctly.
• Stability improvements and multiple fixes have been made to the OSE module.
• The Insert Link pop-up now appears above the full-screen WYSIWYG editor in both the Admin Panel and OSE, ensuring proper visibility.
• Volume discounts can now be added without errors.
• Custom module layouts edited via File Manager after module duplication now sync properly and reflect changes as expected.
• Shipping calculations in the shopping cart now exclude products that don’t require shipping.
• Addressed UI display issues on tablets.
12 updates
New features7
Extension: Email Accounts
Extensions · WebinOne Portal
A new extension for managing email mailboxes is now available. Buying Mailboxes: • Buy any number of 5 GB mailboxes ($2 each) • Purchase via popup with quantity input • New mailboxes appear in the list instantly Managing Mailboxes: • View list with email address, used/total storage • Real-time updates when changes are made Actions via dropdown: • Add Vault: +5GB ($2), +15GB ($4), +25GB ($6), +45GB ($10), +95GB ($20) • Reset Password • Delete Mailbox (with confirmation) Buttons: • Buy Mailbox (opens popup) • Add New Mailbox (quick add from dashboard) Payments: • Charges are added to the main account • Payment confirmations shown in the interface • All changes are applied in real-time
File Manager - Trash and Version History Management
Extensions · File Manager · UI/UX
Several new features and improvements were added to the File Manager. Trash Bucket: • New section to view deleted files • Search by file name • Sort by name, size, or date deleted • Restore latest or any previous version • Preview deleted files (text files open in popup) • Permanently delete files (single or bulk) • Bulk restore File Version History: • All files now keep version history for 30 days • You can preview or restore any version Access Control: • New admin role permission: Can Access File History • History features are only available if: • User has this permission • Website Backup extension is active
Drag & Drop Upload: • Added simple drag-and-drop upload area
HiddenValidator Field for Anti-Bot Protection (Honeypot)
Forms
Added a new custom field type HiddenValidator to help prevent bot submissions. How It Works: • HiddenValidator fields are invisible to users but included in form validation. Submission is allowed only if: • All HiddenValidator fields are empty, or • The fields exist in the Form Builder but were not added to the layout (not submitted). Validation Rules: • Fields are ignored if: • Not added in the Form Builder • Have incorrect HTML (type, name, or mismatched field name)
HiddenValidator values are not saved in form records and not sent in email notifications.
Monaco Code Editor
Code Editor
Replaced the built-in code editor in the admin panel with the Monaco Editor (used in VS Code). Key Benefits: • Improved performance • Syntax highlighting for multiple languages • IntelliSense support • Professional, developer-friendly editing experience
Notification About Mandatory Update to Version 7+
WebinOne Portal
Sites running on version 6.11 that exceed system limits must now be upgraded to version 7. Limit checks are updated daily. Upgrade Required If: • More than 25 custom properties per module • Over 2,000 items (system or custom modules items) • Over 10,000 CRM records Portal Notifications: • A warning banner is shown in the portal header for affected 6.11 sites • Includes a link to a detailed page listing all affected sites with upgrade recommendations • The banner is visible only if the site exceeds the limits
Reseller Role Upgrade
WebinOne Portal
Added the ability for resellers to upgrade their role directly from the My Settings page in the admin, under the Profile tab. Upgrade Options: • Associate – $999 • Partner – $1,999 • Agency – $4,999 If a reseller already has a paid role, only higher roles are available for upgrade (downgrades not needed). The user pays only the difference in price. Upgrade Flow: • Dropdown with available roles appears under the Email field • On selection, a popup shows upgrade info and a PAY button • Payment is processed via Stripe • After successful payment, the role is upgraded automatically, and the user is returned to the Profile page Notifications: • Email confirmation of successful payment • Email notice about role change
URL Rewrites
General
Added a new URL Rewrites section (available on PRO plan). Key Features: • Add/edit rules with the following fields: • Rewritten URL* (RegExp), e.g. ^article/([0-9]+)/([_0-9a-z-]+) • Rewrite To* (RegExp), e.g. /article/article-detail-name • Enabled (default: true)
Notes: • Rewrites work only within the same application (domain). • Rules are stored in the same config file as domain redirects. • Admin user roles updated with new permissions: View, Add, Edit, Delete.
Improvements3
Change Partner Email
WebinOne Portal
Users can now change their email address in the Profile section of the portal. How It Works: • The Email field is now editable • After entering a new address, a confirmation email is sent to the new address • The email is updated only after confirmation via the link (expires in 24 hours) UI Behavior: On input: • "A confirmation email will be sent to your current email. The change will take effect only after confirmation." After saving: • Confirmation popup is shown If not yet confirmed, a warning is displayed under the field: • "Your email is not verified. Please check your inbox to confirm it or resend the confirmation email." Until confirmed, the old email stays visible in the field.
Filter Reminder Recipients by States
Emails
Added a new Member State filter to recurring reminders. Key Benefits: • Target reminders to members in specific (US) states • Reminders are sent only to contacts matching the selected states
Login Error Handling
UI/UX
Improves the admin login experience by displaying error messages directly on the screen without redirection.Provides a smoother and more user-friendly approach to handling login issues.
Other updates2
Disable Sender ReplyTo Option in Workflows
Under Email Notifications > Workflows, each Workflow's settings will have an option to Disable Sender ReplyTo. When checked, the sender’s email (the user's email address used in the form submission) will not be added to the Reply-To field in the outgoing Workflow email. Instead, the receiving email client will use it's default reply-to method (likely the From Address, which will be the domain email used in the system Workflow Email's From field).
Cancel Subscription (Site Deactivation)
Added full support for canceling paid subscriptions and reverting sites to trial mode. Subscription Info Page: • New Subscription tab in each live site's Settings page in the WebinOne portal • Shows current status, activation date, next billing date • Includes plan details, pricing and summary of all active features • Includes a Cancel Subscription button Cancellation Flow: • Cancel subscription in Stripe and PayPal • Double confirmation required • Optional exit survey shown after cancellation Site Changes After Cancellation: • Domains removed (except trial domain) • Removed from server monitoring • Site reset to trial mode • Email domains removed • Notification sent to partner via email
15 updates
New features4
Global Setting to Restrict Certain File Types
File Manager
A new section has been introduced under Misc Settings to enhance control over file uploads across the site. Settings Configuration Location: 'Settings' > 'Misc' Section:Server File Settings Setting Name:Enable file restrictions Enable/Disable Control: A checkbox is provided to activate or deactivate file type restrictions. Default Restricted List: When enabled, a default list of disallowed file types is applied, including but not limited to .exe and .php. Custom Input: Administrators can add, remove, or modify the list of restricted file types to tailor restrictions to site requirements. Scope of Restriction: The file type restriction applies to all key upload channels: • FTP uploads • File Manager uploads • Public forms (e.g., via custom forms or modules) Validation Logic: Files are checked using extension-based validation and MIME type validation for enhanced security. Error Messaging: • Frontend Forms: “The file upload failed because the file type {fileType} is not allowed on this site. Please ensure that your upload complies with the site's file type restrictions. If you need assistance, contact us.” • Admin/FTP Uploads: “File upload rejected. The file type {fileType} is not permitted based on the site's global file restrictions. To modify these restrictions, please review the prohibited file extensions settings in the site Admin.” Enabling Restriction with Existing Files: If the checkbox is selected while restricted files are already present in the File Manager, the following error is shown: “Unable to activate file type restrictions. Your site already contains files of the following restricted types: {restrictedFileTypes}. Please remove these files from the File Manager before enabling this option.”
Recurring Subscriptions Reminder
Emails
A new Recurring Subscription Reminder feature has been introduced, allowing users to configure and schedule automated email reminders for Member Areas, Events, Forms, and Products. The system supports item-based selection, filtering, and sorting, ensuring precise control over notification settings. Settings Configuration Location: 'Email Notifications' > 'Reminders' Section:Reminders Menu Update: A new Reminders option has been added to the admin menu between Workflows and Emails. Reminder Fields: • Name* (string) – Reminder name • Email* (string) – Associated email • Type* (dropdown) – Options: Member Area, Events, Forms, Products • All Items (checkbox): If checked, the dropdown for items is hidden. • Items* (dropdown, multiple selection) – Available when “All Items” is unchecked • Days Before Notification* (int) – Defines when the reminder email should be sent Email Notifications: A new Recurring Reminder Emails tab has been added under Emails with dynamic email tags: • – Displays item data • – Displays member data • – Displays subscription details Sending Logic: • If a specific item is selected, emails are sent only to subscribers of that item. • If no item is selected, emails are sent to all subscribers of the selected category. • Emails are sent N days before renewal, based on the configured value.
Server Cache Settings
General
A new option has been introduced under Misc Settings to allow administrators to exclude specific URLs from server-side caching, providing greater flexibility in cache management. Settings Configuration Location: 'Settings' > 'Misc' Section:Server Cache Settings Setting Name:Exclude URL Rules Input Field: Administrators can specify URL rules that should be excluded from server caching. URL Matching Rules: • Case-Insensitive Matching: All URL checks are performed case-insensitively. For example, /marketplace and /Marketplace are treated as identical. • Wildcard Support (*): If a rule ends with an asterisk (*), the system checks whether the current URL starts with the rule. Example: Setting: /marketplace/shopping_cart?* matches /marketplace/shopping_cart?item=123 • Exact Match: If no wildcard (*) is used, only an exact match will trigger exclusion. Example: Setting: /marketplace/shopping_cart matches exactly /marketplace/shopping_cart but does not match /marketplace/shopping_cart?item=123
System Email Delivery Options
Emails
A new dropdown menu has been introduced in the system email settings, allowing users to configure email sending behavior with predefined options. Settings Configuration Location: 'Email Notifications' > 'System Emails' > {EMAIL} Section:Email Delivery Options Setting Name:Delivery Option Dropdown Options: • Send Always (Default behavior, currently active for all emails) • Never Send • Send Only for Main Orders (For invoice emails only) Logic Implementation: Invoice Emails • Send Always: Emails are sent for every invoice event. • Never Send: No invoice emails are sent. • Send Only for Main Orders: Based on the MainOrderId: If MainOrderId is null: The email is sent (indicating the main order). If MainOrderId has a value (e.g., "23293"): The email is not sent (indicating a sub-order). Other System Emails • Send Always: Emails are sent for every event. • Never Send: No system emails are sent.
Improvements7
Add stripeCustomerId to Component
Liquid
A new property, stripeCustomerId, has been added to the component to improve Stripe integration and customer data management. Component Update Component: New Property:stripeCustomerId Behavior: • If a Stripe subscription exists, stripeCustomerId returns the corresponding Stripe Customer ID. • If no active subscription is found, stripeCustomerId returns null.
Angular Upgrade to v17
Admin Panel · Infrastructure · WebinOne Portal
The system has been upgraded to Angular v17, providing enhanced performance, stability, and compatibility with the latest web technologies. Key Improvements: • Performance Enhancements: Optimized rendering and reduced load times. • Compatibility: Improved support for modern browsers and frameworks. • Security Updates: Integrated latest security patches to safeguard against vulnerabilities. • Developer Experience: Enhanced tooling and debugging capabilities for faster development workflows.
Custom Form Validation Before Submission
Forms
Added support for manually triggering form validation before submission by calling a JavaScript function. This enhancement allows developers to apply validation to a specified DOM form element dynamically. Implementation Details: A new global function window.validateCmsForm(form) has been introduced. This function validates the given form element before submission. Example Usage: HTML: <script>let form = document.getElementById('validation');window.validateCmsForm(form);</script> For individual fields: • class="validation-error" – Applied to fields with validation errors. • class="validation-success" – Applied to successfully validated fields. For the entire form: class="form-validation-error" – Applied if the form fails validation.
Improved Calendar Events - Cell by Cell Output
Events
Enhanced the event calendar with Cell by Cell Events Output, improving event rendering and display for better clarity and usability. Component Manager: In the Component Manager, under 'Events' > 'Calendar', a new checkbox option is available for "Cell by Cell Events Output" which will configure the calendar output code with the appropriate parameter. `include` parameter: Enable 'Cell by Cell Events Output' with the addition of a parameter added to the Event Calendar include tag: cellByCellEventsOutput: "true", eg: createEventCalendarHolder('treepl-calendar-50e311ac-2d2d-4003-8f40-054561e858a4', 3185, 1); Key Improvements: • Better Event Visualization: Events are now rendered within each individual calendar cell, ensuring a structured and intuitive layout. • Improved Readability: Events are displayed more clearly, reducing clutter and overlapping information. • Enhanced Usability: Users can interact with events more easily, improving the overall user experience.
Improved URL Redirects UI/UX
UI/UX
The user interface and experience for managing URL redirects is now consistant with other 'quick add' items by means of the pop-out sidebar, making the process more intuitive and user-friendly.
Installed Extensions Page
UI/UX
A new Installed Extensions page has been added to the site admin, providing better visibility and management of active extensions. Found under the gear icon (top right of admin).
Order Transaction ID in Custom Reports
Custom Reports
The Order Transaction ID is now available in custom reports, enabling improved tracking and filtering of transaction data. Settings Configuration Location: 'Admin' > 'Extensions' > 'Custom Reports' Available In: • Report Fields • Report Filters • Report Results Key Features: • New Field in Reports: Order Transaction ID can now be added to report outputs. • Filtering & Sorting: Users can filter reports based on specific transaction IDs or sort columns based on ID.
Other updates4
Global File Type Restrictions
A new section has been introduced under Misc Settings to enhance control over file uploads across the site. Settings Configuration Location: 'Settings' > 'Misc' Section:Server File Settings Setting Name:Enable file restrictions Enable/Disable Control: A checkbox is provided to activate or deactivate file type restrictions. Default Restricted List: When enabled, a default list of disallowed file types is applied, including but not limited to .exe and .php. Custom Input: Administrators can add, remove, or modify the list of restricted file types to tailor restrictions to site requirements. Scope of Restriction: The file type restriction applies to all key upload channels: • FTP uploads • File Manager uploads • Public forms (e.g., via custom forms or modules) Validation Logic: Files are checked using extension-based validation and MIME type validation for enhanced security. Error Messaging: • Frontend Forms: “The file upload failed because the file type {fileType} is not allowed on this site. Please ensure that your upload complies with the site's file type restrictions. If you need assistance, contact us.” • Admin/FTP Uploads: “File upload rejected. The file type {fileType} is not permitted based on the site's global file restrictions. To modify these restrictions, please review the prohibited file extensions settings in the site Admin.” Enabling Restriction with Existing Files: If the checkbox is selected while restricted files are already present in the File Manager, the following error is shown: “Unable to activate file type restrictions. Your site already contains files of the following restricted types: {restrictedFileTypes}. Please remove these files from the File Manager before enabling this option.”
Server Cache Exclusion Rules
A new option has been introduced under Misc Settings to allow administrators to exclude specific URLs from server-side caching, providing greater flexibility in cache management. Settings Configuration Location: 'Settings' > 'Misc' Section:Server Cache Settings Setting Name:Exclude URL Rules Input Field: Administrators can specify URL rules that should be excluded from server caching. URL Matching Rules: • Case-Insensitive Matching: All URL checks are performed case-insensitively. For example, /marketplace and /Marketplace are treated as identical. • Wildcard Support (*): If a rule ends with an asterisk (*), the system checks whether the current URL starts with the rule. Example: Setting: /marketplace/shopping_cart?* matches /marketplace/shopping_cart?item=123 • Exact Match: If no wildcard (*) is used, only an exact match will trigger exclusion. Example: Setting: /marketplace/shopping_cart matches exactly /marketplace/shopping_cart but does not match /marketplace/shopping_cart?item=123
Recurring Subscription Reminder Emails
A new Recurring Subscription Reminder feature has been introduced, allowing users to configure and schedule automated email reminders for Member Areas, Events, Forms, and Products. The system supports item-based selection, filtering, and sorting, ensuring precise control over notification settings. Settings Configuration Location: 'Email Notifications' > 'Reminders' Section:Reminders Menu Update: A new Reminders option has been added to the admin menu between Workflows and Emails. Reminder Fields: • Name* (string) – Reminder name • Email* (string) – Associated email • Type* (dropdown) – Options: Member Area, Events, Forms, Products • All Items (checkbox): If checked, the dropdown for items is hidden. • Items* (dropdown, multiple selection) – Available when “All Items” is unchecked • Days Before Notification* (int) – Defines when the reminder email should be sent Email Notifications: A new Recurring Reminder Emails tab has been added under Emails with dynamic email tags: • {{this.item}} – Displays item data • {{this.member}} – Displays member data • {{this.recurringsubscription}} – Displays subscription details Sending Logic: • If a specific item is selected, emails are sent only to subscribers of that item. • If no item is selected, emails are sent to all subscribers of the selected category. • Emails are sent N days before renewal, based on the configured value.
Stripe Customer ID in Member Component
A new property, stripeCustomerId, has been added to the {{request.currentmember}} component to improve Stripe integration and customer data management. Component Update Component:{{request.currentmember}} New Property:stripeCustomerId Behavior: • If a Stripe subscription exists, stripeCustomerId returns the corresponding Stripe Customer ID. • If no active subscription is found, stripeCustomerId returns null.
WebinOne Portal: Stripe As a Website Payment Option
WebinOne Portal
The ability that partners and clients can pay the website hosting fee through Stripe with a credit card, instead of the current option with PayPal.
10 updates
New features2
Custom Modules Advanced Filtering
Custom Modules
Public Backlog request link: https://webinone.com/public-backlog-state/delivered/custom-modules-advanced-filtering Add the "Where" parameter to the admin panel. This parameter will be used for the items. Add the "Filter Type" dropdown with the 2 options: "Simple Filtering" and "Advanced Filtering". The default is "Simple filtering". Default view will show a "Filter Type" dropdown and a "Filter by" dropdown. If the user switches to "Advanced filtering" in the "Filter Type" dropdown, the "Filter By" dropdown will be removed and replaced with the "Where" drop-down, which will be a text input field. If the user configures both "Filter By" and "Where", then "Where" will be prioritized, and the system will do filtering based on "Where". "Filter By" will be ignored in such case. The filter value will use the JSON Query Language format as per: https://github.com/clue/json-query-language/blob/master/SYNTAX.md Screenshot: https://prnt.sc/-YJuwkISlCmc
Liquid Parser Inside Text Based Files
Liquid
Backlog request: https://webinone.com/public-backlog-state/request/custom-modules-advanced-filtering Liquid (and module rendering) is now available inside other text based files such as .css, .js, .xml, .json, .txt, etc. Add the liquid parameter to the file URL to force it to be processed by the liquid engine. Example File: /assets/css/main.css In order to parse file with liquid reference the file with the URL parameter: /assets/css/main.css?liquid=1 With the new functionality, the liquid will be parsed within the file, so the file is returned with the parsed liquid, providing the URL param is used when referencing the file.
Other updates8
Validation for Module Names
New feature to prevent the creation of custom modules with duplicate names. • When you try to create a new module, the system will automatically check if a module with the same name already exists. • If a duplicate name is detected, a pop-up message will appear, advising you to change the module's name. Screenshots: https://prnt.sc/LPkuPb-A5CAU
A new system page for reset-password-result has been added. After resetting the password, the user is redirected to this page from the reset-password system page. This page also contains the formSubmissionData object, which, if there are errors, includes a list of errors that are displayed. Added this.formSubmissionData liquid object with the following structure { "form_alias": "reset-password", "error": 0, "errormessages": [], "formtype": "System"} • 'formtype' is always 'System' • 'form_alias' is always 'reset-password' • 'error' and 'errormessages' should be set based on errors occurred during the reset-password flow. On success, 'error' = 0 Screenshots: https://prnt.sc/Bx_O-nZ4DZNy https://prnt.sc/pm10eXlMZxZu https://prnt.sc/VvZs_4r7tkJG https://prnt.sc/GjctWpl-FFBH When we enter the same password reset link for the second time: https://prnt.sc/4dMqo0FeWQLV https://prnt.sc/QXPFHEKxNe5M
Add this.siteURL to all emails and provide all variables in toolbox
1) Add this.siteURL parameter to all email’s liquid context. The parameter should appear here in the toolbox https://prnt.sc/hdl6H0MHqPLq It should contain protocol and domain (save that domain that was used by the site visitor at the time the email sending was scheduled). List of emails: • form autoresponders • system emails • custom emails and custom workflows 2) Provide toolboxes ( https://prnt.sc/ru2bmo) to all emails with the list of variables that are accessible on this object in liquid context for: • form autoresponders • system emails • custom emails Screenshots: https://prnt.sc/uhHv1Mu4SSeq https://prnt.sc/0eq81KiJLCh9
New Component for Booking Subscriptions
Add new component tag for Bookings. The {% component type:"booking_subscriptions" %} component returns subscriptions. It either returns all existing subscriptions or only the subscriptions of the current user. Pattern: {% component type:"booking_subscriptions", viewType:"[[viewType]]", object:"[[object]]", currentMemberOnly: [[currentMemberOnly]], filterBy:"[[filterBy]]", filterValue:"[[filterValue]]", filterCondition:"[[filterCondition]]", collectionVariable:"", layout:"", sortBy:"", sortOrder:"", limit:"[[limit]]", offset:"[[offset]]" %}• viewType• List [default] • Detail
• currentMemberOnly [Boolean | default = true] (not required) • if false get all booking subscriptions of all users • otherwise get booking subscriptions of current logged in CRM member only
• object [item|collection - default = collection] (not required) • collectionVariable (not required) • works the same way as in type: module.
• layout (not required) • path to FTP file that will contain layout content that needs to be parsed. • If specified empty string - do not render anything. • If not specified at all - render default virtual layout.
• filterValue (not required) • value to use in filtering condition
• filterCondition (not required) • Equally [default] • less • more • lessEqually • moreEqualy • contains
• limit (not required) [default = 10] • offset (not required) [default = 0] Single tag item context is described below. If object = collection than this contains attribute property that holds the list of attributes (ie: {{this.items}}): viewType == list { "formId": 0, "memberId": 0, "id": 0, "formName": "", "EventName": "", "Allocation": 0, "Price": "", "dateSubmission": ""} viewType == detail { "formId": 0, "memberId": 0, "fields": [ { "name": "", "alias": "", "value": "", "type": "" } ], "id": 0, "formName": "", "EventName": "", "Allocation": 0, "Price": "", "dateSubmission": ""} Default virtual layout: <ul> {% for item in this.items %} <li> <strong>{{item.formName}}</strong> <span>Date Submission: {{item.dateSubmission | format_date: "dddd, MMMM dd, yyyy"}}</span> </li> {% endfor %}</ul> The new component will be added here: https://prnt.sc/wqRi_L8xLv9o Screenshots: https://prnt.sc/6cP1FQJD1Z2y https://prnt.sc/AS93RF_SyYZe
Improvement to the ‘Setup Analytics’ file input
If a Service Account Key File has already been uploaded, the file input will be filled with asterisks to indicate that a file is present. A "Delete" button will now be visible. Clicking this button will trigger a confirmation popup: "Are you sure you want to remove this file?" If the user clicks "Ok," the file data will be removed from the Google Analytics configuration in the database. If a new file is uploaded and submitted with the setup analytics form, it will replace the old one. If no file is submitted with the form, the existing file data in the Google Analytics configuration will not be removed. DESIGN: https://invis.io/TA104JA6C9VP Screenshots: https://prnt.sc/g4sA72UFpT-F
Website Backup Scheduling Interface Updates
The Website Backup extension scheduling options have been adjusted. The "Period" and "Every" dropdowns have been switched: https://prnt.sc/TJUqZPQ6NC5i A new "Hour" option has been added to the "Period" dropdown. If "Hour" is selected, the time dropdown will be removed. When "Hour" is selected, the "Every" dropdown will show options for 6 and 12 hours (default is 12). If a user had a backup previously, we would count a time based on the previous backup time. The tooltip should say: “Your next backup creation will be launched approximately at [time]” If the user didn't have a backup and it's their first backup, we will do a backup within the next hour. The tooltip should say: “Your next backup creation will be launched approximately at [time]” Screenshots: https://prnt.sc/99KgYCCAX8Wm https://prnt.sc/qEsk4gu7bUU8
eCommerce Сatalog duplication with or without sub-content
Now, users can choose to duplicate not only the catalogs but also the products within those catalogs. When duplicating a catalog, a message will appear with two options: • Duplicate Sub-Catalogs Only: This option allows you to duplicate the catalog along with its sub-catalogs, but without duplicating the products. • Duplicate Sub-Catalogs and Products: This option duplicates both the catalog with its sub-catalogs and all the products within them. Screenshots: https://prnt.sc/kMUu0iyQ3C7O
After setting up an API application under ‘Settings’ > ‘API Application’, you can configure your Webhook on the “Webhooks” tab (https://prnt.sc/g_UDGnzrmDcF). Choosing the entity/item type will then display the available actions (OnCreate, OnUpdate, OnDelete, OnTrigger) and if applicable, the modules/collections to receive webhooks - allowing you to enable just the modules you need to work with Webhooks.
• Go to any site without the "Abandoned Cart Recovery" extension. • Navigate to Admin Roles. • The "Abandoned Cart Reports" restriction should not be displayed. • Additionally, the "Abandoned Cart Emails" restriction has been fixed. Screenshot for reference: Link to screenshot
Orders: Internal Error When Setting Negative Product Units
• Go to the Orders section. • Create a new order. • Open the order details and navigate to the Products tab. • Open the toolbox for adding products. • Select any product (Screenshot for reference: Link). • Change the units to a negative value (validation works and the SAVE button is inactive) (Screenshot for reference: Link). • Change the product without changing the units. • Change the units value (Screenshot for reference: Link). • Click SAVE (Screenshot for reference: Link). Result: An internal error is displayed (Screenshot for reference: Link).
Module Item: Enable Draft
If the draft version of a page is enabled (Screenshot for reference: Link) while the live version is disabled (Screenshot for reference: Link), the draft preview will result in a 404 error (Screenshot for reference: Link).
Cancel on Bambora and PayPal Redirect
• Set up Bambora or PayPal redirect on the site. • Add one product to the cart and choose to pay by Credit Card (Bambora). • After being redirected to Bambora, click Cancel (Screenshot for reference: Link). • On the checkout page, choose "Cash" as the payment method (Screenshot for reference: Link). • In the admin panel, the order is displayed with "None" as the payment status (Screenshot for reference: Link).
Authorize.Net: Paid Secure Zone + Free Secure Zone Issue
• Set up Authorize.Net on the site to provide one-day access. • Create a form that includes both a free secure zone and a paid secure zone. • Submit this form. • In the user's Subscribes, the free secure zone is not applied; only the paid secure zone is applied (Screenshot for reference: Link).
Roles for Portal Users: Display Informative Error
When a Portal user attempts to add their email to an Admin user: • Display an error. • The error popup should contain an informative message stating that this user cannot be added as an Admin user because they are a Portal user in some portal (Screenshot for reference: Link).
504 Gateway Timeout: Deleting Large Folder in File Manager
• Go to the File Manager. • Try to delete a folder that is approximately 1 GB in size (Screenshot for reference: Link). • After removing some large folders (Screenshot for reference: Link), a 500 error (Screenshot for reference: Link) or 504 error will be displayed.
Forms: Assigned CRM Groups Issue
• Create two different CRM groups: one applied to "Form Submissions" and the other to "Event Booking" (Screenshot for reference: Link). • Go to Forms and create a new form. • Assign both CRM groups to the created form (Screenshot for reference: Link). • Submit the form from the frontend. • Go to Form Submissions. • The "Event Booking" CRM group should not be applied to form submissions (Screenshot for reference: Link). The same issue occurs with event bookings, where the "Form Submissions" CRM group should not be applied to event bookings (Screenshot for reference: Link).
Catalogs: Deleting Assigned Catalog Issue
• Go to Catalogs. • Create a new catalog. • Assign this new catalog to any product (Screenshot for reference: Link). • Delete the assigned catalog. Expected: An alert should be shown indicating the catalog is assigned to a product (Screenshot for reference: Link). Actual: • The catalog was deleted. • In the list view, the product shows an empty URL tab (Screenshot for reference: Link). • On the frontend, the product page is unavailable (Screenshot for reference: Link).
Product: Add to Cart Deleted Product
• Go to Products in the admin. • Create a new product. • Go to the frontend to view this product. • Delete the product in the admin (Screenshot for reference: Link,Link). • Attempt to add this product to the shopping cart on the frontend. Result: An error is shown when trying to add the deleted product to the cart (Screenshot for reference: Link).
Payment: PayPal Flow ID Issue
• Go to the Payment section. • Create a PayPal flow (Screenshot for reference: Link). • The created PayPal flow initially has an ID of 0 (Screenshot for reference: Link). • Reload the page. • On the GET request for all payments, the PayPal flow now has a proper ID number (Screenshot for reference: Link). • This ID is then used for the delete request (Screenshot for reference: Link).
Display Zero Values After Decimal Point in Prices
• Ensure that prices and totals are displayed with two decimal places, showing .00 after the decimal point (Screenshot for reference: Link). • Apply a discount and check the displayed price, which should also show .00 after the decimal point (Screenshot for reference: Link). • When JavaScript sends a request to: /public/api/forms/calculate-form-totalcost?Price=29&GiftVoucherCode=&DiscountCode=&Quantity=&EventId=0&FormAlias=patriot_membership_d
• After receiving the response, JavaScript updates the displayed price, ensuring it shows two decimal places.
Forms: Quote Form Should Not Include 'Accept Event Booking' Field
• Go to the Forms section. • Create a generic form and include the "Accept Event Booking" field. • Change the form type to "Quote". • Click Save (Screenshot for reference: Link). Expected Result: • The "Quote" form should not have the "Accept Event Booking" field (Screenshot for reference: Link). • An error should be displayed indicating that the "Accept Event Booking" field is not allowed in a "Quote" form (Screenshot for reference: Link).
Module Item: URL Duplicates (Inactive) Issue
• Go to Misc Settings and uncheck the checkbox (Screenshot for reference: Link). • Go to the Custom Module and create an item (Screenshot for reference: Link). • Go to Pages and create a page folder and a page with the same name as the custom module item (Screenshot for reference: Link). • Both items should display a "duplicate warning" (Screenshots for reference: Link 1,Link 2). Results: • The custom module item has a higher priority than the page. • If you click preview, the frontend shows the content of the custom module item (Screenshot for reference: Link). • If you set the custom module item to inactive (by choosing a future date for the release date) (Screenshot for reference: Link), the page content does not show on the frontend, and instead, a 404 page is displayed (Screenshot for reference: Link). • If you change the URL of the custom module item and set it to active (by choosing a past date for the release date) (Screenshot for reference: Link), the page content is shown on the frontend (Screenshot for reference: Link).
Custom Report: Internal Error When Using Duplicate Field Names
• Go to Forms. • Create a new form with default and custom fields having the same names (e.g., "Address") (Screenshot for reference: Link). • Submit this form from the frontend. • Go to Custom Reports. • Create a new report with the type "Contacts and Cases" and use the submitted form as a filter (Screenshot for reference: Link). • Go to the Fields tab and select both checkboxes for "Address" (Screenshot for reference: Link). • Go to the Results tab, where an internal error is displayed (Screenshot for reference: Link).
Email Marketing: Incorrect CreateDateTime Value in Email Campaigns
• Go to Email Marketing. • Create a new mailing list. • Go to Email Campaigns. • Create a new campaign. • Observe the CreateDateTime option on both the list and detail views, which displays an incorrect value (Screenshots for reference: Link 1,Link 2).
History: Preview Button Not Working
• Log in to the admin panel • Go to Event settings and enable the Rollback extension. • Go to the event item and make some changes. • Open the history window and try to click the Preview button. Result: An error is displayed when clicking the Preview button (Screenshot for reference: Link).
Order: Incorrect Shipping Option Calculation
• Create a new tax (Screenshot for reference: Link). • Create a new shipping option with the applied tax (Screenshot for reference: Link). • Create a new order. • Go to the PRODUCTS tab and add any product. • Select the created shipping option (Screenshot for reference: Link). Result: • The total cost is not calculated correctly (Screenshot for reference: Link). The total should be $37.25. • From the frontend, the calculation is correct. • The shipping price does not recalculate when the shipping option is set up, only when something else is updated (Screenshot for reference: Link).
Portal: Site Copying Issue with Extensions
• Copy a site that includes extensions. • Check the admin panel: the extensions remain enabled (Screenshot for reference: Link). • Check the portal: the extensions are disabled (Screenshot for reference: Link).
Admin Roles: Remove Extra Restrictions
• Go to Admin Roles. • Observe that extra restrictions are being added (Screenshots for reference: Link 1,Link 2). Expected Result: The following restrictions should be removed from Admin Roles, as they are unnecessary: • Menus • ContentTemplates • Snippets • Forms • Contacts • AdvancedCrmGroups • Workflows • WorkflowEmails • EmailTemplates • EmailCampaigns • MailingLists • AdminUsers • AdminUserRoles • Taxes Current Issue: These extra restrictions are appearing in various sections (Screenshot for reference: Link).
eCommerce: System Properties of Products Not Resetting to Zero
• Go to any product. • Change the values in the system properties fields (Screenshot for reference: Link) and click SAVE. • Clear those fields and click SAVE again (Screenshot for reference: Link). Expected Result: The values should be reset to 0, similar to the behavior in stage v5 (Screenshots for reference: Link 1,Link 2). Actual Result: After saving, the fields are restored with the last values instead of being reset to 0 (Screenshot for reference: Link).
Workflows: Incorrect Error Text Displayed
• Go to Comment Settings. • Add a workflow notification to any module (Screenshot for reference: Link). • Click SAVE. • Go to Workflows. • Delete the workflow selected in the comments (Screenshot for reference: Link). Result: An error is displayed with incorrect text referring to forms instead of the relevant module (Screenshot for reference: Link).
Event Group: Naming Consistency
Issue: In the module names, which consist of two words, both words are capitalized except for "Event Group," where "group" is written in lowercase. • Module names with inconsistent capitalization (Screenshots for reference: Link 1,Link 2). • "Event Group" is displayed with "group" in lowercase (Screenshot for reference: Link). • In the dropdown menu for modules, all names are capitalized except for "Event Group," which starts with a lowercase letter (Screenshot for reference: Link). Expected Result: • "Event Group" should be consistently capitalized as "Event Group" in all instances, aligning with the naming convention used for other modules.
Forms: Inconsistent Aliases Between Admin and FTP
• Go to Forms. • Create a form with a multi-word name from the admin panel (Screenshot for reference: Link). The alias is generated with an underscore. • Create a form with a multi-word name from FTP (Screenshots for reference: Link 1,Link 2). The alias is generated with a dash. • Observe that forms created from the admin and FTP have different aliases (Screenshot for reference: Link). Expected Result: Forms created via FTP should use the same alias format as forms created in the admin panel, with underscores. Actual Result: Forms created via FTP have dashes in their aliases, whereas forms created via the admin panel have underscores.
Custom Module: Creating Items from Frontend with Enabled Bookings
• Go to Custom Module settings. • Enable bookings (Screenshot for reference: Link). • Create a new module item from the admin and add a form for creating module items from the frontend on any page. Result: • In the admin, the "Event Date End" field is required (Screenshot for reference: Link). • In the form for creating an item from the frontend, this field is not required (Screenshot for reference: Link). Screen recording for reference.
Misc Settings: Inconsistent Use of Dots at the End of Sentences
• Go to Misc Settings. • Observe that two select options have a dot at the end of the sentence, while the other two do not (Screenshot for reference: Link). Expected Result: All select options should have consistent punctuation, either with or without dots at the end of the sentences.
Custom Module: Parent/Child Table List View Issue
• Go to the custom module with the parent-child relationship (Screenshot for reference: Link). • Go to the table tab in the child module and add a new table (Screenshot for reference: Link). • Go to the parent module with the items list view (Screenshot for reference: Link). Expected Result: The child table should be displayed only in the tree view. Actual Result: The child table is displayed in the items list view of the parent module (Screenshot for reference: Link).
Products: Incorrect Volume Discount Calculation
• Create a new product. • Go to the Price tab. • Create a new price with a volume discount, but ensure it is disabled (Screenshot for reference: Link,Link). • Go to the frontend for this product and increase the quantity to 5 to get the discount. Result: • The displayed price for 5 products is incorrect (Screenshots for reference: Link 1,Link 2). Screen recording for reference.
Security Bug with Comments: Liquid Tags Rendering Issue
• Go to the comments section. • Enter a comment containing Liquid tags, such as {{this}} or {% endraw %}{{this}}{% raw %}. • Submit the comment. Original request: Possible Security Bug With Comments When using the Comments module and submitting a comment, the CMS wraps the body text in Liquid RAW tags if there is Liquid present in the text. However, it's possible to get around this by adding opposing RAW tags around the Liquid to be injected. eg: Some text {% endraw %} {{this}} {% raw %} more text... I've tried this with regular forms and it is not successful and the CMS correctly blocks the Liquid injection attempt (I think by removing the submitted RAW tags). So perhaps the Comments form needs an upgrade to the same security features used for regular forms.
• Go to the Parent module settings atthis link. • Export the Parent module (Screenshot for reference: Link). • Go to the stage environment and import the module atthis link. • After the import, observe that the connection between the parent and child modules is not displayed (Screenshot for reference: Link). Expected Result: The connection between the parent and child modules should be preserved and displayed after importing the module. Actual Result: The connection between the parent and child modules is not displayed after the import.
Comments: Default Item Limit Shows Strange Number in Liquid Output
• Use the Comment component in Liquid without specifying a limit value for comments or commentThreads. • Observe the Pagination.ItemsPerPage in the Liquid output. Expected Result: If the limit value is not specified, the Pagination.ItemsPerPage should show a reasonable default value. Actual Result: The Pagination.ItemsPerPage shows a very large number when the limit value is not specified (Screenshots for reference: Link 1,Link 2). Additional Information: When the limit parameter is specified, it correctly shows the specified value.
Event Subscribers: Incorrect Display of Capacity in Event List
• Create a free event. • Open the event page in two separate tabs. • In the first tab, fill in all fields and click Send. • In the second tab, fill in all fields and click Send. • Go to the Bookings tab and observe the displayed quantity. • Go to the list of Events and observe the displayed capacity. Expected Result: The capacity should be correctly updated and displayed in both the Bookings tab and the list of Events. Actual Result: The Bookings tab displays the correct quantity, but the list of Events shows an incorrect capacity.
System/Custom Modules: Internal Error When All Columns Are Deleted
• Go to any module. • Open the Settings and navigate to the Tables section. • Delete all columns (Screenshot for reference: Link). • Go to Module Items. Expected Result: The module items should be displayed without errors. Actual Result: An internal error is displayed (Screenshot for reference: Link).
"Events: Add Pagination to Follow-Up Tab
• Go to the Events module settings. • Navigate to the Follow-Up tab (Screenshot for reference: Link). Expected Result: Pagination should be added to the Follow-Up tab for better navigation and user experience. Actual Result: Currently, there is no pagination on this page, which can make it difficult to navigate through a large number of follow-ups.
Comments: Inconsistent Capitalization in 'Comment Sending Policy' Dropdown
• Go to the Comments section. • Navigate to Comments Settings. • Click on the "Comment sending policy" dropdown (Screenshot for reference: Link). Expected Result: The dropdown values should be consistently spelled with proper capitalization. Actual Result: The two values are spelled differently, with one using capital letters and the other not (Screenshot for reference: Link).
Comments: Inconsistent Capitalization in 'Comment Sending Policy' Dropdown
• Go to the Comments section. • Navigate to Comments Settings. • Click on the "Comment Sending Policy" dropdown (Screenshot for reference: Link). Expected Result: The dropdown values should be consistently capitalized. Actual Result: The two values are spelled differently, with one using capital letters and the other not (Screenshot for reference: Link).
Custom Report: Inconsistent Capitalization in 'Fields' Tab
• Create a CRM group and apply it to every select (Screenshot for reference: Link). • Go to any custom report. • Navigate to the "Fields" tab. • Observe the names of each block. The word "Fields" is written with a capital letter, while the CRM groups use a lowercase letter (Screenshot for reference: Link). Expected Result: The capitalization should be consistent, with either both words capitalized or both in lowercase. Actual Result: The word "Fields" is written with a capital letter, while the CRM groups use a lowercase letter.
Events: Missing Validation for Follow-Up Emails with Same Name
• Go to the Events module settings. • Navigate to the Follow-Up tab (Screenshot for reference: Link). • Create a new follow-up email (Screenshot for reference: Link). • Create a second follow-up email with the same name. Expected Result: An error or validation message should be displayed, preventing the creation of two follow-up emails with the same name. Actual Result: Two follow-up emails with the same name were created without validation (Screenshot for reference: Link).
All Templates: Add Error Message on Thank You Page
Add validation to display an error message on the thank you page for all templates. This ensures that if a user submits a form and an error occurs, or if a user reloads the thank you page, an appropriate error message is shown. Steps to Implement: • Go to the system pages settings, specifically the Thank You page (Link). • Add the following code snippet to the Thank You page template to handle error display: {% if formSubmissionData == "" or formSubmissionData.error >= 1 %}<div class="grid-container"> <h1>Error</h1> <p>{{formSubmissionData.errormessages | default : "The form wasn't submitted"}}</p> ... Expected Result: • When a form is submitted and an error occurs, the thank you page displays an error message. • When the thank you page is reloaded, an error message is displayed if the form data is invalid or contains errors. This ensures users are informed about submission errors and prevents confusion when reloading the thank you page.
Backup: Restoring Issues
Issue: Backups are not being restored correctly. After initiating a backup restore, no files or data appear in the File Manager or other parts of the site. Additionally, backups are not deleted properly. Steps to Reproduce: • Go to the backup site: Backup Site. • Test on the stage site with ID 32648. • Observe that there are backups with storage sizes ranging from 300-900MB. • Attempt to restore a backup (Screenshot for reference: Link). Expected Result: • Files and data should appear in the File Manager and other parts of the site after restoring the backup. • Backups should be deleted properly when requested. Actual Result: • After restoring a backup, no files or data appear in the File Manager or other parts of the site (Screenshot for reference: Link). • Backups are not being deleted properly (Screenshot for reference: Link). Additional Information: Please investigate the issue to ensure backups are restored and deleted correctly.
System Pages: SEO URL Mappings Display Double Slashes
• Go to any system page. • Navigate to the SEO settings (Example link). • Open the request SEO settings. Expected Result: • The UrlMappings should display a single /. Actual Result: • The UrlMappings display double slashes // (Screenshot for reference: Link). Action Required: • Investigate and correct the URL mapping to ensure it displays only a single /.
System Pages: CodeView/WYSIWYG Switching Issue
Issue: On system pages, switching between CodeView and WYSIWYG sends the correct values (true/false) in the request. However, after reloading the page, it always opens in WYSIWYG mode. Steps to Reproduce: • Go to any system page. • Switch between CodeView and WYSIWYG. • The correct values (true/false) are sent in the request (Screenshots for reference: Link 1,Link 2). • Reload the page. Expected Result: • The editor should remember the last selected mode (CodeView or WYSIWYG) and open in that mode after reloading the page. Actual Result: • After reloading the page, it always opens in WYSIWYG mode, regardless of the last selected mode. Action Required: • Investigate and fix the issue to ensure the editor remembers and opens in the last selected mode after reloading the page.
Orders: Internal Error When Quickly Disabling Gift Certificate and Discount Code
• Create a new order. • Add any product to the order. • Add a discount code and a gift voucher to the order. • Quickly disable the gift certificate and discount code without waiting for a response from the server. Expected Result: • The system should handle the quick disable actions gracefully without causing any errors. Actual Result: • An internal error is shown (Screenshot for reference: Link). Additional Information: • Screen recording of the issue. Action Required: • Investigate and fix the issue to ensure that the system can handle rapid disable actions without causing an internal error.
Forms: Inconsistent Naming for reCaptcha Fields
• Go to Forms. • Create a new form. • Add reCaptcha v2 and reCaptcha v3 fields to the form. Expected Result: • The reCaptcha fields should have consistent naming conventions. Actual Result: • The reCaptcha fields have different names (Screenshot for reference: Link). Action Required: • Ensure that both reCaptcha v2 and reCaptcha v3 fields have consistent and clear naming conventions.
16 updates
New features6
Frontend API access restrictions
1) Add API Endpoint restrictions setup page Add new page: ‘Settings’ -> ‘Frontend API restrictions’ Design: https://invis.io/TY13B20D96NJ 2) API Endpoint restrictions logic Restriction settings: • Enable/disable endpoint • API allowed to the following type of users: • Logged in users (default) • User from the following secure zones: • if this option selected - show list of the secure zones. Only users with access to ANY of the selected secure zones would be allowed to use API.
• Admin Users
• Ownership restriction (where API relates to entities having ownership): • Only Owner allowed (default) (only owner can perform an action or any user that belongs to the type determined above) • Anyone allowed
Restrictions can be applied to the following frontend APIs: • Create Module Item • Update Module Item • Delete Module Item • Update Draft Module Item • Publish Draft Module Item
• Google analytics report • Secure zone subscribers analytics 3) Admin restrictions Add to restrictions • Frontend API restrictions • Can View • Can Edit
4) Plan restriction Min plan available: Essential
Google Analytics events output via component and API
1) Event analytics retrieving logic This logic is accessible only if GA4 analytics is set up in the admin panel. Retrieve data using the following GA4 API: https://developers.google.com/analytics/devguides/reporting/data/v1/rest/v1beta/properties/runReport Request JSON example: { "dimensions": [ { "name": "date" }, { "name": "eventName" }, { "name": "customEvent:coupon_code" }, { "name": "customEvent:user" } ], "metrics": [ { "name": "eventCount" } ], "dateRanges": [ { "startDate": "2023-07-03", "endDate": "2023-07-05" } ], "dimensionFilter": { "andGroup": { "expressions": [ { "filter": { "stringFilter": { "matchType": "EXACT", "value": "coupon_code_clicked" }, "fieldName": "eventName" } }, { "filter": { "stringFilter": { "matchType": "EXACT", "value": "My CUSTOm CODE" }, "fieldName": "customEvent:coupon_code" } } ] } }, "limit": "100", "orderBys": [ { "dimension": { "orderType": "ALPHANUMERIC", "dimensionName": "date" }, "desc": false } ], "keepEmptyRows": true } 2) Liquid component Component pattern: {% component type:"frontend_API", endpoint:"/api/frontend/ga4_run_report", request: "[[request]]", layout:"", collectionVariable:"" %}Params description: • request • json object that represents request to a Google Analytics report API. https://developers.google.com/analytics/devguides/reporting/data/v1/rest/v1beta/properties/runReport#request-body
• layout • Default component logic should be applied here. • Success response JSON object should be attached to liquid this.response variable • Error response JSON object should be attached to liquid this.errorMessages param. Example: "errorMessages": [] • Number of errors should be attached to liquid this.error param. Example: "error": 0 • Default layout is empty
3) API Endpoint via frontend API Create a new frontend API endpoint Endpoint: /api/frontend/ga4_run_report Type: GET Params: request value is URL encoded JSON string as per the following documentation: https://developers.google.com/analytics/devguides/reporting/data/v1/rest/v1beta/properties/runReport#request-body Example: /api/frontend/ga4_run_report?request=%7B%22dimensions%22%3A%5B%7B%22name%22%3A%22date%22%7D%2C%7B%22name%22%3A%22eventName%22%7D%2C%7B%22name%22%3A%22customEvent%3Acoupon_code%22%7D%2C%7B%22name%22%3A%22customEvent%3Auser%22%7D%5D%2C%22metrics%22%3A%5B%7B%22name%22%3A%22eventCount%22%7D%5D%2C%22dateRanges%22%3A%5B%7B%22startDate%22%3A%222023-07-03%22%2C%22endDate%22%3A%222023-07-05%22%7D%5D%2C%22dimensionFilter%22%3A%7B%22andGroup%22%3A%7B%22expressions%22%3A%5B%7B%22filter%22%3A%7B%22stringFilter%22%3A%7B%22matchType%22%3A%22EXACT%22%2C%22value%22%3A%22coupon_code_clicked%22%7D%2C%22fieldName%22%3A%22eventName%22%7D%7D%2C%7B%22filter%22%3A%7B%22stringFilter%22%3A%7B%22matchType%22%3A%22EXACT%22%2C%22value%22%3A%22My%20CUSTOm%20CODE%22%7D%2C%22fieldName%22%3A%22customEvent%3Acoupon_code%22%7D%7D%5D%7D%7D%2C%22limit%22%3A%22100%22%2C%22orderBys%22%3A%5B%7B%22dimension%22%3A%7B%22orderType%22%3A%22ALPHANUMERIC%22%2C%22dimensionName%22%3A%22date%22%7D%2C%22desc%22%3Atrue%7D%5D%2C%22keepEmptyRows%22%3Atrue%7D 4) API Endpoint restrictions Add API Endpoint restrictions: see 2) “API Endpoint restrictions logic” (ie: Disallow processing API if the current logged-in user is mismatched with the restrictions) 5) Default include file for chart Create default chart inside include file: /cms-assets/includes/ga4-report-chart.inc Add ability to redraw chart on selecting different: • Start Date • End Date Use API calls in order to retrieve new values 6) Add component to toolbox Add to toolbox: “Frontend API” > “GA4 Report Chart” Params: • startDate (default: {{"now" | date_add: -1, "month" | date: "%Y-%m-%d" }}) • endDate (default: {{"now" | date: "%Y-%m-%d" }}) • eventName (default: page_view) • requestJSON (default: see "Content" from section (5)) • if provided - ignore all params above.
Output Value {% include "/cms-assets/includes/ga4-report-chart.inc", startDate: "", endDate: "", eventName: "", requestJSON: "" %}
Module Item frontend API forms extending
1) Add permissions to Module -> `Site User permission` Add following permission to the settings: • Allow Save Draft • Allow Publish Draft Add workflow selector for each new permission 2) Rework Module -> `Site User permission` and Module -> `Autoresponder` tabs • Site User permission • Add API Endpoint restrictions (ability to set API Endpoint restrictions for each permission of the particular module): • see 2) “API Endpoint restrictions logic” (ie: Disallow processing API if the current logged-in user is mismatched with the restrictions)
• Autoresponder updates: • Provide ability to configure all autoresponer settings for each action from permission list instead of "one single autoresponder for all actions": • Create module item • Update module item • Delete module item • Update draft module item • Publish draft module item
• Migrate autoresponder settings from "one single autoresponder for all actions" to the following permission-specific autoresponders: • Create module item • Update module item • Delete module item
• Set empty autoresponder settings for the new permission-specific autoresponders: • Update draft module item • Publish draft module item
• Extend autoresponder settings • Setting: Receiver (Select element) • Form sender (default) • Item owner • Sender and owner
• Logic: Receiver setting will determine what email to use as email receiver - current logged in user or actual item owner. Notes: on create item action there will be no difference between both options because item will be created by curren logged in user
Design: https://invis.io/NE13B20N72DB 3) Add Public API for Save Draft and Publish Draft Add 2 new public APIs (similar to edit module item from frontend froms https://prnt.sc/OYeHVehTlJJI): • /public/api/module-items/update-draft • /public/api/module-items/publish-draft Actions: • Send workflow if selected in Module -> Site User permission • Send API specific autoresponder if enabled and configured for certain API in Module -> Site User permission • Disallow to perform action if Module -> Site User permission -> API Endpoint restrictions disallows current user to perform it 4) Update the toolbox with the new forms Add forms to the toolbox (https://prnt.sc/pCCWR5PwOdny) • Update Item's Draft Form • Publish Item's Draft Form 5) Add param to the `module` and `module_of_member` components to receive draft versions of the items Add param: • getDraft • true • false (default)
Logic: if true; returns draft version of the item data insted of the public one. 6) Add URL param for the draft version of the item displaying If url contains following get param - return draft version of the item taken by the URL instead of the public one: • ?DraftPreview=true
Secure Zone Subscribers Analytics
1) Liquid component Component pattern: {% component type:"frontend_API", endpoint:"/api/frontend/secure_zone_subscribers_analytics", request:"[[request]]", layout:"", collectionVariable:"" %}Request expression pattern: { "startDate": "[[startDate]]", "endDate": "[[endDate]]", "filterExpression": [[filterJSONExpression]], "sortExpression": [[sortJSONExpression]], "groupType": "[[groupType]]" } Description of the expression params: [[startDate]] • allowed format: yyyy-mm-dd (if format not matched - use default: NOW date) [[endDate]] • allowed format: yyyy-mm-dd (if format not matched - use default: startDate + one day) [[filterJSONExpression]] • Expression pattern: [ { "secureZones": [ [[secureZoneId1]], [[secureZoneId2]], [[secureZoneIdN]] ] }]
• If supplied string could not be parsed as JSON - use default expression of empty array: [ { "secureZones": [] }]
Logic: IF secureZones is an empty array, retrieve stats for all secure zones. ELSE retrieve stats only for selected secure zones. [[sortJSONExpression]] • Expression pattern (default): [ { "sortBy": "date", "sortOrder": "ASC" }] Allowed `sortBy` values: date If supplied string could not be parsed as JSON - use default expression
[[groupType]] • Possible values • Day (default) • Week • Month • Year If param is not specified - use default value
Full example of the request expresion: { "startDate": "2023-10-01", "endDate": "2023-11-10", "filterExpression": [ { "secureZones": [ 111, 222, 333 ] } ], "sortExpression": [ { "sortBy": "date", "sortOrder": "ASC" } ], "groupType": "Day"} Layout: • Default component logic should be applied here. • Response JSON object should be attached to liquid this.response variable • Default layout is empty Response object example: { "rows": [ { "dimensionValues": [ { "value": "Date" }, { "value": "Total" }, { "value": "secure zone 1" }, { "value": "secure zone 2" }, { "value": "secure zone 3" } ], "metricValues": [ { "value": "20230705" }, { "value": 39 //total number of subscribers to all selected secure zones }, { "value": 4 //number of subscribers to secure zone 1 }, { "value": 2 //number of subscribers to secure zone 2 }, { "value": 33 //number of subscribers to secure zone 3 } ] } ], "rowCount": 1 } 2) API Endpoint via frontend API Create a new frontend API endpoint Endpoint: /api/frontend/secure_zone_subscribers_analytics Type: GET Params: `request` (URL encoded JSON string like in request for liquid object): {"startDate":"2023-10-01","endDate":"2023-11-10","filterExpression":[{"secureZones":[111,222,333]}],"sortExpression":[{"sortBy":"date","sortOrder":"ASC"}],"groupType":"Day"} Example: /frontend_api/secure_zone_subscribers_analytics?request=%7B%22startDate%22%3A%222023-10-01%22%2C%22endDate%22%3A%222023-11-10%22%2C%22filterExpression%22%3A%5B%7B%22secureZones%22%3A%5B111%2C222%2C333%5D%7D%5D%2C%22sortExpression%22%3A%5B%7B%22sortBy%22%3A%22date%22%2C%22sortOrder%22%3A%22DESC%22%7D%5D%2C%22groupType%22%3A%22Day%22%7D
3) API Endpoint restrictions Add API Endpoint restrictions: see 2) “API Endpoint restrictions logic” (ie: Disallow processing API if the current logged-in user is mismatched with the restrictions) 4) Default include file for chart Create default chart inside include file: /cms-assets/includes/secure-zone-analytics-chart.inc Add ability to redraw chart on selecting different: • Group Type • Day • Week • Month • Year
• Start Date • End Date Use API calls in order to retrieve new values Content: {% component type:"frontend_API", endpoint:"/api/frontend/secure_zone_subscribers_analytics", request: "{{requestJSON}}", layout:"", collectionVariable:"frontendAPIResponse" %} Use frontendAPIResponse for the first draw and pass it to JS in order to determine request structure for the change startDate, endDate and groupType. 5) Add component to toolbox Add to toolbox: ‘Frontend API’ > ‘Secure Zones Analytics Chart’ Params: • startDate (default: {{"now" | date_add: -1, "month" | date: "%Y-%m-%d" }}) • endDate (default: {{"now" | date: "%Y-%m-%d" }}) • secureZonesList (default: "") • if passed, should be a CSV string of secure zones ids (example "111,222,333")
• groupType (default: "") • requestJSON (default: see "Content" from section (4)) • if provided - ignore all params above.
Output Value {% include "/cms-assets/includes/secure-zone-analytics-chart.inc", startDate: "", endDate: "", secureZonesList: "", groupType: "", requestJSON: "" %}
Unique, hash and random value liquid filters
Liquid
1) Add a "Unique" liquid filter Add new string filter: Name: unique_value Syntax: {{ "anystring" | unique_value : "[[format]]"}} Params [[format]]: • N or n • D or d • B or b • P or p • X or x Output format: • Liquid String Examples with output: {{ "" | unique_value : "n"}} 234fa26ee4c14ea8b3b916d15982d410
1) Add a page to create/update/delete and see a list of custom widgets for WYSIWYG Add a new tab to ‘Settings’ -> ‘Misc’ Tab Name: WYSIWYG: CUSTOM WIDGETS Content: List of custom widgets with ability to create, update and delete them (https://prnt.sc/325Q0XSoM0yn) 2) Add the ability to insert a custom widget via WYSIWYG Add button to the WYSIWYG that will allow admin user to select widget and add it to the content (https://prnt.sc/UrvFuHc3Gdhx)
Improvements4
Added "nonce" attribute support for CSP
1) Add nonce hash variable to the liquid context Add liquid Property "cspNonceHash" which will contain a unique generated hash for the unique HTTP request. In order to allow scripts to be loaded on the site add nonce attribute to each of them • <script nonce="28f1f85b832ca0167d479123a35ce4b2">alert(9);</script> • <script nonce="28f1f85b832ca0167d479123a35ce4b2" src="/js/my-main.js">alert(9);</script> 2) Add dynamic 'nonce' support in header settings In order to tell the system to generate random hash on each request to the site for the nonce header param - add following string to the header field • 'nonce-cspNonceHash' Once page would be rendered - header would output nonce param with random hash and the same hash would be available via liquid 28f1f85b832ca0167d479123a35ce4b2 variable. Example: • HTTP Header Settings for: Content-Security-Policy: • Field: script-src • Value: 'self' 'nonce-cspNonceHash' • Page content: <html> <head> <script nonce="28f1f85b832ca0167d479123a35ce4b2" src="/js/my-main.js">alert(9);</script> </head> <body> <script nonce="28f1f85b832ca0167d479123a35ce4b2">alert(9);</script> </body> </html>
Example category structure • https://prnt.sc/BYJves_fF_ky The module has selected 1-st level category named AD-1 parent category as the parent category • https://prnt.sc/NJ2glKsPRUes Improvements: 1) Search by values Add ability to search by values 2) Increase the number of shown items Increase the number of show items to 12 https://prnt.sc/gYrGU-kV1IGl (currently shown 6 https://prnt.sc/glmHDzSt0dG8) 3) Category level output improvement 3.1) Feature flag Add feature flag Name: "Improved level displaying on category dropdown" Description: Removes redundant level 4-dashes ("----") on output if parent category is not root (on component category and add/edit module item forms) 3.2) On module item add/edit form Show dashes based on displayed level of categories instead of actual Current: https://prnt.sc/glmHDzSt0dG8 Improved: https://prnt.sc/FqEKrW2X3dum Add change under feature flag 3.3) On component category Show dashes based on displayed level of categories instead of actual level: {% component type:"categories", parentCategory:"[[parentCategoryId]]" %}
Extended request.currentmember liquid object
1) Extend CRM contact liquid object with the recurring subscriptions list Add property with a list of recurring subscriptions to the liquid object and {% component type: "CRMContacts" %} Property Name: recurringsubscriptions Value (list of recurring subscriptions objects): [ { "Code": "I-XXXXXXXXX", "Status": "Active", "MemberId": 1000, "RecurringProducts": [ { "Id": 1002, "Name": "Some Membership", "EntityType": "ModuleItem" } ] }] 2) Add a checkbox includeSecureZonesInfo to liquid component List of CRM Contacts in toolbox If includeRecurringSubscriptions is true add recurringsubscriptions to member object. If includeRecurringSubscriptions is false add emptylist recurringsubscriptions to member object If param is not set to the component - apply false by default
Site search case insensitivity improvement
Improve site search to find items by keywords in case insensitive manner Example: • Module item: • Name: “Test” • Keywords: “SomeKeyword,Someword” • Description: “Some text”
• Expected behavior • when searching via site search using the search string "somekeyword" • should find module item with the name “Test”
• Current behavior • when searching via site search using the search string "somekeyword" • module item with the name "Test" would not be found due to mismatched letter case in “somekeyword”
Other updates6
Zapier - trigger recurring subscription change
Create a new trigger for the subscription change event Name: Updated Recurring Subscription Logic: Trigger event each time subscription status is changed `RecurringSubscription` response object: { "Code": "Sub_123", "Status": "Canceled", "MemberId": 11111, "RecurringProducts": [ { "EntityType": "SecureZoneSubscription", "Id": 1, "Name": "SZ" } ] } Status values: • Incomplete • IncompleteExpired • Trialing • Active • PastDue • Canceled • Unpaid EntityType values: • Form • ModuleItem • SecureZoneSubscription
Extension: Meta Conversion API Integration
1) Add extension Meta Conversion API Integration Name: Meta Conversion API Integration (beta) Short Description: Utilizes Meta Events via the Conversion API. Price: Free during the beta period Design: https://invis.io/E813E62LNS7H Supported the following events: • Add to cart • Initiate checkout • Complete registration • Lead • Purchase More info can be found here: - https://www.facebookblueprint.com/student/activity/212738-connect-your-data-with-pixel-and-conversions-api - https://developers.facebook.com/docs/marketing-api/conversions-api/get-started 2) Extension page in Admin Add page to extension menu item Name: Meta Conversion API Integration Design: https://invis.io/TB13E62NWP3D Content: Form with the following fields • Pixel ID [string] (required) • Access Token [string] (required) 3) Events to be implemented • Add to cart • Triggering logic: Trigger event once the addToCart API is calling (once clicking Add to cart) with a successful response (if an error occurred or not enough inventory - it would not be triggered)
• Start placing an order • Triggering logic: Trigger event once any form with type checkout is loading on the page
• Purchase • Triggering logic: Trigger event once form with payment is successfully submitted (event would be sent regardless of the payment result. The only blocking condition would be if a payment request would not be created successfully.
• Lead • Triggering logic: Trigger event once any form without password field is sent
• Completed registration • Triggering logic: Trigger event once any form with password field is sent
Subscriptions list to contact liquid object
1) Extend CRM contact liquid object with the recurring subscriptions list Add property with a list of recurring subscriptions to the {{request.currentmember}} liquid object and {% component type: "CRMContacts" %} Property Name: recurringsubscriptions Value (list of recurring subscriptions objects): [ { "Code": "I-XXXXXXXXX", "Status": "Active", "MemberId": 1000, "RecurringProducts": [ { "Id": 1002, "Name": "Some Membership", "EntityType": "ModuleItem" } ] }] 2) Add a checkbox includeSecureZonesInfo to liquid component List of CRM Contacts in toolbox If includeRecurringSubscriptions is true add recurringsubscriptions to member object. If includeRecurringSubscriptions is false add emptylist recurringsubscriptions to member object If param is not set to the component - apply false by default
WYSISYG: custom widgets
1) Add a page to create/update/delete and see a list of custom widgets for WYSIWYG Add a new tab to ‘Settings’ -> ‘Misc’ Tab Name: WYSIWYG: CUSTOM WIDGETS Content: List of custom widgets with ability to create, update and delete them (https://prnt.sc/325Q0XSoM0yn) 2) Add the ability to insert a custom widget via WYSIWYG Add button to the WYSIWYG that will allow admin user to select widget and add it to the content (https://prnt.sc/UrvFuHc3Gdhx)
Add nonce attribute support for CSP
1) Add nonce hash variable to the liquid context Add liquid Property "cspNonceHash" which will contain a unique generated hash for the unique HTTP request. In order to allow scripts to be loaded on the site add nonce attribute to each of them • <script nonce="{{cspNonceHash}}">alert(9);</script> • <script nonce="{{cspNonceHash}}" src="/js/my-main.js">alert(9);</script> 2) Add dynamic 'nonce' support in header settings In order to tell the system to generate random hash on each request to the site for the nonce header param - add following string to the header field • 'nonce-cspNonceHash' Once page would be rendered - header would output nonce param with random hash and the same hash would be available via liquid {{cspNonceHash}} variable. Example: • HTTP Header Settings for: Content-Security-Policy: • Field: script-src • Value: 'self' 'nonce-cspNonceHash' • Page content: <html> <head> <script nonce="{{cspNonceHash}}" src="/js/my-main.js">alert(9);</script> </head> <body> <script nonce="{{cspNonceHash}}">alert(9);</script> </body> </html>
Improve site search to find items by keywords in case insensitive manner Example: • Module item: • Name: “Test” • Keywords: “SomeKeyword,Someword” • Description: “Some text”
• Expected behavior • when searching via site search using the search string "somekeyword" • should find module item with the name “Test”
• Current behavior • when searching via site search using the search string "somekeyword" • module item with the name "Test" would not be found due to mismatched letter case in “somekeyword”
https://webinone.com/public-backlog-state/in-process/create-default-js-validation Default validation for mandatory fields Add the option on the Settings tab "Enable Default JS Validation". If this option is enabled, `data-cms_validation` will be added on the form tag and add a validation js script in the head. If a form element is not valid it will add class "validation-error" on the element and if valid "validation-success" will be added.
1) https://webinone.com/public-backlog-state/in-process/ux-improvement-global-component-builder Anywhere in the admin console I press something like ‘Shift + Control + C’ on Windows (Shift + Command + C on Mac). A modal appears with the same functionality as the component draw you get it various modules. I always find myself needing to build a component in my IDE, but I have to go to the admin console, then to something like pages to be able to pull to create a component. Would be nice if we could just access a builder anywhere in the admin console. 2) Likewise, also add ‘Shift + Control + F’ on Windows (Shift + Command + F on Mac) to open the File Manager anywhere in the admin.
Improvements16
Internal infrastructure overhaul
Internal infrastructure overhaul which presumes servers, storage, FTP upgrade and source code transition from .NET 5 to .NET 6. Overall CMS performance and secuirty enhancements are expected with this release.
Add “Delete All Items” toggle for Admin User Roles
Admin Panel · UI/UX
https://webinone.com/public-backlog-state/in-process/add-delete-all-items-toggle-for-admin-user-roles Case: To stop the ability for Admin Users to be able to accidently delete all module items. Can we get an extra flag added in the Admin User Roles that gets generated for each custom module or anywhere this appears Have it unchecked by default. Else, everyone will forget to configure it until it’s too late. So, essentially, ‘Delete All’ function is for Partner/Reseller admins only, unless configured otherwise.
Add Release And Expiry Dates/Time To Menu Items
Admin Panel · Menus
https://webinone.com/public-backlog-state/in-process/add-release-and-expiry-dates-time-to-menu-items When sites are being updated, it is common to have a release time for updates. This release time may be at an inconvenient time for the developer. Frequently site updates will mean new sections of the site are being added or removed. To add and remove sections of the website it would be great to have the ability for new sections of the menu to be automatically released, and old sections of the menu to expire and be hidden. I propose adding the ability to enable release and expirty date/times to menu items. Similar to custom modules, we would have the ability to enable release and expiry under settings for the menu.
Admin UI/UX Adjustments
UI/UX
https://webinone.com/public-backlog-state/in-process/admin-ui-ux-adjustments 1) Add the item preview icon at the top of item edit pages so it’s readily accessible (the current Preview link is often out of reach when you want it). 2) Add a new sticky box with the Components and File Manager buttons on the create/edit module item page and also to places where it’s not currently available, such as; ‘System Pages’, ‘System Emails’ and anywhere an editor region is present like; Form layouts, email/autoresponder/workflow contents. 3) This new sticky box will also include the ‘Properties’ icon along with the ‘File Manager’ and ‘Component Manager’ icons in the editor pages for module Layouts.
Custom Module: Custom Properties. Rename "Text (String)" To "Single Line Text" Or "String (Text)".
Custom Modules
When creating lots of fields it's time consuming to click on the dropdown and scroll to the correct property. It would be nice if you could just push "s" to jump to string. Ideally every type of field would have a name with a unique starting letter so you could use keys to jump to them. Also recommend having string as the default field type when creating a field.
Custom Module: Remove Downloadable Media Checkbox
Custom Modules
https://webinone.com/public-backlog-state/in-process/custom-module-remove-downloadable-media-checkbox When adding a ‘Media’ field type in a Custom Module the “Downloadable file” option is automatically added under the field. I like to see this removed as it would surely not be used all that often and creates confusion and clutter in the interface. Instead, could it be added as an option when setting up the Media property? So we can control whether or not it’s displayed:
Custom Modules Properties: Making Mandatory Items More Visible
https://webinone.com/public-backlog-state/in-process/file-manager-show-date-list-view-in-slide-in The list view in file manager should include the date of the upload like in BC to make it easier to handle e.g. media files, which are updated on a regular basis. The slide-in file manager (when selecting media or other files from within module item) should have an option for list view. It makes it hard to select files with similar long file names in thumbnail view.
File Manager to better display images with transparent backgrounds
File Manager
DESCRIPTION: Enhancement for the File Manager (and Media fields) to better cater for, and display, transparency in image files (such as PNGs and SVGs) so that the thumbnails of transparent images with white areas don’t become invisible. DETAIL: I’ve often come across the issue of not being able to properly see some images files in the File Manager when they have white areas with a transparent background. This mainly occurs for .png and .svg images like icons or logos. Here’s an example:
One solution I’d like to propose is: • remove the &bgcolor=fff from the ImageProcessor parameters that are used on these File Manager images so that the natural backgrounds of the images are maintained (ie: transparencies) • Add a grey grid background behind images so that those with transparency are better represented, like this:
The above background effect was achieved with CSS: background-color: white;background-image: linear-gradient(45deg, #ccc25%, transparent 25%), linear-gradient(-45deg, #ccc25%, transparent 25%), linear-gradient(45deg, transparent 75%, #ccc75%), linear-gradient(-45deg, transparent 75%, #ccc75%);background-size:10px10px;background-position: 00, 05px, 5px -5px, -5px0px; This enhancement would benefit both clients and resellers using the admin.
Module Item Notes: Option To Display Notes More Prominently
Admin Panel · Custom Modules
https://webinone.com/public-backlog-state/in-process/module-item-notes-option-to-display-notes-more-prominently Module item notes are great! But they are a bit small and users can miss them. Sometimes I want to add big bold notes that will give users instructions that they can’t miss. Issues: Currently module field notes are displayed in a small icon that needs to be hovered to see them. Clients may miss this subtle icon. Solution: Add a check box that will allow notes for a module field to be displayed inline:
Site Information Enhancements/Fixes
Admin Panel
https://webinone.com/public-backlog-state/in-process/site-information-enhancements-fixes A few minor adjustment requests for Site Information module: dateTime field is still just a Date field. Is it possible to update this to select Time as well (as per dateTime field update throughout the rest of the admin) When setting an Alias (particularly a ‘Short Alias’) there is a validation that runs to check for conflicting names. However, this seems to look at ALL properties in ALL groups, not just the group you are in, which starts to make it harder to set up short aliases. For example: In a group called ‘Company Info’ with a property of ‘Licence’ you might have Short Alias of Then in another group called ‘Company Branding’ with a property of ‘Logo’ you might want Short Alias of . But the validation only checks against the last Liquid reference of l (which conflicts) rather than the whole path (which is unique). The textarea field type is labeled as Text (Multiple), but I think it should be Text (Multiline). Liquid: It would be great to recursively nest site information items. To do so they would need to render liquid, which they currently don’t. For example if I have a site information company name and I want to nest that in a copyright notice so the client can just embed the copyright notice at the end of their blog posts. Please make liquid work inside site information fields. Other: 1. Ability to shuffle items once added. 2. Add a checkbox in the Group level determining whether that group’s properties are added to the Component toolbox or not. • Checkbox title: • Add to the toolbox
3. HTML Layouts for formatted output.
UX/UI Request: List Template Used Against System Pages
Provide ability to set which detail layout to apply on module item create/edit forms • hidden field with `DetailLayoutID` name.
• Value equals the Detail Layout ID • <input type="hidden" name="DetailLayoutID" value="12345">
Logic • when submitting the form • if such field is provided • try to find detail layout using provided id
• if field is not provided OR detail layout wasn't found • apply current logic of selecting a detail layout
Secure to CartID and crm member cookies
Set Secure attribute on the following cookies • CardId
• treepl.member.auth
UX Improvement - “Global Component Builder” and “Global File Manager”
1) https://webinone.com/public-backlog-state/in-process/ux-improvement-global-component-builder Anywhere in the admin console I press something like ‘Shift + Control + C’ on Windows (Shift + Command + C on Mac). A modal appears with the same functionality as the component draw you get it various modules. I always find myself needing to build a component in my IDE, but I have to go to the admin console, then to something like pages to be able to pull to create a component. Would be nice if we could just access a builder anywhere in the admin console. 2) Likewise, also add ‘Shift + Control + F’ on Windows (Shift + Command + F on Mac) to open the File Manager anywhere in the admin.
Add “Delete All Items” toggle for Admin User Roles
https://webinone.com/public-backlog-state/in-process/add-delete-all-items-toggle-for-admin-user-roles Case: To stop the ability for Admin Users to be able to accidently delete all module items. Can we get an extra flag added in the Admin User Roles that gets generated for each custom module or anywhere this appears Have it unchecked by default. Else, everyone will forget to configure it until it’s too late. So, essentially, ‘Delete All’ function is for Partner/Reseller admins only, unless configured otherwise.
Custom Module: Custom Properties. Rename "Text (String)" To "Single Line Text" Or "String (Text)".
Fix losing updated data on saving operations when the actual token is expired. 1) Presave to session storage flow • Once any changes are made on any form in the admin UI • save them to session storage
• on saving operation if the token is expired and reload is performed • restore saved to session storage data and perform save operation so data will be saved with the new token
Feature flags changes (v6.10)
Apply the following changes to feature flags: • Move to the external section • Site load speed improvement
• Description • Improved logic of saving, updating, and deleting module items without a long delay on the page loading.
This feature flag switches the logic of saving module items, pages, etc. New logic will take less time to load any page after saving if you have many module items. The opposite part of this logic is the increasing time of any import module item process for sites that have many module items. It is applicable to the sites with a lot of module items created. On sites that do not have a lot of module items there is almost no difference between current item saving logic and improved version of it.
Internet connection checker (UI)
Add internet connection monitoring in the admin panel. If internet connection is lost - show message: "No Internet Connection"
Liquid Date Formatting Issue fix
Liquid Date Formatting Issue An issue with the Liquid date formatting filter (`| date`) has been identified. Below is a description of the issue, possible conflicts with existing implementations, and our proposed fix. ISSUE: When using the date filter syntax of `%I` for outputting the hour in 12-hour time with a leading zero (eg: `{{ "now" | date: "%I" }}`) the output will be incorrect for the hour of 12 (am or pm), in that it will output `00` instead of `12`. This is purely a formatting issue for this particular filter syntax and does not affect Liquid date calculations. CONFLICTS: We don't anticipate this fix will negatively impact any current implementations of this feature - on the contrary, any date-related Liquid implementations using the 12-hour filter output would currently be breaking under the conditions described in this issue and therefore, the fix will correct those implementations. In the rare case that you have an implementation relying on the hour of 12, in 12-hour time, with leading zero output, being "00" (which is incorrect), you will need to adjust your code to allow for this correction. PROPOSED FIX: As there is a small chance of this change affecting existing implementations and due to the issue's low criticality, we will add the feature flag "Apply fix to liquid date filter". The fix itself will then be rolled out as a hotfix to all sites during their data center non-business hours. No downtime is expected for the admin or site front-ends during this hotfix and a notification will be posted once it has been fully completed across all data centers. FEEDBACK: If you have any questions, feedback, or concerns regarding this fix, please reach out to support via a support ticket before the proposed fix date is reached. NOTES: The similar `| format_date` Liquid filter does not suffer from the described issue and is therefore unaffected by this fix and continues working normally.
System WF + defaul email
Custom WF + custom email
send
skip
send
replace to default email
send
send
send
• OR logic in description representation • If the workflow has a custom email assigned • Allow sending workflow BUT with system email instead of the assigned custom email
• Continue validation if the workflow has a system email assigned:
• When the site plan is Essential: • Disallow sending workflow if it has IsDefault = false
• Allow sending workflow if it has IsDefault = true
• When the site plan is Business: • Allow sending workflow
https://prnt.sc/bh8RQGPoHV_c 2) Improve displaying of the workflows with forbidden emails applied on workflow listing Show label for workflows with custom email applied Pattern • <WorkflowName> (<label>)
Label • forbidden email applied available starting Pro plan
Color • red
Example • My custom workflow (forbidden email applied available starting Pro plan)
3) Show inactive email field on workflows on plans lower than pro • On edit workflow form
Empty tables UI improvements - Admin
Empty tables logic/UI Show message "Nothing here yet" instead of empty table if no searching-filtering is applied Show empty table if any search or filtering is applied to the list view
Case sensitivity FTP improvement
1) Pages and folders case change on migration Description: On migration we would collect all url slugs of "Page" and "Folders" module items that has at least one uppercase letter and convert them to lowercase. Then we will rename the files and folders for the following items accordingly in the "/Content/Pages" folder 2) Liquid incorrect paths change on migration Places to be operated: • Item description
• Snippet
• Content Template
• Email Template
• Email content
• Module Layouts
• Form content
• Includes (that are included in any of the places above and inside includes as well)
Description: On migration we would scan page content, templates, snippets, module layouts, etc for using liquid include and component with custom layout path tags and replace paths to match case-sensitive actual path (for example if we found {% include "/Content/Pages/testfolder/TestIncludeFile.inc" %} we will fix it to match actual path - /Content/Pages/TestFolder/TestIncludeFile.inc and it will become {% include "/Content/Pages/TestFolder/TestIncludeFile.inc" %}) 3) JS, CSS, and image URLs change on migration Places to be operated: • Same as above
Description: Same as in previous but working with html tags insted of liquid 4) Improve the logic of operation files and folders in the "/Content/Pages" folder Description: Any files that would be created in the "/Content/Pages" folder should be lowercase from now on. If they would be created not fully lowercased - they would be ignored. So if you create a file Test.html in the folder /Content/Pages/ - it WOULD NOT create a page with slug Test. But if you create a file test.html in the folder /Content/Pages/ - it WOULD create a page with slug test. Also renaming test.html to Test.html would unlink the Test.html file from the "/test" page. If you save the "/test" page from the admin UI it will create a test.html file and it will be linked with the page (the main rule is that the page slug is fully equal to the file name (case sensitive)). Any operations with the Test.html would not be reflected in any way on the pages at all. However, if you rename it back to the test.html - it will be linked back to the page "/test" but without content sync (it means that if you rename test.html to Test.html, change content in Test.html and rename it back to test.html - the content of the page "/test" would not be the same as in the test.html file. The first save of the file or page would determine - what content would be saved to opposite entity in that case - if the save file - page content would be updated. If the save page - the file content would be updated). 5) System and custom email file name fix Description: On migration we would change all file names that reflect all system and custom (workflow, followup, abandoned cart) emails so it is the same as the email Name (right now if you have a workflow email with the name "My Custom Email" - it has a file on FTP with the name "my-custom-email.html". This step will rename the file to become "My Custom Email.html"). NOTE: So if you already have the backup version of the site you are working with then just make a fresh copy right after your site would be updated to the v6.10 More documentation on this change can be found here.
Angular 15 refactoring
• new datetimepicker
• migration from moment to luxon
• Clear styles when pasting • Clear all styles when pasting content into wysiwyg. If you try to paste some content from MS Word should be shown a modal to choose to keep or not styles pasted from Word.
Event calendar month by URL accessibility
Add month-year accessibility via URL to the event calendar URL parameters names: • CMSEventCalendarMonth
• CMSEventCalendarYear
If page requested via URL like • /page?CMSEventCalendarYear=2021&CMSEventCalendarMonth=09
Calendar should open the appropriate year and month view
Rework all paginations on all admin UI layouts to work through server side. This would allow optimizing a list load speed on all layouts that previously used client-side pagination. Also this update would standardize pagination UI on all layouts
Added pagination to the following list layouts: • templates
• mailing lists
• email campaigns
• admin users
System emails a-z sorting by name
All system emails now sorted alphabetically Plus a "Template" column was added to the system emails table list. • https://prnt.sc/qB9Vnd__-Cmh
"New Item" button name standardization
"New Item" button text was changed from ADD to CREATE throughout the admin.
Now Email data widget would show only data that corresponds to current type of email (workflow email, follow-up email or abandoned cart notification email) • https://prnt.sc/NnyR2GejC8zT
Products - InStock value doesn't show in frontend after import
• create a new product by import (file attached) with "Enable Inventory Control" - true, and In Stock - 1000 https://prnt.sc/mlPYOEGCiEuK • add <pre>{{this}}</pre> in product detail layout • go to frontend this product • value "InStock" : 0 , but must be equal to the value in the import file = 1000 • after this go to product detail in admin and click save https://prnt.sc/fBjMhWORc89h and go to the frontend value "InStock" = 1000 https://prnt.sc/Afg55sGjcQZv
Using Cases component you can not filter "equally" by form name
• If in component use "equally" condition - should display only the same name • {% component viewType: "list", currentMemberOnly: "false", filterBy: "FormName", filterValue: "Registration", filterCondition: "contains", limit:"100", type: "cases" %}
----
{% component viewType: "list", currentMemberOnly: "false", filterBy: "FormName", filterValue: "Registration", filterCondition: "equally", limit:"100", type: "cases" %} • On page display not correct tag with "equally" https://prnt.sc/iSQPxriPa3Qk
• New Google Analytics (GA4) integration is now available on Treepl. Now you have the ability to switch between UA and GA4 by selecting which analytics should be applied on the Setup Analytics page ( https://prnt.sc/n1_vt1LC7yuR ) • You have the ability to set up integration by following these steps: https://docs.webinone.com/site-settings-and-management/set-up-analytics • If you already have Universal Analytics setup - just follow these migration steps: https://docs.webinone.com/migrating-to-ga4-from-a-google-analytics-ua-property • NOTE: if you previously followed instructions for temporary GA4 setup then when you complete the migration steps from the article above - go to file manager and remove GA4 include file in order to avoid the duplicated output of script tags for GA4.
19 updates
Improvements1
Misc Improvements (v6.9)
Admin Panel · General · UI/UX
- Improvements based on support tickets. More details will be provided in the release notes.
Other updates18
Zapier: contact fields extending with secure zone data
Extend Zapier functionality: • add contact secure zones output to the contact object (as a list with their expiration dates, zone ids, and zone names). • contact object that returns after • Add contact trigger • Edit contact trigger • Add contact action • Edit contact action • Search contact action
Show/Hide Inactive/Disabled Items
Add additional filter on module items list view in admin UI (near enabled/disabled filter https://www.screencast.com/t/FCtVkiLom) • Label • Expired State • Type • dropdown • options • All • default • Active • Inactive Don't show Expired State drop if: • Enable Release Date and Enable Expiration Date (Module -> Default properties settings https://prnt.sc/m71sDpZF3D00) are false for the parent and child module
• Enable Release Date andEnable Expiration Date (Module -> Default properties settings https://prnt.sc/m71sDpZF3D00) are false for the current module Don't filter by item's Release Date on filtering inactive items if Enable Release Date (Module -> Default properties settingshttps://prnt.sc/m71sDpZF3D00) are false Don't filter by item's Expiration Date on filtering inactive items if Enable Expiration Date (Module -> Default properties settings https://prnt.sc/m71sDpZF3D00) are false Logic: • Determines whether the list should contain inactive items or not • inactive items are items whose release date is greater than the current date or whose expiry date is less than the current date
Portal automations improvements: Site reactivation on payment and recurring period switching
1) Site reactivation and Billing Cycle change (Portal) When site is reaching its subscription expiry date AND payment is not recived yet: • Show status Grace Period • period • +10 days to subscription expiry date (+24*10 hours) • Design • https://projects.invisionapp.com/share/CD131XYUKXSH#/screens If payment is recieved • show status Activated Display columns on live site table as shown in design: • https://projects.invisionapp.com/share/CD131XYUKXSH
• Rename column Recurring Type to Billing Cycle When clicking payment button • Show popup with ability to change Billing Cycle or reactivate current subscription
• https://projects.invisionapp.com/share/CD131XYUKXSH#/screens/470227508 • Preselect the Billing Cycle that is already chosen for the current site • Reactivation will be applied if selected Billing Cycle is the same as the site already has. If another Billing Cycle is selected - create new subscription with the new Billing Cycle • in both cases - after payment is received • cancel previous subscription On reactivation • If reactivation applied in Grace period
• Set recurring date to the same day of the next month or year when the previous subsctiption should be paid if there would be no issues with it. And in the payment date just charge the amount for the selected cycle. Example: • if payment $20 per month is created 01-01-2022 than grace period starts after 01-02-2022. And if reactivation is made on 05-02-2022 than payer will be charged for $20 right away and than next recurring day will be assigned as 01-03-2022 (same day as previous subscription had) • If Billing Cycle is changed during the active subscription period. Example:
• charge amount for the selected cycle right away (lets say we are changing billing cycle from anually $200 to monthy $20 - then charging $20)/ And set recurring date for +1 selected billing cycle after the expiration date of the previous subscription (for this example +1 month to the expiration date).
When trying to change site plan in Grace period - show error • Site plan changing is not allowed during the grace period Payment button should show different labels based on the site status (Grace period or active period) • In Grace period • Reactivate • In default active period • Change Billing Cycle
2) Site reactivation and Billing Cycle change (CMS) If Direct Billing extension is enabled for the site: • Add the ability to see Billing (/admin/billing) button on the site admin UI and add the ability to pay for the site subscription in Grace period • https://prnt.sc/0UFLDok9GM0p
3) Reminder emails Use default email template. 1) After 1 day (24 hours) after Expiry date (in Grace period) • Send Email notification to the reseller
• Subject: • <sitename> (<siteURL>) will be deactivated due to non-payment • Body
• Your site <sitename> will be deactivated due to non-payment on <dateOfDeactivation>. Please log in to your PayPal account and make sure your billing is up-to-date. If you have any questions, please contact us at support@treepl.co.
• Format of date
• 11 Sep, 2022 (GMT +10:00) • time zone • site 2) After 9 days (24*9 hours) after Expiry date (in Grace period) • Send Email notification to the reseller
• Subject • <sitename (<siteURL>)> will be deactivated due to non-payment • Body
• Your site <sitename> will be deactivated due to non-payment on <dateOfDeactivation>. Please log in to your Treepl Portal to set up a new PayPal subscription to address the issue. If you have any questions, please contact us at support@treepl.co.
• Format of date
• 11 Sep, 2022(GMT +10:00) • time zone • site
Portal automations improvements: Invoicing fix
Invoice email fix On invoice sending for the recurring plan payment • send invoice based on the plan from webhookinstead of the very first created plan This is to avoid the wrong plan name being displaying in the invoice email after changing site plan.
Orders list retrieving optimization
Optimize the algorithm of Order list retrieving in the admin UI • Reduce the load time
Error notification on payment gateway webhooks setup
On saving payment credentials • if there are any errors regarding adding webhooks for this site • show an error from the API response (like this https://prnt.sc/CgPfZCnET0iD) • Error pattern • An error occurred during the payment gateway webhook setup: <detailsFormGatewayError>
reCaptcha v2 to v3 start transition - Step#1
Since reCaptcha v2 couldn't save from bot attacks well enough - we are highly recommended to replace all reCaptcha v2 implementations on your sites with v3. Also, we are starting reCaptcha v2 deprecating process. The first step will be to remove the ability to add reCaptcha v2 to all new forms.
Change plan restriction for feature HTTP Headers Settings• Change minimum site plan requirement • From Pro to Essential
Form with two paid secure zones
On one form use two paid secure zones -> One zone daily $10, Second zone $5 -> assigned those two secure zones on one form and buy - display error https://prnt.sc/3B58_ool2W2g
Site Global - do sorting of properties like in v6.7
1. Go to products 2. Create a new product with inventory control "In Stock" = 1 https://prnt.sc/ye6QLngYGrQi 3. Go to frontend and buy this product 4. Go to the product INVENTORY tab the "In Stock" field again = 1
"Delete Selected" button in Contacts - Form Submission and Event Bookings tabs
1. Go to Contact and open the Form Submission tab -> If the user has more than 20 submissions and display pagination when selecting all on the second page and click Delete Selected -> deleted all items https://prnt.sc/6xxfcduYtQtM
Contacts - uppercase letters
1. Go to contacts 2. Pay attention to the member with uppercase letters in the "email" field 3. After submitting any form from a member with uppercase letters a duplicate of that user with a letter with lowercase letters is created in the email field Fix - migration where the original and duplicate contacts were merged into one with all cases, bookings, orders, and secure zones
25 updates
New features4
Abandoned Cart Functionality
Ecommerce
1) Extension setup Add new Extension to the portal and to extension JSON file so portal user could enable and disable extension on the ‘Site’ > ‘Extensions’ tab in the Portal “Abandoned Cart Recovery” Short Description: With abandoned cart recovery functionality (for logged-in users only), you can automatically send reminders to customers who add products to their cart and leave without completing an order. Information: According to statistics, about 80 percent of customers abandon purchases for different reasons after adding items to their shopping carts. With Treepl abandoned cart recovery you can automatically email users after a cart or checkout is abandoned. And you have the ability to set the time when the email will be automatically sent. So you can stay in touch with your customers while they still remember your store and products.
For logged-in users only. Design: https://invis.io/JP13194K9QFA Pricing: Free during the beta period Extension Restrictions logic: • Disallow enabling the extension on the site if its plan is lower than eCommerce • This extension is only available for Ecommerce plan 2) Abandoned Cart Recovery extension not installed or subscription expired error message When admin performs any action related to Abandoned cart admin UI (listed in the list below) layouts AND Abandoned Cart Recovery extension is Disabled or Abandoned Cart Recovery extension subscription is expired • Show error message: “This action can't be performed: Abandoned Cart Recovery extension is disabled or expired for this site” Likewise, if the Restore cart functionality is attempted: • Following the restore cart link • redirect to the system page "error-page" and set error message to the liquid - this.ErrorMessage
3) Add shop settings for abandoned carts and improve current settings Add following setting to ‘eCommerce’ > ‘Settings’ > ‘Shop Settings’: • “Abandoned cart time in Hours” (number) • 4 (default) • Default adjustment based on Shopping Cart Lifetime: • if shopping cart lifetime is less than or equal to 4 AND greater than 1 • set Abandoned cart time to (shoppingCartLifetime minus 1) as default value
• if shopping cart lifetime is equal to 1 • set Abandoned cart time to 1 as default value
• if shopping cart lifetime is equal to 0 • set Abandoned cart time to 1 as default value • set shopping cart lifetime=1
• allowed range between 1 and 876000
Logic: Applied to the shopping cart created via add to cart process (skip shopping carts that is created on generic payment form submissions, event payment forms, and recurring forms): • Number of hours after latest update in the cart that determine shopping cart as Abandoned (should be always less or equal to the shopping cart lifetime) • When shopping cart becomes Abandoned; create a history record (Shopping Cart Become Abandoned Recording). See “History Data” below. Validation: • If Abandoned cart time is bigger than shopping cart lifetime, show Error Message “The abandoned cart time shouldn't be bigger than the shopping cart lifetime” • If there is an enabled abandoned cart email notification which time is bigger than the shopping cart lifetime, show Error Message “There is at least one abandoned cart notification which time is bigger than the shopping cart lifetime” • Update allowed range for Shopping Cart Lifetime (it should be in range between 1 and 876000) DESIGN: https://invis.io/CW10NLS86GBJ
4) Abandoned Cart Emails Add tab to ‘Email Notifications’ > ‘Emails’ page called “Abandoned Cart Emails” Shows list of emails by new email type "Abandoned Cart Email" Tab will only be visible when the Abandoned Cart Recovery extension is enabled/active. 5) Abandoned Cart Email LIQUID object should contain following data: • ShoppingCart • same object as on shopping cart
• TrackingURL • see (6) Tracking URL logic
• RestoreCartURL • see (7) Restore cart functionality
Email Sending Logic: • Create a history record (Email Sent Recording) regarding Email sent. See “History Data” below. • Add following image tag before closing </body> tag of the email content • <img src="" height="1" width="1">
• Send email On email save: • disallow saving if there is no </body> tag in this email content OR the assigned email template (since this is required for the pixel image tracking). Show error message “Email content should contains <body></body> tag” • disallow saving if there is notag in the content. Show error message “Email content must containsliquid tag” 6) Tracking URL logic • Pattern • https://<siteDomain>/public/api/track-email/abandoned-cart/open?id=<ShoppingCartid>¬ificationId=<idOfAbandonedCartNotificationStep>&guid=<guid>
• Logic • If there is NO Email Opened Recording history record with such guid in the history: • Create a history record (Email Opened Recording) to track email opening events. See “History Data” below.
• return 1px x 1px transparent png image as a response (with Content-Type: image/png)
• Logic • this request should restore the shopping cart and redirect the user to the shopping cart page • Get Shopping Cart by id • Create a history record (Shopping Cart Recovered Recording) to track shopping cart recovery. See “History Data” below. • restore Shopping Cart • set it as a current active shopping cart
• redirect a user to the /shopping-cart page
8) Abandoned Cart Extension Page Add new menu item • ‘Extensions’ > ‘Abandoned Cart Recovery’ Content • Notifications • Abandoned Carts • Reports Menu item and page will only display if the Abandoned Cart Recovery extension is enabled/active. 9) Abandoned Cart Recovery -> Notifications tab List of all Abandoned Cart Notifications ordered by interval set in ‘Send Email After’ setting. • Table columns • Send Email After • {SendEmailAfter value}Hours From Abandonment
• Emails Sent • Number of sent emails
• Email Open Rate • Percent of unique opened emails among all sent emails
• Cart Recovery Rate • Percent of all Recovered shopping carts among all shopping carts marked as Abandoned
• Actions
• each row • has edit button • has delete buttons • when deleting the notification - do not restore its hour statistics when new notification with the same interval will be created, for example: • 12 hours notification has 25% recovery rate and 30% open rate • user deletes this notification • then user creates new notification and sets interval to 12 hours • new created notification should have 0% recovery rate and 0% open rate
• may display disabled state
• ability to sort by columns - Name ASC (default) • pagination • ability to bulk delete selected items • ability to filter items by state: • All (default) • Enabled • Disabled
• Remember last selected show filter DESIGN: https://invis.io/8C10J9OPQM7D Add new notification functionality: • “Add New Notification” button • Display Add/Edit Form side panel • Send Email After Cart Abandonment Delay (in hrs) (numeric) • allowed range between 1 and 876000 • number of hours should be less than eCommerce -> Settings -> Shop Settings -> Shopping Cart Lifetime In Hours. Else error message: “Abandoned cart notification can't be created outside of the shopping cart lifetime.” • validate that selected number of hours is still not selected for another email. Else error message: “Abandoned cart notification for the selected delay is already exists”
• Email (dropdown - list of Abandoned Cart Emails) • Enabled
DESIGN: https://projects.invisionapp.com/share/8C10J9OPQM7D#/screens/447828839 10) ‘Abandoned Cart Recovery’ > ‘Abandoned Carts’ tab List of all abandoned carts. • Table columns • Name (left empty if shopping cart has no owner) • Email • Total Cost • Lifetime • Difference in hours between Current Date Time and Created Date Time • Pattern • if difference is more than 24 hours: [<numberOfDays> days ]<numberOfHours> hours • if difference is less than 24 hours: [<numberOfHours> hours]<numberOfMinutes> minutes
• Sorting should be done by decimal, eg: • 3 hrs and 30 minutes would be 3.50 • 3 hrs and 31 minutes would be 3.52
• Created Date Time • Last Update Date • Expiry Date (datetime when shopping cart will be deleted) • Actions
• Email Opened Recording (Store the following data) • ShoppingCartId • Email (shopping cart owner email) • AbandonedCartNotificationId • Record DateTime • Type (EmailOpened)
• Shopping Cart Recovered Recording (Store the following data) • ShoppingCartId • Email (shopping cart owner email) • AbandonedCartNotificationId • Record DateTime • Type (ShoppingCartRecovered)
• Shopping Cart Become Abandoned Recording (Store the following data) • ShoppingCartId • TotalCost • Email (shopping cart owner email) • Record DateTime • Type (ShoppingCartBecomeAbandoned)
• Shopping Cart Become Deleted Recording (Store the following data) • ShoppingCartId • TotalCost • Email (shopping cart owner email) • Record DateTime • Type (ShoppingCartDeleted)
12) Shopping cart delete operation upgrade Before shopping cart delete action add a history record (Shopping Cart Become Deleted Recording). See (11.5) 13) ‘Abandoned Cart Recovery’ > ‘Reports’ tab • Abandoned and recovered carts • Abandoned and recovered carts amounts • Abandoned and recovered carts report DESIGN: https://projects.invisionapp.com/share/C2130V1FMP5X#/screens 14) Analytics dashboard charts Provide ability to add • Abandoned and recovered carts • Abandoned and recovered carts amounts • Abandoned and recovered carts report Show these charts only if Abandoned Cart Recovery extension is enabled/active DESIGN: https://invis.io/7910J9P1H3CG 15) Admin User Role Restrictions Add following admin user role restrictions • Abandoned Carts • Can View • Can Delete
• Abandoned Cart Notifications • Can View • Can Add • Can Edit • Can Delete
• Abandoned Cart Emails • Can View • allows to see Abandoned Cart Emails tab on ‘Email Notifications’ > ‘Emails’ page
• Can Add • allows to show add button on ‘Email Notifications’ > ‘Emails’ page (tab Abandoned Cart Emails). • allows to show add new follow-up email button on create follow-up form
• Can Edit • Can Delete • these 2 restriction above should allow to view ‘edit’ and ‘delete’ buttons on ‘Email Notifications’ > ‘Emails’ page (tab Abandoned Cart Emails)
• Abandoned Cart Report • Can View
Show these restrictions only if Abandoned Cart Recovery extension is enabled/active.
On create new admin user role set all restrictions above to true by default.
E-commerce Quoting Option
CRM · Ecommerce
Original Description: E-commerce quoting option so that when an order goes through the admin it can be edited or completed before the quote is transformed into an order and the invoice is issued for payment in full or for a deposit payment. A workflow can then also be generated for the order to go to the client/accountant/franchisee. DESIGN https://invis.io/YAX7PB2EC3Q 1) Create Order functionality Provide ability to create new order from the admin Default status is ‘New’ Invoice Number should not be generated during this action • Form fields • Order Name • Domain (Dropdown - list of available site domains) • Status (Dropdown - list of available statuses) • Assigned To (Required - CRM lookup field) • Invoice Number • Invoice Date (preset to current date) • AWB Number • Tracking Url • Shipping address • City • State • Zipcode • Country • Advanced CRM groups assigned to the order • Add Custom Fields (available after saving the order)
2) Change products in the order Provide ability to edit order products from the admin BC reference: https://prnt.sc/s2oblz
• Disallow adding products if they are recurring products • Show error message “Recurring product is not allowed to be added”
• Disallow editing products data if an order is a recurring order • Show error message “Orders with recurring products are not allowed to be edited”
• Change inventory accordingly if there is are quantity changes to any ecommerce product order lines • Provide the ability to edit the product name • Provide the ability to change prices https://prnt.sc/x5cffi• implement linked recalculation between • Unit Price, Units, and Total Price (the Unit Price and Total Price should be calculated according to the applied tax)
• once Unit Price or Total Price change is applied • do not apply volume discounts to this orderline any more • tax settings still should be applied to this product after quantity change
• Provide the ability to delete the product from the order If saving order with changed products, gift vouchers, discount codes, or shipping options and the order has an active recurring subscription: • show error • This order data is not allowed to be changed for orders with recurring subscriptions
3) Change overall order data Provide ability to change the following data for an Order: • tax • giftvouchers • discount codes • shipping options • Disallow editing this data if: • an order contains an active recurring subscription
Provide ability to Generate Invoice Number via admin UI ( https://projects.invisionapp.com/share/A8W5SNPF5QX#/screens) • if generate invoice number action performed to the order that already has a system or custom invoice number • show an error message “This order already has an invoice number”
• Show ‘Generate Invoice Number’ button only on orders that don't have a system generated or manually added invoice number. 4) New Payment type of “Refund” Provide ability to add “Refund” as a payment type • Refund type can be added: • manually from the admin (in Order payments tab) • via webhooks: • Stripe: refund, cancel(only automatic flow) • Paypal: refund • Authorize: refund, void(cancel) • Bambora: - • Eway: -
• Allowed to be deleted (if manual added only) • Value should be shown as a negative value (currency format should be taken according to the current format setting on the current domain) • https://prnt.sc/cjhUDIhdlBKR
5) Form changes Create a new form type of “Quote” (for requesting a quote in the ecommerce quoting process) • Logic is the same as for the Checkout but • generates order without an invoice number.
• On Edit form action (tab ‘Form Builder’ or tab ‘Settings’) • do not show recurring secure zones on the Settings tab if the selected form type is Quote • if the selected type is Quote and there are paid secure zones attached to the form • Show error message “Quote form can't be saved with the attached recurring secure zones”
• On Edit form action (tab ‘Form Builder’) • if Form Type is Quote • If the "Accept Payment" field is selected on the form builder - show an error: “Quote form can't be saved with the "Accept Payment" field” • Do not show the following field buttons in the system fields list https://prnt.sc/GtfaxcIGuoPO• Accept Payment • Discount Code • Gift Voucher • Accept Event Booking
• if Form Type is Checkout • Do not show the following field buttons in the system fields list https://prnt.sc/GtfaxcIGuoPO• Discount Code • Gift Voucher • Accept Event Booking
• On Form submit: • if Form Type is Quote AND "Accept Payment" field is selected on the form builder - show an error: “Quote form can't be submitted with the ‘Accept Payment’ field” • if Form Type is Quote AND there is no shipping option selected on the shopping cart DO NOT stop processing the form. • if Form Type is Quote AND there is at least one recurring product in the shopping cart - show an error: “Quote form can't be submitted with recurring products in the shopping cart” • if Form Type is ‘Quote’ OR Form Type is ‘Checkout’ and there is a product in the shopping cart that was deleted - show an error: “Your shopping cart contains deleted products. Please review and remove all deleted products from the shopping cart and proceed once again”
• On loading ‘Checkout’ or ‘Quote’ page from the shopping cart: • if there is a product in the shopping cart that was deleted - show an error: “Your shopping cart contains deleted products. Please review and remove all deleted products from the shopping cart and proceed once again”
6) Shopping cart changes Add request quote button to shopping cart liquid object: {% component type:"shopping_cart" %} • QuoteButtonHtml: <button class="system_button" data-cms_cart_quote="">Get a quote</button> • clicking on the button should lead to /quote • apply Before After and trigger js events • CMS_BeforeGoToQuote • CMS_AfterGoToQuote • CMS_TriggerGoToQuote
• clicking Quote button validation should not require a shipping option to be selected 7) Request a quote system pages Create system pages for Quotes • Get A Quote (/quote) • redirect here if clicked on the request quote button on the checkout • see content in page ‘Settings’ > ‘System Pages’ > ‘quote’
• Quote Receipt (/quote-receipt) • user will be redirected here after quote form submission (default page) • see content in page ‘Settings’ > ‘System Pages’ > ‘quote-receipt’
8) System emails Create System email for Quotes • For Quote Orders, send in place of Invoice email • sent on quote order create • ability to send quote if clicked ‘send quote’ button in the Order detail page (instead of ‘send invoice’)
• Default From Email • admin@trustedemail.co
• Default Subject • Quote
• Default From Name • Admin
• Content • see content in file ‘Email Notifications’ > ‘System Emails > ‘Quote’
9) Secure zone logic On Quote form submit with Secure Zones assigned: • If there are paid secure zones assigned - show error message “Recurring secure zone subscription is not allowed for the ‘Quote’ form type” • else; immediately subscribe user to all free secure zones assigned to the form. 10) Precreate Request Quote form on all sites with default styles Replicate default HTML/styles from the Checkout form, but remove payment fields and Total Amount field. Create the form on all sites with the alias of ‘quote’ Fields on formbuilder: • firstname • lastname • email • phone • Shipping Address • reCAPTCHA v3 11) Plan restrictions Disallow submission of forms with type ‘Quote’ on plans lower than eCommerce. Show error message “Quote forms are not available on current site plan” 12) Admin User Role Restrictions Add following admin user role restrictions • Orders • Can Add • Can Edit Details • Can Edit Payments • Can Edit Products
For all roles that have Orders -> Can View=true set Orders -> Can Edit Details=true (for backward compatibility)
For all roles that have Orders -> Can View=true set Orders -> Can Edit Payments=true (for backward compatibility)
Logic • Orders -> Can Add=false • Blocks add new order request • Removes Add New Order button from UI ( https://prnt.sc/3kND8xikawwT)
• Orders -> Edit Details=false • Removes Edit button from UI ( https://prnt.sc/qJv5vry38oQU) • Blocks update order details form url /admin/orders/123456/details • Blocks update order details request • Blocks generate invoice request • Removes Generate Invoice button from UI
• Orders -> Edit Payments=false • Removes Add Offline Payment button from UI ( https://prnt.sc/B0YqlLBAT_aX) • Removes Edit Delete buttons from payment records UI ( https://prnt.sc/svzcrrdDszLv) • Blocks Add Edit Delete payment record requests
1) Add header settings page Add new menu item and page under ‘Settings’ > ‘HTTP Header Settings’ DESIGN https://invis.io/M4107BHKYUDC Content • list of allowed headers • Ability to enable/disable header • Ability to setup header's specific settings • ability to enable header • ability to setup header value (described below)
• Logic • Add seconds to the current datetime and set resulting http-date
2) Logic For ANY URL request (to any page or file) that is NOT related to the admin files and requests • add selected and configured headers to the response • if header is enabled AND there is at least one not empty option inside • add header with the selected options • checkbox options • if true - add option to the header. Else - ignore this option
• text options • if NOT empty string - add option with the value to the header. Else - ignore this option
• dropdown options • if NOT empty option selected - add option with the selected value to the header. Else - ignore this option
3) Admin user role restrictions Add following admin user role restrictions • HTTP Header Settings • Can View • Can Manage
4) Site plan restrictions Show ‘Settings’ > ‘HTTP Header Settings’ page starting from plan • Pro ---------- Headers Validator Site: https://securityheaders.com/
Module item rating
1) Module item rating in the items list and detail forms (admin UI) Provide ability to add Item Rating column in module -> table setup to show rating in item list view
Add new system property to Edit module item form • “Item Rating” (text) • Always readonly • if somehow value is posted via edit item endpoint, ignore value from request AND do NOT override value in DB (it should be calculated automatically once comments rating for this item are added edited or deleted) • Value=Average rating posted via comments to this item (Approved ratings counted only)
2) New module item liquid property Add a new property to the module item (in liquid) • “Item_Rating” (numeric) • Value=Average rating posted via comments to this item (Approved ratings counted only)
3) Searching logic Provide the ability to search by ‘Item_Rating’ property when using{% component type:"module", isSearchResult:"true"%}for searching, same as for Number custom property - via requesting a range using: • prop_Item_Rating_Min • prop_Item_Rating_Max 4) Sorting logic Provide the ability to sort by ‘Item_Rating’ field in module component tag, eg: {% component type:"module", sortBy: "Item_Rating", sortOder: "ASC/DESC" %}
Improvements8
Add view only column Item Urls to Export
Add additional column in the export module item file (as a display value only) for the full item URL (parent and slug) • Column title “URL list” • list of all item URLs separated by ; • placed after ‘Parents’ column • on import action; ignore this column (for display/export purpose only)
1) Request params improvement Add new property to ‘request.request_url’ liquid object • request.request_url.originalParams Value is an object of all URL params however arrays should be represented as arrays instead of as CSV string Example: • /lab?myArrayProp=option%201&myArrayProp=opti,on%202&myTextprop=textValue <pre>{}</pre> Outputs: { "myarrayprop": "option 1,opti,on 2", "mytextprop": "textValue" } <pre>{}</pre> Outputs: { "myarrayprop": ["option 1", "opti,on 2"], "mytextprop": "textValue" } 2) Advanced CRM group field liquid object improvement Add ‘ArrayValue’ property. If a field is checklist or dropdown (multiple) - paste selected options as an array to this property. For all other fields paste value as first element of the array Example: {% component groupAlias: "MyAdvancedCRMGroup", entityType: "contact", entityId: "12345", collectionVariable: "groupFieldsList", layout: "", type: "CRMContactCustomGroup" %}
Output: { "Name" : "My Checklist", "Alias" : "MyChecklist", "Value" : "check 1,che,ck 3,check 4", "ArrayValue" : ["check 1", "che,ck 3", "check 4"] }, { "Name" : "My Text", "Alias" : "MyText", "Value" : "my, some text", "ArrayValue" : ["my, some text"] }, { "Name" : "My Number", "Alias" : "MyMuber", "Value" : 123, "ArrayValue" : ["123"] } 3) Save entity improvement For the following property types: • checklist • dropdown multiple View selected options of the property of type checklist or dropdown multiple as CSV string on list and detail layouts in Admin UI • If options are like • option 5 • option 6 • option 7,7
• CSV string should be like • option 5 5,option 6,option 7,7
Provide the ability to save selected options if they contain "," character • via Admin UI • Create module item • Edit module item • Create CRM Contanct (advanced CRM fields) • Edit CRM Contanct (advanced CRM fields) • Create CRM Form Submission (advanced CRM fields) • Edit CRM Form Submission (advanced CRM fields) • Create CRM Event Booking (advanced CRM fields) • Edit CRM Event Booking (advanced CRM fields) • Create CRM Order (advanced CRM fields) • Edit CRM Order (advanced CRM fields)
• via save/edit entity frontent form • Form submission • Edit account form • Create module item form • Edit module item form
Entities that requires this improvement (admin UI) • module item • case • custom form fields • advanced crm fields
• order • advanced crm fields
• event booking • advanced crm fields
Add also following updates to module item update and search forms (site frontend forms) • Module item update form • For Checklist property type
var propertyValues="{{this.ListcheckboxList | join:","}}".split(',');
change to
var propertyValues="{{this.ListcheckboxList | join:"|||;/;|||"}}".split('|||;/;|||');
• For Dropdown (multiple) property type
var values=''.split(',');
change to
var values='{{this.ListListbox_list | join:"|||;/;|||"}}'.split('|||;/;|||');
• Module item search form • For Checklist property type
var propertyValues="".split(',');
change to
var propertyValues="{{request.request_url.originalParams.prop_ListcheckboxList | join:"|||;/;|||"}}".split('|||;/;|||');
• For Dropdown (multiple) property type
var values=''.split(',');
change to
var values='{{request.request_url.originalParams.prop_ListListbox_list | join:"|||;/;|||"}}'.split('|||;/;|||');
4) Custom report improvement According to the Save entity improvement improve custom report results searching by filters that contain value with "," character • filtering by custom form field on the following report types • Contacts and Cases • Contacts and Orders • Contacts and Event Bookings
• filtering by advanced crm field on the following report types • Contacts • Contacts and Cases • Contacts and Orders • Contacts and Event Bookings • Contacts and Secure Zones
5) Import/Export improvement Add following logic to import/export process for the following entities: • Module item • Contact • Case • Booking • Order Logic: For any property with type Checklist or Dropdown (multiple) • On Export • When generating CSV string of selected options replace "," substring with "%2С"
• On Import • After retrieving list of selected options from CSV string for each option replace "%2С" substring with ","
• CSV string for the property (to the excel cell) • option 5,option 6,option 7%2С7
• Import • CSV string for the property (from excel cell) • option 5,option 6,option 7%2С7
• result list of options to be applied • option 5 • option 6 • option 7,7
6) Improve filters on custom reports `In` and `NotIn` filters: Add a new setting to the filter called: • Values Filter Condition (dropdown) • OR (default) • AND
Logic: • If OR selected (current logic will be applied) - will find all items that have at least one value from the filter values list • If AND selected - will find all items that have all values from the filter values list Design: https://prnt.sc/KsffJVqXl2pm Example: Add an advanced CRM group with the field “theChecklist” to the contact of type Checkbox: • options • 1 • 2 • 3 • 4
Select the following values for the contacts: • Contact1 • theChecklist • 1 • 3
New module setting: Add new module setting called “Disable detail layout” (checkbox - false by default) Logic: If ‘Disable detail layout’ is TRUE: • Make unreachable all module items URLs of the module • add "?<moduleId>/" to the module slug and hide it on module settings tab • this action will prevent item urls from being accessible since saved url will contain ? character which CMS will determine as a URL parameter, eg: • /detail-allowed-module-slug/item-slug-1 • could be accessed by URL https://domain.my/detail-allowed-module-slug/item-slug-1?someParam=33 • because item url will be taken as /detail-allowed-module-slug/item-slug-1
• Show module URL field as inactive. • Show but do not allow to change it from Admin UI and ignore changing on Backend
• Show module item URL field as inactive. • Show but do not allow to change it from Admin UI and ignore changing on Backend • on edit module item action from Admin UI • on edit module item from frontend action
• Hide Detail Layout dropdown on add/edit module item form in admin UI • preset "Don't use" value as default on backend on create item
• Do not add items of the module to the SITEMAP • On Import process if creating a new item • if there is a detail layout column and it's value is empty set ‘Don't use’ layout instead of the first existed detail layout of the module (like it works now and should work when ‘Disable detail layout’ is FALSE)
The logic of Detail layout "Don't use" logic improvement If module item has Detail layout property selected as "Don't use" • show 404 page content (with 404 status code) when accessing the item by URL • Do not add such items to the SITEMAP
Event payment order with tax
Event payments now honor tax settings and volume discount brackets assigned to Event prices. Liquid output improvement of the event item: Add following properties to liquid output of the event item:
JS for volume discount: When changing allocation field: • recalculate total amount based on volume discount settings of the price On page load: • recalculate total price via API call based on • price in data-event_one_item_price • quantity in Payment_ItemQuantity • quantity discount
• and paste totalAmount to the value of • field by selector [name="Payment_Amount"] • field by selector #PaymentTotalCost
eWay payment field expiration workaround
1) Extend eWAY payment gateway settings Adds new option for how the payment integration displays in payment forms.
When configuring eWay as a payment option under ‘Settings’ > ‘Payments’ new option for: • Checkout Integration Type (dropdown) • Inline (default - current implementation) • Modal (new implementation)
2) Logic for Modal Do not show payment fields on the form. Instead, once form is submitted show popup modal with payment fields. 3) Improve payment fields validation After form submit: • if payment fields error occurred • reload payment fields iframe
This should avoid issue when credit card data determined as expired after second form submit even after payment data was fixed
"Remember Me" for CRM login form
Provide the ability to remember the logged-in state for CRM Members and configure its duration.
1) Add a new eCommerce setting Add new setting to ‘Ecommerce’ > ‘Settings’ > Tax and Shipping’ > ‘Tax Settings’ • “Tax rounding strategy” (dropdown) • Banker rounding + error compensation (unit price and total price) [default] • Banker rounding (unit price only)
2) Rounding Logic on shopping cart calculation When banker rounding + error compensation (unit price and total price) applied • use current price rounding strategy (banker rounding + error compensation) • rounding applied to • unit price separately • total price separately
When banker rounding (unit price only) applied: • use banker rounding to unit price. Then calculate orderline total price as rounded unit price multiplied by quantity. Error compensation mechanism is not needed here • apply rounding to • unit price only
Other updates8
Event payment to include tax and volume discounts
Event payments now honor tax settings and volume discount brackets assigned to Event prices. Liquid output improvement of the event item: Add following properties to liquid output of the event item:
JS for volume discount: When changing allocation field: • recalculate total amount based on volume discount settings of the price On page load: • recalculate total price via API call based on • price in data-event_one_item_price • quantity in Payment_ItemQuantity • quantity discount
• and paste totalAmount to the value of • field by selector [name="Payment_Amount"] • field by selector #PaymentTotalCost
"Remember Me" for CRM login form
Provide the ability to remember the logged-in state for CRM Members and configure its duration Settings: Add new setting to ‘Settings’ > ‘Misc’ > ‘CRM Settings’ • Remember me lifetime (numeric) • 30 (default)
• Logic • Determines how many days should logged in state be held after login form submit
Login form upgrade: Add Remember me checkbox to login form layout when retrieve login form from Components toolbox (Secure Zone -> Login Form) Add following html code to the form layout (after password fields): <label for="RememberMe">Remember me</label> <input type="checkbox" name="RememberMe" id="RememberMe"> Example: https://prnt.sc/mhd_q974tKDb Login form logic: When user submit login form with checked Remember me checkbox • set member logged-in cookie lifetime based on Remember me lifetime setting if not checked • Member logged-in cookie lifetime defaults to 1 day
Improve Site load speed while saving module item
Replace the current solution with a materialized view to the DB table supported by triggers to sync data. Improve the following logic that using the Table solution • Add DB Table solution to drafts • Improve saving module item when keywords was changed • Improve Import module items process
Abandon Cart Functionality
1) Extension setup Add new Extension to the portal and to extension JSON file so portal user could enable and disable extension on the ‘Site’ > ‘Extensions’ tab in the Portal “Abandoned Cart Recovery” Short Description: With abandoned cart recovery functionality (for logged-in users only), you can automatically send reminders to customers who add products to their cart and leave without completing an order. Information: According to statistics, about 80 percent of customers abandon purchases for different reasons after adding items to their shopping carts. With Treepl abandoned cart recovery you can automatically email users after a cart or checkout is abandoned. And you have the ability to set the time when the email will be automatically sent. So you can stay in touch with your customers while they still remember your store and products.
For logged-in users only. Design: https://invis.io/JP13194K9QFA Pricing: Free during the beta period Extension Restrictions logic: • Disallow enabling the extension on the site if its plan is lower than eCommerce • This extension is only available for Ecommerce plan 2) Abandoned Cart Recovery extension not installed or subscription expired error message When admin performs any action related to Abandoned cart admin UI (listed in the list below) layouts AND Abandoned Cart Recovery extension is Disabled or Abandoned Cart Recovery extension subscription is expired • Show error message: “This action can't be performed: Abandoned Cart Recovery extension is disabled or expired for this site” Likewise, if the Restore cart functionality is attempted: • Following the restore cart link • redirect to the system page "error-page" and set error message to the liquid - this.ErrorMessage
3) Add shop settings for abandoned carts and improve current settings Add following setting to ‘eCommerce’ > ‘Settings’ > ‘Shop Settings’: • “Abandoned cart time in Hours” (number) • 4 (default) • Default adjustment based on Shopping Cart Lifetime: • if shopping cart lifetime is less than or equal to 4 AND greater than 1 • set Abandoned cart time to (shoppingCartLifetime minus 1) as default value
• if shopping cart lifetime is equal to 1 • set Abandoned cart time to 1 as default value
• if shopping cart lifetime is equal to 0 • set Abandoned cart time to 1 as default value • set shopping cart lifetime=1
• allowed range between 1 and 876000
Logic: Applied to the shopping cart created via add to cart process (skip shopping carts that is created on generic payment form submissions, event payment forms, and recurring forms): • Number of hours after latest update in the cart that determine shopping cart as Abandoned (should be always less or equal to the shopping cart lifetime) • When shopping cart becomes Abandoned; create a history record (Shopping Cart Become Abandoned Recording). See “History Data” below. Validation: • If Abandoned cart time is bigger than shopping cart lifetime, show Error Message “The abandoned cart time shouldn't be bigger than the shopping cart lifetime” • If there is an enabled abandoned cart email notification which time is bigger than the shopping cart lifetime, show Error Message “There is at least one abandoned cart notification which time is bigger than the shopping cart lifetime” • Update allowed range for Shopping Cart Lifetime (it should be in range between 1 and 876000) DESIGN: https://invis.io/CW10NLS86GBJ
4) Abandoned Cart Emails Add tab to ‘Email Notifications’ > ‘Emails’ page called “Abandoned Cart Emails” Shows list of emails by new email type "Abandoned Cart Email" Tab will only be visible when the Abandoned Cart Recovery extension is enabled/active. 5) Abandoned Cart Email LIQUID object should contain following data: • ShoppingCart • same object as on shopping cart
• TrackingURL • see (6) Tracking URL logic
• RestoreCartURL • see (7) Restore cart functionality
Email Sending Logic: • Create a history record (Email Sent Recording) regarding Email sent. See “History Data” below. • Add following image tag before closing </body> tag of the email content • <img src="{{this.trackingURL}}" height="1" width="1">
• Send email On email save: • disallow saving if there is no </body> tag in this email content OR the assigned email template (since this is required for the pixel image tracking). Show error message “Email content should contains <body></body> tag” • disallow saving if there is no{{this.RestoreCartURL}}tag in the content. Show error message “Email content must contains{{this.RestoreCartURL}}liquid tag” 6) Tracking URL logic • Pattern • https://<siteDomain>/public/api/track-email/abandoned-cart/open?id=<ShoppingCartid>¬ificationId=<idOfAbandonedCartNotificationStep>&guid=<guid>
• Logic • If there is NO Email Opened Recording history record with such guid in the history: • Create a history record (Email Opened Recording) to track email opening events. See “History Data” below.
• return 1px x 1px transparent png image as a response (with Content-Type: image/png)
• Logic • this request should restore the shopping cart and redirect the user to the shopping cart page • Get Shopping Cart by id • Create a history record (Shopping Cart Recovered Recording) to track shopping cart recovery. See “History Data” below. • restore Shopping Cart • set it as a current active shopping cart
• redirect a user to the /shopping-cart page
8) Abandoned Cart Extension Page Add new menu item • ‘Extensions’ > ‘Abandoned Cart Recovery’ Content • Notifications • Abandoned Carts • Reports Menu item and page will only display if the Abandoned Cart Recovery extension is enabled/active. 9) Abandoned Cart Recovery -> Notifications tab List of all Abandoned Cart Notifications ordered by interval set in ‘Send Email After’ setting. • Table columns • Send Email After • {SendEmailAfter value}Hours From Abandonment
• Emails Sent • Number of sent emails
• Email Open Rate • Percent of unique opened emails among all sent emails
• Cart Recovery Rate • Percent of all Recovered shopping carts among all shopping carts marked as Abandoned
• Actions
• each row • has edit button • has delete buttons • when deleting the notification - do not restore its hour statistics when new notification with the same interval will be created, for example: • 12 hours notification has 25% recovery rate and 30% open rate • user deletes this notification • then user creates new notification and sets interval to 12 hours • new created notification should have 0% recovery rate and 0% open rate
• may display disabled state
• ability to sort by columns - Name ASC (default) • pagination • ability to bulk delete selected items • ability to filter items by state: • All (default) • Enabled • Disabled
• Remember last selected show filter DESIGN: https://invis.io/8C10J9OPQM7D Add new notification functionality: • “Add New Notification” button • Display Add/Edit Form side panel • Send Email After Cart Abandonment Delay (in hrs) (numeric) • allowed range between 1 and 876000 • number of hours should be less than eCommerce -> Settings -> Shop Settings -> Shopping Cart Lifetime In Hours. Else error message: “Abandoned cart notification can't be created outside of the shopping cart lifetime.” • validate that selected number of hours is still not selected for another email. Else error message: “Abandoned cart notification for the selected delay is already exists”
• Email (dropdown - list of Abandoned Cart Emails) • Enabled
DESIGN: https://projects.invisionapp.com/share/8C10J9OPQM7D#/screens/447828839 10) ‘Abandoned Cart Recovery’ > ‘Abandoned Carts’ tab List of all abandoned carts. • Table columns • Name (left empty if shopping cart has no owner) • Email • Total Cost • Lifetime • Difference in hours between Current Date Time and Created Date Time • Pattern • if difference is more than 24 hours: [<numberOfDays> days ]<numberOfHours> hours • if difference is less than 24 hours: [<numberOfHours> hours]<numberOfMinutes> minutes
• Sorting should be done by decimal, eg: • 3 hrs and 30 minutes would be 3.50 • 3 hrs and 31 minutes would be 3.52
• Created Date Time • Last Update Date • Expiry Date (datetime when shopping cart will be deleted) • Actions
• Email Opened Recording (Store the following data) • ShoppingCartId • Email (shopping cart owner email) • AbandonedCartNotificationId • Record DateTime • Type (EmailOpened)
• Shopping Cart Recovered Recording (Store the following data) • ShoppingCartId • Email (shopping cart owner email) • AbandonedCartNotificationId • Record DateTime • Type (ShoppingCartRecovered)
• Shopping Cart Become Abandoned Recording (Store the following data) • ShoppingCartId • TotalCost • Email (shopping cart owner email) • Record DateTime • Type (ShoppingCartBecomeAbandoned)
• Shopping Cart Become Deleted Recording (Store the following data) • ShoppingCartId • TotalCost • Email (shopping cart owner email) • Record DateTime • Type (ShoppingCartDeleted)
12) Shopping cart delete operation upgrade Before shopping cart delete action add a history record (Shopping Cart Become Deleted Recording). See (11.5) 13) ‘Abandoned Cart Recovery’ > ‘Reports’ tab • Abandoned and recovered carts • Abandoned and recovered carts amounts • Abandoned and recovered carts report DESIGN: https://projects.invisionapp.com/share/C2130V1FMP5X#/screens 14) Analytics dashboard charts Provide ability to add • Abandoned and recovered carts • Abandoned and recovered carts amounts • Abandoned and recovered carts report Show these charts only if Abandoned Cart Recovery extension is enabled/active DESIGN: https://invis.io/7910J9P1H3CG 15) Admin User Role Restrictions Add following admin user role restrictions • Abandoned Carts • Can View • Can Delete
• Abandoned Cart Notifications • Can View • Can Add • Can Edit • Can Delete
• Abandoned Cart Emails • Can View • allows to see Abandoned Cart Emails tab on ‘Email Notifications’ > ‘Emails’ page
• Can Add • allows to show add button on ‘Email Notifications’ > ‘Emails’ page (tab Abandoned Cart Emails). • allows to show add new follow-up email button on create follow-up form
• Can Edit • Can Delete • these 2 restriction above should allow to view ‘edit’ and ‘delete’ buttons on ‘Email Notifications’ > ‘Emails’ page (tab Abandoned Cart Emails)
• Abandoned Cart Report • Can View
Show these restrictions only if Abandoned Cart Recovery extension is enabled/active.
On create new admin user role set all restrictions above to true by default.
Add full Urls to Export
Add additional column in the export module item file (as a display value only) for the full item URL (parent and slug) • Column title “URL list” • list of all item URLs separated by ; • placed after ‘Parents’ column • on import action; ignore this column (for display/export purpose only)
• Change the page tab title to “Edit <Page name>'” • If a multiline custom property or a Content system property contains <script, <style, {{, {% this property should be blocked for editing via OSE. • If a multiline custom property or a Content system property contains blocks with a data attribute 'cms_ose_editable_text' all content from this block should be parsed into a separate WYSIWYG like a multiline custom property. A title for this section should be determined from a data attribute 'cms_ose_editable_text_title'. If this attribute is not found the title for this WYSIWYG should be constructed as follows: '<this property name> Text Block <index>'. • If some page doesn't have custom modules for editing and this page can be edited, all editable properties should be shown by default on the toolbox. • Add a javascript event trigger 'CMS_TriggerRefreshOSEItems' for a 'load more' function on the site frontend for a list of module items refreshing on the toolbox. This one should be triggered after AJAX. • Do some small UI/UX changes: https://invis.io/9U12ZSAU5NZY • Add a module name to the toolbox title • Add an "add new item" button on the items list at the first position (if it's available on a module).
Multiline Text property changes
Change custom property settings in Modules for text (multiline) fields. • Rename ‘Enable WYSIWYG’ to ‘WYSIWYG’ • default unchecked • if selected - allow the ability to use WYSIWYG view on add/edit item form in Admin
• add ‘Code Editor‘ setting • default checked • if selected - allow the ability to use Code view on add/edit item form in Admin
Go to Site Information In option Date Time add possibility to set time https://prnt.sc/aE6rxofG-tnr https://treepl.slack.com/archives/C023SU50YQP/p1658336160885129
Page caching - desktop/mobile
Page is caching ‘device_type’ value in Liquid ‘request’ object.
1) SSO oauth for zapier (+scopes) Add oAuth 2.0 APIs • Authorization • Access Token Request • Refresh Token Request Retrieved Bearer token should get access to Treepl CMS APIs created specially for Zapier (for the site that should be determined by domain)
Request Domain field on Zapier in order to retrieve access token to the particular site only 2) Extension rule Add new Extension to the portal and to extension JSON file so portal user could enable and disable extension on the ‘Site’ -> ‘Extensions’ tab in the Portal • Title • Zapier Integration (beta)
• Short Description • Allows handling the connection between Treepl CMS and apps that Zapier supports.
• Information • Triggers (should be performed by Treepl once appropriate action is made in the CMS):
-New Module Item -Updated Module Item -New CRM Member -Updated CRM Member -New CRM Form Submission -Updated CRM Form Submission -New CRM Event Booking -Updated CRM Event Booking -New Order -Updated Order -New Gift Voucher -Updated Gift Voucher -Triggered Workflow
• Actions: -Create Module Item -Update Module Item -Create CRM Member -Update CRM Member -Create CRM Form Submission -Update CRM Form Submission -Create CRM Event Booking -Update CRM Event Booking -Update Order Details -Create Gift Voucher -Update Gift Voucher
• Searches: -Find Module Item -Find CRM Member -Find CRM Form Submission -Find CRM Event Booking -Find Order -Find Gift Voucher
• CRM Member { "Id":1442, "Email":"test@test.com", "FirstName":"Jhon", "LastName":"Doe", "Address":"", "City":"", "State":"", "ZipCode":"", "Country":"", "BillingAddress":"", "BillingCity":"", "BillingState":"", "BillingZipCode":"", "BillingCountry":"", "Site":"", "Phone":"123456789", "Status":"", "Notes":"", "Type":"Consumer", "CreatedDateTime":"2019-06-12T17:28:59.07", "UpdatedDateTime":"2020-08-07T06:56:27.713", "CrmType":"Member", "CrmGroup":{ " | My Group Name 1 | ":{ "My Field Name 1.1":"field Value 1", "My Field Name 1.2":"field Value 2" }, " | My Group Name 2 | ":{ "My Field Name 2.1":"field Value 1", "My Field Name 2.2":"field Value 2" } } }
• CRM Form Submission { "Id":1442, "Form":"form_alias", "Email":"test@test.com", "FormField":{ " | My Field Name 1":"field Value 1", " | My Field Name 2":"field Value 2" }, "CrmGroup":{ " | My Group Name 1 | ":{ "My Field Name 1.1":"field Value 1", "My Field Name 1.2":"field Value 2" }, " | My Group Name 2 | ":{ "My Field Name 2.1":"field Value 1", "My Field Name 2.2":"field Value 2" } } }
• CRM Event Booking { "Id":1442, "Form":"form_alias", "Email":"test@test.com", "ModuleItem":123, "Allocation":1, "FormField":{ " | My Field Name 1":"field Value 1", " | My Field Name 2":"field Value 2" }, "CrmGroup":{ " | My Group Name 1 | ":{ "My Field Name 1.1":"field Value 1", "My Field Name 1.2":"field Value 2" }, " | My Group Name 2 | ":{ "My Field Name 2.1":"field Value 1", "My Field Name 2.2":"field Value 2" } } }
• Order { "Id":1442, "Email":"test@test.com", "OrderName":"Checkout", "Status":"Paid", "InvoiceNumber":"1234", "InvoiceDate":"2022-01-01T13:34:44", "AWBNumber":"", "TrackingURL":"", "ShippingAddress":"", "ShippingCity":"", "ShippingState":"", "ShippingZip":"", "ShippingCountry":"", "CrmGroup":{ " | My Group Name 1 | ":{ "My Field Name 1.1":"field Value 1", "My Field Name 1.2":"field Value 2" }, " | My Group Name 2 | ":{ "My Field Name 2.1":"field Value 1", "My Field Name 2.2":"field Value 2" } }, "PaymentType":"CreditCard", "FormId":13, "MemberId":47, "CaseId":89, "AmountPending":"0.0000", "AmountPaid":"10.0500", "PaymentIntentId":"XXXXXXXXXXXXXX", "PaymentIntentClientSecret":"XXXXXXXXXXXXXXXXXXXXXXXXXXXX", "FormatSetting":{ "Name":"AU", "Culture":"en-AU", "DecimalsQuantity":2, "Currency":{ "Code":"AUD", "Symbol":"$", "DigitalCode":"36", "Name":"Australian Dollar" } }, "DomainCountry":{ "Name":"AUSTRALIA", "Code":"AU" }, "DestinationCountry":{ "Name":"AUSTRALIA", "Code":"AU" }, "ShippingOption":{ "Id":"12252410371037462605", "ShippingOptionId":"7361027874612052004", "Name":"AustraliaPost - Parcel Post", "Price":8.1364, "TaxPercent":10, "TaxRate":0.1, "TaxPrice":0.81, "TotalPrice":8.95, "SubTotalPrice":8.14 }, "Discount":{ "Id":null, "Code":null, "Type":null, "Amount":0 }, "GiftVoucher":{ "Id":null, "Code":null, "Amount":0, "Balance":0 }, "SubTotalPrice":"1.0000", "TaxPercent":"10.0000", "TaxRate":"0.1000", "TaxPrice":"0.9100", "DiscountPrice":"0", "TotalPrice":"10.0500", "ShippingPrice":"8.1364", "ShippingTaxRate":"0.1000", "ShippingTaxPrice":"0.81", "ShippingSubTotalPrice":"8.14", "ShippingTotalPrice":"8.95", "GiftVoucherPrice":"0", "SubTotalTaxPrice":"0.1000", "DiscountedSubTotalTaxPrice":"0.1000", "GrandTotalPrice":"1.1000", "TotalPriceExcludingTax":"9.1400", "TotalPriceExcludingTaxAndGiftVoucherAmount":"9.1364", "TaxCode":"GST", "Items":[ { "Id":"15049017874163171386", "EcommerceItemId":2139, "SmallImage":null, "Name":"product 1", "Type":"ModuleItem", "ModuleId":0, "SKUCode":"39207d4d-c9c0-4a9d-a435-f2c8f8778e68/Size/Large", "Quantity":1, "ProductFileLink":null, "URL":"/shop/product1", "TaxCode":"GST", "OnSalse":false, "Price":0, "TaxPercent":10, "UnitPrice":1, "TaxPrice":0.1, "UnitTotalPrice":1.1, "TotalPrice":1.1, "UnitTaxPrice":0.1, "TaxRate":0.1, "TotalPriceExcludingTax":1, "UnitRecommendedPrice":0, "UnitRecommendedTaxPrice":0, "UnitRecommendedTotalPrice":0, "AttributesString":"Size: Large; Color: Green,Yellow", "Attributes":{ "Size":[ "Large" ], "Color":[ "Green", "Yellow" ] } }, { "Id":"435", "EcommerceItemId":3453, "SmallImage":null, "Name":"product 2", "Type":"ModuleItem", "ModuleId":0, "SKUCode":"39207d4d-c9c0-4a9d-a435-f2c8f8778e68/Size/Large", "Quantity":1, "ProductFileLink":null, "URL":"/shop/product1", "TaxCode":"GST", "OnSalse":false, "Price":0, "TaxPercent":10, "UnitPrice":1, "TaxPrice":0.1, "UnitTotalPrice":1.1, "TotalPrice":1.1, "UnitTaxPrice":0.1, "TaxRate":0.1, "TotalPriceExcludingTax":1, "UnitRecommendedPrice":0, "UnitRecommendedTaxPrice":0, "UnitRecommendedTotalPrice":0, "AttributesString":"Color: Red", "Attributes":{ "Color":[ "Red" ] } } ] }
Public Triggers (should be performed by Treepl once appropriate action is made in the CMS): • New Module Item • Module [dropdown (multiple)] • list of module names
• Update Module Item • Module [dropdown (multiple)] • list of module names
• New CRM Member • Updated CRM Member • New CRM Form Submission • Form Name [dropdown (multiple)] • list of forms
• Updated CRM Form Submission • Form Name [dropdown (multiple)] • list of forms
• New CRM Event Booking • Form Name [dropdown (multiple)] • list of forms
• Updated CRM Event Booking • Form Name [dropdown (multiple)] • list of forms
• New Order • Updated Order • New Gift Voucher • Updated Gift Voucher • Triggered Workflow • Workflow [dropdown (multiple)]
• New Comment • Module [dropdown (multiple)] • list of module names
• Updated Comment • Module [dropdown (multiple)] • list of module names
4) Actions Once module item created/updated • add rollback with new source "Zapier"
Dropdowns in zapier forms • Secure Zone • Value: SecureZoneId • Display Name: SecureZoneName
• Country • Value: CountryCode • Display Name: CountryName
• Form • Value: FormAlias • Display Name: FormName
• Recurring Type • Value: RecurringTypeName • Display Name: RecurringTypeName
Public Actions (allows to create or edit items in Treepl performed by Zapier): • Create Module Item • Update Module Item• Module [dropdown REQUIRED] • list of module names
• Item Name [string REQUIRED] • URL Slug [string] • Description [string (multiline)] • System Fields (dynamic list of property names) Add an info block with the name of the group of fields (before listing of fields) • Parents [dropdown (or dropdown multiple)] • list of parent module items
• Template [dropdown] • list of templates
• Detail Layout [dropdown] • list of templates
• Enabled [boolean] • Disable from site search [boolean] • Release Date [date] • Expiry Date [date] • Weighting [string] • Site Search Keywords [string] • Added by [string] • value is email • if not found in CRM - skip this value
• Secure Zones [dropdown] • list of secure zones • adds an item to secure zones
• Tags [dropdown] • list of module tags
• Categories [dropdown] • flat list of categories (labels are path-like: "/category/subcategory")
• Author [dropdown] • list of authors
• Event Fields (dynamic list of property names). Show these fields only if the selected module has "Enable bookings == true" in (Module details => advanced settings). Add an info block with the name of the group of fields (before listing of fields). • Hide When Full [boolean] • Allow Multiple Bookings Per Email [boolean] • Capacity [number] • Event Date Start [date] • Event Date End [date]
• Product Fields (dynamic list of property names). Show these fields only if the selected module is Product. Add an info block with the name of the group of fields (before listing of fields) • Small Image [string] • Large Image [string] • On Sale [boolean] • Is Gift Voucher [boolean] • Product Weight [number] • Product Width [number] • Product Height [number] • Product Depth [number] • Enable Drop Shipping [boolean] • Unit Type [string] • Minimum Units [number] • Maximum Units [number] • Recurring Type [dropdown] • list of recurring types
• Is Shippable [boolean] • Is Downloadable [boolean] • Number Of Possible Downloads [number] • Supplier [string]
• Custom fields (dynamic list of property names). Each Zapier field should have the same type as the module property. Add an info block with the name of the group of fields (before listing of fields) • Custom Fields…
• Create CRM Member • Update CRM Member• First Name • Last Name • Email [REQUIRED] • Address • City • State • Zip • Country [dropdown] • list of countries
• Site • Phone • Status • Notes • Type [dropdown] • list of types
• Billing Address • Billing City • Billing State • Billing Zip • Billing Country [dropdown] • list of countries
• Advanced Fields (dynamic list of property names). Each Zapier field should have the same type as advanced CRM group property. For each advanced CRM group add an info block with the Advanced CRM Group name - https://prnt.sc/kdChsqRILvXT• Advanced Fields…
• Create CRM Form Submission • Update CRM Form Submission• Id [REQUIRED - for update form only] • Email [REQUIRED - for update form only] • Form Name [dropdown REQUIRED - for create form only] • list of forms
• Form Fields (dynamic list of property names). List of all system and custom form fields. Add an info block with the name of the group of fields (before listing of fields) • Advanced Fields (dynamic list of property names). Each Zapier field should have the same type as advanced CRM group property. For each advanced CRM group add an info block with the Advanced CRM Group name - https://prnt.sc/kdChsqRILvXT• Advanced Fields…
• Create CRM Event Booking • Update CRM Event Booking• Id [REQUIRED - for update form only] • Email [REQUIRED - for update form only] • Form Name [dropdown REQUIRED - for create form only] • list of forms
• Module [dropdown REQUIRED - for create form only] • list of modules that have Enable Booking = true
• Module Item [dropdown REQUIRED - for create form only] • list of forms
• Allocation [number (default = 1)] • Form Fields (dynamic list of property names). List of all system and custom form fields. Add an info block with the name of the group of fields (before listing of fields) • Advanced Fields (dynamic list of property names). Each Zapier field should have the same type as advanced CRM group property. For each advanced CRM group add an info block with the Advanced CRM Group name - https://prnt.sc/kdChsqRILvXT• Advanced Fields…
• Update Order Details Base information update only • Id [REQUIRED - for update form only] • Order Details (group of fields listing all system order fields) • Order Name [REQUIRED] • Status [dropdown] • list of statuses
• Invoice Number • Invoice Date • AWB Number • Tracking URL • Shipping Address • Shipping City • Shipping State • Shipping Zip • Shipping Country [dropdown] • list of countries
• Order Details… Add an info block with the name of the group of fields (before listing of fields)
• Advanced Fields (dynamic list of property names). Each Zapier field should have the same type as advanced CRM group property. For each advanced CRM group add an info block with the Advanced CRM Group name - https://prnt.sc/kdChsqRILvXT• Advanced Fields…
• Create Gift Voucher • Update Gift Voucher• Id [REQUIRED - for update form only] • Name [string] • Recipient Name [string] • Recipient Email [string (email) REQUIRED] • Recipient Message [string (multiline)] • Country/Currency [dropdown] • list of Country/Currency pairs available for the site
• Amount [number] • Enabled [boolean]
• Create Comment • Update Comment• Id [REQUIRED - for update form only] • Module Item Id • Thread Id • Parent Id • First Name • Last Name • Email [REQUIRED] • Rating • Comment
5) Searches Public Searches Form: • Find Module Item• Id • Module [dropdown] • list of module names
• Item Name [string] • URL Slug [string] • Description [string (multiline)] • System Fields (dynamic list of property names). Add an info block with the name of the group of fields (before listing of fields). • Parents [dropdown (or dropdown multiple)] • list of parent module items
• Release Date [date] • Expiry Date [date] • Weighting [string] • Added by [string] • value is email • if not found in CRM - skip this value
• Tags [dropdown] • list of module tags
• Categories [dropdown] • flat list of categories (labels are path-like: "/category/subcategory")
• Author [dropdown] • list of authors
• Event Fields (dynamic list of property names). Show these fields only if selected module has Enable bookings == true in (Module details => advanced settings). Add an info block with the name of the group of fields (before listing of fields) • Capacity [number] • Event Date Start [date] • Event Date End [date]
• Product Fields (dynamic list of property names). Show these fields only if the selected module is Product. Add an info block with the name of the group of fields (before listing of fields) • Small Image [string] • Large Image [string] • On Sale [boolean] • Is Gift Voucher [boolean] • Product Weight [number] • Product Width [number] • Product Height [number] • Product Depth [number] • Enable Drop Shipping [boolean] • Unit Type [string] • Minimum Units [number] • Maximum Units [number] • Recurring Type [dropdown] • list of recurring types
• Is Shippable [boolean] • Is Downloadable [boolean] • Number Of Possible Downloads [number] • Supplier [string]
• Custom fields (dynamic list of property names). Each Zapier field should have the same type as the module property. Add an info block with the name of the group of fields (before listing of fields) • Custom Fields…
• Find CRM Member• Id • First name • Last Name • Email • Address • City • State • Zip • Country [dropdown] • list of countries
• Site • Phone • Status • Notes • Type [dropdown] • list of types
• Billing Address • Billing City • Billing State • Billing Zip • Billing Country [dropdown] • list of countries
• Find CRM Form Submission• Id • Form Name [dropdown] • list of forms
• Email
• Find CRM Event Booking• Id • Form Name [dropdown] • list of forms
• Email
• Find Order• Id • Email • Order Name • Status [dropdown] • list of statuses
• Invoice Number • Invoice Date • AWB Number • Tracking URL • Shipping Address • Shipping City • Shipping State • Shipping Zip • Shipping Country [dropdown] • list of countries
• Find Gift Voucher• Id • Name [string] • Recipient Name • Recipient Email • Recipient Message [string (multiline)] • Country/Currency [dropdown] • list of Country/Currency pairs available for the site
• Amount [number]
• Find Comment• Id • Module Item Id • Email • Rating • Comment
• Find Workflow• Id • Name
6) Restrictions Do not allow to process triggers, actions and searches if zapier extension is disabled for the site
Other updates4
Feature flags changes (v6.7)
Apply the following changes to feature flags: Move “Improved Custom Reporting” to internal section AND set enabled by default.
Add ‘Release Date’ field to the layout of the form for creating and updating an item with a custom module 1) creating https://www.screencast.com/t/LOdThMS6beL <label>Release Date</label> <input type="datetime-local" name="prop_ReleaseDate" value="" >
1) Create a new Settings section on a module settings page Called “Follow Up Emails” which includes the option: • Enable Follow-Up Emails (checkbox) - preset to ‘true’ for Events module Show section only if “Module” > “Advanced Settings” > “Enable bookings” is true. 2) Create a new tab "DEFAULT FOLLOW-UP EMAILS" on a module edit page Display only if the module has ‘Follow Up Emails’ -> ‘Enable Follow-Up Emails’ setting set to ‘true’ AND if ‘Module’ -> ‘Advanced Settings’ -> ‘Enable bookings’ is true Content: • List of default follow-up emails • ability to add new default follow-up email • ability to edit and delete default follow up email
Add ‘Date Field’ column after ‘Delivery Type’ • Show field display name if field exists • Show saved field alias if field doesn't exist any more (but alias is saved for a follow-up) 3) Create a new tab "CUSTOM FOLLOW-UP EMAILS" on a module item edit page • Display only if the module has ‘Follow Up Emails’ -> ‘Enable Follow-Up Emails’ setting set to ‘true AND if ‘Module’ -> ‘Advanced Settings’ -> ‘Enable bookings’ is true. Content • “Send only custom follow-up emails” (checkbox) • When enabled, allow to add/edit/delete custom follow-up emails • List of custom follow-up emails • ability to add new custom follow-up email • ability to edit and delete custom follow up email
DESIGN: https://projects.invisionapp.com/share/JA10JVKP2K78#/screens/447175909 • Set title Delivery Time instead Delivery Date • Add Date Field column after Delivery Type • Show field display name if field exists • Show saved field alias if field doesn't exist any more (but alias is saved for a follow-up)
Rename default admin menu item name from “Workflow Emails” to “Emails” and EntityAlias from ‘WorkflowEmails’ to ‘Emails’
In custom admin menus, find menu item with alias ‘WorkflowEmails’ and rename to ‘Emails’
Add tabs: • Workflow Emails • Place existing listing and “add workflow emails” logic here
• Follow-Up Emails • Add listing and add/edit/delete Follow-up emails logic here • Show tab only if site plan is BUSINESS or higher
Set following restrictions based on site plan • Show ‘Email Notification’ -> ‘Emails’ page starting from BUSINESS plan • Show ‘Workflow Emails’ tab starting from PRO plan • Show ‘Follow-Up Emails’ tab starting from BUSINESS plan
5) Create/edit follow up email logic • Select one of the already created follow-up emails or create a new one (like it works on workflows - https://prnt.sc/TyNsogEjZwIa) • Choose the trigger date field • Release Date • Expiry Date • Event Date Start • show if the module has ‘Advanced Settings’ -> ‘Enable Booking’ = true
• Event Date End • show if the module has ‘Advanced Settings’ -> ‘Enable Booking’ = true
• all custom properties with type datetime • Choose a time shift for the chosen trigger date field: https://prnt.sc/nKOv35KSrxTw• Delivery Time (numeric) • Delivery Type (dropdown) • Days After • Days Before • Hours After • Hours Before
• Date Field (dropdown) - list of module item date fields • system fields: • Release Date • Expiration Date • Event Date Start • Event Date End
• custom fields (display name is the name of the custom field)
• on edit • do not allow to save follow-up if Date Field is empty (only set field to be empty if the saved alias belongs to the date field that doesn't exist anymore)
6) Follow-Up Email sending logic
If the module has’Follow Up Emails’ -> ‘Enable Follow-Up Emails’ setting set to ‘true’ AND ‘Module’ -> ‘Advanced Settings’ -> ‘Enable bookings’ is true • Schedule sending follow-up emails for each module item (for each subscriber to this module item) based on the selected date field: • For module items that have ‘Send only custom follow-up emails’ = true • send only custom follow-up emails • if there are no custom follow-up emails in the list - no email will be sent for this module item
• For module items that have ‘Send only custom follow-up emails’ = false • send only default follow-up emails
7) Email liquid ‘this’ object should contain the following properties: • item • object that contains same fields as item from component type module (including event fields)
• member • module item subscriber
8) Site Plan Restrictions Allow view and use of ‘Follow Up Emails’ on module settings if site plan is PRO or higher Hide DEFAULT FOLLOW-UP EMAILS on module view and CUSTOM FOLLOW-UP EMAILS tab on module item view if site plan is lower than BUSINESS If site's plan is ESSENTIAL • disallow sending followup emails • if plan will be restored to BUSINESS or higher all follow-up emails that wasn't sent while site plan was ESSENTIAL should NOT be sent after plan upgrade 9) Admin User Role permissions Ability to enable/disable Default and custom followup emails should be managed by ‘Can Edit Basic Module Settings’ module's restriction
Add following admin user role permissions: • Emails • Can View • if disabled; hide 'Email Notifications' -> 'Emails' menu item and do not allow to open 'Email Notifications' -> 'Emails' page
• Follow-ups • Can View • if disabled; hide DEFAULT FOLLOW-UP EMAILS on module view and CUSTOM FOLLOW-UP EMAILS tab on module item view
• Can Add • Can Edit • Can Delete • these 3 restriction above should allow to view ‘add’, ‘edit’ and ‘delete’ buttons on DEFAULT and CUSTOM follow-ups pages
• Follow-up Emails • Can View • allows to see ‘Follow-up Emails’ tab on mail ‘Notifications’ -> ‘Emails’ page
• Can Add • allows to show ‘add’ button on 'Email Notifications' -> 'Emails' page (tab ‘Follow-up Emails’) • allows to show ‘Add new follow-up email’ button on create follow-up form
• Can Edit • Can Delete • these 2 restriction above should allow to view ‘edit’ and ‘delete’ buttons on 'Email Notifications' -> 'Emails' page (tab ‘Follow-up Emails’)
On create new admin user role • set all permissions above to true by default For all existed admin user roles • All permissions above should be false • On update from v6.5 to v6.6 • Add to all existing admin user roles following permissions with preset value • ‘Emails’ -> ‘Can View’ with value TRUE if • current user role permission has ‘Workflow Emails’ -> ‘Can View’ == true
10) Duplicating module item logic Duplicate ‘Send only custom follow-up emails’ checkbox when duplicating the module item
Duplicate ‘Custom follow-ups’ when duplicating the module item
Duplicate ‘Default follow-ups’ when duplicating the module
12) Import/Export of module items Add ‘Send only custom follow-up emails’ checkbox to import/export process
‘Follow-ups’ should NOT be added to module item import/export process
13) Import/Export of module logic Add ‘Enable Default Follow-Up Emails’ AND ‘Enable Custom Follow-Up Emails’ checkboxes to module import/export process
Do NOT add ‘Default follow-ups’ to export file
Preview And Draft Mode For Pages And Module Items
Custom Modules · Pages and Templates
Preview and Draft mode on pages and custom modules. DESIGN: https://invis.io/TXX3577QCWJ 1) Draft Mode logic Provide the ability to: • save draft content of ‘Settings’ and ‘SEO’ tabs for Module Items • save draft content of ‘Settings’ tab for Content Templates • delete the draft version of the content • switch between draft and live mode • preview draft • the draft should be accessible by the same URL but with GET param ?DraftPreview=true • if no draft content is available - show live content of the item
• Save draft content to live • clicking on the ‘Publish’ button commits the draft version to live (overriding the previous live version) • draft content should be deleted on this operation
On opening edit item form • always show live version of the content 2) FTP sync of pages logic • Changes made via FTP applied to Live content ONLY 3) Special Properties Exceptions Changing these fields on draft should be ignored: • SKU Code • URL slug • Parent items • Home page state • Secure zone assignment • Product Downloadable File • Recurring Type eg: https://prnt.sc/sba18v 4) Draft accessibility Ability to switch to draft mode should be allowed/restricted via Admin User Roles for the ‘Can View And Manage Draft’ option. 5) Admin User Roles/Permissions Add permissions option to the following module groups: • Each Custom module permissions group • Default Custom Module permissions group • Page permissions group • Content Template permissions group • Blogs permissions group • Blog Posts permissions group • Banner Groups permissions group • Banners permissions group • Galleries/Sliders permissions group • Slides permissions group • FAQ Groups permissions • FAQ Questions permissions • Authors permissions group • Products permissions group • Catalogs permissions group • Events Group permissions • Event permissions group Permissions option: • Can View And Manage Draft if restriction is disabled; do not show switcher between draft and live mode on item edit form in admin [UI]
Improvements6
Add Shipping Address Fields to Form
Forms
1) Address fields on the form settings Add ‘Shipping Address’ and ‘Billing Address’ buttons to Form builder http://prntscr.com/1juqgk3.
Once selected add a group of fields to the default layout of the form.
Fields that should be added to the form layout are: • Shipping Address • Payment_ShippingAddress (Shipping Address) • Payment_ShippingCity (Shipping City) • Payment_ShippingState (Shipping State) • Payment_ShippingZipCode (Shipping ZIP Code) • Payment_ShippingCountry (Shipping Country)
Both fields can be marked as required. And once marked as required - all fields inside the group become required (address, city, zip etc) and vice-versa. 2) Form submission flow When such a form is submitted - add ‘Shipping Address’ and ‘Billing Address’ data to the CRM Order object (like it works previously for Shipping Address fields)
NOTE: • For backward compatibility - use value of the ‘formData.Zip_Code’ as value for shipping zip code as well as the value of ‘formData.Payment_ShippingZipCode’ • if both occurred in the ‘formData’ then use ‘formData.Payment_ShippingZipCode’
• For backward compatibility - always check if Shipping fields are present in ‘formData’ even if they are not selected on the form builder. • Do not use value of ‘Payment_ShippingCountry’ on form (type “checkout”). Use value of the selected shipping country from the shopping cart. 3) Attach billing and shipping address fields to appropriate CRM entities • Add ‘billing address’ fields to the ‘contact’ entity • migrate data from contact address to contact billing address • setup payment logic to take the address from the contact billing address field instead of the contact address field • if the billing address field is empty - use the contact address fields
• Add ‘shipping address’ fields to the ‘order’ entity 4) Update the billing address from the payment gateway • When changes to the billing address come from payment providers update ‘contact billing address’ fields instead of ‘contact address’ fields 5) Liquid output • Add the following properties to the ‘contact’ liquid object • BillingAddress • BillingCity • BillingState • BillingZipCode • BillingCountry
• Contact liquid object occurrence • • item from {% component type: "CRMContacts" %} • on system pages • on system emails • on autoresponder emails • on form submission • on create module item submission
• on workflow and follow-up emails
6) Add these fields to Import/Export processes • add billing address fields to contact import/export • add shipping address to order import/export 7) Restore to default "checkout" form upgrade • Remove adding hard-coded shipping fields to the HTML layout of the form with the type "checkout" when clicking "restore to default" on form layout
Custom Modules - Show Image thumbnail in Table Columns
Custom Modules
Original Description The ability to show thumbnail in Custom Module table. Where a Custom Module has an Item Property>Custom Property that is type Media. In that Custom Module’s > Table of items can we add the option to show a thumbnail of the actual image as well as the current option to show its path.
1) Add new properties to the Settings -> Misc => Recaptcha Settings group (under Recaptcha Version field) • reCAPTCHA v2 Site Key • reCAPTCHA v2 Secret Key • reCAPTCHA v3 Site Key • reCAPTCHA v3 Secret Key All of these fields should be empty by default 2) Rename incorrect reCAPTCHA labels • Rename all ‘Recaptcha’ labels in admin to ‘reCAPTCHA’ 3) Add the reCaptcha property to the ‘this’ object of the form: • • the value should be determined based on what reCaptcha is added to the form. • If no reCaptcha is added to the form - set null
Use Settings -> Misc => reCAPTCHA Settings group fields to retrieve keys for the object. • If reCAPTCHA v2 Site Key, reCAPTCHA v3 Site Key are empty - use our system keys 4) Add property ‘system_recaptcha_sitekey’ property to the ‘request’ liquid object which renders the key as saved above or the system key if no custom key is available: • 6Lf2cGcUAAAAABbL4aDrclASNZx9S3uaI9EvpvlI
5) Replace reCAPTCHA key instances for the following: • all web form layouts • default form layouts (when generated by restore to default request) • system form layouts (when generated by toolbox request) • System pages • 401 • reset-password • request-reset-password
• System pages default layouts (when generated by restore to default request) • 401 • reset-password • request-reset-password
• CMS ‘Add scripts to head’ functionality (for Google reCAPTCHA API) 6) Change reCaptcha validation logic to use the secret key and site key stored in Settings -> Misc => reCAPTCHA Settings (or system keys if null) The feature is based on: https://webinone.com/public-backlog-state/request/custom-recaptcha-key-setup
eCommerce User Input Field For Products
Ecommerce
Allow the capture of user input data (text) against a purchased product. New Attribute type • User Input field Output via liquid • Add new attribute type to ‘item_attributes’ liquid component. • Should be output as a text input on the default attributes layout. • Add it to the orderline of ‘order’ and ‘shopping cart’ object (the same as any other attribute data) Advanced Logic of the attribute type • If a product with User Input attribute is added to cart more than once, unique text input should specify unique orderline (order, shopping cart), as opposed to adding an additional quality to the same product orderline. Product Import/Export Output value via Export function and apply value via an Import Format: • [attribute name][is_required]|[attribute_type]|[is_inventory_item]:; • [attribute_type] is ‘8’ or ‘UserInput’
Example • Test attr text*|UserInput|False:; Output via admin UI • Display in “Order” > “Products” on orderline Updated Output in default layouts • invoice email • shopping cart • item_attributes component default layout
Original request: https://webinone.com/public-backlog-state/request/_order-object-to-be-generally-available Documentation (shown all places where order object is not available but should) https://docs.webinone.com/liquid/order-object#secOrderObjectAvailability Screen shot: https://prnt.sc/ytsrt6 1) BUG Fix: Supplier System Email: In ‘Email template’ - {{this.order}} data not working 2) BUG Fix: All system Emails and autoresponders: ‘From name’ and ‘Subject’ are not parsed via liquid with the same context as body. 3) Improvement: When product with supplier is purchased add supplier email to the order line object https://prnt.sc/s5dy3k 4) Improvement: Further ‘order’ object support: Add ‘this.order’ object to the following places (set null value if no payment occurred) • form thankyou page • for paid secure membership (generic form)
• workflow (Body) • for paid secure membership (generic form)
• workflow (From, Subject fields) • for paid secure membership (generic form) • for paid form (generic form) • for paid form (single item form) • for paid form (checkout form)
• autoresponer (Body) • for paid secure membership (generic form)
• Supplier Email (From, Subject fields) • for paid form (checkout form)
• Low Stock Email (From, Subject fields) • for paid form (checkout form)
• Gift Voucher Email (Body) • for paid form (checkout form) • custom send via the admin http://prntscr.com/ytvvbc
• Gift Voucher Email (From, Subject fields) • for paid form (checkout form) • custom send via the admin http://prntscr.com/ytvvbc
• Secure Zone Details Email (Body) • for paid secure membership (generic form)
• Secure Zone Details Email (From, Subject fields) • for paid secure membership (generic form)
Related Products Alphabetised
Admin Panel · Ecommerce
Original description: Currently the ‘related products’ for any product are not listed in alphabetical order and there is no search field. This means you have to try to locate the product you want by scrolling through a random list of products, to try and find the right product to add as ‘related’. This needs to be alphabetised based on the name of the product as well as have a search function so you can quickly locate the correct product to add.
Improvement: Both alphabetical list and search fields added to Related Products UI. DESIGN: https://invis.io/V810G318WBN6
Other updates10
Site Storage Email Notification
Extend the "approaching limit" email notification repetition for site storage (when storage exceeds 90% capacity) Now to be once a week instead of once a day
[Portal] Emergency Settings
Add a new page in the Portal for Emergency Settings Page should contain the following settings (just store saved data. No additional logic based on these are required)
All fields are NOT required • First name • Last name • Email • Phone number • Any additional info Design: https://invis.io/8512E2GQU7XY
HTML security for GET url params in liquid request object
Add new filter to liquid • unescape This filter should decode html entities to its original strings (as an opposite to ‘escape’ filter) Example • {{"<br>" | unescape}} • result = <br> Improve liquid XSS security by implementing the following improvements in the ‘request.request_url.params’ liquid object • convert all URL get parameters values to become HTML decoded Example: • URL: /my_page?myParam=<script>alert(1);</script> • page content: {{request.request_url.params.myParam}} • expected output • <script>alert(1);</script>
• in case you will need to output original html - using this filter should help • {{request.request_url.params.myParam | unescape }}
Add "Is Main Order" and "Is Recurring Order" property to order fields on Contact and order custom report
Improve Contacts and Orders custom report • Add "Is Main Order" property to order fields • type • boolean
• Add it to the 'Fields' tab ('Order Fields 'section) • Add it to the ‘Filters’ tab • Logic: Shows if the current order is a main or a suborder
• Add "Is Recurring Order" property to order fields • type • boolean
• Add it to the 'Fields' tab ('Order Fields 'section) • Add it to the ‘Filters’ tab • Logic: Shows if the current order is a main or a suborder
Secure media file - uploaded images display broken
Secure media file - uploaded images display broken If the user creates an item from the front and upload an image - (media-files folder should be SECURE https://prnt.sc/PsCLJTjnbpig
If there is no robot.txt file or it is there but empty, paste it there:
User-agent:*
                Disallow:

                Sitemap: link to sitemap as it is now
otherwise, we do not update the robots.txt file at all in this way, we will pre-install default settings on all new sites - and if the file is not empty, then we consider that it is already customized and we do not touch it and if they want to reset to default - let them delete the file or make it empty
Custom module - name of properties with "-"
https://treepl.slack.com/archives/C023SU50YQP/p1643293254025400 If create name of propery with "-" they do not display correctly on "Update form” on front-end: https://skr.sh/sCIsq9GzArG ALSO doesn't work in JSON {% component source: "2", layout: "List", object: "collection", collectionVariable: "family", type: "module" %} <pre>{{family.items[0].mother-in-law}}</pre>
Parent/Child custom module - not correctly display name of properties
• Delete application • Show confirm dialog: “Are you sure you want to delete this app?”
Site Plan Restrictions: Allow using Public API starting Pro plan Admin User Restrictions: Add restrictions • API Applications • Can View • Can Add • Can Edit • Can Delete
On Success return bearer token (life time 4 hours): { "access_token": "tokenStringHere", "expires_in": 14400, "scope": "public_api", "token_type": "Bearer" }
If an app is disabled - return error: { "ErrorCode" : 401001, "Message" : "The application is disabled" }
If clientId/clientSecret pair wasn't found - return error: { "ErrorCode" : 401002, "Message" : "Invalid client_id and/or client_secret" }
If site plan is less than Pro: { "ErrorCode" : 401003, "Message" : "Public API is restricted for your site plan" }
If scope is invalid: { "ErrorCode" : 401006, "Message" : "Invalid Scope" }
If grant_type is invalid { "ErrorCode" : 401007, "Message" : "Invalid Grant Type" } API version 1 All of the following endpoints requires Authorization header with the token retrieved by retrieve access token endpoint
If any request doesn't contain access token or token can't be found in DB, show error: { "ErrorCode" : 401000, "Message" : "Invalid Access Token" }
ElseIf any request contains access token but it has been expired, show error: { "ErrorCode" : 401004, "Message" : "Access Token expired" }
ElseIf an app associated with the access token - is disabled: { "ErrorCode" : 401001, "Message" : "The application is disabled" }
ElseIf access token - is revoked: { "ErrorCode" : 401005, "Message" : "The Access Token has been revoked" }
New Service (Enterprise)
Server monitoring inside dashboard Provide the ability to manually set up server instances of the web farm to the CMS DB
If web-farm is enabled for the site - show charts of CPU Utilization for each server on the analytics dashboard
DESIGN: https://invis.io/6T12DFCCWRGA Server enabling by schedule inside dashboard + hours balance Ability to schedule second server enabling for the period of time Add/edit slot form fields: • Each slot should be at least 3 hrs long (if you need more time - you can add more duration). Available durations: • 3 • 6 • 9 • 12 • 15 • 18 • 21 • 24
• Allow to choose start time with 1hr step starting from 0:00 AM till 11:00PM • Allow to setup slot name When adding/editing slot: • do not allow to choose duration; • that overlap the next slot • if there is no gap (at least 1h) between current slot and next slot
• do not allow to choose time that is busy by another slot or if this time is 1hr gap between slots • do not allow to decrease slot if it is currently active (only increase slot duration allowed) Do not allow to delete past and currently active slots: • Allow deleting of future slots Show time when next server enabling will be performed
Show hours balance • Buy more button should show popup with text: “Please contact us at support@treepl.co to schedule an extra server upgrade.” DESIGN: https://invis.io/6T12DFCCWRGA
Improvements2
Customers And Products Report
CRM · General
Currently, the system will allow for a report on Customers and Orders, which can be filtered by Product, however, the results display ALL of the customer’s products in the order that contains the product that you’re filtering by. What we really need to is to be able to see all customers who purchased a specific product – but without displaying their other purchases as well.
This was possible in BC so I assumed it would be implemented with the equivalent Treepl reporting module, but it is not.
Improved Custom Reporting
CRM
Custom Reports Filter improvement Create Feature flag in Beta section called “Improved Custom Reporting” 1) Create new filters for the custom reports: LOGIC: • in • Found all items that have a property value that is equal to one of the supplied list of values
• not in • Found all items that have a property value that is not equal to all of the supplied list of values
On Saving filters if there is at least one ‘In’ or ‘Not In’ filter in filters list AND “Improved Custom Reporting” is disabled: “Filters “In” and “Not in” are not allowed if feature flag “Improved Custom Reporting” is disabled.”
On Retrieving report results if there is at least one ‘In’ or ‘Not In’ filter in filters list AND “Improved Custom Reporting” is disabled: “Results can’t be retrieved: Filters “In” and “Not in” are not allowed if feature flag “Improved Custom Reporting” is disabled.” Custom Reports Generation Improvement Improvements: ‘Report’ -> ‘Results’ tab • Improve speed of report generation and pagination. • Improved logic should be used only if feature flag is enabled ‘Report’ -> ‘Filters’ tab • Date fields value (Type: "DateTime"): Replace current logic of showing all dates from all items (https://www.screencast.com/t/USYltiD1) with datepicker element (like https://www.screencast.com/t/OChM9GVksz)
Other updates6
Custom Reports Filter improvement
Create Feature flag in Beta section called “Improved Custom Reporting” 1) Create new filters for the custom reports: LOGIC: • in • Found all items that have a property value that is equal to one of the supplied list of values
• not in • Found all items that have a property value that is not equal to all of the supplied list of values
On Saving filters if there is at least one ‘In’ or ‘Not In’ filter in filters list AND “Improved Custom Reporting” is disabled: “Filters “In” and “Not in” are not allowed if feature flag “Improved Custom Reporting” is disabled.”
On Retrieving report results if there is at least one ‘In’ or ‘Not In’ filter in filters list AND “Improved Custom Reporting” is disabled: “Results can’t be retrieved: Filters “In” and “Not in” are not allowed if feature flag “Improved Custom Reporting” is disabled.”
Custom Reports Generation Improvement
Improvements: ‘Report’ -> ‘Results’ tab • Improve speed of report generation and pagination. • Improved logic should be used only if feature flag is enabled ‘Report’ -> ‘Filters’ tab • Date fields value (Type: "DateTime"): Replace current logic of showing all dates from all items (https://www.screencast.com/t/USYltiD1) with datepicker element (like https://www.screencast.com/t/OChM9GVksz)
Server monitoring inside dashboard
Provide the ability to manually set up server instances of the web farm to the CMS DB
If web-farm is enabled for the site - show charts of CPU Utilization for each server on the analytics dashboard
Server enabling by schedule inside dashboard + hours balance
Ability to schedule second server enabling for the period of time Add/edit slot form fields: • Each slot should be at least 3 hrs long (if you need more time - you can add more duration). Available durations: • 3 • 6 • 9 • 12 • 15 • 18 • 21 • 24
• Allow to choose start time with 1hr step starting from 0:00 AM till 11:00PM • Allow to setup slot name When adding/editing slot: • do not allow to choose duration; • that overlap the next slot • if there is no gap (at least 1h) between current slot and next slot
• do not allow to choose time that is busy by another slot or if this time is 1hr gap between slots • do not allow to decrease slot if it is currently active (only increase slot duration allowed) Do not allow to delete past and currently active slots: • Allow deleting of future slots Show time when next server enabling will be performed
Show hours balance • Buy more button should show popup with text: “Please contact us at support@treepl.co to schedule an extra server upgrade.” DESIGN: https://invis.io/6T12DFCCWRGA
Public API for Orders
Create public API endpoints: • CRM ORDERS • [GET] Get Orders List • [GET] Get Single Order • [PUT] Update Order
• Delete application • Show confirm dialog: “Are you sure you want to delete this app?”
Site Plan Restrictions: Allow using Public API starting Pro plan Admin User Restrictions: Add restrictions • API Applications • Can View • Can Add • Can Edit • Can Delete
On Success return bearer token (life time 4 hours): { "access_token": "tokenStringHere", "expires_in": 14400, "scope": "public_api", "token_type": "Bearer" }
If an app is disabled - return error: { "ErrorCode" : 401001, "Message" : "The application is disabled" }
If clientId/clientSecret pair wasn't found - return error: { "ErrorCode" : 401002, "Message" : "Invalid client_id and/or client_secret" }
If site plan is less than Pro: { "ErrorCode" : 401003, "Message" : "Public API is restricted for your site plan" }
If scope is invalid: { "ErrorCode" : 401006, "Message" : "Invalid Scope" }
If grant_type is invalid { "ErrorCode" : 401007, "Message" : "Invalid Grant Type" } API version 1 All of the following endpoints requires Authorization header with the token retrieved by retrieve access token endpoint
If any request doesn't contain access token or token can't be found in DB, show error: { "ErrorCode" : 401000, "Message" : "Invalid Access Token" }
ElseIf any request contains access token but it has been expired, show error: { "ErrorCode" : 401004, "Message" : "Access Token expired" }
ElseIf an app associated with the access token - is disabled: { "ErrorCode" : 401001, "Message" : "The application is disabled" }
ElseIf access token - is revoked: { "ErrorCode" : 401005, "Message" : "The Access Token has been revoked" }
Update item from front-end - rewrites ‘media’ type data
When user updates custom module item from front-end it rewrites data in any "Media" type properties.
14 updates
New features2
Page Rollback Option
Admin Panel · Custom Modules
0) Store files for downloadable products on FTP Move all current files for all products to ftp folder "/_downloadable_products", with file path using the folwing format: “/{productId}/{filename}.{fileext}” • New files stored in folder "/_downloadable_products" on product saving using the above file path format. • Deny access by URL to any file in this folder (show 404 page not found) • When new file is uploaded - do not delete previous file from the folder. So if you apply rollback to the version where another file was set, you can restore access to it. 1) Rollback setting in module settings Create new collapsable section in module settings titled “Extension Settings” which provides the ability to enable rollback options in the module.
NOTE: Rollback is enabled by default for ‘Page’ module and ‘Content Templates’ for all site plans regardless of the Backup extension being installed or not.
Design: https://projects.invisionapp.com/share/W6X356SMH23#/screens 2) Restriction logic Rollback options are only provided for the site if the Backup extension is installed and is not expired - except for ‘Pages’ and ‘Content Templates’ which have rollback turned on by default. 3) Rollback listing on Items and Content Templates Once Rollback is enabled for the item • show ‘History’ button near ‘Save/Back’ buttons: https://projects.invisionapp.com/share/XZ1228SX8M7N#/screens (at the very bottom) • Once clicked - show the History panel • Show only those rollback records that belong to the current set of properties (‘Settings’ or ‘SEO’) • https://projects.invisionapp.com/share/XZ1228SX8M7N#/screens/461401436 • show first records that fit the window. Then on scroll - load more • provide the ability to sort the list of rollback records • Sort by • Date (Default) • Editor
4) Rollback recording logic Recording logic should be applied to the following editing points: • Editing via admin UI • Save type is ‘Settings’ or ‘SEO’ (based on wich tab user is on saving)
• Editing via FTP • Save type is ‘Settings’
• Editing from the Edit Item Form (front-end) • Save type is ‘Settings’
• Editing via import • Save type is ‘Settings’ AND ‘SEO’ (because import row may contain properties from both sections. Create 2 rollback records in this case)
Rollback records should be applied for different sets of item properties: • type ‘Settings’ • All fields that are shown in the ‘Settings’ tab of the item edit page in admin UI • For ‘Content Templates’ the fields include: • Name • IsDefault • Content • AmpContent • TemplateSettings • EcommerceJS • MainCSS • PaymentJS • RecaptchaJS
• type ‘SEO’ • All fields that are shown in ‘SEO’ tab of the item edit page in admin UI
Once item or content template is edited (with changes made) in any editing point: • Create Rollback record (as type ‘Settings’) with the following info: • Source • Admin UI • FTP • Edit Item Form (from front-end) • OSE • Import
• Data • all values of all properties of the item or template that they had before saving
• Editor • Store CRM record Id or Admin record Id for linkage • View Format • Type • CRM Member • Admin User • Portal Owner • Portal User Display CRM Member and Admin User as links to the CRM contacts and Admin users details respectively.
• else • Show Confirmation popup: “This version will now be loaded for previewing where you will have the option to 'Restore' the changes.” • clicking on ‘Restore’ rollback button: • Will preset edit form by the values from the rollback record (omitting values that could not be restored. If the property type is not the same as in the rollback - set empty value to the property) • change name of the Save button to Restore • This action requires user to click Restore in order to finalize restoring process • Show warning messages near fields that are not restored correctly
When clicking ‘Delete’ rollback button: • Delete rollback record from DB • Restrict Delete operation for all admin users except Partners. If user with another role triggers Delete rollback action, show message: “You don't have permission to perform this action” 7) Permissions Add permissions to the following modules: • Each Custom module permissions group • Default Custom Module permissions group • Page permissions group • Content Template permissions group • Blogs permissions group • Blog Posts permissions group • Banner Groups permissions group • Banners permissions group • Galleries/Sliders permissions group • Slides permissions group • FAQ Groups permissions group • FAQ Questions permissions group • Authors permissions group • Products permissions group • Catalogs permissions group • Events Group permissions group • Event permissions group
Restrictions: • Can View And Manage Rollback History, if restriction is disabled: • do not show history button on item edit form in admin [UI] • block get history api endpoint [BE]
• Can Enable/Disable Rollback On Module Settings, if restriction is disabled: • Hide Enable Rollback checkbox on module settings [UI] • Skip saving new value of Enable Rollback checkbox on editing module settings [BE]
Add new extension to the list of current extensions: • Website Backup (beta) • Short Description: Manage your site backups (schedule, restore, etc.) • Information: Manage your complete site backups (manual, automated schedule, restore, etc.) and enable item rollback capabilities for Content Templates, Pages and other Modules Pricing is free during the beta period Note: Backup extension is only available for sites running v6.4 or higher Backup listing page Design: https://projects.invisionapp.com/share/FW121SWA84TV#/screens/460427502
Displays list of backup records, with actions/info: • Download Backup File • Restore Backup (see logic in Restore Backup Process) • Delete Backup • Pagination • Storage/Size info • Bulk delete operations • Backup now (see logic in “Backup Process”) • Upload Backup File (creates new backup record) Settings page
Note: Treepl storage packages to come after Beta version. Extension in Admin UI Add menu item to admin menu titled “Extensions” showing the installed extension/s as a sub-menu item (ie; Website Backup) The UI for the Backup extension here will be the same as in the Portal. Backup Process Design: https://projects.invisionapp.com/share/FW121SWA84TV#/screens/460427504 Once backup process is triggered: • Show loader with progress • create new backup record • set type ‘Manual’ or ‘Scheduled’ based on the trigger source • set date of the backup
• follow Backup logic described below • Once process is finished • remove loaders and enable all backups
Actions and buttons: • Cancel backup • shows confirm message before perform the action: “Are you sure you want to cancel the create backup process”
Scheduled Backup Process Setup schedule checker based on Scheduled backup settings: • Trigger Backup Process once • difference between current date and latest backup date is bigger than Repeat frequency • AND • current time is the same as selected in Time field (the Time field is represented by the timezone of the site, not UTC)
Once Restore backup process is triggered, show confirmation window with the following text and buttons: “Your current version of the site will be restored to the backup version. Please make sure you have made a backup of the site before starting the restoration if this data is important for you.”
Ok | Cancel
If clicked Ok: • check if site is live or trial • if trial - check if site plan is lower than plan of the backup • if site plan is lower than in backup - upgrade site plan to the one from backup • Show loader with progress • Disable all backups (show in gray and hide action buttons) • Check if reseller from the backup is the same as the current site's reseller • if true • Show loader with progress • Disable all backups (show in gray and hide action buttons)
• If false • Show error popup: “You cannot restore a site from the backup due to permissions issue.”
• restore • Custom Icons for admin menu • Appdata -> Custom Admin Menu json file • FTP files and folders • DB
• restart site • remove loaders and enable all backups
Actions and buttons: • Cancel backup restoring • shows confirm message before perform the action: “Are you sure you want to cancel the restore backup process”
Actions and buttons • Cancel backup uploading • shows confirm message before performing the action: “Are you sure you want to cancel the upload backup process”
Error message when there is not enough storage for uploaded backup file: “You've run out of storage for the backups. Please upgrade your storage.”
Backup logic 1) Steps • Backup • DB • FTP files and folders • Appdata -> Custom Admin Menu JSON file • Custom Icons for admin menu
• Store them to the encrypted file with the name • {siteSubdomain}-{datetime}.seed
• Update progress on each step
2) Exceptions flows • Backup file size is greater than available storage • Based on the value of ‘Behavior On Low Storage’ • Email me and skip new • Delete attempted backup files • Send “Low Storage Email” system email to reseller
• Remove oldest and create new • if Backup file size is greater than full storage limit • Show message: “You've run out of storage for the backups. Your backup request has been cancelled. Please upgrade your storage and launch a new backup request.” • Follow ‘Email me and skip new’ flow
• else • Get list of backups in order: createDate DESC • Delete backups starting from the first in the list until there will be enough space to store the backup
• Only one backup or restore process is allowed for the same time. Show error message if trying to perform backup or restore once another process is working: “Only one backup or restoration process is allowed for the site at a time. Please wait until the current process is finished or cancel it and try again.”
Low Treepl Storage Email: Send to • {ResellerEmail} Subject • You've run out of storage for the {site_name} backups.
Content • You've run out of storage for the {site_name} backups. Your backup request has been cancelled. Please upgrade your storage and launch a new backup request.
Upgrade
Logic • “Upgrade” button will lead to the ‘Portal’ -> ‘Site’ -> ‘Extensions’ -> ‘Website Backup’ settings page Treepl Storage Setup S3 bucket storage for all backups of Treepl storage. Setup it on the same DC where the Treepl portal is located. Setup 1GB of storage by default.
Extension uninstall behaviour Do not delete all backup data stored on Treepl storage if partner clicks uninstall backup extension. So if the extension is reinstalled at a later time - all previous backups would still be available.
Allow Portal Users to get full access to the ‘Extensions’ tab (like Agency user has)
domain redirects and non-www to www redirect
Domain redirects management (Portal) Add Page for domain redirects management under ‘Site’ -> ‘Domain Redirects’ tab (next to Domains tab - https://www.screencast.com/t/t94mO7GEmy ) Show list of redirects Provide ability to add, edit and delete redirects
Domain redirects management (CMS Admin) Add Page for domain redirects management under ‘Settings’ -> ‘Domains’ -> ‘Domain Redirects’ tab ( https://invis.io/TQ11WXQDKYE4 ) Logic is the same as for the portal
Add/edit redirect form • From URL (dropdown) {list of all existing domains for the site, including www versions if existed} • To URL (dropdown) {list of all existing domains for the site, including www versions if existed, except domain selected in From URL} • Enabled (boolean) determines if redirect should be applied to the site or not Add/edit redirect form logic • Add js that will exclude a domain from ‘To URL’ each time ‘From URL’ is changed • In order to apply redirects, the user needs to click ‘Apply’ button under the list of redirects. Otherwise, all changes will be lost once the user leaves the page • Show standard warning message if a user made any changes and go out of the tab without clicking ‘Apply’
• Once clicked ‘Apply’: • Show confirmation popup with text: “Please note that we'll need to restart the site in order to apply the changes. The site will be unavailable for a few minutes right after the restart. Do not refresh the page, this will result in the"service unavailable" error.” • If clicked OK - show full page locking loader and wait until the site will be reloaded. Then hide loader
Show Page for the following roles: • Partners • Agencies
Workflow notifications improvement for payments
Add sending form workflows after retrieving successful payment webhook (missing workflow logic for payment forms that redirects to payment site after submit)
• Use Cases • Payment method = PayPal • Stripe 3D secure
• Logic • if Form Submission Data contains customWorkflows field • take a list of workflow ids from it
• else • take a list of workflows attached to the form in the settings tab
In SEO tab - SEO priority change after every saving
Advanced CRM Group - not correct order after edit group
• Create advanced CRM Group and assigned to Contact • Go to Contact and fill all fields https://prnt.sc/1w7wung • After go to group and change order of fields • Go to contact and display old order BUT if open edit - display correct https://prnt.sc/1w7wzfi • THE SAME problem with UPDATE account form where use advanced CRM Group and assigned to Contact - https://prnt.sc/1w7xvmn
Offline payment - add ability to edit and delete from all types
Discount Codes - Release/Expiry Dates to match timezone
• Go to discount codes and create a new code with release and expiry dates as now
Expected: Dates must match the time zone on the site Actual: Dates match the UTC time zone
Export Event Bookings with custom fields
• Create form SingleItem with custom fields and Adv CRM group • After go to Events bookings and make export exactly from this new form • In file not display custom fields
32 updates
New features1
Recurring Products
Ecommerce
Reworked recurring models so they all work the same: • StripeWebHook • + Stripe Customer Portal
• PayPalWebHook • AuthorizeWebHook • Create Subscriptions • RecurringForms • Products • Events • New form type handler • + Discount/GiftVoucher logic
Original Request Ability to create products with recurring subscription. It will operate in a similar way it did in BC. 0) Fix logic for forms that are NOT type "Generic" that have recurring secure zone/s attached Add new validation rule on form submission handler: • If form type is NOT "Generic" AND any of the secure zones attached to the form are recurring • Return error with message: Recurring secure zone subscription is not allowed for the "{formTypeAlias}" form type
Add new validation rule on form edit action (tab settings) in the admin: • If form type is NOT "Generic" AND any of the secure zone attached to the form are recurring • Return error with message "{formTypeAlias}" form type is not allowed for the form that has recurring secure zones subscriptions assigned.
• If form type is NOT "Generic" • Show all non-recurring secure zones AND any already selected secure zones (even if they are recurring secure zones)
1) Shopping cart recurring rules Add validation for ‘add to cart’ and ‘buy now’ functions • All products in the shopping cart should have the same recurring type • allow only products with the same recurring type to be added to the shopping cart. (This restriction should be applied because token payments don't allow creating multiple subscriptions for different recurring periods using one single payment token) 2) Recurring Orders Once recurring order is created - mark it as “Main”
All orders that will be created by recurring payments for future payment cycles should be marked as “Suborder”. Link this order to the “Main” order.
Add suborders tab to the “Main” and “Suborders” detail page (api/orders/{id}/suborders) • https://projects.invisionapp.com/share/FTZVU4BE9HS#/screens/441983575 • Do not show deleted Main and Suborders in the list under suborders tab • If an order has been deleted before it is marked as Main, then; • restore it and mark as Main once recurring webhook is triggered
Add ‘IsRecurring’ and ‘MainOrderId' to Order object: https://prnt.sc/1xpmgbd 3) Canceling Recurring Subscriptions Provide ability to: Cancel recurring subscriptions on “Order” > “Suborder” tab (api/orders/{orderId}/cancel-subscription-on-secure-zone) - from the main order or any suborders https://projects.invisionapp.com/share/FTZVU4BE9HS#/screens/441983574 Cancel subscription by logged in user: • Add new properties to the order object in liquid: • `mainOrderId` (int) • Tag output: • Description: instance id of the main order if current order is a recurring sub order • if order has NO recurring subscriptions or the order is Main in recurring order sequence • null
• else • id of the main order
• `isRecurring` (boolean) • Tag output: • Description: true if order has attached recurring subscription
• `hasActiveSubscription` (boolean) • Tag output: • Description: true if order has attached recurring subscription AND it's state is Active, PastDue or Incomplete
• [UI] Add "Cancel Subscription Form" to "CRM" toolbox menu (Show starting Pro plan) • Code Generated:
• if the form is submitted by a user who is not logged in • show system error-page. With message: Not logged in users are not allowed to cancel subscriptions
• if the form is submitted by a user that doesn't belong to the subscription • show system error-page. With message: You can't cancel the subscription that wasn't created by you
After cancelling a subscription: • Still show main order and sub orders on “order” > “suborder” tab • do not show cancel subscription button
4) Recurring Events Add ability to create recurring event subscriptions. • add system field “Recurring Type” to the event system fields list (same field that is used for secure zones) • once payment is made using ‘SingeItem’ form linked to the event with “Recurring Type” not equal to None • create recurring subscription order using event price and period selected in Recurring Type
• On event delete action - if it has active recurring subscriptions - show an error message: The item with active recurring subscriptions can't be deleted 5) Recurring Generic Forms • Create a new form type for general recurring payment • “Recurring” (for general forms with arbitrary recurring payment collection)
• Only show and allow recurring secure zones via form’s Settings -> Secure Zones dropdown • add “Recurring Type” setting on Form -> Form Builder tab. • Do NOT show “None” option for Recurring Type • [UI] Show “Recurring Type” only if selected form type is “Recurring” (for both: create and edit form layouts)
• On Create form action • if Form Type is Recurring • Automatically add "Accept Payment" field to the form • If Recurring Type accidentally comes as NULL or None • Set ‘Daily’ by default
• On Edit form action (Form Builder tab) • if Form Type is Recurring • If the "Accept Payment" field is not selected on the form builder - show an error: Recurring form can't be saved without the "Accept Payment" field • If the "Email" field is not selected on the form builder - show an error: Recurring form can't be saved without the "Email" field
• on Recurring from submitting (accident cases that should be prevented by the logic described above but still may happen due to unexpected errors) • if Recurring Type is (NOT equal to None AND is NOT NULL) • create recurring subscription order using form price and period selected in Recurring Type
• else - show error message: Recurring form can't be submitted without the "Recurring Type" field • if the "Accept Payment" field is not selected on the form - show an error message: Recurring form can't be submitted without the "Accept Payment" field
6) Recurring Product • Change “Recurring Type” property options to be the same as for secure zones • Show error on checkout submit if products with different Recurring Types are added to the shopping cart: Recurring type [typeName] is not allowed for the current payment: gateway • create recurring subscription order using product price and period selected in Recurring Type • On product delete action - if it has active recurring subscriptions - show an error message: The item with active recurring subscriptions can't be deleted 7) Submitting form with recurring payment error cases • On form with recurring payment submit • If PaymentMethod is CreditCard OR Paypal • if PaymentMethod is FREE AND totalPrice after discount is 0 AND discount applies for ALL recurring payments • proceed request and create order
• else • Show validation error: • This payment type is not allowed for the recurring subscription
Improvements1
OSE Editor (former nICE)
UI • add new Froala WYSIWYG editor • remove jQuery dependency from nice frontend implementation BE • Add Nice content wrapping logic (like it was in v5) • Add simple text blocks wrapping logic (like it was in v5) • Add Nice scope collection and output via js for frontend scripts
Other updates30
Set “Enable Shipping” to true by default
Change the default value to “true” that is set for ‘Enable Shipping’ property on Product create action
Action Sources: • Product create form (admin UI http://prntscr.com/1w8tfm6 ) • Import Product (for new products only AND if Enable Shipping column is not specified in the file)
Send Invoice number to payment provider
On Payment Form submit after successful validation: • If current shoppingCart.invoiceNumber == null • Generate invoiceNumber • Set invoiceNumber to the shoppingCart.invoiceNumber • Set shoppingCart.invoiceNumber to payment data of the payment providers: • Eway • Authorize • PayPal Flow (simple payment) • Stripe (in metadata)
OSE (Nice)
UI • add new Froala WYSIWYG editor • remove jQuery dependency from nice frontend implementation BE • Add Nice content wrapping logic (like it was in v5) • Add simple text blocks wrapping logic (like it was in v5) • Add Nice scope collection and output via js for frontend scripts
CRM contact ‘States’ improvements
Add new Secure Zone verification setting to: • Settings -> Misc -> CRM Settings ️ • Enable email verification flow (Default = true) • When false: ️ • Do not send (or require) a verification email for secure zone subscriptions • On login - do not show validation error if isEmailVerified property of the member is false and just log the user in
Improve Secure Zone registration logic️: • If a user submits registration form with correct email and password (or if EnableEmailVerificationFlow=false AND if is first registration form submit): ️ • automatically log user in if isEmailVerified=true or EnableEmailVerificationFlow=false
Edit Account form - change email address • When member changes email address - create internal request for new email ️ • Validate if new email is not used ️ • if used - return false result
• If Enable email verification flow == true ️ • Set new email to desiredEmail property of the contact record • Send verification email ️ • If verified ️ • replace email with desiredEmail value
• Else ️ • allow login under old email until confirmed
• else ️ • replace email with desiredEmail value
CRM contacts ‘states’ indicator ️ Ability to see state of the CRM contact ️ • CRM contact crmType=Contact (no icon) • CRM contact crmType=Member AND isEmailVerified=true (blue icon) • CRM contact crmType=Member AND isEmailVerified=false AND EnableEmailVerificationFlow=false (blue icon) • CRM contact crmType=Member AND isEmailVerified=false AND EnableEmailVerificationFlow=true (grey icon) DESIGN: https://invis.io/TPZ0MD55NJA Liquid improvement Extend object of {% component type: "CRMContacts" %} ️ • add crmType property to contact object:️ • values • Contact • Member
• add isEmailVerified property to contact object️ (Boolean) • Extend filtering of {% component type: "CRMContacts" %} (add to toolbox also)️ • add to ‘filterBy’: • crmType • Contact • Member️
• isEmailVerified • true • false
• Note: these filters would search by actual CRM contact records data, regardless of the state of Enable email verification flow flag. Logic improvement • When the registration form is submitted • set crmType=Member ️
• When CRM contact edited by admin when a new password is set • set crmType=Member ️ • set isEmailVerified to true️
Resend Verification Email • Add “Resend Verification” button in admin (http://prntscr.com/13e3l2l) • show only if isEmailVerified=false
CRM Contacts Advanced Search • Add searching and sorting to CRM contacts • CRM Type • all • contacts • members
• Member Type • all • non-confirmed member • confirmed member
Update CRM Contact data scopes improvements and refactoring
Update CRM Contact data scopes improvements Refactor the CRM contact update function based on the following existing update scopes: • Update CRM contact from Admin UI Scope • Allow editing if • User is logged in into Admin UI via admin login form
• Disallow editing following fields • IsDataUsingAllowed
• Update Account Form Scope • Allow editing if • User is logged in via site login form
• Disallow editing following fields • Role
• Update CRM Contact Form Scope (form rendered by {% component type:"member_update_form" %}) • Allow editing if • User is logged in via site login form AND has Role==Admin
• Disallow editing following fields • IsDataUsingAllowed • Role
• Update CRM Contact via general form submit Scope • Disallow editing following fields • All Contact Fields • If (see Update CRM Contact and related data fix)
• Update CRM Contact via stripe customer portal Scope • Edit following fields on "customer.updated" webhook retrieve: • Email • Country • City • State • Address • ZipCode • Phone
Update Stripe customer data on update CRM contact action On any update account scopes (except Update CRM Contact via stripe customer portal scope) • if CRM customer has stripe customer relationship. • update the following stripe customer's fields: • Email • Country • City • State • Address • ZipCode • Phone
Update CRM Contact and related data fix On general form submit • 1) If CRM Contact by formSubmissionData.Email is already exists AND CRMContactRecord.crmType==Member • if form is a registration form AND Enable email verification flow == true AND CRMContactRecord.isEmailVerified==False • Go to Point 2)
• else • Skip updating existed CRM Contact data by info in formSubmissionData • Skip updating Advanced CRM Group fileds if group is attached to the Contact data • however create groups for Form Submissions, Orders and Event Bookings with the info from formSubmissionData if group is also attached to the appropriate CRM entity
• 2) else • Create or update CRM Contact data by formSubmissionData • If formSubmissionData.<contactFieldAlias> == "" - DO NOT update CRMContactRecord.<contactFieldAlias> ️
• Create or update Advanced CRM Group fileds if group is attached to the Contact data using info in formSubmissionData • If formSubmissionData.<AdvancedCRMGroupfiledAlias> == "" - DO NOT update AdvancedCRMGroup.<AdvancedCRMGroupfiledAlias> attached to the CRM Contact ️
• If form is a registration form • follow the registration process (improvements to the registration process are described in CRM contacts states improvements)
Update form field names for consistency
Change names for all fields from Camel Case to Pascal Case (start with capitalized letter) in order to set them to standard.
This change is backward compatible.
Change names on ‘Update Account Form’ layout: • email => Email • firstName => FirstName • lastName => LastName • confirmPassword => ConfirmPassword • password => Password • oldPassword => OldPassword • site => Site • address => Address • phone => Phone • city => City • state => State • zipCode => ZipCode • country => Country • status => Status • notes => Notes • All advanced crm group fields => UpCase first letter • example: dealersettings_FreeEuTaxation => Dealersettings_FreeEuTaxation
Change names on ‘General Form’ layout: • All advanced crm group fields => UpCase first letter • example: dealersettings_FreeEuTaxation => Dealersettings_FreeEuTaxation
Invoice number sequence shift on edit order
When editing order and changing invoice number • If new invoice number is bigger or equal to the next invoice number in invoice number sequence • next invoice number value in invoice number sequence to new invoice number+1
Check Wholesaler status on payment flows
For all forms • if from has field Accept Payment AND (formType is SingleItem OR Checkout) • Compare current logged in user type with CRM contact record determined by email in formSubmissionData (if no user is logged in - set as Consumer) • If they are different - show an error message: The submitter and CRM member types do not match.
Import Contacts improvement (update email flow)
On import for each contact record • if row contains id • if contact record found (by id) • if record email is different from import value • if there is no such email in the DB • change email for the record
• else • skip whole record update process
• else • update record
• else • skip whole record update process
• else • try find contact record by email • if found • update record
• else • create record
Add .stl .dcm extensions to the CMS
Add ability to upload files with extensions: • .stl • .dcm
Restrict selecting child module that is already set as parent to another module
Module -> Settings -> Advanced settings: • Allow creating foreign items from other existing Custom Modules setting • if the selected module is changed: • Do not allow to save linkage to that new module if it is already linked to another module as a parent or a child module. Show error: This module already has parent-child relation
Import the same items - doesn't work autocomplete URL's
https://treepl.slack.com/archives/C023SU50YQP/p1636929659049100 Create custom module and import files In files create several the same items with the same name and URL's (settings "disable autocomplete" should be turn off) Actual: After importing display items with the same URL's
Expected: If URL' s repeated - should be added 1 to URL's
Contacts - import with 100+ CRM fields doesn't work
• Go to CRM -> Contacts • Import file from attachments
Add in recaptcha v3 (live and trial sites) info about CMS_CustomSubmit https://www.screencast.com/t/rs4jGR6iNl - as on right side
Сustom module - create custom property with system name
• Create custom property with name - "Name" https://prnt.sc/1wlilt4 • After create the second custom property with the name "test" - display error https://prnt.sc/1wlio9x • After trying to add a new column in the table - display error too https://prnt.sc/1wlirp1 Expected: Create custom property without errors
Put this code on page {% component type: "CRMContacts", sortBy: "UpdatedDateTime", sortOrder: "DESC", collectionVariable: "customer", layout: "" %}
<pre>{{customer}}</pre>
Display
it results in Liquid Error: Expression of type 'System.Nullable`1[System.DateTime]' cannot be used for return type 'System.Object'
Admin Reset Member Password - in liquid add info about who was reset password
• Go to system email -> Admin Reset Member Password • Put in email {{this}} tag and reset some user password - email doesn't receive https://prnt.sc/1wmyclo Expected: In liquid should display email and name that user who change password https://prnt.sc/1wmypip
Go to Menu -> create a new item and assigned link -> in list of pages not correct order https://prnt.sc/1yr1vu6 AND https://prnt.sc/1yr3z1e
Liquid Error in Deferred Order Payment Email
Go to https://stage-test.trialsite.co/admin/system-emails/336 and add {{this}} on email content Notify the client with this message http://joxi.ru/L21BOJ3twvzX4A
Expected: the customer received an email with the correct content Actual: Liquid Error: Self referencing loop detected for property 'OrderStatus' with type 'eCommerce.BusinessModel.DomainModel.OrderStatus'. Path 'Order.OrderStatus.CustomWorkflows[0]'. http://joxi.net/gmvXNVjCewd93A
Time zone - incorrect time
• Create and update item • Check output {{this.LastUpdatedDate | date: "%a, %b %e, %Y - %r" }} • Site time differs from update time http://joxi.ru/Vm6Y13kC37WOKr
Group layout - should be {{this.id}}
In layout of group item not correct display {{this.id}} https://prnt.sc/1wzn9tv
Plan Restriction • Available starting from Pro Comments General logic description • Comments may be threaded (i.e. commenters can respond to existing comments) or flat (a chronological listing of comments). • We should have the ability natively to emphasize the module item’s author comments. • use item.addedBy of the module item and comment.author.id in condition in liquid comment layout
• Comments should have the ability to be added to any module items and products. • Prevent liquid and html in comments • html encode and wrap {% raw %}{% endraw %} on liquid
• Ability to mark comment links as “no-follow” for SEO reasons (auto-apply nofollow to the links on rendering or saving process) • Allow sending rating with comment • Available rating range 1-100
Add ability to delete comments • Add ability to edit comments • Add admin UI for comments and comment settings • Add ability to assign workflow notification once a comment is created Comments Moderation Add ability to moderate comments • Add page Content -> Comments Apply workflow to send a notification once the comment is created Moderators would receive a notification of new comments and have the ability to approve or deny comments. Design: • https://projects.invisionapp.com/share/UR11LP1167WB#/screens Comments Admin UI Show comment list on the page Content -> Comments Add filters for the comment list • Period • Show date picker to choose a date range
• Status • Approved • Pending • Spam
• Module • List of modules
• Module Item • List of module items
Design; • https://projects.invisionapp.com/share/XT11KVGCNJA8#/screens Comments settings Add settings to the page Content -> Comments Allow to setup • moderation of the new comments • moderation of the edited comments • comment sending policy • Options • Comment Once Only • Comments unlimited
• Prevent HTML in comments • strip all HTML from the body • find all links in the content and wrap it in <a href="[link]" rel="noindex, nofollow" >[link]</a>
Comment submit form The form should contain the following fields • Body • string (multiline)
• Rating • number • min 1 • max 100
• reCaptcha v3 Send workflow once a comment is created (if comment settings for the module contain workflows) If comment settings (moderation of the new comments) for the module required moderation - set the status to Pending If not - set the status to Approved Use Comment body saving rules once saving the item Show error message if comment settings (comment sending policy) is Comment Once Only and currently logged-in member already has at least one comment to the current item • Error message • You can't leave more than one comment for this item
[Create Comment] Form Example <form action="/public/api/comment/}?layout=" method="post"> [Reply to comment] Form Example <form action="/public/api/comment//?layout=" method="post"> <label>Rating</label> <input name="rating" type="number" min="1" max="100" /> <textarea name="postComment"></textarea> <input type="submit" value="Post" /> </form> Comment edit form Send workflow once a comment is edited (if comment settings for the module contain workflows) If comment settings (moderation of the edited comments) for the module required moderation - set the status to Pending Use Comment body saving rules once saving the ite [Edit Comment] Form Example <form action="/public/api/comment/edit/?layout=" method="post"> <label>Rating</label> <input name="rating" type="number" min="1" max="100" /> <textarea name="postComment"></textarea> <input type="submit" value="Post" /></form> Comment delete form Allow deleting comments that belong to the logged-in user only. • Error message • You can't delete comment that doesn't belong to you
General component Default Layout (/cms-assets/layouts/comments/template.layout):<div> class="comment-list"></div><a> href="/public/api/comments/load-more/?page=2&limit=&layout=">load more</a><form action="/public/api/comment/?layout="> <label>Rating</label> <input name="rating" type="number" min="1" max="100" /> <textarea> name="postComment"></textarea> <input type="submit" value="Post" /></form> Comment layout (/cms-assets/layouts/comments/comment_default.layout): Component Toolbox Add both components to • Comments • Thread List • Flat List
Improvements1
Ecommerce: Ability To Print And Re-send An Invoice From The Order (CRM)
Ecommerce
1) Packing Slip and Package Label layouts Add system Print Layouts for • Packing Slip • Package Label Store them on FTP in the following paths: • /Content/ShippingLayouts/PackingSlip.html • /Content/ShippingLayouts/PackageLabel.html Implement the following admin layouts and functionality: • Apply FTP sync functionality. • Create Shop settings -> Shipping Layouts tab (similar to Module Layouts tab http://prntscr.com/tj2psa ) Add layouts to the Shop settings -> Shipping Layouts tab. • On edit layout - allow editing content only (name should not be editable). Once edited - apply sync to FTP. 2) Print Buttons Add print icon ( https://invis.io/YAX7PB2EC3Q ) that would allow you to choose one of the following actions • Invoice • Packing Slip • Package Label Clicking on any of those should trigger print action of the corresponded layout (Invoice layout is an Invoice system email content).
Other updates58
Item Name
Parents
Test SubItem
/module-slug/test-parent
Test Parent
/module-slug
/module-slug;/module-slug/test-parent
• When applying parent relationship changes, import will show error and will skip applying changes to the item, if: • at least one of the parent urls • is not existing in the DB OR • is not successfuly prepared to be added from the current import file - see (3) and (4)
• Import will show error and will skip applying changes to the item if you set up several parents to the item and the parent item Module doesn't have setting "Allow multiple parents" == true.
6) Import will show error and will skip applying changes to the item on update item if `Parents` column contains URL of the current item (item could not be set as child to itself!)
NOTE: If an error will be applied to the item that is supposed to be a parent to some other items in the import file - all those child items will not be added/updated as well because of the error that one of the parent URLs does not exist as described above in (5).
FALSE
TRUE
See table 3
FALSE
See table 2
FALSE
TRUE
FALSE
TRUE
FALSE
TRUE
TRUE
TRUE
FALSE
TRUE
FALSE
TRUE
FTP sync time improvement
Significantly increased sync time when update pages, templates, snippets etc via FTP Fixed site errors when upload more then 100 files at once
Slowly works page
Fixed slow page load speed when used a lot of content for secure zone
Events - Start Date change after update 6.1.8
Ticket - https://services.treepl.co/qa-dashboard-tickets/4990/team_chat Go to https://www.tlcc.com.au/admin/module/1827/list-view?pageIndex=0&view=list-view Search 2022 or 2021 years Pay attention the name, start date and url, they have different dates http://joxi.net/a2XNoY7TQ4jzBr http://joxi.net/12MRoxVigkyDOA
Sitemap - Release date issue for blog post
Create new blog with future release date Go to site map and generate new sitemap New created blog with future release date should not showing in sitemap http://joxi.ru/Y2LaoD8txMekOA
Misc settings - checkbox in CRM settings is not saved
Go to Misc -> CRM settings and enable checkbox "Secure Uploads" Reload the page Pay attention on checkbox in CRM settings is not saved http://joxi.ru/YmE5opqTG9BRlm
JSON - not correct display custom properties and pagination
Create custom module with data source and CRM group Use this code {% component source: "__test team", layout: "", limit: "100", collectionVariable: "data", type: "module" %} Not display correct custom properties https://prnt.sc/1rkf2bd And info about pagination display not correct If you go to the second page https://prnt.sc/1rkui7t
favorites component
Not correct work includeItemData false. Not display correct ProductDataJsonHTML. Not correct display pagination and quantity.
Products - Sorting of group items doesn't work
Not correct order in group items http://joxi.net/V2V7ovGtB8JKEA http://joxi.net/MAj5aeRTd1K112
Secure Zone - secured files were opening to not logged users (If name secure item contains spec symbol)
Make the folder secure and add several files to it (https://stage-test.trialsite.co/admin/file-manager?path=%2f__SZ%20folder) Files can be accessed and downloaded even by unregistered users http://joxi.ru/EA4YxbaCXxaE5r http://joxi.ru/BA0YlbaC1V46Vr
Import contacts - secure zone is not deleted via import
Do export contacts Delete "Secure Zone" and "Secure Zone Expiration Date" fields in xlsx file and do import Go to imported contact and pay attention that the secure zone is not deleted http://joxi.ru/gmvXNVjCeM9BjA (works in v5)
Edit item from front - can't save empty field from front
Go to front and edit Description - delete all info and save In admin changes not applied https://prnt.sc/1v1eqou https://treepl.slack.com/archives/C023SU50YQP/p1633532626211100
not correct this.RecipientName where it should be this.PurchaserName
In Gift Voucher layout Uses this.RecipientName where it should be this.PurchaserName http://prntscr.com/t0ibqq
/admin vs /Admin
Go to https://stage.treepl.co/Admin and https://furnitura-copy-site.etrnl.me/Admin Error 404 on v6 http://joxi.ru/DrlW3MEhK0MwzA
Export - Secure Zone Expiry dates wrong/Import - assign Secure Zone
Go to Contacts and do export Pay attention on exportin file all Expiry Dates = "2099-12-11" http://joxi.ru/Y2LaoD8txvRpvA
URL with symbols doesn't open / download
Upload file via form (attached or https://stage-test.trialsite.co/admin/contacts/10163/form-submissions/10302) Try download file from form http://joxi.ru/D2Pnoy6twRlJyr or file manager http://joxi.ru/p27YyEgCLxvn6r
Attributes - set up a lot of domains
Create on Domains more than 3 and set up different currency Go to Product -> cteate attributes -> save all prices 0 https://prnt.sc/1v0q2z9 -> display "show more" https://prnt.sc/1v0q4fv
Order of catalogs not correct
Go to Products Open Catalogs tab - catalogs display is not correct order like on page Catalogs https://prnt.sc/1u8adja
Custom module - sorting by tags doesn't work
Go to custom modules and enable tags Add some items with tags Create new table with property "Item Tag " http://joxi.ru/L21BOJ3twVDRbA Try sorting items in list view http://joxi.net/YmE5opqTG9LbPm (it works in v5)
Error after clicking on the "login" button
Click on the "login" button without filling in the email address and password field https://prnt.sc/1upqpsv The following error will be displayed https://prnt.sc/1uqyzqy
Orders - Order statuses
Go to https://furnitura-copy-site.etrnl.me/admin/ecommerce-settings/statuses first bug - http://joxi.ru/xAeoWX8UMVqObm deleted items are showing in order editing second bug - http://joxi.ru/GrqakBVtzbq7nr after renaming the order status changed the name to the previous one after editing the content http://joxi.ru/ZrJKojEFQkljNm third bug - new order status emails used the content of previous emails http://joxi.ru/eAOOo65cvGl3zA
Advanced CRM Groups - Сhanges order after creating a new field and reloading the page
Go to Advanced CRM Groups Create new fields in any CRM group and click save Reload page Pay attention new fields change their position (https://www.dropbox.com/s/giv4det5q1faf2x/CRM%20random%20fields.webm?dl=0)
Advanced CRM Group - not display on thanky, workflow and autoresponder
create form with adc crm group (set up all types https://prnt.sc/1ubwm1q) On thank you, workflow and autoresponder - not display info https://prnt.sc/1ubjuh1 https://prnt.sc/1ubjwcn
Unassign secure zone from front-end
CRM contact Role field Add system field to the CRM contact record. Place it on the edit contact form and contact details page in the admin. Add Admin User indicator on the contact list. Field description: • Name • Role
• Type • select • Values • General • default
• Admin User
Restrictions: • Count CRM users with role Admin User as invited admin users to the site. Apply Site Plan restrictions to invite admin user or save new CRM record with role Admin User based on SUM of admin users plus CRM records with role Admin User • Show same error message on trying to create CRM contact with role Admin User as on inviting admin users. DESIGN: • https://invis.io/F310N6DTHPD8 Component for the subscriptions form {% component type:"member_update_form", source:"subscriptions", userId:"123", layout:"", collectionVariable:"" %} • Params Description • Source (required) • can take one of the following values • subscriptions • renders form that updates secure zone subscriptions info
• info • renders form that updates contact info
• userId (required) • id of the contact record • if empty or user can not be found - do not render the layout. CollectionVariable should be null. • if current logged-in user is NOT CRM contact with role Admin User - do not render the layout. CollectionVariable should be null.
• this object • Add ordering to the Show Secure Zones list • show in alphabetical order by secure zone name
{ // all fields like in {{request.currentmember}} https://docs.treepl.co/liquid/request-object#secCurrentMember // new fields marked in orange member : { "id": 162, "email": "asmith@example.com", "firstname": "Alex", "lastname": "Smith", "address": null, "city": null, "state": null, "zipcode": null, "country": "Australia", "site": null, "phone": null, "status": "", "notes": "", "type": 2, "isDataUsingAllowed": true, "createddatetime": "9/11/2019 3:32:23 AM", "updateddatetime": "3/24/2021 2:44:32 AM", // Add this field to the {{request.currentmember}} also "role": "Admin User", // Get ALL secure zones and add flag "issubscribed" : true|false // Do NOT change the {{request.currentmember}} object thisway "securezones": [ { "id": 1, "name": "Secure Zone 1", "landingpageid": 2541, "createddatetime": "2018-11-21T15:17:23", "updateddatetime": "2018-11-21T15:17:23", "expirydatetime": "2022-11-21T15:17:23" "issubscribed": true }, { "id": 2, "name": "Secure Zone 2", "landingpageid": 1234, "createddatetime": "2018-11-21T15:17:23.037", "updateddatetime": "2018-11-21T15:17:23.037", "expirydatetime": "9999-12-30T13:00:00" "issubscribed": false } ] }}
Toolbox Secure Zone -> Update Member Form Form validation and processing Create update member subscriptions form handler API • endpoint • /forms/members/update-subscriptions.ashx
• Add support of the jsonResponse param in GET params of the endpoint Validate submission: • If the currently logged in user is not null AND he has Role == Admin User • if formData.userId is empty - show validation message • UserId field is required
• elseif user can't be found by formData.userId - show validation message • User with specified id doesn't exist
• elseif user found by formData.userId has role Role == Admin User - show validation message • Users with "Admin User" role can't be updated
• else • Proceed to update member data the same way as it works in the admin UI
• else • Set Error message to the formSubmissionData: • Action restricted for your user role
• if jsonResponse • render formSubmissionData as json response similar to other form submissions
• else If current logged in user is null • Redirect to the 401 system page.
Admin UI -> CRM contact -> Subscriptions sort order Add ordering to the Show Secure Zones list • show in alphabetical order by secure zone name Component for the info form {% component type:"member_update_form", source:"info", userId:"123", layout:"", collectionVariable:"" %} • Default layout <form action="/forms/members/update-member.ashx" method="POST" enctype="multipart/form-data"> <input type="hidden" name="userId" value="{{this.member.id}}"/> //similar content as generates for update account form in /api/forms/system-form-templates ProfileFormTemplate // including advanced crm groups attached to the Contacts // replace request.currentmember. in values with this.member. in order to correctly fill the data into the form </form>
Toolbox Secure Zone -> Update Member Form Form validation and processing Create update member form handler API • endpoint • /forms/members/update-member.ashx
• Add support of the jsonResponse param in GET params of the endpoint Validate submission: • If the current logged in user is not null AND he has Role == Admin User • if formData.userId is empty - show validation message • UserId field is required
• elseif user can't be found by formData.userId - show validation message • User with specified id doesn't exist
• elseif user found by formData.userId has role Role == Admin User - show validation message • Users with "Admin User" role can't be updated
• else • Proceed to update member data the same way as it works in the admin UI EXCEPT of the Role and IsDataUsingAllowed fields. These fields are not allowed to be updated via this API. No error message is needed just skip the role field from the formData if it occurs there.
• else • Set Error message to the formSubmissionData: • Action restricted for your user role
• if jsonResponse • render formSubmissionData as json response similar to other form submissions
• else • Redirect to the 403 system page.
Import/Export Process for field Role Do not add this field to the import and export contacts process. The role could be assigned only via admin UI
Create mailing list based on custom report
Custom Report Changes Add Mailing List Sync group to the Custom Report -> Settings tab Fields: • Enable Sync With Mailing List • checkbox • once selected - show fields below
• Mailing List • dropdown • required once Enable Sync With Mailing List is selected • values • List of all mailing lists
• DO NOT ALLOW to select a mailing list that has already been used by another custom report
• Update Period (in hours) • number (int) • save 0 by default
• Sync Type • dropdown • values • "Add All Users From Report" (default) • "Adjust Mail List Users To Be The Same As In The Report" • "Remove Mail List Users That Are Collected In The Report"
DESIGN (take labels from task) • https://invis.io/DW10NCNEKU72 Update Report Logic Every hour try to find a custom report by condition: • report.EnableSyncWithMailingList == true AND • report.UpdatePeriod > 0 AND • (report.LastUpdatedDate + report.UpdatePeriod) < nowDate If found - force Generate Report flow Sync Logic Once Generate Report flow is triggered • Generate Report • If report.EnableSyncWithMailingList == true • Get all contacts from the report • Get mailing list by report.MailingList • Get all contacts added to a mailing list • if report.SyncType == "Add All Users From Report" • find all contacts from the report that are not added to the mailing list • add those to the mailing list
• else if report.SyncType == "Adjust Mail List Users To Be The Same As In The Report" • unsubscribe all contacts from the mailing list that are not matched to the report contacts • subscribe to the mailing list all contacts from the report contacts that are not subscribed yet
• else if report.SyncType == "Remove Mail List Users That Are Collected In The Report" • unsubscribe all contacts from the mailing list that are matched to the report contacts
An issue with grouped items import
After the products import, the grouped items were broken if the shipping was enabled for products.
Shipping Option - Radio button can't be enabled with the "Handling Charge" setting
• Go to Shipping Options -> edit -> settings • Change the fee for "handling charge" • Go to shopping cart • The switch can't be enabled with the "Handling Charge" setting
Bambora - order is created in Bambora, but not created in the admin
• Try to buy a product and on the last step - • Close the window • In Bambora the payment is created, but not in admin
Custom report - Advanced CRM group does not display in reports
• Create an Advanced CRM group and assigned it to Contact • Create custom report -> Contact and Secure Zone - no info from CRM group
Copying a site without custom properties
After copying a site in Custom Module item for a CRM data source field was empty
Orders - does not send an email when the status changes.
When I change the status CRM>Orders, the system updates the status but doesn't send the email.
The detail layout is being returned instead of the list layout layout
When the grouped product was selected from the dropdown, the detail layout was displayed instead of the list layout was displayed instead of the list layout.
Email - incorrect tags display
These tags aren't displayed correctly {{this.FormSubmissionData.Fields.Custom}} and {{this.FormSubmissionData.Fields.System}}
Catalogs - deleted catalogs
• Components->Ecommerce-> List of Catalogs -> Filter values - deleted catalog are displayed
Discount codes - stopped working
Some discount codes are not applied correctly on the front-end
Events - double import doesn't work
• Go to Events • Create an Event group and import files from attachments twice • The error gets displayed after the second import
Email - Workflow Notification
The form name is displayed incorrectly in the Workflow Notification email
Tree view on items
• Create more than 10 folders • Go to the second page and open one folder • Inside the folder create more than 10 folders • Go to a subfolder on the second page - incorrect URL display
Default shopping_cart - doesn't work
The default shopping_cart summary layout does not seem to be rendering anything.
Custom Module - random view works incorrectly
Initial randomized order of items won’t remain when navigating the pagination
Checkout form - incorrect info in admin
On checkout, when the user puts in shipping address, shipping city and shipping zipcode, that data overwrites the data the user has populated address, city and zipcode with. Does the user leave the shipping address blank on checkout, data the user has given as address for the crm gets deleted.
Bambora, PayPal - an email with “_”
• Go to buy a product and put email test_@test.co • Pay with Bambora or PayPal - returns error • If user submitted checkout form with testt3606_@ - ORDER page stops working in the admin
Customize table - error on list when createing same name in columns
• Create Property with name Description • Try to display this column on a table - error returned (validation required)
Event - not rendering {{this.parent.id}}
• Go to form for the event and add this tag into layout: {{this.parent.id}} https://prnt.sc/1r4k2dx • Open an event on the front-end - no parent ID is displayed
Customized column - "Supplier" column missing
• Go to any custom module->table and set up Supplier column • Go to list of custom modules items - no Supplier is displayed
Custom Report - no filtering by "form fields"
Custom reports couldn’t be generated by the form custom fields.
6.1.4
Blog search
Search within blog doesn’t work.
6.1.4
Time zone
Time zone bug: the Release date and Expiry dates are displayed
incorrectly.
6.1.4
Custom module
Search in custom module: the search doesn't work by min-max number and
min-max date time.
searchScope is only searching on the last property in the search string.
eg: only items with FieldTwo == Test Two are displayed:
If the property order around is switched, only items with FieldOne == Test One
are displayed: searchScope: "{'prop_FieldTwo':'Test
Two','prop_FieldOne':'Test One'}" All queries other than the last one
are ignored.
6.1.4
Events
The following error is displayed: "Liquid Error: Field not found in row:
CustomerTypeName" instead of the event payment form for the logged in
user. If the user is not logged in, the form displays fine.
6.1.4
Setup Analytics
Google script is being inserted even if no analytics is set up
(https://prnt.sc/1e1b4lx - there is no account ID in this script).
6.1.4
Liquid CRM
Filtration by customer ID for the cases, orders, bookings lists and
custom CRM group output.
6.1.4
Liquid
Roll back the output of arrays in liquid with wrapping in [] .
6.1.4
Products and Events
Optimize products, events, related items, grouped items, and favorites functions
6.1.4
Custom modules
If you render {{this}}, "Parent": null, ParentName and ParentUrl are missing on the page in the page folder.
6.1.4
SEO
This condition doesn't work: https://prnt.sc/1d358hv, when rendering {{this.SEOTitle}} on the system pages, nothing is rendered.
6.1.4
Liquid
The Id isn't rendered in the "orders" FormatSetting component: https://prnt.sc/1dzy1h8, therefore currency custom settings do not apply.
Customize table in Custom Module -> set up Added by - > the information isn't displayed on the list: https://prnt.sc/1bppzw6
6.1.4
Admin
Empty snippet -> create empty snippet -> add this snippet to the page -> there's a liquid error on the front end
6.1.4
CRM
When an admin user outputs information about contacts on the page {% component type: "CRMContacts", collectionVariable: "crm" %}, there is an extra token field that the admin user should not see. And an admin user who has different tokens is rendered multiple times:
https://prnt.sc/1gnkgv4
6.1.4
ID
Keep old ids (one-digit) mapping to the new ones (four-digit) for the following
- Workflow
- Mailing list
- Secure Zone"
6.1.4
Export
Custom module export bug: the custom properties were missing in the Excel file.
6.1.4
Export
If there were more than 2 products in the order, the products were displayed incorrectly in the Excel file (https://prnt.sc/1gmcjwz).
6.1.4
Export
Custom modules incorrect custom fields order output to the Excel doc.
6.1.4
Import
After catalog import, only the root folder was applied to products.
6.1.4
Import
Bug: Internal error when importing the custom module.
6.1.4
Shipping Options
The test shipping option couldn't be deleted from the admin if it was selected in the order.
6.1.4
Blog
"Internal error" after selecting the author for the blog.
6.1.4
Event
Even if the "Enable Bookings" checkbox was disabled, the events weren't displayed on the frontend.
6.1.4
Orders/cases
With 6.1.4 if the payment is canceled by the payment provider, there will be an error message after the form submission attempt, the case and order won't be created and therefore the workflow and autoresponder won't be sent.
6.1.4
Sitemap
The sitemap was generated incorrectly if the expiry date and release date were disabled in the custom module.
6.1.4
FormSubmissionData
{{FormSubmission.Order.ShippingAddress}} tag wasn't working correctly for the autoresponder, workflow and invoice.
6.1.4
Setup Analytics
The Tracking ID and View ID couldn't be saved in the "Setup Analytics" tab.
6.1.4
"Allow listing CRM contacts data" checkbox
Saving bug: the value of the "Allow listing CRM contacts data" checkbox wasn't saved properly (https://prnt.sc/1gmrhhs).
6.1.4
ID
Bug: incorrect user and form submission ID in the autoresponder.
6.1.4
ID
Note: If during the implementation you've hardcoded the IDs (e.g. secure zone or customer IDs), you'll need to change these IDs to the new ones.
6.1.4
Custom Module
Custom module create/edit functions:
1) The code (create/edit) is generated in the incorrect order: http://joxi.ru/v29Y8y7CR8ddK2
2) The categories are not saved: http://joxi.ru/nAy1g6eTa7yaYA
3) The tags from the form are not rendered to the front end: http://joxi.ru/E2pZxnMT4lOvbr
4) There's an error "access forbidden" after creating though an item is being created.
5) After editing the custom module the layout is changed to the default one: http://joxi.ru/n2YJo0YU73Gk3A
6) The redirect doesn't work when creating/editing (for instance, <input type="hidden" name="redirectURL" value="/my-new-confirmation-page">) a custom module:
http://joxi.ru/gmvXNVjCdkyvdA
6.1.4
Secure Zone
Create a form with a paid (daily) secure zone -> set up a form autoresponder {{this}} -> incorrect info about secure zone is rendered:
https://prnt.sc/1ginqhf
6.1.4
Liquid (concurrent processes error)
Intermittent liquid error when rendering menus: "Liquid Error: The process cannot access the file 'D:\iis\websites\4085\25585\ftp\Content\MenuLayouts\new_main_menu\Main Menu\menu.layout' because it is being used by another process.
6.1.4
Liquid (concurrent processes error)
Intermittent liquid error when viewing catalogs: "Liquid Error: Exception while reading from stream"
Select "Use default template" in the custom module settings - create an item and select "Use default template" - incorrect template is being displayed: https://prnt.sc/1be0xnr.
When you uncheck "Enable Bookings", the homepage layout completely breaks and for some reason ecommerce fields are shown in the backend and the event date fields are removed.
All pages connected with eCommerce are working slowly.
6.1.5
Category
module_category_list is not rendering the category IDs. The IDs are visible in the JSON collection output but do not render when looping {% component type: "module_category_list", module: "Blog Post", collectionVariable: "test" %} <pre>{{test}}</pre> <pre>{{test.Items[0].Id}}</pre>
6.1.5
Custom module
If "Enable bookings" checkbox is enabled https://prnt.sc/1ibjad4, the items aren't displayed on the front end.
6.1.5
Custom module
If "Enable bookings" checkbox is enabled https://prnt.sc/1ibjad4 and {{this}} is rendered on the item detail, the information on "hide when full", etc. related to the event will be missing.
DWG and DXF file formats weren't supported for media downloads.
6.1.5
Email Marketing
The API Key value wasn't saved in the "API Provider" tab.
6.1.5
Custom modules, Update Form
Custom module Update Form bug: the update form wasn't adding the "/" before the image URL. Also, the custom properties were deleted after the custom module was updated.
6.1.5
Custom module
The field information and custom properties were displayed incorrectly in the workflow.
6.1.5
Pages
Only folders were shown and the pages were missing in the "pages" tab on the tree view after the page folder was edited and the "back" button was clicked.
6.1.5
Form / form submission
The form submissions had the incorrect time. The same issue was with event bookings.
6.1.5
Recaptcha
"Create Login", "Reset password" and "Update Account" form bug: if the Recaptcha v2 or v3 was set up, the error was displayed after the form submission.
6.1.5
Recaptcha
Bug: the user could submit a form without passing the Recaptcha verification. This affected the "Login", "Reset password" and "Update" forms.
6.1.5
Form / form submission
The autoresponder and workflow weren't sent after the form submission.
6.1.5
Emails
The system emails weren't sent.
6.1.5
Form
The redirect wasn't working for the "secure zone login" functionality and the user was redirected to the error page after logging into the secure zone.
6.1.5
Pages
The "Make item secure" functionality wasn't working correctly for pages and folders, the checkbox with the secure zone name couldn't be disabled.
6.1.5
Email Templates
The changes weren't displayed in the invoice even though the system template was edited.
Create a weekly paid secure zone -> pay for secure zone access -> an order is neither created nor secure zone is assigned to the user https://prnt.sc/1jflseu/, the form submissions are created
6.1.6
Site notifications
The issue with the email delivery is now fixed (this applies to workflows, autoresponders, "reset password" and "Invite admin user" emails, etc.)
6.1.6
Shopping cart
Bug: if two products were added to the shopping cart and one product was deleted, the error was displayed.
6.1.6
Stripe
The shipping address was displayed incorrectly in Stripe (only the country information was passed to Stripe after the payment).
6.1.6
Pages
BUG: the content was deleted in the parent folder when there was a URL conflict within the folder (identical URLs conflict).
6.1.6
FTP
The pages weren't shown in the "Pages" tab after they were uploaded via FTP. The pages weren't visible in FTP either.
6.1.6
Bambora
There was an issue with products purchase with the following settings for Bambora: https://prnt.sc/1mv8g20
6.1.6
Stripe / Bambora 3D secure / Pay with Pay Pal
If two-step card payment was selected for one of the following gateways: Stripe, Bambora, "Pay with Paypal", the internal error was displayed after the payment.
6.1.6
Authorize net
BUG: Even though the "Give one-day access before payment received" option was selected: http://joxi.net/DmBYjR7Cg9DaMr, the access wasn't granted to the user after payment.
6.1.6
Email domains
If the domain wasn't verified (the "Failed" status was shown in the admin) and the "Retry" button was clicked, the "internal error" was shown: https://prnt.sc/1mv4jvd
6.1.6
Taxes
Multiple identical tax codes were displayed in the dropdown on the shopping cart page if the user constantly logged in and logged out from the secure zone.
6.1.6
Cases
BUG: this.case couldn't be displayed on the page, the "Liquid error" was shown instead.
6.1.7
Payment settings
After removing the payment gateway settings and refreshing the page, they are coming back: http://joxi.ru/BA0YlbaCvgLaqr
Set an API Provider -> then go to Mailing Lists and create new -> an error is being displayed: https://prnt.sc/1indmrm
6.1.7
Liquid
{{request.request_data.referrer}} changed from displaying relative URLs to absolute URLs.
6.1.7
Liquid
The following tags do not work: {{this.formSubmissionData.fields.custom.Payment_ShippingAddress.value}} {{this.formSubmissionData.Fields.Custom.Payment_ShippingCity.value}} {{this.formSubmissionData.Fields.Custom.Payment_ShippingState.value}} {{this.formSubmissionData.Fields.Custom.Zip_Code.value}}
6.1.7
Event booking
BUG: The event bookings were displayed without an event name after the event was purchased and then deleted.
6.1.7
Time zone
The time was displayed incorrectly in admin in such cases: - for orders; - incorrect time for the {{this.order.invoiceDate}} tag;
6.1.7
Currency
After adding a new currentcy, add a product with the price and configure payment settings, then delete a product and payment settings and try to delete the currency -> an error is being displayed: http://joxi.ru/n2YJo0YU7LYB5A
6.1.7
WYSIWYG
BUG: If the image was inserted via WYSIWYG, the long image code was displayed in the code view instead of the short one.
If you go to the checkout forms and fill in all the fields (incl. zip, state, city or system city and address), everything works fine. If you don't fill all these fields on the checkout, the data the user has indicated as an address will be deleted in the site admin: https://prnt.sc/1qhjkbf
5.9.5 - {{this.InventoryProductVariations}} tag displayed such a data array: http://joxi.ru/4Ak6REZHjNy4V2With v6 you need to add specific tags to display elements of that data array:{{this.SKUCode}}, {{this.InStock}}, there's no access to PreOrder:http://joxi.ru/YmE5opqTGbDzRm http://joxi.ru/a2XNoY7TQ0aWWr
SEO -> select Enable Automation of sitemap https://prnt.sc/1qd0l8n -> go to Sitemap -> the automation doesn't work
6.1.8
Import with empty lines
If you go to an Event and make an export (there should be several lines empty in the file) https://prnt.sc/1q2tqgj -> and then import the same file -> it results in an error in the site admin, however, the import will be completed with empty items: https://prnt.sc/1q2u0g0
6.1.8
Weighting
If in addition to weighting in module items you'll add sorting by name to module output,the sorting by weighting will be ignored if filtering is in use. Without filtering weighting works correctly.
6.1.8
Custom module
When you create/update an item from the front-end, the info from the FormSubmissionData won't be displayed in the workflow.
6.1.8
Create items from the front-end
When you create/update an item from the front-end, incorrect time is displayed in the site admin: https://prnt.sc/1qhk320
Temporary restriction: currently, you can import up to 600 products. This restriction will be lifted in the upcoming releases.
6.1.8
Pages (UI)
After opening the pages in the list view and editing the page from the folder, this folder was added to the breadcrumbs. After clicking on this page from breadcrumbs, the "Analytics" page was opened in the admin.
6.1.8
Domain request
The following tag wasn't working correctly: {% component type: "domain_settings", collectionVariable:"domain" %} <pre> {{domain}} </pre>
6.1.8
URL redirect
The redirects with the .htm page suffix weren't working correctly (e.g. the redirect from contact.htm to contact)
6.1.8
Shipping Options
When the new catalog was created, it wasn't displayed in the "Shipping options settings" tab. The similar issue was for discounts ("apply discount to selected catalog" checkbox).
6.1.8
Liquid
The blog archives weren't displayed on the site when using this tag: {% component type:"module_archive", module:"Blog Post", parentItemId:"{{parentItemId}}", numberOfMonths: 2, layout:"/includes/archive.layout", sortBy:"date", sortOrder:"DESC" %}
6.1.8
Edit item from the front-end
If the created select element is not "multiple" for the "custom module update form" and the "---" is selected on the front-end, the changes were not saved in the admin.
6.1.8
Search by custom module
The search by the author wasn't working correctly in custom modules. The similar issue was for the "data source" drop down.
6.1.8
Custom Reports
The custom reports weren't running if the following items were selected for "Contacts and Orders" report type: Contact ID, First Name, Email, Order ID, Date submission. Also, the custom reports weren't created with the form custom fields.
6.1.8
Order of attributes
BUG: when the product was created, the attribute output was incorrect on the front-end.
6.1.8
Liquid
BUG: {{this['SiteSearchKeywords']}} wasn't rendered on the page.
6.1.8
WWW domain
The payment fields weren't displayed on the forms for the www domain, they worked correctly for the non-www version of the site.
6.1.8
Case sensitivity
BUG: the email fields were case sensitive
6.1.8
Import of items with identical names
If the items with identical names were added to the events export file, the incorrect URLs were displayed in the admin after the import of this file.
6.1.8
Liquid
- The following tags weren't working without "this":
{{FormSubmissionData}}
{{Order}}
- These tags weren't displayed in the invoice: https://prnt.sc/1r1yn06 ;
- when {{this.order}} was added to the invoice, the CaseID wasn't displayed;
- when <pre>{{FormSubmission.Order.ShippingAddress}}</pre> was pasted to the order page, the required info wasn't displayed;
- when <pre>{{FormSubmissionData}}</pre> was pasted to the order page, the required info wasn't displayed.
6.1.8
Products import
BUG: after deleting the IDs in the product export file and then importing this file, the following issues occurred: - the "prices" tab was blank; - the "internal error" was displayed in attributes, inventory, related items, grouped items.
6.1.8
Shopping cart
The setting "Lifetime for shopping cart" was working incorrectly.
6.1.8
Time in event booking/one time payment form
The incorrect payment time was displayed in the Orders -> "Payments" tab after purchasing the event or submitting a payment form (one-time payment).
6.1.0
Export
Orders export doesn't work if large amounts are separated by commas and
dots.
6.1.0
Site Search
Site search returns 'site is being indexed'.
6.1.0
CRM
Internal errror when registering to a Secure Zone.
6.1.0
Catalog
404 error when viewing catalogs on the site. It works correctly only
when adding catalogs to the URL.
6.1.0
Secure Zone
Logout from the Secure Zone doesn't work.
6.1.0
Archive
Archives do not work correctly.
6.1.2.8
Form
Autoresponder is missing content.
6.1.2.8
Secure Zone
A second Secure Zone can't be assigned to a contact - the page keeps
loading. If you assign 1 Secure Zone only - it works correctly.
6.1.2.8
Custom modules import/export
Custom modules import/export issues:
1) There's an error if importing right after the export:
https://prnt.sc/1dypkvi.
2) Incorrect property date is exported.
3) Templates aren't imported/exported correctly.
4) Modules categories aren't updated.
6.1.2.8
Custom modules
Custom modules items preview doesn't work (404) if "еnable bookings" has
been selected: http://prntscr.com/190pi2x.
6.1.2.8
JS is broken because of the ItemCategorieList.
6.1.2.8
Orders export
Orders export works incosistently.
6.1.2.8
Titles
There's an issue with titles output: a duplicate is rendered (both
titles are rendered for the page and the folder.
6.1.2.8
Shopping cart
Liquid error on the shopping cart even after resetting it to the default
layout.
6.1.2.8
Secure Zone
You can access a Secure Zone after the subscription has expired.
6.1.2.8
Products
500 error when creating a product.
6.1.2.8
It's impossible to render name and URL when adding data source to the
custom properties. When rendering {{this}}, these fields are
empty: http://prntscr.com/198uy0g.
6.1.2.8
Catalogs
Internal error when viewing catalogs list. "An error occurred.
(Exception while reading from stream)" on the product detail.
6.1.2.8
Site search
Products aren't shown in the site search results.
6.1.2.8
Workflows and autoresponders aren't sent.
6.1.2.9
CRM
Liquid error when rendering a contact and filtering by ID.
Internal error after trying to delete a contact or duplicating an admin
user.
6.1.2.9
Products grouping
"Group Items -> set up one product group https://prnt.sc/1dzv53y
-> add this code to the page: {% component source: ""Products"",
layout: ""List"", limit: ""100"", type: ""module"" %} only main group
product should be displayed on the page:
https://prnt.sc/1dzx1g2.
6.1.2.9
Admin
Incorrect order deletion. When the order was deleted in the "Orders"
tab, it wasn't deleted in the "Contatcs" -> particular contact ->
"Orders" tab.
6.1.2.9
The order was showing in the export file even though it was deleted.
6.1.2.9
The "Email invoice" and "Send test email" functionality wasn't working
(https://prnt.sc/1dzppf9).
Issue with system email tags output. Now these tags are not case
sensitive:
{{this.order}}
{{this.Order.Items[0]}}
{{this.customer}}
{{this.member}}
{{this.member}}
{{this.Member.SecureZone[0].Name}}
6.1.2.9
SKU code
SKU code issue: when the product had been created using the generated
SKU code and then this code was changed to the custom one, there was a
synchronization issue.
1) The payment process wasn’t working with the two-step card payments
and the “Redirect” checkout integration type (https://prnt.sc/1dzx3yt).
2) After the form submission, the list of the purchased products wasn’t
displayed on the frontend with the “Inline” and “Modal” integration
types.
6.1.2.9
Event Calendar
Issue with the calendar output on the frontend.
6.1.2.9
Events
When a paid event form was created, the event price wasn't displayed on
the frontend. The total amount wasn't calculated correctly after
changing the quantity. Also, the order was generated incorrectly.
Liquid tags
The {{liquidContext}} tag wasn't working correctly for the invoice,
workflow and autoresponder.
6.1.2.9
Liquid tags
When the currency on the domain was being changed (custom symbol), the
ToDomainMoneyFormat liquid filter wasn't changed:
https://prnt.sc/1dxqfr5.
Export
The custom properties and "parent" were displayed incorrectly in the
products export spreadsheet.
Custom modules
The "create/update custom module items from the frontend" functionality
has been fixed.
6.1.2.9
Product Group
"Liquid Error: Field not found in row: CategoryIdList" error was
displayed on the frontend instead of "select" (e.g. product size
options).
6.1.2.9
Case sensitivity
Case sensativity of the alias name: {% component type: "snippet", alias:
"menu_Desktop"%} and {% component type: "snippet", alias:
"menu_desktop"%} - both options are working fine now. The same applies
to SortBy: "weighting".
6.1.2.9
Form submissions output
The form submissions of the particular logged-in user weren't displaying
on the frontend.
6.1.2.9
Admin
The "Enabled" checkbox wasn't working correctly. Even though the item
was disabled, it was displaying on the frontend.
6.1.2.9
Products
In the "attribute" dropdown the values were displayed twice.
6.1.3
Forms
Even if the URL redirect was set up for the form, the redirect wasn't
working.
6.1.3
Liquid tags
The info about pagination wasn't displayed in the {{this}} tag for
modules (custom modules, blog, etc.):
https://skr.sh/s8oOfcT43ae
6.1.3
Blog
Issue with the incorrect author ID in Blog.
6.1.3
Advance CRM group
When rendering a CRM group field, all values are displayed instead of
logged-in user ones.
10 updates
New features2
Gift Cards And Discount Codes On Any Payment Forms
Ecommerce · Forms · Member Area
Gift Vouchers and Discount Codes can now be used with all form payments (general payment, paid Events, paid Secure Zone subscriptions). For Secure Zone Recurring Discount Settings: Add new settings to ‘eCommerce’ > ‘Settings’ > ‘Settings tab’:
“Recurring Settings” • Discount applies to • First Payment Only (default) • All Payments
Discount Code and Gift Voucher to forms: Ability to add ’Discount Code’ and ’Gift Voucher’ fields to the form builder. Generate following HTML on default form html:
Do not allow to add Discount Code or Gift Voucher field to the form type="checkout". If attempted, show error: “<fieldName> doesn't allowed on this type of the form”
Do not allow to change the type of the form to type="checkout" if it contains Discount Code or Gift Voucher field. If attempted, show same error as above. When payment proceeds - apply following Discount and Gift Voucher like it works on shopping cart. • SKIP applying on from type="checkout" • APPLY on • Generic form • General payment • Secure zone recurring payment
JS implementation: • Add ’priceCalculation.js’ to the head section of the page if form contains Discount Code or Gift Voucher field. • Implement algorithm in JS that decreases price when Discount and/or Gift Voucher applies (trigger it on ’Payment_DiscountCode’, ’Payment_GiftVoucher’ or ’Payment_Amount’ field change event): • Take ’PaymentAmount’ form ’name="Payment_Amount"’. • Take value of ’GiftVoucherValue’ based on ’Payment_GiftVoucher’ • Take value of ’DiscountCodeValue’ based on ’Payment_DiscountCode’ • DiscountCodeValue = PaymentAmount * DiscountCodePercentageValue or • DiscountCodeValue = DiscountCodeAmountValue implement and use frontend API request to determine values of a discount code and a gift voucher. • Return validation errors for DiscountCode AND GiftVoucher (see shopping cart errors)
• Set ’TotalCost’ to <input id="PaymentTotalCost"/> of the current form
Discount payment flow: • If PaymentAmount matches the required payment amount for the current form (for Generic form with recurring secure zones - sum of all recurring subscription prices. For SingleItem - priceOfEvent*allocation) • If DiscountCode is applied AND (DiscountCode IS expired OR RedemptionQuantity == Expire After x Redemption OR DiscountCode IS disabled) • Show appropriate validation error (see shopping cart errors)
• Else • Begin • Create Order. • Set OrderLine price to PaymentAmount • Apply Discount and/or Gift Voucher • DO Increase RedemptionQuantity for the Discount
• Then • Get TotalCost by the logic described above.
• Then • If Discount applies to == First Payment Only • Create Recurring Payment • Set first payment Price to TotalCost and recurring Price to PaymentAmount
• elseif Discount applies to == All Payments • If DiscountCodePercentageValue == 100 • Create secure zone subscriptions with expiration date 31-Dec-9999 • Do NOT Create Recurring Payment
• else • Create Recurring Payment Set first payment Price to TotalCostand recurring Price to PaymentAmount * (1-DiscountCodePercentageValue/100) • if TotalCost == PaymentAmount * (1-DiscountCodePercentageValue/100) • set general recurring payment with price == TotalCost
• Then • if GiftVoucherValue > 0 and (PaymentAmount - DiscountCodeValue) > 0 • GiftVoucherBalance = GiftVoucherValue - (PaymentAmount - DiscountCodeValue) • Apply GiftVoucherBalance to the GiftVoucher
• else • show current validation error message
• Then • When recurring payment triggers webhook • Get Parent Order's DiscountCode • Get Parent Order's OrderLine • Create order using OrderLine and DiscountCode • DO NOT increase RedemptionQuantity for the DiscountCode
For Stripe: For recurring payment if payment gateway is STRIPE If Discount applies to == All Payments AND applied DiscountCode and GiftVoucher - show validation message: “Current site settings doesn't allow applying Discount Code and Gift Voucher at the same time for recurring payments”
Examples: Examples of secure zone subscription purchase (Discount applies to == First Payment Only):
1. For % off discount, it should be a one-time discount. So that the renewal is at the normal rate for that subscription.
For instance: • subscription cost $100 • 50% discount
Result • first payment: 100*0.5 = $50 • recurring payments: $100
2. For dollar amount discount, it would work the same way - on the initial purchase only. All recurring invoices would not use the discount.
For instance: • $100 subscription • $50 discount • $30 gift voucher
Result • first payment 100-50-30 = $20 • all recurring payments: $100
Stripe Customer Portal
Ecommerce
Implement Stripe Customer Portal Page (What is this? https://stripe.com/docs/billing/subscriptions/customer-portal) Liquid: Add link for the Stripe Customer Portal into the request member object: ‘request.currentmember.StripeCustomerPortalLink’
When clicking on the link: • if current logged in user == null • Render content of 401 System Page
• Else, verify if current logged in user equals to order's CRM contact • If true: Open Stripe Customer Portal page • Else: Render content of 403 System Page
Implement Flows triggered by the Stripe Customer Portal
Cancel Recurring Flow: • If subscription canceled from Stripe Customer Portal - cancel subscription in the CMS
Change Subscription (that contains only one Plan): • If subscription plan was changed from Stripe Customer Portal - sync plan on the subscription in CMS
Change Email Address: • If email address changed from Stripe Customer Portal - begin change of CRM Contact -> Email property: • Create request to change email • send confirmation email to new email address • if confirmed - change email • else - do nothing
Change Billing Address: • If Billing Address changed from Stripe Customer Portal - change CRM Contact -> Billing Address accordingly
Change Phone Number: • If Phone changed from Stripe Customer Portal - change CRM Contact -> Phone property
Improvements2
Account Created In Portal
Admin Panel
In the Partner Portal in both the Live Site and Trial site settings, can we get a “Account Created” text field, which generates the exact date that the site was created? To go one step further, possibly if we can get the date the website went live?
So, Trial site settings would show: Date Trial Site was Created; and, Live Site settings would show: Date Trial Site was Created and the Date the Live Site went live.
Custom Reports: Customer And Order logic extending
CRM
Add following ”view” and ”filter” options to ”Customer And Order” report type allowing further order and individual product reporting/filtering:
• Product Name - Show dropdown of ALL product names on filter • Product Attributes - General string field on filter • SKU Code - General string field on filter • Product Quantity - Number field on filter • Product Price - Number field on filter • Product Total Price - Number field on filter • Order Discount Price - Number field on filter • Order Discount Code - General string field on filter • Order Gift Voucher Price - Number field on filter • Order Gift Voucher - General string field on filter • Order Shipping Price - Number field on filter
BC example: http://prntscr.com/15dpmrd When the following fields are selected for viewing - show each product data on a separate row.
Gift Cards + Discount Codes on form payments and secure zone subscriptions
Gift Vouchers and Discount Codes can now be used with all form payments (general payment, paid Events, paid Secure Zone subscriptions). For Secure Zone Recurring Discount Settings: Add new settings to ‘eCommerce’ > ‘Settings’ > ‘Settings tab’:
“Recurring Settings” • Discount applies to • First Payment Only (default) • All Payments
Discount Code and Gift Voucher to forms: Ability to add ’Discount Code’ and ’Gift Voucher’ fields to the form builder. Generate following HTML on default form html:
Do not allow to add Discount Code or Gift Voucher field to the form type="checkout". If attempted, show error: “<fieldName> doesn't allowed on this type of the form”
Do not allow to change the type of the form to type="checkout" if it contains Discount Code or Gift Voucher field. If attempted, show same error as above. When payment proceeds - apply following Discount and Gift Voucher like it works on shopping cart. • SKIP applying on from type="checkout" • APPLY on • Generic form • General payment • Secure zone recurring payment
JS implementation: • Add ’priceCalculation.js’ to the head section of the page if form contains Discount Code or Gift Voucher field. • Implement algorithm in JS that decreases price when Discount and/or Gift Voucher applies (trigger it on ’Payment_DiscountCode’, ’Payment_GiftVoucher’ or ’Payment_Amount’ field change event): • Take ’PaymentAmount’ form ’name="Payment_Amount"’. • Take value of ’GiftVoucherValue’ based on ’Payment_GiftVoucher’ • Take value of ’DiscountCodeValue’ based on ’Payment_DiscountCode’ • DiscountCodeValue = PaymentAmount * DiscountCodePercentageValue or • DiscountCodeValue = DiscountCodeAmountValue implement and use frontend API request to determine values of a discount code and a gift voucher. • Return validation errors for DiscountCode AND GiftVoucher (see shopping cart errors)
• Set ’TotalCost’ to <input id="PaymentTotalCost"/> of the current form
Discount payment flow: • If PaymentAmount matches the required payment amount for the current form (for Generic form with recurring secure zones - sum of all recurring subscription prices. For SingleItem - priceOfEvent*allocation) • If DiscountCode is applied AND (DiscountCode IS expired OR RedemptionQuantity == Expire After x Redemption OR DiscountCode IS disabled) • Show appropriate validation error (see shopping cart errors)
• Else • Begin • Create Order. • Set OrderLine price to PaymentAmount • Apply Discount and/or Gift Voucher • DO Increase RedemptionQuantity for the Discount
• Then • Get TotalCost by the logic described above.
• Then • If Discount applies to == First Payment Only • Create Recurring Payment • Set first payment Price to TotalCost and recurring Price to PaymentAmount
• elseif Discount applies to == All Payments • If DiscountCodePercentageValue == 100 • Create secure zone subscriptions with expiration date 31-Dec-9999 • Do NOT Create Recurring Payment
• else • Create Recurring Payment Set first payment Price to TotalCostand recurring Price to PaymentAmount * (1-DiscountCodePercentageValue/100) • if TotalCost == PaymentAmount * (1-DiscountCodePercentageValue/100) • set general recurring payment with price == TotalCost
• Then • if GiftVoucherValue > 0 and (PaymentAmount - DiscountCodeValue) > 0 • GiftVoucherBalance = GiftVoucherValue - (PaymentAmount - DiscountCodeValue) • Apply GiftVoucherBalance to the GiftVoucher
• else • show current validation error message
• Then • When recurring payment triggers webhook • Get Parent Order's DiscountCode • Get Parent Order's OrderLine • Create order using OrderLine and DiscountCode • DO NOT increase RedemptionQuantity for the DiscountCode
For Stripe: For recurring payment if payment gateway is STRIPE If Discount applies to == All Payments AND applied DiscountCode and GiftVoucher - show validation message: “Current site settings doesn't allow applying Discount Code and Gift Voucher at the same time for recurring payments”
Examples: Examples of secure zone subscription purchase (Discount applies to == First Payment Only):
1. For % off discount, it should be a one-time discount. So that the renewal is at the normal rate for that subscription.
For instance: • subscription cost $100 • 50% discount
Result • first payment: 100*0.5 = $50 • recurring payments: $100
2. For dollar amount discount, it would work the same way - on the initial purchase only. All recurring invoices would not use the discount.
For instance: • $100 subscription • $50 discount • $30 gift voucher
Result • first payment 100-50-30 = $20 • all recurring payments: $100
Stripe Customer Portal
Implement Stripe Customer Portal Page (What is this? https://stripe.com/docs/billing/subscriptions/customer-portal) Liquid: Add link for the Stripe Customer Portal into the request member object: ‘request.currentmember.StripeCustomerPortalLink’
When clicking on the link: • if current logged in user == null • Render content of 401 System Page
• Else, verify if current logged in user equals to order's CRM contact • If true: Open Stripe Customer Portal page • Else: Render content of 403 System Page
Implement Flows triggered by the Stripe Customer Portal
Cancel Recurring Flow: • If subscription canceled from Stripe Customer Portal - cancel subscription in the CMS
Change Subscription (that contains only one Plan): • If subscription plan was changed from Stripe Customer Portal - sync plan on the subscription in CMS
Change Email Address: • If email address changed from Stripe Customer Portal - begin change of CRM Contact -> Email property: • Create request to change email • send confirmation email to new email address • if confirmed - change email • else - do nothing
Change Billing Address: • If Billing Address changed from Stripe Customer Portal - change CRM Contact -> Billing Address accordingly
Change Phone Number: • If Phone changed from Stripe Customer Portal - change CRM Contact -> Phone property
Custom Reports: Customer And Order logic extending
Add following ”view” and ”filter” options to ”Customer And Order” report type allowing further order and individual product reporting/filtering:
• Product Name - Show dropdown of ALL product names on filter • Product Attributes - General string field on filter • SKU Code - General string field on filter • Product Quantity - Number field on filter • Product Price - Number field on filter • Product Total Price - Number field on filter • Order Discount Price - Number field on filter • Order Discount Code - General string field on filter • Order Gift Voucher Price - Number field on filter • Order Gift Voucher - General string field on filter • Order Shipping Price - Number field on filter
BC example: http://prntscr.com/15dpmrd When the following fields are selected for viewing - show each product data on a separate row.
Allow module child item search from Tree View (same as List View)
Blogs · UI/UX
The ability to search in nested module items and in Tree View (like you can in List View) for Pages, Snippets, Custom Modules, etc. This brings list search to all modules now, including Blogs, Banners, Galleries, etc.
Add ability to select the version of reCaptcha used for system forms
Add section to ‘Settings’ > ‘Misc’ with the ability to choose reCaptcha v2 or reCaptcha v3 to use on all system forms, which include: • login form • restore password request form • reset password form (on ’reset-password’ system page) • Update account form
Selected reCaptcha will affect both, the way the form's html is generated from the toolbox/component manager, and the reCaptcha validation for the submit action.
Module Introductory Note: allow adding an introductory paragraph to the module list view
Admin Panel · Custom Modules
Allow adding an introductory paragraph to the module list view to give editors some guidance. Sometimes we want to give users some general directions for a module or some context on how a module is being used and what part of the website it populates.
Proposed solution: Allow the addition of notes to a module that would be displayed inline above a module’s list view. Suggest that they are in a collapsible accordion that would be open by default, but after being closed by the user it would remember its state and stay closed on future visits.
New liquid engine provides much faster data retrieval than the previous version. However there are also some differences in liquid work between versions.
Mostly they are the fixes of previous functionality that was semi-broken but still could be used by some partners as it was.
In that case such use of the buggy implementation required it to be fixed.
Ability to rename site name in Treepl Portal (under site settings)
Export site details
Export data for Trial and Live sites Show button that performs export all sites details [in excel format]
For Live sites: File Name: “Live_Sites_Export_${dateStr}.xlsx” Export Data: • Site Name • Live Site URL (Primary domain) • Trial Site URL • Plan • Plan Fee • Date Created • Expiry Date For Trial sites: File Name: “Trial_Sites_Export_${dateStr}.xlsx” Export Data: • Site Name • Trial Site URL • Plan • Date Created
Restrictions: • Allowed for portal owner role (‘Partner’, ’Agency’ and ’Treepl User’ (added to the ’Agency’ portal)) • Not available for ’Free user’ and ’Associate’ levels
Renewal notifications
Renewal checker will ping sites for renewal info. If site found that matches condition - send email notification.
Conditions: If current date is: • for site with monthly subscription • 3 days priorthe date of subscription
• for site with annually subscription • 1 month (30 days) prior the date of subscription • 3 days prior the date of subscription
Email sending conditions: • Send email only to account owner • if account owner is agency - DO NOT send email to there Treepl user/s
• If subscription created via direct billing flow • send email to payer • send email to account owner
Email notifications: Create emails templates for monthly and annual subscription DESIGN: https://invis.io/H6111B3M9PYQ
New liquid engine provides much faster data retrieval than the previous version. However there are also some differences in liquid work between versions.
Mostly they are the fixes of previous functionality that was semi-broken but still could be used by some partners as it was.
In that case such use of the buggy implementation required it to be fixed.
Allow module item search from Tree View (same as List View)
The ability to search in nested module items and in Tree View (like you can in List View) for Pages, Snippets, Custom Modules, etc. This brings list search to all modules now, including Blogs, Banners, Galleries, etc.
Pagination on tree view module items
1) Add pagination for tree view in admin panel (UI is the same as for list view).
Pagination is now applied to both ’Parent’ items (viewed as folder icons) and ’Child’ items (viewed as file icons) and acts upon the whole list.
2) Apply Sorting via backend. Default sorting is not set (sort "folders" (parent module items) first then "files" (child module items)).
Remember latest applied sorting (like it's done for list view). Store sorting field/sort direction separately from list view so they are remembered independently.
3) Add searching by name for the current level
Show/Hide Inactive/Disabled Items
The ability to show/hide inactive/disabled items across all modules. • showing all enabled and disabled • showing just enabled • showing just disabled
Allow adding an introductory paragraph to the module list view to give editors some guidance. Sometimes we want to give users some general directions for a module or some context on how a module is being used and what part of the website it populates.
Proposed solution: Allow the addition of notes to a module that would be displayed inline above a module’s list view. Suggest that they are in a collapsible accordion that would be open by default, but after being closed by the user it would remember its state and stay closed on future visits.
Add ability to select the version of reCaptcha used for system forms
Add section to ‘Settings’ > ‘Misc’ with the ability to choose reCaptcha v2 or reCaptcha v3 to use on all system forms, which include: • login form • restore password request form • reset password form (on ’reset-password’ system page) • Update account form
Selected reCaptcha will affect both, the way the form's html is generated from the toolbox/component manager, and the reCaptcha validation for the submit action.
One big universal template with all the features and functionalities that Treepl offers: TEMPLATE MAX
Improvements4
Ability to use variables in for tag
Liquid
Ability to use `limit` and `offset` param value via variables (not just via pure numbers). Example: {% assign array = "1,2,3,4,5,6,7,8,9" | split: "," %} {% assign off = 3 %}
Ability to use ‘from’ and ‘to’ param value via variables (not just via pure numbers). Example: 1<br> 2<br> 3<br> 4<br> 5<br>
Before update, such code caused: Liquid Error: Object reference not set to an instance of an object.
Add ReleaseDate and Enabled properties to add/edit module item form for logged in users
Custom Modules
Add `prop_ReleaseDate` to the add and edit module item HTML forms, retrieved via the Component Manager/Toolbox. Add ability to use `prop_Enable` to add/edit module item controllers. On ADD form; if `prop_Enable` is specified in form submission - apply its value only if there is no admin approval required rules in place for the module.
Default list layout for favorites list
General
Added default list layout for favorites (list of all items added to favorites). Default layout will render: Name, description and URL to item. New layout file created `list.layout` at `/cms-assets/layouts/favorites/` (https://prnt.sc/10v7n7j) Admin Component Manager: Rename `CRM > Favorites` to `CRM > Add to Favorites Button` Add `itemId` param. Add item search to this field if `source` selected (preset with `5526`) Remove limit param from this area (it only makes sense for favorites list) Add CRM > Favorites list Preset list layout with path to new layout file `/cms-assets/layouts/favorites/list.layout` (https://prnt.sc/10vbu8z).
Improve Stripe payment error messages and payment form onsubmit
Ecommerce
Submit flow for payment forms and/or recaptcha v3 formshas been reworked. Backend: `formSubmissionData`object (for both JSON response and Liquid) now will always have `FormRedirectLink` property. Value will be either: system thank you page for the form custom redirect link (from redirectURL hidden field for that the form) or redirect URL for Payment_Method==Paypal or bamboraEU (redirect) payment gateway NOTE: `FormRedirectLink` will be set even if there are errors in the `ErrorMessages` property. If you go to the link without checking for errors – they will be set to `formSubmissionData`Liquid object on that page as well, but only for the first page load.
Frontend: Improve reCaptcha v3 and payment JS. Added new custom event that will be triggered after all reCaptcha v3 validations (instead of the regular `submit` event) These events allows you to: - Add any additional validation actions and stop the form submit via `event.preventDefault();` function. - Perform AJAX submit of the form (with already validated recaptcha token and payment data) See documentation for these events and example here: https://docs.webinone.com/ecommerce/shopping-cart-javascript#secPaymentFormEvents
Other updates5
Default list layout for favorites list
Added default list layout for favorites (list of all items added to favorites). Default layout will render: Name, description and URL to item. New layout file created `list.layout` at `/cms-assets/layouts/favorites/` (https://prnt.sc/10v7n7j) Admin Component Manager: Rename `CRM > Favorites` to `CRM > Add to Favorites Button` Add `itemId` param. Add item search to this field if `source` selected (preset with `{{this.id}}`) Remove limit param from this area (it only makes sense for favorites list) Add CRM > Favorites list Preset list layout with path to new layout file `/cms-assets/layouts/favorites/list.layout` (https://prnt.sc/10vbu8z).
Improve Stripe payment error messages and payment form `onsubmit`
Submit flow for payment forms and/or recaptcha v3 formshas been reworked. Backend: `formSubmissionData`object (for both JSON response and Liquid) now will always have `FormRedirectLink` property. Value will be either: system thank you page for the form custom redirect link (from redirectURL hidden field for that the form) or redirect URL for Payment_Method==Paypal or bamboraEU (redirect) payment gateway NOTE: `FormRedirectLink` will be set even if there are errors in the `ErrorMessages` property. If you go to the link without checking for errors – they will be set to `formSubmissionData`Liquid object on that page as well, but only for the first page load.
Frontend: Improve reCaptcha v3 and payment JS. Added new custom event that will be triggered after all reCaptcha v3 validations (instead of the regular `submit` event) These events allows you to: - Add any additional validation actions and stop the form submit via `event.preventDefault();` function. - Perform AJAX submit of the form (with already validated recaptcha token and payment data) See documentation for these events and example here: https://docs.webinone.com/ecommerce/shopping-cart-javascript#secPaymentFormEvents
Add Release date to Add/edit item forms
Add `prop_ReleaseDate` to the add and edit module item HTML forms, retrieved via the Component Manager/Toolbox. Add ability to use `prop_Enable` to add/edit module item controllers. On ADD form; if `prop_Enable` is specified in form submission - apply its value only if there is no admin approval required rules in place for the module.
Liquid improvement: Ability to use variables in {% for %} tag
Ability to use `limit` and `offset` param value via variables (not just via pure numbers). Example: {% assign array = "1,2,3,4,5,6,7,8,9" | split: "," %} {% assign lim = 3 %} {% assign off = 3 %} {% for item in array limit: lim offset: off reversed %} {{item}}<br> {% endfor %}
Ability to use ‘from’ and ‘to’ param value via variables (not just via pure numbers). Example: {% assign from = 1 %} {% assign to = 5 %} {% for item in (from..to) %} {{item}}<br> {% endfor %}
Before update, such code caused: Liquid Error: Object reference not set to an instance of an object.
Bug fixes2
Fix secure zone assignment via forms with Payment Method == Cash
Now, secure zone should be assigned once payment is added to the order and its status changed to paid.
Volume Discount applying fix
Now, volume discount applies based on SUM of quantities of all product variations instead of applying per variation only.
1) Analytics Customization • https://prnt.sc/x8ckpz • https://prnt.sc/x8c7mt • delete chart • reorder chart using drag and drop • edit single chart (see point 2 below) • Ability to restore analytics to default (https://prnt.sc/x8c9yz) • ability to add chart to the analytics layout 2) Single Chart customization • https://prnt.sc/x8c3hy • change width via col size dropdown • show/hide tabs buttons (for tabbed charts) • default period of days selector • Chart title customization 3) Add Chart to analytics • https://prnt.sc/x8ccae • clicking add - creates empty chart panel • clicking add button inside - opens chart selector (https://prnt.sc/x8cddk) 4) Restrictions Feature available on PRO Plan and higher.
Other updates7
Favorites
1) Add/remove from favorites actions Add two GET URLS (public api), one for “add” and one for “remove”, for logged in users with `itemId` as parameter (id of module item that should be added to favorites)
• `moduleIdentifier` (required) - moduleName or moduleId. • `itemId` (not required) - id of the module item • `limit` (not required) Default=ALL - number of items to be rendered • `collectionVariable` (not required) - works the same way as other modules. • `layout` (not required) - path to FTP file that will contain layout content to be parsed. - If specified empty string - do not render anything. - If not specified at all - render default virtual layout (see design link below). • `includeItemData` (not required)- true/false boolean. Default=false
Default sorting by `CreatedDateTime` DESC.
Single item context is: • Id • FavoritesInfo • IsFavorite • CreatedDateTime • AddToFavoritesURL • RemoveFromFavoritesURL
(If `includeItemData` == true, the modules typical data will be included along with the above “Favorites” data.
3) Add component to toolbox, under: “CRM” > “Favorites”
4) Add default JS and styles for favorites: Once added to favorites - change favorite icon appearance and switch URL from ’add to favorites’ to ’remove from favorites’. Once removed from favorites - change favorite icon appearance and switch URL from ’remove from favorites’ to ’add to favorites’.
If user is not logged in and clicks Add or Remove from favorites - redirect them to system error page with the following data: • {{this.ErrorType}} • FavoritesRequiresLogin
• {{this.ErrorMessage}} • You need to be logged in to the site in order to add this item to your favorites list.
Apply ability to request add and remove from favorites API urls with GET param `jsonResponse=true`. If `true` - return JSON response with error details (status code 401). Otherwise - redirect to error page with the above described type and message.
1) Add to data passed to eWay: • First Name • Last Name • Address • Postcode 2) Change ”Invoice Description” to <form name>
3) Add data passed to Stripe (only for one-time payment): • First Name • Last Name • Address • Postcode 4) Change ”Description” to <form name>
Show Product URL based on current catalog
On product detail show URL based on catalog that it’s contained in.
Modify component type module logic: If filtered by `parentId` add `this.url` value based on the parent determined by `parentId`, eg: • Item has 3 parents: • Parent_1 (ID 11) (shown by default) • Parent_2 (ID 22) • Parent_3 (ID 33)
• When {% component type:"module" %} for the example item this object should have • {{this.Url}} == "/parent1"
• When {% component type:"module", filterBy:"parentId", filterValue:"22" %} for the example item this object should have • {{this.Url}} == "/parent2"
• When {% component type:"module", searchScope:'{"parentId": "33"}' %} for the example item this object should have • {{this.Url}} == "/parent3"
Customize Analytics
1) Analytics Customization • https://prnt.sc/x8ckpz • https://prnt.sc/x8c7mt • delete chart • reorder chart using drag and drop • edit single chart (see point 2 below) • Ability to restore analytics to default (https://prnt.sc/x8c9yz) • ability to add chart to the analytics layout 2) Single Chart customization • https://prnt.sc/x8c3hy • change width via col size dropdown • show/hide tabs buttons (for tabbed charts) • default period of days selector • Chart title customization 3) Add Chart to analytics • https://prnt.sc/x8ccae • clicking add - creates empty chart panel • clicking add button inside - opens chart selector (https://prnt.sc/x8cddk) 4) Restrictions Feature available on PRO Plan and higher.
Copy File URL to clipboard
Add ability to get file’s URL in file manager and file manager toolbox. • Сopy File URL (relative URL) • Preview In New Tab
Rename following wording in the CMS: • Module -> Settings -> Advanced Settings • “Enable subscription” to ”Enable bookings” (http://prntscr.com/vxn4mi)
• Event -> Details: • “SUBSCRIPTIONS” tab renamed to ”BOOKINGS” (http://prntscr.com/vxmw13) • Table column ”Subscribed Date” to ”Booking Date” • Excel export table column (on import - react on both new and old name) - “Subscribed Date” to ”Booking Date” - “Allow Multiple Subscription Per Email” to ”Allow Multiple Bookings Per Email”
• Toolbox -> Events • Toolbox item name ”Event Subscription Form” to ”Event Booking Form” • Field Name ”Event Subscription Form” to ”Event Booking Form” (http://prntscr.com/vxn1ru)
• Form • Default user field title ”Accept Event Subscription” to ”Accept Event Booking” (http://prntscr.com/vxn41h)
• CRM -> Event bookings • Title ”Booking Subscriptions” to ”Event Bookings” (http://prntscr.com/vxn7gx)
Drop shipping feature improvement
Feedback description: When a visitor makes an order for several different items on one and the same order the system will create one purchase-order for each item even if they all are supplied by one and the same supplier. This obviously causes a lot of extra work for the suppliers. BC consolidated several items to one and the same purchase-order and only split the order if there were multiple suppliers to supply the items on the order.
Solution: Consolidate several items to one supplier email for the same order instead of sending supplier email for each product.
Description: New 'Notes' field against any custom field created in the admin. It would display next to the field when clients are creating Custom Module items and could provide additional info to help them when entering content. For example: with an image field, the note might read "This image is displayed as the thumbnail on your Team Members page and ideally should be portrait orientation and at least 500px wide". The note could perhaps be hidden under a help/info icon to keep the layout clean. On property add/edit form: Allow add notes (https://projects.invisionapp.com/...)
Source Description: Provide ability to change icon of the item in tree view (http://prntscr.com/vu9h50)
• Add icon field to the `module` > `settings` page http://prntscr.com/vuhivv. Provide ability to choose icon from the system or custom library. • Store icons in /admin-assets system folder. Store folder outside FTP folders. • Provide ability to add icon to the icons custom library (on Admin menu configurator page). Design: https://invis.io/S6ZFRJWRNJG Suggested icon dimensions and extension: 24x24px, SVG • Change icons display logic on module items tree view • if module has custom icon - show it instead of "File" or "Folder" icon • else - show icon as previously: - if module is Parent module - "Folder" icon - if module is Child module - "File" icon
Description: Currently pagination outputs raw unordered list. Apply some default formatting to remove the bullets from the list and make it horizontal. Also by default it would be nice to truncate the pagination with “…” and show the last page if there are over 5 pages. If we really want to get fancy we could make the default styling along these lines. https://prnt.sc/vv8ivx
1) Component param Add param to component type `module` and `module_of_member` • styledPagination : "true" • default value is false • if true - show new pagination structure instead of old one
2) Toolbox • Show under ”Display Pagination” • if checked - show new pagination structure instead of old one • Hide if ”Display pagination” is false • Set default value to true. But reflect in component string only if display pagination is true
Applies to the following modules: • Custom module (Groups and Item lists) • Blogs (Groups and Item lists) • Gallery/Slider (Groups and Item lists) • FAQ's (Groups and Item lists) • Banners (Groups and Item lists) • Authors • Events (Groups and Item lists) • eCommerce (Catalogs and Product lists)
Admin UI changes (v5.9)
Admin Panel · UI/UX
Task list: • Add site Name and User Name to the header (https://invis.io/N5ZHIBBCKZJ) • Add notifications indicator with description in tooltip http://prntscr.com/vvmpzk • Fix datasource search in datasource pickers (search by `contains` rule instead of the `name starts with` - https://prnt.sc/vv8pm7) • Sort datasource items alphabetically in datasource pickers (https://prnt.sc/vv8pau) • Add button that will trigger sort all module tags alphabetically (https://prnt.sc/vv8q36) Add confirmation popup in order to prevent accidentally sorting. • Add loader and notification on: • Import module items • Export module items • Duplicate module item • Designs: - https://invis.io/FJZHI9XDE3B
- https://prnt.sc/vv907c - blinking circle and message that shows what process is currently working
- https://prnt.sc/vv910x - message that shows when you try to close the tab where background process is working
• Add to `Settings` -> `Misc` ability to switch off warning message (https://prnt.sc/vv92oq) when you switch between wysiwyg and ACE editors (https://prnt.sc/vv934e) Default value is false • Improve tree view of Gallery/Slider modules on all sites: - remove `url` and `template` columns - add `image` column
Description: Validation warning for general URL conflicts before saving item. ie: for Pages and other items not influenced by the Advanced URL Manager.
1) Update `Settings` -> `Misc` in group “Admin Panel Settings” with new setting “Disable autocomplete for already taken URL slugs” (default is ‘false’)
2) Logic If `true` - do not add `-1` to the slug on save. Throw validation error message "Warning: Duplicate URL" If false - logic should be as it was earlier.
Misc Improvements (v5.9)
Admin Panel · General · UI/UX
- Set 404, 403 and 401 status codes when showing appropriate system pages - Improve GDPR control, Contacts and advanced CRM groups - Ability to "Favorite" a module item - CRM -> Bookings: Export to Excel to be filtered by form name?
Description: A ‘Recent Items’ section to quickly go back into last page/module you were in, without having to navigate back to that page.
Functionality • Store history in session storage. • Add to visited pages recent item history. If the page is already in the history - move it up in the history list (instead of adding duplicate history item). • Remember 10 last visited pages.
Description: Implement the icons in “Content” section that are already under the components insertion list. https://prnt.sc/vtq0wq All other icons on the 2nd level should remain the same. Apply it to all default menus. Leave custom menus as is.
2) Implement "immediateredirecttoaccept" setting: When the payment has gone through you end up on a "success" page on the bambora site and you can then click to go back to the Treepl site with the receipt. This can be passed so you don't see that page but go directly to the Treepl receipt page via the "immediateredirecttoaccept" parameter. Bambora Documentation: https://developer.bambora.com/europe/...
3) Language control settings Provide possibility to select the language for the payment window.
4) Add transaction ID to the list view of the order (and allow search). eg: http://prntscr.com/vikmzm
Admin UI: Orders pagination (patch v5.8.1)
Improve Pagination speed (CRM -> Orders)
Invoices for portal payments (patch v5.8.2)
For direct billing with commissions: • Add billing address and personal details fields to the CMS billing page in order to add them to the invoice. • Make them required. • Send Invoice to the payer instead of the Agency user.
Set 404, 403 and 401 status codes when showing appropriate system pages
Implement server responses for 404, 403 and 401 statuses to set appropriate status codes and at the same time still display appropriate System Pages content.
12. [ ✔] In the “Form Builder” options, perhaps adjust the form ‘Type’ display names an provide a short explainer, eg 14. [✔ ] In Secure Zones, when setting “Membership Renewal Rate”, perhaps change the values from “Day, Week, Month, Year” to “Daily, Weekly, Monthly, Yearly” 23. [ ✔] On the Product settings tab, suggest changing “Max Downloads Allowed” to “Maximum Downloads Allowed” (for consistency) 30. [ ✔] For ALL module ‘Layouts’ tab, perhaps remove the redundant “Create New...” from the “CREATE NEW” dropdown option. Two example 31. [ ✔] For the Products/Catalogs “Layouts” tab, consider removing the ‘s’ from headings “Catalogs Layouts” and “Products Layouts” to just “Catalog Layouts” and “Product Layouts” 33. [ ✔] Consider adjusting “Discount Codes” menu item and headers to title-case 34. [ ✔] Consider adjusting “Gift vouchers” and “Shipping options” to title-case in the main admin menu 36. [ ✔] Under “eCommerce” > “Settings”, consider adjusting headings and labels to title-case. Also, ‘lifetime’ is one word so change “Shopping cart life time in hours” to “Shopping Cart Lifetime in Hours” 38. [✔ ] Under “Reports” > “Custom Reports”, could the list display more human readable ‘Type’ values? Ie: “Contacts and Event Bookings” instead of “ContactAndEventBookings” 40. [✔ ] Under “Reports” > “Custom Reports”, when editing a Report, under the ‘Fields’ tab consider adjusting some letter cases (“Id” should be “ID” if possible) and perhaps change “E-mail” to “Email” for consistency. Assuming these changes will then flow through to the report column headers.
Description: New 'Notes' field against any custom field created in the admin. It would display next to the field when clients are creating Custom Module items and could provide additional info to help them when entering content. For example: with an image field, the note might read "This image is displayed as the thumbnail on your Team Members page and ideally should be portrait orientation and at least 500px wide". The note could perhaps be hidden under a help/info icon to keep the layout clean. On property add/edit form: Allow add notes (https://projects.invisionapp.com/...)
Source Description: Provide ability to change icon of the item in tree view (http://prntscr.com/vu9h50)
• Add icon field to the `module` > `settings` page http://prntscr.com/vuhivv. Provide ability to choose icon from the system or custom library. • Store icons in /admin-assets system folder. Store folder outside FTP folders. • Provide ability to add icon to the icons custom library (on Admin menu configurator page). Design: https://invis.io/S6ZFRJWRNJG Suggested icon dimensions and extension: 24x24px, SVG • Change icons display logic on module items tree view • if module has custom icon - show it instead of "File" or "Folder" icon • else - show icon as previously: - if module is Parent module - "Folder" icon - if module is Child module - "File" icon
Improve GDPR control, Contacts and advanced CRM groups
1) Add new Group to `Settings` -> `Misc` • GDPR (“Allow listing CRM contacts data” True/false boolean)
2) Logic If ”Allow listing crm contacts data” == true - discard "Allow listing my contact data in the CMS" checkbox behavior and always allow use all contact data: • via components • {% component type: "CRMContacts" %} • {% component type: "CRMCustomGroup" %} • {% component type: "CRMContactCustomGroup" %}
• in the admin CRM data pickers
3) Components logic extending Add includeSecureZonesInfo: "true" param to {% component type: "CRMContacts" %} If not set - default value is false
Also add it to the toolbox. If true - add following object to item context (similar to what we have in {{request.currentmember}}): securezones": [ { "id": 1, "name": "Member Only Area", "landingpageid": null, "createddatetime": "2020-10-20T14:59:54.347", "updateddatetime": "2020-11-12T16:07:27.113", "expirydatetime": "9999-12-31T06:00:00", "ExpiryOption": null, "ExpiryAfter": null, "AccessType": 0, "Plans": null, "CountPaidSubscribers": 0 },
Admin UI changes
Task list: • Add site Name and User Name to the header (https://invis.io/N5ZHIBBCKZJ) • Add notifications indicator with description in tooltip http://prntscr.com/vvmpzk • Fix datasource search in datasource pickers (search by `contains` rule instead of the `name starts with` - https://prnt.sc/vv8pm7) • Sort datasource items alphabetically in datasource pickers (https://prnt.sc/vv8pau) • Add button that will trigger sort all module tags alphabetically (https://prnt.sc/vv8q36) Add confirmation popup in order to prevent accidentally sorting. • Add loader and notification on: • Import module items • Export module items • Duplicate module item • Designs: - https://invis.io/FJZHI9XDE3B
- https://prnt.sc/vv907c - blinking circle and message that shows what process is currently working
- https://prnt.sc/vv910x - message that shows when you try to close the tab where background process is working
• Add to `Settings` -> `Misc` ability to switch off warning message (https://prnt.sc/vv92oq) when you switch between wysiwyg and ACE editors (https://prnt.sc/vv934e) Default value is false • Improve tree view of Gallery/Slider modules on all sites: - remove `url` and `template` columns - add `image` column
Description: Validation warning for general URL conflicts before saving item. ie: for Pages and other items not influenced by the Advanced URL Manager.
1) Update `Settings` -> `Misc` in group “Admin Panel Settings” with new setting “Disable autocomplete for already taken URL slugs” (default is ‘false’)
2) Logic If `true` - do not add `-1` to the slug on save. Throw validation error message "Warning: Duplicate URL" If false - logic should be as it was earlier.
Description: Currently pagination outputs raw unordered list. Apply some default formatting to remove the bullets from the list and make it horizontal. Also by default it would be nice to truncate the pagination with “…” and show the last page if there are over 5 pages. If we really want to get fancy we could make the default styling along these lines. https://prnt.sc/vv8ivx
1) Component param Add param to component type `module` and `module_of_member` • styledPagination : "true" • default value is false • if true - show new pagination structure instead of old one
2) Toolbox • Show under ”Display Pagination” • if checked - show new pagination structure instead of old one • Hide if ”Display pagination” is false • Set default value to true. But reflect in component string only if display pagination is true
Applies to the following modules: • Custom module (Groups and Item lists) • Blogs (Groups and Item lists) • Gallery/Slider (Groups and Item lists) • FAQ's (Groups and Item lists) • Banners (Groups and Item lists) • Authors • Events (Groups and Item lists) • eCommerce (Catalogs and Product lists)
Small UI tweak: Add Icons To Items Under "Content" Section
Description: Implement the icons in “Content” section that are already under the components insertion list. https://prnt.sc/vtq0wq All other icons on the 2nd level should remain the same. Apply it to all default menus. Leave custom menus as is.
Description: A ‘Recent Items’ section to quickly go back into last page/module you were in, without having to navigate back to that page.
Functionality • Store history in session storage. • Add to visited pages recent item history. If the page is already in the history - move it up in the history list (instead of adding duplicate history item). • Remember 10 last visited pages.
Add new setting to `Form` -> `Settings`: • Send Secure Zone Login Details Email (default: true) • If enabled - don't send ”Secure Zone Login Details” system email on secure zone subscription form submit
Add new setting to `Form` -> `Settings` • Send Confirm Email Notification (default: true)
Add liquid variables of ”Confirm Email Notification” to the scope of the following system emails: • Invoice • this.EmailConfirmationUrl • + Secure Zone Login Details variables
• Secure Zone Login Details • this.EmailConfirmationUrl (set empty string as value if no confirmation required [ie: if user is already confirmed])
CRM -> Bookings: Export to Excel to be filtered by form name?
Settings: • Default Commission Value (validate numbers only, range: 0 - 900) • My PayPal Email • Resend Verification button • show only if current paypal email is not verified. • clicking on the button should resend ’paypal email verification’ email
Once form is saved - send ’paypal email verification’ email with the confirm button. Once confirm button is clicked - mark paypal email as verified. • If error occured while confirmation - show system page with error text • else if OK - show success page and link to trial sites list page.
DO NOT SEND commissions to paypal emails until they are verified (trigger Payment error)
2) Add commission tab to site edit page Add tab that will allow to setup commission for the site for monthly and annually subscriptions.
Settings: • Commission Type (dropdown) • Percentage (default) • Value
• Commission Value (validate numbers only) • ranges for ‘Value’ type: 0 - [value that gives 5000 in Your client Pays] • ranges for ‘Percent’ type: 0 - [percent value that gives 5000 in Your client Pays] • default value from the ’MySettings’ -> ‘Commissions’ -> ’Default Commission Value’
Calculated summary should follow logic as described in this spreadsheet (for display purposes use 4.4% fee per transaction since it is the biggest one that may be charged): Spreadsheet
Algorithm • When receiving payment - determine the [transaction fee percent]. • Calculate [treepl part] as: [Original treepl price] * (1-[transaction fee percent]) - 0.30 (per transaction value part of the fee) • Calculate [reseller's part] as: [received amount] - [treepl part] - 0.25 (standard fee for sending money from one paypal account to another) • Send [reseller's part] to the PayPal Email: • if ’Payment Error’ occurs: send system email to support@treepl.co: Subject: “Commission sending error” Content: Should contain [reseller's part] price, PayPal email, error info, date, site id and url • else: Send an Invoice to the payer
Provide ability to: • add domain: Create hosted zone in this step. Once created successfully - show ’Success’ state. Otherwise ‘Pending’ state. • delete domain
2) ’My Settings’ -> ‘Domains’ tab -> ‘domain details’ page Show 3 tabs: • Custom records • Here you can add/edit/delete any A, CNAME, MX, TXT records that you want • NS and SOA records • Read-only tab for display purposes only. • Treepl Sites records • Read-only tab for display purposes only. • Shows all records that Treepl Portal creates for all Treepl sites under this branded domain. 3) Restrictions Restrict access to ’Partners’ and ’Agencies’ only. Allow ’Partners’ and ’Agencies’ to have: • 1 branded subdomain for ’Partner’ • up to 3 branded subdomains for ’Agency’ Disallow ’My Settings’ -> ‘Domains’ tab for portal users 4) Add user role indication Provide role indication icon and tooltip near user email. Design: http://prntscr.com/vlj6j8
Other updates5
PORTAL: Portal restructure
1) Rename Menu items Change following: • ‘My Details’ to ’My Settings’ • ‘Backlog’ to ’Public Backlog’
Split Menu in two parts. Set to bottom menu following items: • Public Backlog • Documentation • Pricing For Resellers
Change Icons for • My Settings • Pricing For Resellers • Projects / Services • Support
2) Restrictions Restrict commissions for Agency role only Show prices that include commissions on the Treepl CMS sites in direct billing page DO NOT include commissions if clicking pay from the portal.
3) FTP credentials tab Create FTP under trialsite.co subdomain
Settings: • Default Commission Value (validate numbers only, range: 0 - 900) • My PayPal Email • Resend Verification button • show only if current paypal email is not verified. • clicking on the button should resend ’paypal email verification’ email
Once form is saved - send ’paypal email verification’ email with the confirm button. Once confirm button is clicked - mark paypal email as verified. • If error occured while confirmation - show system page with error text • else if OK - show success page and link to trial sites list page.
DO NOT SEND commissions to paypal emails until they are verified (trigger Payment error)
2) Add commission tab to site edit page Add tab that will allow to setup commission for the site for monthly and annually subscriptions.
Settings: • Commission Type (dropdown) • Percentage (default) • Value
• Commission Value (validate numbers only) • ranges for ‘Value’ type: 0 - [value that gives 5000 in Your client Pays] • ranges for ‘Percent’ type: 0 - [percent value that gives 5000 in Your client Pays] • default value from the ’MySettings’ -> ‘Commissions’ -> ’Default Commission Value’
Calculated summary should follow logic as described in this spreadsheet (for display purposes use 4.4% fee per transaction since it is the biggest one that may be charged): Spreadsheet
Algorithm • When receiving payment - determine the [transaction fee percent]. • Calculate [treepl part] as: [Original treepl price] * (1-[transaction fee percent]) - 0.30 (per transaction value part of the fee) • Calculate [reseller's part] as: [received amount] - [treepl part] - 0.25 (standard fee for sending money from one paypal account to another) • Send [reseller's part] to the PayPal Email: • if ’Payment Error’ occurs: send system email to support@treepl.co: Subject: “Commission sending error” Content: Should contain [reseller's part] price, PayPal email, error info, date, site id and url • else: Send an Invoice to the payer
Provide ability to: • add domain: Create hosted zone in this step. Once created successfully - show ’Success’ state. Otherwise ‘Pending’ state. • delete domain
2) ’My Settings’ -> ‘Domains’ tab -> ‘domain details’ page Show 3 tabs: • Custom records • Here you can add/edit/delete any A, CNAME, MX, TXT records that you want • NS and SOA records • Read-only tab for display purposes only. • Treepl Sites records • Read-only tab for display purposes only. • Shows all records that Treepl Portal creates for all Treepl sites under this branded domain. 3) Restrictions Restrict access to ’Partners’ and ’Agencies’ only. Allow ’Partners’ and ’Agencies’ to have: • 1 branded subdomain for ’Partner’ • up to 3 branded subdomains for ’Agency’ Disallow ’My Settings’ -> ‘Domains’ tab for portal users 4) Add user role indication Provide role indication icon and tooltip near user email. Design: http://prntscr.com/vlj6j8
2) Implement "immediateredirecttoaccept" setting When the payment has gone through you end up on a "success" page on the bambora site and you can then click to go back to the Treepl site with the receipt. This can be passed so you don't see that page but go directly to the Treepl receipt page via the "immediateredirecttoaccept" parameter.
Provide ability to choose this flow in bambora payment gateway settings and implement the appropriate logic. Bambora Documentation: checkout#operation-sessions
3) Language control settings Provide possibility to select the language for the payment window.
4) Add transaction ID to the list view of the order. Provide ability to search by it http://prntscr.com/vikmzm
Admin UI: CRM -> Orders pagination improvement
Admin UI speed improvement on CRM -> Orders page. Improve pagination in order to return order list faster.
Bug fixes1
{% component type: "shopping_cart" %}Layout and collectionVariable params behavior fix
If you add `collectionVariable` param to the component the layout doesn’t render in the following cases: • When Layout param is missing (should render default layout) • When layout param is present but value refers to the layout file
NOTE: You may have such kind of components in you code ({% component type:"shopping_cart", collectionVariable:"shoppingCartData" %}) that by mistake may miss the layout:"" param that stops component from rendering the default layout but still show no default layout (because of the current bug) . You need to add missed layout:"" param to such components in order to fix incorrect implementation of the component.
13 updates
New features3
Bill Clients Directly
Admin Panel
The ability to bill clients directly. Enabled via Treepl Portal, paid via site admin.
Default setting for availability for search engines
SEO
1) Add default configuration setting Add setting to ’Module’ -> ‘Properties’ -> ‘Default Properties’ -> “Show new items for search engines”: • Defines if module items should be automatically visible for search engines after create item action (default value for ”Show this page for search engines” checkbox in ’item’ -> ‘SEO’ tab). • Via Admin UI • Via Import process • Via Create item form from the site front-end
2) Setup default state of the new setting for system properties Preselect ”Show new items for search engines checkbox” for the following system modules: • Blog Post • Page • Page Folder • Blog • Event Groups • Events
3) Add two buttons that ‘enable’ and ’disable’ all existing module items of the particular module for search engines
Agency Plan: Payment + Site activation steps on site 1) Portal settings - ability to allow direct billing and site activation In Treepl Portal on ‘Edit Site’ page add new setting: “Allow Activation on the site”
2) Billing from the admin Add Billing button to the "gear" menu Design Show it only if ”Allow Activation on the site” is TRUE and the site is not paid yet Once clicked show Billing page Design Link to terms and conditions: https://treepl.co/terms-of-service
Allow user to pay for the site activation (validate the terms and conditions checkbox is checked).
Once paid - set return URL to lead to the ’Settings’ -> ‘Domains’ (1st step of the activation).
3) Domain Activation Steps Add domain activation steps to the ’Settings’ -> ‘Domains’ page Design: https://invis.io/QSYWMTYD4W6
Add ability to: • Go through all activation steps (similar to how it's already done in the portal) • add new domain (replicate same steps as on the portal) • change primary domain (add indicator on the domains list) • When clicking change domain show confirm popup ”Current domain settings will be reset. Are you sure you want to continue?”
• change domain name (Design) • delete domain (add this function to the portal as well) [deleted domain should be able to be added back] Agency Plan: Custom logo for individual site 1) Add Custom branding menu Add menu item to the "Gear" menu (if current admin has role lower then agency - display menu item as disabled)
2) Add Custom Branding Page • allow to change all branding options that Partner can do in the portal • allow to reset custom site assets (show warning popup: “Are you sure you want to reset custom branding?” • if current admin has role lower then Agency - do not allow to open this page
3) Custom Branding functionality Change branding assets displaying logic (on login, reset password screens etc) as follows: • try show custom logo or background image that was set for the current site • if not found - try show custom logo or background image that was set in the portal for all sites of the current Reseller (Partner or Agency) • if not found - show default Treepl assets Agency Plan: Portal users 1) Add ability to invite staff to Agency user portal (portal users) DESIGN https://invis.io/N3YUAKE28BK
Invited user should be able to perform any action that the agency user can except for: • Delete sites • See ’Portal Users’ tab and invite other Portal users
Invite process should be similar to admin users invite in the CMS (create user if not exist or just invite already existed) • if user is already invited to any agency user portal then show error message: “This user is already invited as Portal users to another Agency.” • if user is already exist in the identity server and has role: • Admin user • force rewrite there role to Portal user • once they will try to login to any site where they are already marked as admin - remove that mark and release admin slot for that site
• Any other role show error message: “This user couldn't be invited as Portal user.”
• send Invite email
Text for ? icon near INVITE NEW USER button: “Portal users would have same privileges that your account has except of ability to delete sites and invite new Portal users”
2) Add lazy create process on CMS sites When Portal user passes login/verification process (via SSO) to the site that belongs to the Agency of the Portal user - add this Portal user to the DB if it's not exited there yet.
3) Portal user influence to admin users UI and restrictions Portal user should: • not be visible in admin users • not take slot of admin users • have same permissions as their Agency Agency Plan: Functionality to store and share Modules (for Agency) 1) Implement new share module functionality DESIGN: https://invis.io/RAYV4SIEFGP
Show ‘Export’ button on edit module -> Settings page (see design). Show ‘Import’ button on create new module page (in the same place as ‘Export’ button on design).
When clicking ’Export’: • Download json file with module settings (described in Import/Export logic part of the task) When clicking ’Import’: • Upload file and verify that module (or each module of parent-child module linkage) doesn't have conflicts between already existed module aliases • If conflicts found show popup: • When only one conflict found: “Module with name "[ModuleName]" is already exists on the site. Paste new name for module or click cancel. "[ModuleName]": [input for name] OK | Cancel • When conflicts found in both parent and child module names: “Modules with names "[ParentModuleName]" and "[ChildModuleName]" are already exist on the site. Paste new names for modules or click cancel. "[ParentModuleName]": [input for name] "[ChildModuleName]": [input for name] OK | Cancel • Validate that new names do not conflict with any already existed modules in the CMS via JS (OK button is disabled until there will be no conflicts) as well as via backend (show same popup once again if JS passed the validation but module was created between the time popup displaying and new names confirmation submit).
• If no conflicts found - perform Import logic • Show loader while module is creating
• If module has parent-child linkage • extract both module settings (extract child module first)
• If module has Datasource fields • save datasource module alias as reference in the property settings • Extract datasource module settings as well • if any property module also has datasource: • if datasource module is not added to the export repeat current step for it as well • else - skip datasource
• if datasource module also has parent-child linkage • extract that linkage also
Import: If file could not be parsed show error: “File is not valid for import process”. Else: • Go for each module that is stored in the file • Try create module (by ’Settings’ tab data) • if site already have module with the same alias as module from export skip module creation • mark module as ’skipped’ in import settings • if module has parent-child linkage in the import settings - mark both (parent and child) as ’linkageRejected’
• DO NOT try to set parent-child linkage on this step (even if they should be added based on module settings)
• Try find workflows by names: • if found apply workflow • else - skip workflow setting
• Go for each module marked as parent and has ’linkageRejected == false’ • link child module by alias based on settings from the import file
• Go for each module that is stored in the file AND is not marked as ’skipped’: • update module (by Properties tab data) • update module (by Layouts tab data) • update module (by Table tab data)
Improvements1
Custom Reports needing export of Secure Zone members
Member Area
1) Add new type of custom report called “Contacts and Secure Zones” SETTINGS: - hide Form Filter when this type is selected
FIELDS: - Contact Fields (Same as for all other report types) - Secure Zone Membership Fields: • Secure Zone Name • Secure Zone Membership Status • Active • Expired • logic: if 'nowDate' < 'secureZoneMembershipExpiryDate' then ’Active’ else ’Expired’
• Secure Zone Membership Cost • Secure zone price taken from secure zone settings • country/currency setting for price should be taken from the latest order that was made via form with secure zone subscription • if ’Renewal Rate’ is ’Once’ - take cost from the order (order line price) • if no such order - display empty value
• Secure Zone Membership Currency • currency should be taken from the latest order that was made via form with secure zone subscription • if ’Renewal Rate’ is ’Once’ - take cost from the order (order line price) • if no such order - display empty value
• Secure Zone Membership Expiry Date • Expiration date that is assigned to the current secure zone membership http://prntscr.com/uz78rl
• Secure Zone Membership Renewal Rate (taken from secure zone settings): • Once • Day • Week • Month • Year
- Advanced CRM groups (same as on ‘Contacts only’ report type)
FILTERS: - Add Secure Zone Membership Fields to the filters: • Secure Zone Name (dropdown) • -- all secure zone names --
• Secure Zone Membership Status (dropdown) • Active • Expired
• Secure Zone Membership Cost (string) • Secure Zone Membership Currency (dropdown) • -- list of all currencies allowed for the site (based on domain settings) --
• Secure Zone Membership Expiry Date (date string) • Secure Zone Membership Renewal Rate (dropdown) • Once • Day • Week • Month • Year
2) Add human-friendly labels for all other types Display these labels instead of ENUM values on reports list layout http://prntscr.com/uz6w0f • Contacts Only • Contacts and Cases • Contacts and Orders • Contacts and Event Bookings
Agency Plan:Payment + Site activation steps on site
1) Portal settings - ability to allow direct billing and site activation In Treepl Portal on ‘Edit Site’ page add new setting: “Allow Activation on the site”
2) Billing from the admin Add Billing button to the "gear" menu Design Show it only if ”Allow Activation on the site” is TRUE and the site is not paid yet Once clicked show Billing page Design Link to terms and conditions: https://treepl.co/terms-of-service
Allow user to pay for the site activation (validate the terms and conditions checkbox is checked).
Once paid - set return URL to lead to the ’Settings’ -> ‘Domains’ (1st step of the activation).
3) Domain Activation Steps Add domain activation steps to the ’Settings’ -> ‘Domains’ page Design: https://invis.io/QSYWMTYD4W6
Add ability to: • Go through all activation steps (similar to how it's already done in the portal) • add new domain (replicate same steps as on the portal) • change primary domain (add indicator on the domains list) • When clicking change domain show confirm popup ”Current domain settings will be reset. Are you sure you want to continue?”
• change domain name (Design) • delete domain (add this function to the portal as well) [deleted domain should be able to be added back]
Agency Plan:Custom logo for individual site
1) Add Custom branding menu Add menu item to the "Gear" menu (if current admin has role lower then agency - display menu item as disabled)
2) Add Custom Branding Page • allow to change all branding options that Partner can do in the portal • allow to reset custom site assets (show warning popup: “Are you sure you want to reset custom branding?” • if current admin has role lower then Agency - do not allow to open this page
3) Custom Branding functionality Change branding assets displaying logic (on login, reset password screens etc) as follows: • try show custom logo or background image that was set for the current site • if not found - try show custom logo or background image that was set in the portal for all sites of the current Reseller (Partner or Agency) • if not found - show default Treepl assets
Invited user should be able to perform any action that the agency user can except for: • Delete sites • See ’Portal Users’ tab and invite other Portal users
Invite process should be similar to admin users invite in the CMS (create user if not exist or just invite already existed) • if user is already invited to any agency user portal then show error message: “This user is already invited as Portal users to another Agency.” • if user is already exist in the identity server and has role: • Admin user • force rewrite there role to Portal user • once they will try to login to any site where they are already marked as admin - remove that mark and release admin slot for that site
• Any other role show error message: “This user couldn't be invited as Portal user.”
• send Invite email
Text for ? icon near INVITE NEW USER button: “Portal users would have same privileges that your account has except of ability to delete sites and invite new Portal users”
2) Add lazy create process on CMS sites When Portal user passes login/verification process (via SSO) to the site that belongs to the Agency of the Portal user - add this Portal user to the DB if it's not exited there yet.
3) Portal user influence to admin users UI and restrictions Portal user should: • not be visible in admin users • not take slot of admin users • have same permissions as their Agency
Agency Plan:Functionality to store and share Modules (for Agency)
Show ‘Export’ button on edit module -> Settings page (see design). Show ‘Import’ button on create new module page (in the same place as ‘Export’ button on design).
When clicking ’Export’: • Download json file with module settings (described in Import/Export logic part of the task) When clicking ’Import’: • Upload file and verify that module (or each module of parent-child module linkage) doesn't have conflicts between already existed module aliases • If conflicts found show popup: • When only one conflict found: “Module with name "[ModuleName]" is already exists on the site. Paste new name for module or click cancel. "[ModuleName]": [input for name] OK | Cancel • When conflicts found in both parent and child module names: “Modules with names "[ParentModuleName]" and "[ChildModuleName]" are already exist on the site. Paste new names for modules or click cancel. "[ParentModuleName]": [input for name] "[ChildModuleName]": [input for name] OK | Cancel • Validate that new names do not conflict with any already existed modules in the CMS via JS (OK button is disabled until there will be no conflicts) as well as via backend (show same popup once again if JS passed the validation but module was created between the time popup displaying and new names confirmation submit).
• If no conflicts found - perform Import logic • Show loader while module is creating
• If module has parent-child linkage • extract both module settings (extract child module first)
• If module has Datasource fields • save datasource module alias as reference in the property settings • Extract datasource module settings as well • if any property module also has datasource: • if datasource module is not added to the export repeat current step for it as well • else - skip datasource
• if datasource module also has parent-child linkage • extract that linkage also
Import: If file could not be parsed show error: “File is not valid for import process”. Else: • Go for each module that is stored in the file • Try create module (by ’Settings’ tab data) • if site already have module with the same alias as module from export skip module creation • mark module as ’skipped’ in import settings • if module has parent-child linkage in the import settings - mark both (parent and child) as ’linkageRejected’
• DO NOT try to set parent-child linkage on this step (even if they should be added based on module settings)
• Try find workflows by names: • if found apply workflow • else - skip workflow setting
• Go for each module marked as parent and has ’linkageRejected == false’ • link child module by alias based on settings from the import file
• Go for each module that is stored in the file AND is not marked as ’skipped’: • update module (by Properties tab data) • update module (by Layouts tab data) • update module (by Table tab data)
Default setting for availability for search engines
1) Add default configuration setting Add setting to ’Module’ -> ‘Properties’ -> ‘Default Properties’ -> “Show new items for search engines”: • Defines if module items should be automatically visible for search engines after create item action (default value for ”Show this page for search engines” checkbox in ’item’ -> ‘SEO’ tab). • Via Admin UI • Via Import process • Via Create item form from the site front-end
2) Setup default state of the new setting for system properties Preselect ”Show new items for search engines checkbox” for the following system modules: • Blog Post • Page • Page Folder • Blog • Event Groups • Events
3) Add two buttons that ‘enable’ and ’disable’ all existing module items of the particular module for search engines
Custom Reports needing export of Secure Zone members
1) Add new type of custom report called “Contacts and Secure Zones” SETTINGS: - hide Form Filter when this type is selected
FIELDS: - Contact Fields (Same as for all other report types) - Secure Zone Membership Fields: • Secure Zone Name • Secure Zone Membership Status • Active • Expired • logic: if 'nowDate' < 'secureZoneMembershipExpiryDate' then ’Active’ else ’Expired’
• Secure Zone Membership Cost • Secure zone price taken from secure zone settings • country/currency setting for price should be taken from the latest order that was made via form with secure zone subscription • if ’Renewal Rate’ is ’Once’ - take cost from the order (order line price) • if no such order - display empty value
• Secure Zone Membership Currency • currency should be taken from the latest order that was made via form with secure zone subscription • if ’Renewal Rate’ is ’Once’ - take cost from the order (order line price) • if no such order - display empty value
• Secure Zone Membership Expiry Date • Expiration date that is assigned to the current secure zone membership http://prntscr.com/uz78rl
• Secure Zone Membership Renewal Rate (taken from secure zone settings): • Once • Day • Week • Month • Year
- Advanced CRM groups (same as on ‘Contacts only’ report type)
FILTERS: - Add Secure Zone Membership Fields to the filters: • Secure Zone Name (dropdown) • -- all secure zone names --
• Secure Zone Membership Status (dropdown) • Active • Expired
• Secure Zone Membership Cost (string) • Secure Zone Membership Currency (dropdown) • -- list of all currencies allowed for the site (based on domain settings) --
• Secure Zone Membership Expiry Date (date string) • Secure Zone Membership Renewal Rate (dropdown) • Once • Day • Week • Month • Year
2) Add human-friendly labels for all other types Display these labels instead of ENUM values on reports list layout http://prntscr.com/uz6w0f • Contacts Only • Contacts and Cases • Contacts and Orders • Contacts and Event Bookings
Add to ’eCommerce’ -> ‘Settings’ -> ‘tax and shipping’ new setting called “Shipping option order price limitations applied to” Location: http://prntscr.com/v0oq2r
Options (dropdown): • subtotal with tax (default) • subtotal without tax
Logic: Based on the selected value - apply ”Shipping option order price limitations” accordingly: • in JS logic in order to display shipping option or not • in backend if shipping option set request was pushed to the server but shipping option doesn't allowed by price limitation
Setup primary domain to be first in SEO canonical link helper
Improve canonical link helper: Domain selector should show Primary domain by default (first option in dropdown) http://prntscr.com/v9z3i7
Secure/Non Secure form submission folder form setting
Fixed ability to download secured file only in you are logged in to the admin dashboard
38 updates
New features1
BONUS: US-2 Data Center (Virginia)
Infrastructure
New data center: US (Virginia)
Improvements4
BONUS: Customer Submitted Content - Add workflow for when items are edited
Custom Modules · Workflow
Provide ability to setup workflows in ’Module’ -> ‘Settings’ -> ‘Site User Permission’ (http://prntscr.com/rl85f0) for the following actions: • Add item by site user: Current workflow list should be transformed into this setting. Move multi-select under ’Allow add new items’ option. • Edit item by site user: New multi-select of workflows. • Delete item by site user: New multi-select of workflows.
Provide ’customWorkflows’ field to be processed on module item create/update/delete site user forms.
Logic of this field should be exactly the same as for customising workflows for web forms - where by it overrides workflow/s selected in form settings
Apply following changes to feature flags: Remove flag from the system: • Advanced URL manager
Move to internal flags AND set enabled • New liquid engine & nICE 2.0 • Advanced payment flow
Misc Improvements (v5.6)
CRM · Ecommerce · SEO
- Sitemap.xml Exclude Module List - Update CRM Contact Group on edit account form - Advanced CRM groups on custom reports (+export) - CRM import/export + advanced CRM groups - Group products JS and Liquid logic - Rounding Formula for Taxation Engine - Shipping and tax improvements - module_tag_list and module_category_list improvement - Export of orders - Exporting Subscribers from Events - "Tax Never Applies" option for price - Do not skip selected shipping options - When Sorting items via sortBy sortOrder - skip weighting - CRMCustomGroup component type as alias to CRMContactCustomGroup
User Submitted File Upload To Specific Folder (+ secure/unsecure submitted files)
Custom Modules
1) Add new settings to the ‘Form’ -> ‘Settings’ page: • Secure Uploads (default: False) • Uploads Folder (default: /_form_submissions/) • Folder picker to select path to ftp folder (do not allow a paste of folder path manually) • Do not allow ftp root (/).
2) When form is submitted, store uploaded files (from custom fields and advanced CRM group fields) in the folder selected in the ’Uploads Folder’ setting.
Create folder if it does not exist when submitting the form.
When accessing any file - check if it's folder contains any folders set in any form’s secured folder setting: • requested file path contains (starts with) any form's ’Uploads Folder’ setting and the form has ’Secure Uploads’ set to “true” • if folder is secured - verify that current site visitor is a logged in admin user • if so - allow access to the file • otherwise - show 403 page
When Email Domain verification process fails - show ’Retry’ button when statuses set to failed http://prntscr.com/udjtv0. Clicking on the button should retry the verification process on the Amazon side. States should be reset to pending.
Add reply-to sender for workflows
Modify workflow emails by adding reply-to header and copy email of the CMR user that originally triggered this workflow.
Secure/Unsecure form submission folder
1) Add new settings to the ‘Form’ -> ‘Settings’ page: • Secure Uploads (default: False) • Uploads Folder (default: /_form_submissions/) • Folder picker to select path to ftp folder (do not allow a paste of folder path manually) • Do not allow ftp root (/).
2) When form is submitted, store uploaded files (from custom fields and advanced CRM group fields) in the folder selected in the ’Uploads Folder’ setting.
Create folder if it does not exist when submitting the form.
When accessing any file - check if it's folder contains any folders set in any form’s secured folder setting: • requested file path contains (starts with) any form's ’Uploads Folder’ setting and the form has ’Secure Uploads’ set to “true” • if folder is secured - verify that current site visitor is a logged in admin user • if so - allow access to the file • otherwise - show 403 page
1) ‘Update Account’ system form improvement: On submission of the ‘Update Account’ form - update CRM group fields that are already attached to the current contact CRM (either globally attached to contacts or custom attached to individual contact). Form field names would be the same as they are on web forms (‘groupAlias_fieldAlias’ pattern)
2) ’Update Account’ Form in toolbox update: In the component toolbox, under ‘Secure Zones’ > ‘Update Account Form’, in addition to the current fields, generate all advanced CRM group fields that are assigned to Contacts globally. NOTE: All custom attached CRM groups can still be updated via the ‘Update Account’ form but all fields for that custom group should be manually added to the update account form's HTML code by the developer based on ’groupAlias_fieldAlias’ pattern for form fields names.
3) Provide ability to store files submitted via edit account form in certain folder Add section to ’Settings’ -> ‘Misc’ -> “CRM settings”: • Uploads Folder (default: ‘/_customer_data/’) • Folder picker to select path to ftp folder (do not allow a paste of folder path manually) • Do not allow ftp root (/)
• Secure Uploads (default ‘false’)
When user uploads file on edit account form submission: • add folder with member id (if not existed yet) • place uploaded file in that folder If ’Secure Uploads’ == true then allow download files from ’/_customer_data/’ folder for the logged in admin user only.
Advanced CRM groups on custom reports (+export)
1) Integrate 'Advanced CRM Groups' to the custom reports: • Add ability to choose fields from Advanced CRM Groups attached to selected primary CRM type (entity that is chosen in 'Type' in settings tab http://prntscr.com/ugy9qk). Selected fields will then be shown on the ‘Fields’ tab. • Provide ability to apply filter to any Advanced CRM Group's field that was shown on the ’Fields’ tab (regardless if it was chosen or not) • Show Advanced CRM Group fields selected in the ‘Fields’ tab on the Results table. Add those fields to the export file as well.
2) ‘Select all’ UI improvement for groups of fields Add ability to select all fields via one checkbox in title section as shown in design: http://prntscr.com/ugyf7c Provide such ability to all groups (system groups and Advanced CRM Groups)
3) Improve sorting on results tab Provide ability to sort results by any field shown on the results tab (any contact, case,advanced CRM group field). Check that sorting and pagination are performed via server side, not via UI capabilities 4) Fix report results headers • Remove prefixes (like Case, Contact, etc): • in table titles on result tab http://prntscr.com/ugyii6 • in export file headers http://prntscr.com/ugykm6
1) Include Advanced CRM Groups into the Import/Export functionality Export: • When Exporting any CRM entity (Contact, Form Submission, Order or Booking subscription) - collect all advanced CRM groups that are attached to the selected set of items (for example if you choose form for case export - grab only advanced CRM groups attached to items that were retrieved by the query) and extend Excel table by them • use groupAlias_fieldAlias format for column titles Import: • provide the ability to import Form Submission and Booking subscription. • use groupAlias_fieldAlias format for column titles as markers for fields that need to be updated • when importing data: • if there will be no field with some fieldAlias in group with groupAlias - skip content of this column • if create or update operation is impossible for any entity (due to lack of required columns or empty/incorrect cell value) - skip processing this particular item and continue to the next item.
2) Implement "Get Import Template" button • Add "Get Import Template" button. When clicked show popup with advanced CRM groups represented as checkbox list. • Allow user to choose what groups should be included in the template besides native entity data. • Add this button to Contact, Form Submission and Booking subscription • use groupAlias_fieldAlias format for column titles DESIGN: https://invis.io/VMYECYV6ZGQ
module_tag_list and module_category_list improvement
1) Improve performance of 'module_tag_list' and 'module_category_list' components Use search by a separate table in order to retrieve data faster.
Add additional table that will hold the following data: • release date • expiry date • active (boolean - ‘true’ if ’enabled’ AND product inventory visible etc) • moduleId • itemId • tagname or categoryId
Update this table on: • module item add • module item edit • module item delete • reindex module • reindex site
Redo 'module_tag_list' and 'module_category_list' logic so it should search its data based on the table above instead of searching by regular site search. Sorting and indexing should be performed via SQL instead of via the C#
Export of orders
Add ability to call export for Orders - Green for order data. Data goes on the 1st row. - Red for order lines data. Product data goes starting on the 2nd row (1st row is empty for them) and goes down until all order lines will be output
Column Headers: • Order ID • Order Name • Currency/Country • Status • Member Email • Invoice Number • Invoice Date • Weight Measurement • Dimension Measurement • Shipping Address • Total Cost • Amount Paid • Pending Collection • Shipping Cost • Discount • Gift Voucher • Created Date Time • Product • Attributes (use pattern: http://prntscr.com/uizc1s) • Weight • Width • Height • Depth • Units • Unit Price • Tax Rate • Total Price
Exporting Subscribers from Events
Add export Event Subscribers functionality on 'Events' -> ‘Edit Event’ -> 'Subscriptions' tab (https://prnt.sc/sbawkq) Resulting excel should have the same columns as the table has on that page.
Rounding Formula for Taxation Engine
Implement rounding algorithm that will be based on:
1) Bankers Rounding: when rounding applied to a number that has 0.5 in the decimal component of the price (represented in cents)
Add checkbox to the price instances near tax dropdown, called: “Tax Never Applies: (default= false)
Logic: When checked - tax should not be added to the order line that represents this product (or shipping option) when tax selected on the shopping cart.
“Country/Currency select” (Choosing value from this select to load settings specific for that particular country/currency pair)
• Tax applies to (multiselect dropdown list) Determines if taxes should be applied to selected entities or not - shipping options (selected by default) - gift vouchers (selected by default) • Auto-select tax if only one option available (boolean - default value ’true’) Determines if the single tax in the tax dropdown be automatically selected when a user comes to the shopping cart and/or changing country. • Hide tax selector if only one option available (boolean - default value ’false’) Determines if the tax dropdown be hidden by JS if there is only one tax option available. • Enable tax dropdown (boolean - default value ’true’) Determines if {% component type: "tax_codes" %} component renders the tax dropdown or not. Also determines if server-side validation should require it or not. • Shipping Countries (multiselect dropdown list - default empty list) • -- list of all countries -- Also provides the ability to select all options. So the user can easily select all and then deselect the few not needed. • Logic: determines what country list will be shown when rendering the component {% component type: "countries" %} - if value is empty - show all countries. Otherwise show only selected countries - if {% component type:"countries", allowedCountries:"US,AU" %} has ’allowedCountries’ param - use its list of countries instead of shop setting (component param overrides shop settings).
• Choose Default Country (dropdown - default = null) • -- list of all countries selected in Shipping Countries dropdown -- • Logic: Determines what country should be automatically selected when a user comes to the shopping cart.
• Make shipping country required (boolean - default ’false’) Determines if country dropdown can be deselected or not
Do not skip selected shipping options
When shopping cart updated after changing quantity - if shipping options that was selected previously are still available - leave it selected.
When any of the following processes occured: • add product to cart • change product quantity • remove product from cart • add/remove discount code • add/remove gift voucher
DO NOT reset selected shipping option if after shopping cart update that shipping option is still available.
When Sorting items via ‘sortBy’/‘sortOrder’ - skip weighting
Improve sorting of module items functionality on {% component type: "module" %} and {% component type: "module_of_member" %} via a new parameter for the component: • ignoreWeighting: "true" (default value ‘false’) • if value true: skip sorting by weight before sorting by 'sortBy' (if 'sortBy' is empty then alphabetical sort should be applied - remove "sorting by weight first" logic also) • if false: apply current sorting algorithm (first by weight then by name ASC).
Add this new parameter to the toolbox for: • Custom modules • List of items • List of member's items
• Gallery/Slider • FAQ`s • Banners • Authors • Events • eCommerce • Catalogs list • Products list
‘CRMCustomGroup’ component type alias to ‘CRMContactCustomGroup’
Create an alias of 'CRMCustomGroup' that will trigger the same functionality that 'CRMContactCustomGroup' (including all component properties).
So {% component type: "CRMCustomGroup" %} will do the same as {% component type: "CRMContactCustomGroup" %}
Group products JS and liquid logic
Product Grouping on Detail Layout improvements:
1) Add to all product detail layout custom forced wrapper (only if product has any grouped products):
2) Add JS that will request, via AJAX, the selected sub-product or main product once the appropriate option has been selected in the dropdown rendered via the component. Render layout based on the 'layoutName' and 'productID' sent in the request and with the following liquid variables: • this • si • siteinformation • request
3) Add ‘this.URL’ to the liquid context of each item in {% component type: "grouped_items" %}. Add ‘this.URL’ to the <option> element as 'data-product_url' attribute.
4) Provide custom event ’onProductLayoutChanged’ that could be used by any site owner's JS once layout will be changed via AJAX.
Product Grouping on List Layout improvements:
1) Fix component type module so it returns only main Product (if it is part of the Grouped products list) and don't return Grouped sub-products. Only MAIN product should be listed via {% component type=module %} (and type=module_of_member). Sub-products should not impact the pagination and should not be listed except if those components have ‘isSearchResult: "true"’ or ’searchScope’ param in which case include subproducts in the search results. 2) Add custom wrapper to list layout if it contains any grouped products (if layout contains {% component type: "grouped_items" %}) and if the 'object' param is set to 'item' http://prntscr.com/tzf1n2 (wrap same as in detail layout above)
NOTE: If you are using component type module with 'object: "collection"' then you should add wrapper from point 1 inside your for loop manually in order to allow product grouping logic to work.
3) Provide custom JS event 'onProductLayoutChanged' and JS for layout reload (similar as described for the detail layout above).
4) Fix group order Order of items that are listed via component should be the same as sorted in the admin.
$('body').on('onProductLayoutChanged', function(){ <!-- some code --> });
Feature flags changes (v5.6)
Apply following changes to feature flags: Remove flag from the system: • Advanced URL manager
Move to internal flags AND set enabled • New liquid engine & nICE 2.0 • Advanced payment flow
BONUS: Customer Submitted Content - Add workflow for when items are edited
Provide ability to setup workflows in ’Module’ -> ‘Settings’ -> ‘Site User Permission’ (http://prntscr.com/rl85f0) for the following actions: • Add item by site user: Current workflow list should be transformed into this setting. Move multi-select under ’Allow add new items’ option. • Edit item by site user: New multi-select of workflows. • Delete item by site user: New multi-select of workflows.
Provide ’customWorkflows’ field to be processed on module item create/update/delete site user forms.
Logic of this field should be exactly the same as for customising workflows for web forms - where by it overrides workflow/s selected in form settings
Here is a Google Doc with all admin wording suggestions.
Minor text changes in most cases.
https://docs.google.com/document/d/1qg5mZaZl0h7AFb8YFyGsjKMAsEDysBjGTQzhxqyHSUY/edit?usp=sharing 1. [ ✔] When editing a Menu item, the ‘ID Name’ field should perhaps be just ‘ID’ 2. [ ✔] In the Component toolbox, perhaps remove the words ‘Get’ from the beginning of the Item Form options 3. [ ✔] In the Component toolbox, when getting a search form, there is the FORM CODE and the COMPONENT CODE, but it’s not particularly clear these are two links, or the Form code link might be missed. Suggest separating these 2 links a bit more or perhaps even having 2 headings, eg 4. [ ✔] In the Component toolbox, perhaps use correct apostrophes in the FAQ section 5. [ ✔] In the Component toolbox, use lowercase ‘o’ in ‘of’ under the “Banners” and “Authors” sections for consistency with all other options 6. [ ✔] In the Component toolbox, under “Events”, use capital letter for ‘Event Groups’, ‘Event’ and ‘Form’. Perhaps rename “List of event’s groups” to “List of Event Groups” 7. [✔ ] In the Component toolbox, under “eCommerce”, suggest using title-case throughout for consistency 8. [✔ ] In the Component toolbox, under “CRM”, suggest rewording options for consistency 9. [✔ ] In the File Manager, when clicking the “Add New” button, it could probably just say “Folder” and “File” instead of repeating “Add new folder/file” 10. [✔ ] In the File Manager, the upload file drop zone could be made a little clearer by adding “to upload” after “click here” link 11. [✔ ] In the File Manager, in the context menu of a folder/file, perhaps the “Secure Zone” option should just read “Secure”
13. [✔ ] In the Form “Settings”, perhaps add an ‘s’ to “Workflow” and “Secure Zone” labels (since multiple items can be selected). And, below this, the term “Autoresponder” is probably more widely used instead of “Auto-response” (not a big deal though)
15. [✔ ] In Secure Zone “Members” tab, the “Emails” column header should probably just be “Email” (without the ‘s’) 16. [✔ ] As above, the same change for “CRM” > “Contacts” list 17. [✔ ] In “CRM” > “Contacts”, when adding a new contact, perhaps change “E-mail” field label to “Email” for consistency 18. [✔ ] In “Form Submissions”, perhaps change the column heading of “Date Submission” to “Submission Date” or “Date Submitted” 19. [ ✔] In “CRM” > “Orders”, when viewing the “Payments” tab, perhaps use a capital ‘C’ in “Amount Captured” column heading (for consistent title-case use) 20. [✔ ] In “Email Marketing” > “Email Campaigns” in the ‘Settings’ tab, for the “Schedule Delivery” option, perhaps change to just “Delivery”. 21. [✔ ] In “Email Marketing” > “Mailing Lists”, under ‘Subscribers’ tab, perhaps adjust “Emails” column heading to just “Email” 22. [ ✔] In “Email Marketing” > “API Provider”, adjust page heading to use a capital ‘P’ for “provider”
24. [✔] On the ‘Catalogs’ tab when editing a Product, perhaps add heading above the selection boxes to make it a little clearer what’s what 25. [ ✔] On the ‘Inventory’ tab when editing a Product, perhaps use title-case for the ‘Added to shopping cart’ label making it ‘Added to Shopping Cart’ (for consistency) 26. [ ✔] Similar to point 24) above, perhaps add headings to the selection boxes 27. [ ✔] Under ‘Grouped Items’ tab when editing a Product, perhaps use title-case for the “Main product” checkbox label (for consistency) 28. [ ✔] Under the ‘SEO’ tab for ALL module types, perhaps reword and title-case the “<head> section extra” label, possibly: “<head> Section Additions” or “Additional <head> Code” 29. [ ✔] In ALL module ‘Settings’ page, use title-case for the ‘Site User Permissions’ checkbox labels. And perhaps change “Auto-response” heading to the more widely used “Autoresponder”
32. [ ✔] For ALL module “Table” tab, consider using title-case for the ‘Add new column’ heading so it reads “Add New Column” (in the side panel when adding a column)
35. [✔ ] Under a Shipping Options “Settings” tab, consider adjusting the “Show Shipping option to” label to title-case so it reads: “Show Shipping Option to”
37. [ ✔] Under “eCommerce” > “Settings” → ‘Manage Status’ tab, consider adjusting for title-case
39. [ ✔] Under “Reports” > “Custom Reports”, when editing a Report, the help bubble for “Settings” and “Form Filter” need adjusting. For “Settings”, it still refers to the previous naming of “Make Public” but should now be “Make Sharable”
41. [ ✔] Under “Settings” > “Domains” and ‘Site Domains’ tab, consider adjusting for title-case in the sidebar for editing ‘Currency and Format’ and ‘Country’ 42. [ ✔] ...as above, also in the ‘Email Domains’ tab when adding a new domain, adjust for title-case
44. [ ✔] Under “Settings” > “Admin Users”, column header and edit field label say “E-mail” consider changing to “Email”. Also note edit panel heading to title-case 45. [✔ ] Under “Settings” > “Admin Menu Configurator”, consider adjusting headings and buttons for title-case 46. [ ✔] Under “Settings” > “Setup Analytics”, consider correcting “Id” to “ID”
48. [ ✔] Under “SEO” rename the “Pages search engine settings:” label to be more clear (since this option enables/disables ALL module item content, not just Pages). Something like “Global ‘Show for Search Engines’” with maybe even a paragraph under this heading, or a help bubble, describing what it does exactly,
Fix truncate liquid string filter
Fix liquid ‘truncate’ filter so if second param is NULL (http://prntscr.com/ui7qip) then apply "..." string as suffix. And if second param is an empty string "" (http://prntscr.com/ui7r3k) then apply an empty string "" as suffix.
1) Rename 'offline-credit-card-payment' system page (https://prnt.sc/spcfi5) - Change name and URL to 'deferred-order-payment'.
2) Rename Offline Credit Card Payment system email (https://prnt.sc/spcg1w) - Change name to 'Deferred Order Payment'. - Change value of the 'this.offlinePaymentPageURL' according to the new URL of 'deferred-order-payment' system page. - Change Subject to ’Pay Order #{{this.order.id}}’.
3) Change offline credit card payment namings (https://prnt.sc/spcer0) - Change 'Offline Credit Card Payment' to 'Deferred Order Payment'. - Change 'Send Offline Credit Card Payment' to 'Send Deferred Order Payment Email'. - Change 'Pay By Credit Card' to 'Pay Order'.
Add ability to track offline payment
1) Provide ability to track offline payment for the order - Rename 'Paid By Cash' (http://prntscr.com/ui8sv8) to 'Add Offline Payment'. - When clicking on it the sidebar panel appears http://prntscr.com/ui8u0m. - Make 'Payment Type' a dropdown to be active and provide the following options (instead of 'Offline'): • Cash (default) • Cheque • EFT • Money Order • Other • Credit Card
Add additional fields to the payment form: • Payment Date (datetime - defaults to current date/time) - Renamed ’Date’ label to ’Payment Date’ http://prntscr.com/ul7wju • Notes (textarea) - For custom purposes. Just store the data and show on view and edit mode http://prntscr.com/ul7tf2
Rename all existing ’Offline Payment’ types to 'Cash'
Add "ID" to customizable columns
Add ability to choose 'ID' property for the custom columns http://prntscr.com/tjg8az. If selected - show item ID in the list view table according to the custom columns display rules.
Override quantity field with Product Minimum Units
1) Add validation for shopping cart ’change quantity’ and product ’add to cart’ actions: • validate that total quantity after add or change action is between Minimum Units and Maximum Units http://prntscr.com/tjp1fc • if Minimum Units is empty - default value is 1 • if Maximum Units is empty - default value is infinity
2) Show error messages once validation is not passed: • quantity > Maximum Units: ERROR: Quantity entered is too large, please enter a smaller quantity. • quantity < Minimum Units: ERROR: Quantity entered is too small, please enter a larger quantity.
<input type="number" data-ecommerce_product_quantity_field="{{this.id}}" {% if this.minimumUnits > 0 %}min="{{this.minimumUnits}}"{% endif %} {% if this.maximumUnits > 0 %}max="{{this.maximumUnits}}"{% endif %} value="{% if this.minimumUnits > 0 and this.params.quantity == null %}{{this.minimumUnits}}{% else %}{{this.params.quantity | default: 1}}{% endif %}"/>
4) Fix bug: ’this.params’ object is not filled by custom params. As a result such record {% component itemId: "{{this.Id}}", type: "ecommerce_item_quantity", quantity:"10" %} isn't rendered with quantity = 10 when it should.
Add following properties to the 'Product' (order line), 'Shopping_Cart' and 'Order' objects: • taxCode • taxCodeHtml • Product (order line) • Shopping_Cart • Order objects
Property (type media) - apply URL partial encode for liquid
Improve module item liquid object for ‘Media’ type properties in {% component type: "module" %} and {% component type: "module_of_member" %}: If property type is 'Media' - launch the following algorithm to its value: • extract file name from file path (file name is between last "/" and "end of string" OR "?") • apply URL encode to the name • join path and name back together • place the value back to the property
The value of the 'Media' property still should be un-encoded on edit item form in the admin.
Also update "copy to clipboard" links so they return encoded filename https://prnt.sc/uu6ljx
Eg: So if an item would have a value like "/pdf/myPdf#2.pdf?downloadable=1" it will be encoded like "/pdf/myPdf%232.pdf?downloadable=1" and placing {{this.myPdf}} into the href attribute of the link will not break the file accessibility. For example: <a href="{{this.myPdf}}">Download PDF<a>
Add module ID/alias to the item object (LIQUID)
Extend module item object by adding following properties • Module_ID • Module_Alias
Add {{this[‘LastUpdatedDate’]}} to properties list (toolbox)
Add {{this[‘LastUpdatedDate’]}} to properties list in ’Module’ -> ‘Layout’ -> ’Properties’ toolbox. It exists, just not listed.
Provide ability to duplicate Workflows to copy workflow instance: • with the same list of ’Recipients’ • linked to the same ’Workflow Email’
Add browser Cache control headers
Add this header to all file requests (max age of 7 days): “Cache-Control: private, max-age=604800”
Bug fixes1
date liquid filter fixes
Fix/implement following patterns for date filter (that is based on http://strftime.net/): 1) Implement %w pattern: • Weekday as a decimal number, where 0 is Sunday and 6 is Saturday. Example: {{ "now" | date: "%w" }}
3) Implement %Z pattern: • should show name of the timezone set for the site (use same values as for liquid's {{request.timezone}} object)
4) Fix %z pattern: • shows +00:00 but should be -05:00 (if the site timezone is set to -5) (use same values as for liquid's {{request.timezone}} object)
29 updates
New features4
Authorize.net Payment Gateway
Ecommerce
1) Create support for Authorize.net Payment gateway.
2) Gateway logic should support following flows of capturing price: • ‘Instant payment’ (charge money right away)
Places for logic to be implemented in: • ‘Settings’ -> ’Payment’: Provide ability to setup API credentials for Authorize.net • Page rendering function: Setup auto-add authorize payment scripts in <head> section similar to how it's done for eway and stripe • Payment form submit processor: Setup charging process via Authorize.net API using token retrieved from formData
BONUS: 2FA (two-factor authentication)
Admin Panel · General
1) Implement 2FA for the Treepl SSO service (Use google authenticator) 2) enable 2FA on edit account (partner portal): http://prntscr.com/u6s3zj 3) each time on login to portal or any site • show QR code and code field on separate page after successful login (if 2FA not set up for the current user) http://prntscr.com/u6s4y8 • show code field on separate page after successful login (if 2FA is set up for the current user) (without QR code) 4) add ability to enable 2FA for the site on site details and show indicator on sites list • similar checkbox setting as on edit profile • show if 2FA is enabled for the site 5) for site admin users (if 2FA for the site is enabled) each time on login: • show QR code and code field on separate page after successful login (if 2FA not set up for the current user) http://prntscr.com/u6s4y8 • show code field on separate page after successful login (if 2FA is set up for the current user) (without QR code)
Ecommerce: 3rd Party Shipping Integration
Ecommerce
3rd Party Shipping Integration: (BASE LOGIC) 1) Shop Measurements Setup Add the following settings to the ’eCommerce’ -> Settings’. Determines the unit of measure to be applied to the Shipping options and Products Width, Height, Depth and Weight for the calculation of shipping price.
Preset kg and cm for all sites in Database by default.
Options: • dimension: • cm (default) • in • mm • m • ft • yd
• weight: • kg (default) • lb • oz • g
2) Shipping Option Integration Setup Modify the shipping option Details form according to the following fields order: • Name • Currency / Country • Type (new extended list) • User Defined • FedEx • UPS • USPS • Canada Post • Australia Post • New Zealand Post
• Tax Code • Price
Once any type with Shipping Integration selected- hide ’Price’ fields and show additional fields specific to the selected shipping provider: • Origin Zip/Postcode (string) • Shipping Provider Services (dropdown) unique fields for the particular shipping provider including api access params. BC Example for each shipping provides: • FedEx: http://prntscr.com/tb948g • UPS: http://prntscr.com/tb95vr • USPS: http://prntscr.com/tb965b • DHL: http://prntscr.com/tb96i2 • Canada Post: no example. See API requirements and capabilities that we could provide. • Australia Post: http://prntscr.com/tb96r4 • New Zealand Post: no example. See API requirements and capabilities that we could provide.
When shipping option that has shipping provider integration is selected, show additional input field: “Destination Zip/PostCode” • If shipping provider accepts any other additional fields that affects the cost - show them (For example: “Address is residential” field for UPS Air https://prnt.sc/talnkb, https://prnt.sc/talo94) • Once zip is entered - request available shipping Options from the shipping provider via API and show them under ’Destination Zip/PostCode’ (here is an example of shipping options retrieving for FedEx https://www.fedex.com/lite/lite-ship.html?locale=en_us&cntry_code=us#address) • If there are several options available for the destination - provide the ability to choose one. • If there are only one option available - preselect it. • if no options available - show message "No shipping options available for this destination". • if any error occured - show error message.
4) Shipping option display based on order rules Shipping options that have shipping provider integration should follow the same rules as currently works for ’User Defined’ shipping options (Shipping Option -> Settings tab).
This includes: • measurement constraints • price constraints • limit delivery to country • exclude if purchase from catalogs
5) Shipping Price Calculation Rules Once shipping provider returns the options and their prices - extract ’shippingTaxRate’, ‘shippingPrice’ based on the response data (if no tax set in the CMS the tax info will be taken from the shipping integrator if provided). Then recalculate base shipping price by adding any ’Handling Charge’ and ’Additional Per item Handling Charge’. And then recalculate ’shippingTaxPrice’, ‘shippingTotal’ and all other related prices like it works for ’user defined’ shipping options.
Set resulting values to the liquid object of the shopping cart.
Return to UI prices that already includes ’Handling Charge’, ’Additional Per item Handling Charge’ and ’taxPrice’. Basically the ’shippingTotal’ (https://prnt.sc/talnkb)
2) Provide ability to edit some Order details: http://prntscr.com/tb48qa • Status Type (rename label to Status) • Invoice Date
3) Add new admin panel page: ‘Ecommerce’ > ‘Settings’: Move here Shopping cart life time setting from Misc settings (https://prnt.sc/sw1toc)
4) Order Statuses should be reworked: DESIGN http://prntscr.com/u6s8kg. Add ’Manage Statuses’ Tab to ’eCommerce’ -> ‘Shop Settings’ page Provide Ability to Create, Update, Delete Status and change their order in the dropdown on the ’eCommerce’ -> ‘Shop Settings’ -> ’Manage Statuses Page’ (http://prntscr.com/u6s8s9)
Add/Edit contains following fields: • Status Name (required) • Type (not editable. For display purposes only) • Custom (default) • New • AwaitingPayment • PendingCharge • PaymentCanceled • Paid
• Workflow (multi-select) • Not Set (default) • --- list of workflows ---
• Notify Customer • boolean (default false)
Provide following delete logic: • Only Statuses with Type=’Custom’ could be deleted. • Don't show delete button and don't execute delete operation on statuses that has type other than ’Custom’
Pre-create following statuses (set all to: Workflow=Not Set, Notify Customer=False) • New (selected when order is created) • Awaiting Payment (selected when create order via checkout form) • Pending Charge (selected when two step card payment successfully placed funds for the order on hold) • Payment Canceled (selected when: admin canceled the pending charge payment, or, pending charge payment was expired and as a result was canceled) • Success (selected when CMS retrieves a message from payment provider that payment was successfully processed) • Payment Failed (selected when CMS retrieves a message from payment provider that payment failed)
Remap all orders with current enum statuses as follows: • AwaitingPayment => Awaiting Payment (Type=AwaitingPayment) • Succeed => Success (Type=Paid) • Failed => Payment Failed (Type=PaymentFailed) • New => New (Type=New)
5) Add new system email (‘Email Notifications’ > ‘System Emails’): • ‘Order Status Changed’ • Order Status • dropdown of all order statuses. • based on the selected status, show associated ’System Email Details’ and ’Content’ fields. • store ’System Email Details’ and ’Content’ fields data for each Order Status separately. • store this set of system emails on FTP in separate folder: • /Content/SystemEmails/OrderStatusChanged/[[order-status-name]].html • each time when new custom order status will be created - create [[order-status-name]].html file • each time when custom order status name will be changed- changed [[order-status-name]].html file • apply FTP synchronization to these files (update file content will update Content field of the email)
Liquid scope for "this": • order • oldOrderStatus • customer • siteUrl eg: Dear , The status of your order (#) has been changed from to .
6) Add functionality to the order status change event: When changed (manually or via backend flow logic) - get new status settings and • send ’Order Status Changed’ system email if ’Notify Customer’ setting is True • send all selected workflows that are selected in the ’Workflow’ setting (if there is a workflow selected) 3rd Party Shipping Integration: Liquid component tag for shipping providers additional fields Add new component tag for "shippingProvidesFields": {% component type:"shippingProvidesFields", collectionVariable:"", layout:"" %}
• collectionVariable (not required) - works the same way as in other modules. • layout (not required) - path to FTP file that will contain layout content to be parsed. • If specified empty string - do not render anything. • If not specified at all - render default virtual layout.
2) Gateway logic should support following flows of capturing price: • ‘Instant payment’ (charge money right away) Places for logic to be implemented in: • ‘Settings’ -> ’Payment’: Provide ability to setup API credentials for Paypal • Page rendering function: Setup auto-add Paypal payment scripts in <head> section (similar to how it's done for eway and stripe) • Payment form submit processor: Setup charging process via Paypal API using token retrieved from formData
Improve file manager to use lazy loading functionality (to show only those elements that are visible on screen) in order to prevent long loading of the files and folders when there are a lot of files and/or sub-folders. Once user scrolls the active area, show following elements and hide previous so browser would not be overloaded.
Custom Shipping Layouts Bug
eCommerce JS should not overwrite the <options> layout entirely. Option layout should be taken from the ’data-cms_cart_shipping_option_name_layout’ attribute that is located on the <select> tag. If no data attribute would be found - js will use default option name layout.
Back-end: Default layout should be improved by adding ’data-cms_cart_shipping_option_name_layout="{itemName} ({itemPrice})"’ to the select tag http://prntscr.com/tcue19
3rd Party Shipping Integration:Order States and Tracking Info Management
1) Add two system fields to the ’Order’ item in the admin (after Invoice Date http://prntscr.com/tb49jp): • AWB Number • Tracking URL (as an active link)
Also added to the ‘Order’ liquid object.
2) Provide ability to edit some Order details: http://prntscr.com/tb48qa • Status Type (rename label to Status) • Invoice Date
3) Add new admin panel page: ‘Ecommerce’ > ‘Settings’: Move here Shopping cart life time setting from Misc settings (https://prnt.sc/sw1toc)
4) Order Statuses should be reworked: DESIGN http://prntscr.com/u6s8kg. Add ’Manage Statuses’ Tab to ’eCommerce’ -> ‘Shop Settings’ page Provide Ability to Create, Update, Delete Status and change their order in the dropdown on the ’eCommerce’ -> ‘Shop Settings’ -> ’Manage Statuses Page’ (http://prntscr.com/u6s8s9)
Add/Edit contains following fields: • Status Name (required) • Type (not editable. For display purposes only) • Custom (default) • New • AwaitingPayment • PendingCharge • PaymentCanceled • Paid
• Workflow (multi-select) • Not Set (default) • --- list of workflows ---
• Notify Customer • boolean (default false)
Provide following delete logic: • Only Statuses with Type=’Custom’ could be deleted. • Don't show delete button and don't execute delete operation on statuses that has type other than ’Custom’
Pre-create following statuses (set all to: Workflow=Not Set, Notify Customer=False) • New (selected when order is created) • Awaiting Payment (selected when create order via checkout form) • Pending Charge (selected when two step card payment successfully placed funds for the order on hold) • Payment Canceled (selected when: admin canceled the pending charge payment, or, pending charge payment was expired and as a result was canceled) • Success (selected when CMS retrieves a message from payment provider that payment was successfully processed) • Payment Failed (selected when CMS retrieves a message from payment provider that payment failed)
Remap all orders with current enum statuses as follows: • AwaitingPayment => Awaiting Payment (Type=AwaitingPayment) • Succeed => Success (Type=Paid) • Failed => Payment Failed (Type=PaymentFailed) • New => New (Type=New)
5) Add new system email (‘Email Notifications’ > ‘System Emails’): • ‘Order Status Changed’ • Order Status • dropdown of all order statuses. • based on the selected status, show associated ’System Email Details’ and ’Content’ fields. • store ’System Email Details’ and ’Content’ fields data for each Order Status separately. • store this set of system emails on FTP in separate folder: • /Content/SystemEmails/OrderStatusChanged/[[order-status-name]].html • each time when new custom order status will be created - create [[order-status-name]].html file • each time when custom order status name will be changed- changed [[order-status-name]].html file • apply FTP synchronization to these files (update file content will update Content field of the email)
Liquid scope for "this": • order • oldOrderStatus • customer • siteUrl eg: Dear {{this.customer.firstname}}, The status of your order (#{{this.order.invoiceNumber}}) has been changed from {{this.oldOrderStatus}} to {{this.order.status}}.
6) Add functionality to the order status change event: When changed (manually or via backend flow logic) - get new status settings and • send ’Order Status Changed’ system email if ’Notify Customer’ setting is True • send all selected workflows that are selected in the ’Workflow’ setting (if there is a workflow selected)
3rd Party Shipping Integration:(BASE LOGIC)
1) Shop Measurements Setup Add the following settings to the ’eCommerce’ -> Settings’. Determines the unit of measure to be applied to the Shipping options and Products Width, Height, Depth and Weight for the calculation of shipping price.
Preset kg and cm for all sites in Database by default.
Options: • dimension: • cm (default) • in • mm • m • ft • yd
• weight: • kg (default) • lb • oz • g
2) Shipping Option Integration Setup Modify the shipping option Details form according to the following fields order: • Name • Currency / Country • Type (new extended list) • User Defined • FedEx • UPS • USPS • Canada Post • Australia Post • New Zealand Post
• Tax Code • Price
Once any type with Shipping Integration selected- hide ’Price’ fields and show additional fields specific to the selected shipping provider: • Origin Zip/Postcode (string) • Shipping Provider Services (dropdown) unique fields for the particular shipping provider including api access params. BC Example for each shipping provides: • FedEx: http://prntscr.com/tb948g • UPS: http://prntscr.com/tb95vr • USPS: http://prntscr.com/tb965b • DHL: http://prntscr.com/tb96i2 • Canada Post: no example. See API requirements and capabilities that we could provide. • Australia Post: http://prntscr.com/tb96r4 • New Zealand Post: no example. See API requirements and capabilities that we could provide.
When shipping option that has shipping provider integration is selected, show additional input field: “Destination Zip/PostCode” • If shipping provider accepts any other additional fields that affects the cost - show them (For example: “Address is residential” field for UPS Air https://prnt.sc/talnkb, https://prnt.sc/talo94) • Once zip is entered - request available shipping Options from the shipping provider via API and show them under ’Destination Zip/PostCode’ (here is an example of shipping options retrieving for FedEx https://www.fedex.com/lite/lite-ship.html?locale=en_us&cntry_code=us#address) • If there are several options available for the destination - provide the ability to choose one. • If there are only one option available - preselect it. • if no options available - show message "No shipping options available for this destination". • if any error occured - show error message.
4) Shipping option display based on order rules Shipping options that have shipping provider integration should follow the same rules as currently works for ’User Defined’ shipping options (Shipping Option -> Settings tab).
This includes: • measurement constraints • price constraints • limit delivery to country • exclude if purchase from catalogs
5) Shipping Price Calculation Rules Once shipping provider returns the options and their prices - extract ’shippingTaxRate’, ‘shippingPrice’ based on the response data (if no tax set in the CMS the tax info will be taken from the shipping integrator if provided). Then recalculate base shipping price by adding any ’Handling Charge’ and ’Additional Per item Handling Charge’. And then recalculate ’shippingTaxPrice’, ‘shippingTotal’ and all other related prices like it works for ’user defined’ shipping options.
Set resulting values to the liquid object of the shopping cart.
Return to UI prices that already includes ’Handling Charge’, ’Additional Per item Handling Charge’ and ’taxPrice’. Basically the ’shippingTotal’ (https://prnt.sc/talnkb)
6) Checkout form improvement based on the shipping providers integration Set zip code field to disabled (it is not allowed to be changed) and pre-filled by the value chosen on the shopping cart step (similar to how country is pre-selected based on the country selected on the shopping cart and not allowed to be changed).
3rd Party Shipping Integration:Liquid component tag for shipping providers additional fields
Add new component tag for "shippingProvidesFields": {% component type:"shippingProvidesFields", collectionVariable:"", layout:"" %}
• collectionVariable (not required) - works the same way as in other modules. • layout (not required) - path to FTP file that will contain layout content to be parsed. • If specified empty string - do not render anything. • If not specified at all - render default virtual layout.
1) Implement 2FA for the Treepl SSO service (Use google authenticator) 2) enable 2FA on edit account (partner portal): http://prntscr.com/u6s3zj 3) each time on login to portal or any site • show QR code and code field on separate page after successful login (if 2FA not set up for the current user) http://prntscr.com/u6s4y8 • show code field on separate page after successful login (if 2FA is set up for the current user) (without QR code) 4) add ability to enable 2FA for the site on site details and show indicator on sites list • similar checkbox setting as on edit profile • show if 2FA is enabled for the site 5) for site admin users (if 2FA for the site is enabled) each time on login: • show QR code and code field on separate page after successful login (if 2FA not set up for the current user) http://prntscr.com/u6s4y8 • show code field on separate page after successful login (if 2FA is set up for the current user) (without QR code)
Replace old order.totalHtmlPrice and remove property
Replace all occurrences of ’totalHtmlPrice’ to ’totalPriceHtml’ within order or shopping cart objects in following places: • System emails: • Supplier Notification • Invoice • OfflineCreditCardPayment
• Forms: • Checkout
• System Pages: • offline-credit-card-payment • order-receipt • shopping_cart
ATTENTION: Custom includes, layouts or snippets where totalHtmlPrice has been used as part of any custom logic will not be replaced. It needs to be replaced to totalPriceHtml by the partner manually.
Payment gateways:Paypal
1) Create support for Paypal Payment gateway.
2) Gateway logic should support following flows of capturing price: • ‘Instant payment’ (charge money right away) Places for logic to be implemented in: • ‘Settings’ -> ’Payment’: Provide ability to setup API credentials for Paypal • Page rendering function: Setup auto-add Paypal payment scripts in <head> section (similar to how it's done for eway and stripe) • Payment form submit processor: Setup charging process via Paypal API using token retrieved from formData
1) Create support for Authorize.net Payment gateway.
2) Gateway logic should support following flows of capturing price: • ‘Instant payment’ (charge money right away)
Places for logic to be implemented in: • ‘Settings’ -> ’Payment’: Provide ability to setup API credentials for Authorize.net • Page rendering function: Setup auto-add authorize payment scripts in <head> section similar to how it's done for eway and stripe • Payment form submit processor: Setup charging process via Authorize.net API using token retrieved from formData
{% break %} and {% continue %} not working in liquid 2.0
Example: {% for item in (1..10) %} {{item}}<br> {% if item == 6 %} THIS SHOULD BREAK HERE! <br>{% break %} {% endif %} {% endfor %} <br> <hr> <br> {% for item in (1..10) %} {% if item >= 6 %} THIS SHOULD CONTINUE HERE! <br>{% continue %} {% endif %} {{item}}<br> {% endfor %}
Advanced CRM: Custom Fields Groups CRUD Page Add page for Custom CRM groups list (http://prntscr.com/thh86e). Provide ability to add, edit, delete the Custom CRM group. Provide ability to use pagination for Custom CRM groups.
Add/Edit form should contain following fields: • Form name (string) • Apply To (dropdown) - list of entries allowed to applied CRM group to:• Contact: would be listed here http://prntscr.com/thh8eg • Order: would be listed here https://prnt.sc/syn4d6 • Form Submission: would be listed here https://prnt.sc/syn5ld • Booking Subscription: would be listed here https://prnt.sc/syn6nx
• CRM fields (panel with list of custom fields with ability to create/update/delete field. Similar to form fields builder) Allowed field types:• DateTime • CheckboxList • DropdownList • DropdownList (multiple) • ListboxList • RadioList • Boolean • Multiline • String • Upload • DataSource • Number
Design: http://prntscr.com/thh7y7 Advanced CRM: Custom CRM Field Groups attaching rules and linkage There should be 2 types of custom crm groups linkage Global setting: • Determines what groups are marked as Attached to ALL CRM contacts. • Represented as list of groups. Individual Contact record Attachment: • Determines group to certain contact linkage. 1 to 1. • Represented as list of Groups-to-Contact records. Saved custom crm group values for the contact should be saved as group-field-contact-value records. group-field-contact-value records should not be deleted on unassigning Global setting or Certain Contact record Attachment from the crm contact. Description • If custom CRM group is attached to Contacts via global setting then each contact should view that group in the bottom of the contact details page • If custom CRM group is attached to the certain Contact record via:• form submission • adding via button on contact detail view http://prntscr.com/orpcbb• Then view that groups in the bottom of the contact details page.
Linkage entities (each should have EDIT entity button and "Add Custom Fields" button https://prnt.sc/orpcbb): • Contacts • Form Submissions • Orders • Booking Subscriptions Group Displaying Rules: • Display custom group for the entity IF• Current entity type was added in the "Apply to" property of the CRM group settings. • OR • Custom group was checked in the "Add Custom Fields" setting of the current entity https://prnt.sc/orpcbb
• "Add Custom Fields" settings https://prnt.sc/orpcbb should be all unchecked by default. Admin user is the only one person that could check any of those custom groups. Advanced CRM: Attach Custom field groups to web forms Provide ability to choose Custom CRM Groups and attach them to the form. http://prntscr.com/thh94m Default layout builder should build all fields of each group similar to the form's custom fields. Name should be: [[GroupAlias]]_[[FieldAlias]] Example: Group alias: AccountInfo Field alias: Position Field: <input type="text" name="AccountInfo_Position"> Advanced CRM: Add custom CRM field groups to CRM record CRM contact detail page should contain new button: “Add Custom Fields” Clicking on that button should show panel that allows to select existing custom CRM forms. When selecting a form and click save - that custom CRM group should be attached to the Contact (Certain Contact record Attachment). http://prntscr.com/thhakq Advanced CRM: Liquid component tag for custom CRM fields Add new component tag component type:"CRMContactCustomGroup": Pattern:
• groupAlias (required) - alias of the custom CRM group.• All group fields with their values should be set to the array of objects if fieldAlias is not set. Otherwise should contain only one element, being the object for the specified field set via fieldAlias.
• entityType (not required) - determines the CRM entity type to retrieve custom group for. Values can be:• form_submission • event_booking • order • contact (default, if no type set for the component)
• entityId (not required) - determines the CRM entity to retrieve custom group for• if entityType is contact• If field is empty - try use current logged in CRM contact id. - If no logged in users found return empty context item • If CRM contact has isDataUsingAllowed not equal to true than return empty context item
• else • If field is empty - return empty context item
• fieldAlias (not required) - alias of the CRM group field. Should be used to find a particular group field value for the CRM contact (determined by entityId and the group determined by groupAlias). • collectionVariable (not required) - works the same way as other modules. • layout (not required) - path to FTP file that will contain layout content for the data. • If specified empty string - do not render anything. • If not specified at all - render default virtual layout.
Item context: { "Alias": "", "Fields" : [ { "Name" : "", "Alias": "", "Value" : "" }, ... ] } Default virtual layout: Advanced CRM: Toolbox - Liquid component tag for custom CRM fields Add new item to toolbox: • CRM• CRM Contact Custom Group
Advanced CRM: Plan restrictions All functionality with advanced CRM custom groups should be available starting from Pro plan. Add to menu: • CRM• Advanced CRM Groups
Assign CRM Records To Module Items As Datasource
CRM · Custom Modules
CRM Records as Datasource: System property for allowing using crm contact records Add new system property to CRM Contact record: isDataUsingAllowed (bool) • label: Allow listing my contact data in the CMS • default value: false • can be set to true via edit account form (Add this field to the edit account form html that generates by toolbox) • can NOT be set to true via admin panel CRM records that has this checkbox ticked ON will be allowed to: • be assigned to module items (should help with the GDPR since this checkbox allows user to disallow using his record just by unchecking the checkbox on the profile page). • be used by liquid component for retrieving and listing contacts. • Add this property to the form builder, allowing to set it to TRUE on registration forms (http://prntscr.com/q89aht) CRM Records as Datasource: Module item custom property - CRMRecord Add new Module item property type: CRM record • property allows to assign any CRM record that has "isDataUsingAllowed=true" • holds id of crm contact record (similar to datasource). • switching "isDataUsingAllowed" to false should trigger removing that crm record id from all module items that have properties of CRM record type with that saved id. CRM Records as Datasource: Liquid output of CRM records Add new component tag component type:"CRMContacts": Pattern:
Component should filter, sort and return list of CRM contacts that has isDataUsingAllowed equal to true ONLY • filterBy (not required) - CRM Contact property name to perform filtering by. • filterValue (not required) - value to perform filtering by param set in filterBy. Similar to module component filtering. • limit (not required) - number of tags to be rendered (Default value is 10) • offset (not required) - number of contacts in the result list to skip retrieving start from (Default value is 0) • sortBy (not required) - any contact system properties (Default value is FirstName) • sortOrder (not required) - ASC or DESC (Default value is ASC) • collectionVariable (not required) - works the same way as other modules. • layout (not required) - path to FTP file that will contain layout content for the data. • If specified empty string - do not render anything. • If not specified at all - render default virtual layout.
Default virtual layout: <ul> </ul> Item context: { "items" : [ { "id": 0, "email": "", "firstname": "", "lastname": "", "address": "", "city": "", "state": "", "zipcode": "", "country": "", "site": "", "phone": "", "status": "", "notes": "", "createddatetime": "", "updateddatetime": "", }, ... ] } CRM Records as Datasource: Toolbox - Liquid output of crm records Add new item to toolbox • CRM• CRM Contact List
Custom Reports
CRM
Custom Reports: Builder DESIGN http://prntscr.com/thh497 1) Add page and menu item: ‘Reports’ > ‘Custom Reports’ Provide ability to: • Add new report • list reports (with pagination 20 per page) • Show only reports marked as public or that were created by the current logged in Admin User 2) All functionality with Custom Reports is available starting from Pro plan. 3) Reports Builder: SETTINGS Save the report by name and set as public option that allows you to share the report with other admin users. If Make public set to false - you are the only one who will see this report. TYPE The type determines what fields should be collected for Fields and Filters steps and what entities should be collected for the final report. - Contacts (default) - Contacts and Cases - Contacts and Orders - Contacts and Event Bookings FORM FILTER Select a form (from all available web forms) to filter only those cases,orders or event bookings that belong to this form. Show section only if type is one of: - Contacts and Cases - Contacts and Orders - Contacts and Event Bookings --------- FIELDS Select Fields to be seen on report as column headers • Fields For Cases:• Case Id • Form name • Date Submission
• Fields For Orders• Order Id • Form name • Date Submission • Currency • Country • Total Cost • Amount Paid • Pending Collection • Shipping Address • Shipping City • Shipping State • Shipping Zip Code • Shipping Country • Invoice Number • Invoice Date • Status
• Fields For Booking Subscriptions• Booking Subscription Id • Form name • Booking Date • Allocation • Price • Event Id • Event Name
• Contact fields• Contact • First name • Last Name • E-mail • Address • City • State • Zip Code • Country • Site • Phone • Status • Notes • Type
• Form fields (show only if certain form was included for report) • <list of all selected form's custom fields>
--------- FILTERS • Field (to filter by)• <all fields available from the report type>
• Condition options (depending on Field value type)• Equals • NotEqualTo • LessThan • GreaterThan • LessOrEqual • GreaterOrEqual • Contains • DoesNotContain • StartsWith
• Value (depending on Field type)• if the field is general string or number type - show text field • if it's a dropdown or radiolist - show dropdown
Ability to add additional filtering rules --------- RESULTS Generate sortable and paginated results table. Ability to export to Excel file. Custom Reports: Export Provide ability to export Custom report to Excel file. Columns should be the same as the report.
Other updates27
Payment Flow For Europe:Two-step card payments
1) Add new setting to the form settings (show only if at least one of the selected payment gateways support Two-step card payments) • Payment Flow• Instant payment (default) • Two-step card payments
2) Payment gateways with Two-step card payments support: • Stripe • Bambora 3) Current payment flow logic is Instant payment. Once Two-step card payments selected and if payment gateway supports Two-step card payments - setup and apply following payment flow logic: • documentation (from Stripe) - https://stripe.com/docs/charges/placing-a-hold or - https://stripe.com/docs/payments/capture-later • Once user submitted a payment form - place required funds on hold. • Creating order, email notifications etc should be created/sent similar as for Instant payment flow but set cost to pending amount value. Set payment state to pending. Set Order state to pending charge. • Add ability on order -> payments to proceed hold payment https://prnt.sc/ruktxm• If clicked and payment proceed successfully - set payment state to Success • otherwise - set payment state to canceled and Order state to Payment Canceled.
• If hold is expired (7 days period of hold) - then force change payment state to canceled. Order to Payment Canceled. • Add cancel button. Release the hold funds and payment state to canceled. Order state to Payment Canceled. • Failed order could be fixed via adding cash payment record or via deferred payment flow. • If order consists of downloadable products only - force process Instant payment flow 4) Add Amount captured column on the Order -> Payments table http://prntscr.com/tfci79
Payment Flow For Europe: Stripe for EU (SCA via 3D Secure)
1) Implement Strong Customer Authentication (SCA): (SCA) is a regulatory requirement in effect as of September 14, 2019, that impacts many European online payments. It requires customers to use two-factor authentication like 3D Secure to verify their purchase. 2) Add setting to stripe Payment Gateway (Enable 3D Secure) Enabling this setting will force payment form to trigger Payment Intents flow with support of 3D Secure rather then Charges 3) Create new system page: Checkout payment (/checkout-payment) 4) Payment Intents flow will not ask you for card details on the form but once the form is sent - it should redirect you to Checkout payment system page. In case you are paying for Event, secure zone subscription or general payment: • order should be created after payment is confirmed • secure zone subscription should be applied after payment is confirmed • event subscription should be added after payment is confirmed 5) If shopping cart total price was changed after user comes to Checkout payment system page - show validation error on submit: “Price of the shopping cart was changed. Please go back to the <a href="/shopping_cart">Shopping Cart</a> page, verify the data and re-submit the form.”
Payment gateways: Bambora Payment gateway
1) Create support for Bambora Payment gateway. Use Norway and Switzerland logic version: https://developer.bambora.com/europe/checkout/getting-started/create-payment 2) Gateway logic should support following flows of capturing price that should be configured via gateway settings (similar as for stripe): • Instant payment: charge money right away • Two-step card payments: place money on hold allowing to charge manually via order 3) Show error message if domain is not verified (endpoint is not valid error from bambora) on charging: “The payment can't be processed. This domain is not verified by Bambora. Please contact their support in order to get the domain verified.”
Custom Reports: Builder
DESIGN http://prntscr.com/thh497 1) Add page and menu item: ‘Reports’ > ‘Custom Reports’ Provide ability to: • Add new report • list reports (with pagination 20 per page) • Show only reports marked as public or that were created by the current logged in Admin User 2) All functionality with Custom Reports is available starting from Pro plan. 3) Reports Builder: SETTINGS Save the report by name and set as public option that allows you to share the report with other admin users. If Make public set to false - you are the only one who will see this report. TYPE The type determines what fields should be collected for Fields and Filters steps and what entities should be collected for the final report. - Contacts (default) - Contacts and Cases - Contacts and Orders - Contacts and Event Bookings FORM FILTER Select a form (from all available web forms) to filter only those cases,orders or event bookings that belong to this form. Show section only if type is one of: - Contacts and Cases - Contacts and Orders - Contacts and Event Bookings --------- FIELDS Select Fields to be seen on report as column headers • Fields For Cases:• Case Id • Form name • Date Submission
• Fields For Orders• Order Id • Form name • Date Submission • Currency • Country • Total Cost • Amount Paid • Pending Collection • Shipping Address • Shipping City • Shipping State • Shipping Zip Code • Shipping Country • Invoice Number • Invoice Date • Status
• Fields For Booking Subscriptions• Booking Subscription Id • Form name • Booking Date • Allocation • Price • Event Id • Event Name
• Contact fields• Contact • First name • Last Name • E-mail • Address • City • State • Zip Code • Country • Site • Phone • Status • Notes • Type
• Form fields (show only if certain form was included for report) • <list of all selected form's custom fields>
--------- FILTERS • Field (to filter by)• <all fields available from the report type>
• Condition options (depending on Field value type)• Equals • NotEqualTo • LessThan • GreaterThan • LessOrEqual • GreaterOrEqual • Contains • DoesNotContain • StartsWith
• Value (depending on Field type)• if the field is general string or number type - show text field • if it's a dropdown or radiolist - show dropdown
Ability to add additional filtering rules --------- RESULTS Generate sortable and paginated results table. Ability to export to Excel file.
Custom Reports: Export
Provide ability to export Custom report to Excel file. Columns should be the same as the report.
Import/Export of prices, attributes and inventory
Export format: Add all system properties of the product after default properties and before custom properties Product area should be defined as (http://prntscr.com/rhxeho): • (1) first line - info of the product and its relations • (2) all lines under with the same SKU code before end of file or another SKU code (SKU code should be same and present in all lines of the product data) Add following fields for specific-serialized relations: • Parents [name of the parent module]. eg: `Catalog`• Value: [parent item urls separated by `;`]. eg: `/catalog-1/sub-catalog;/catalog-1;/;`
• Sale Price• Value: [country]-[currency]/[sale-price],[quantity for threshold option №1]/[price threshold option №1],[quantity for threshold option №2]/[price threshold option №2]; eg: AU-AUD/30.00,2/26.00,5/22.00;AU-USD/20.00,10/18.00,100/16.00;
NOTES: If no [currency] specified - use Currency-By-Country-Defaults.json mapper as default currency for country definition
• Related Products• Value: [product_sku_code]; eg: HAYNM5AXVB;sub_prod_1;HMDP9271;
• Low Stock Notification• Value: number eg: 50
NOTES: Greater than or equal to 0
• Enable Inventory Control• Value: (boolean) true or false eg: Y or TRUE N or FALSE or empty
• Can Pre-Order• Value: (boolean) true or false eg: Y or TRUE N or FALSE or empty
• Hide if Out of Stock• Value: (boolean) true or false eg: Y or TRUE N or FALSE or empty
• Attributes (ignore this cell value if product ALREADY EXIST AND has GENERATED VARIATIONS AND "Variations Enabled" cell != FALSE) • Value: (complex pattern described below, intended to be on one line)
NOTES: If no [currency] specified - use Currency-By-Country-Defaults.json mapper as default currency for country definition
Example String: AU-AUD/30.00,2/26.00,5/22.00;AU-USD/20.00,10/18.00,100/16.00;
• Recurring Type• Value: one of (numeric or string value) - 1 or Once - 2 or Daily - 3 or Weekly - 4 or Fortnightly - 5 or Monthly - 6 or Quarterly - 7 or Half Yearly - 8 or Yearly
• Hide if Out of Stock• Value: (boolean) true or false eg: Y or TRUE N or FALSE or empty
NOTES: If TRUE and no variations was created earlier - generate all variations and edit them by the values within columns Variations Code, Enabled, In Stock, Pre-Order determining variation by attribute options combination in the column Variation Options. If FALSE - discard variations.
• Variation SKU Code This column and columns below are assigned both to initial (global) product and to it’s variations. - Value for the first row assigned to the global product settings. - Values in the row/s below (that relate to initial product) are assigned to each variation row.• Value: string (unique SKU code, should be empty for product row but required for variation row) If not set - ignore entire variation row data.
Eg: HAYNM5AXVB
• Enabled• Value: (boolean) true or false eg: Y or TRUE N or FALSE or empty
• Variation Options• Value: [option_of_attribute_1] ; [option_of_attribute_2] ; etc.
NOTES: Determines what variation should be edited by the fields: - Variations Code - Enabled - In Stock - Pre-Order
If such combination not found in the product - ignore changes in this row for the following columns: - Variations Code - Enabled - In Stock - Pre-Order
eg: HAYNM5AXVB;sub_prod_1;HMDP9271;
• In Stock• Value: number (greater than or equal to 0)
• Pre-Order• Value: number (greater than or equal to 0)
Liquid security issue on form submission
Add algorithm that will protect user-submitted content of liquid and JS injection in all form submissions and when user adds or edits a module item, for all text fields. • IF Module -> Settings ->Site User Permissions -> Requires Approval == disabled https://prnt.sc/sq0ga9 AND • IF it contains any of the following substring:• {% • %} • {{ • }} • <script • <style • </script> • </style>
• do the following:• if any liquid symbols was found• remove tags from the content • wrap all content with value here
• then replace • <script to the <script-is-not-allowed • <style to the <style-is-not-allowed • </script> to the </script-is-not-allowed> • </style> to the </style-is-not-allowed>
• run current item create/edit logic
• else• run current item create/edit logic
• If user edits the item and Module -> Settings ->Site User Permissions -> Requires Approval == enabled• Disable item after performing the changes
IMPORTANT: Validate text value length AFTER the wrapping if it has occurred. So if original value fits the single line text field but once wrapped it doesn't - the validation error should be shown. Example: <div> <h1>Some title</h1> {{this}} <script>location.href = "https://some-fishing.site"</script> <style>body{display: none !important;}</style> </div>
Datasource Field: When focus a field - get first 50 datasource items
Improve Datasource Form control: • perform search by focusing the field (trigger empty search if keyword is not set or empty) • Show 50 items of found results • Add search icon that will submit search request by entered keyword • Add remove icon that will erase entered keyword and will submit empty search request
Recaptcha v3 validation JS fix
Fix for general form Fix for payment form CMS generated javascript changes to avoid conflicts with payment JS. No Partner/front-end changes required.
Advanced CRM: Custom Fields Groups CRUD Page
Add page for Custom CRM groups list (http://prntscr.com/thh86e). Provide ability to add, edit, delete the Custom CRM group. Provide ability to use pagination for Custom CRM groups.
Add/Edit form should contain following fields: • Form name (string) • Apply To (dropdown) - list of entries allowed to applied CRM group to:• Contact: would be listed here http://prntscr.com/thh8eg • Order: would be listed here https://prnt.sc/syn4d6 • Form Submission: would be listed here https://prnt.sc/syn5ld • Booking Subscription: would be listed here https://prnt.sc/syn6nx
• CRM fields (panel with list of custom fields with ability to create/update/delete field. Similar to form fields builder) Allowed field types:• DateTime • CheckboxList • DropdownList • DropdownList (multiple) • ListboxList • RadioList • Boolean • Multiline • String • Upload • DataSource • Number
Advanced CRM: Custom CRM Field Groups attaching rules and linkage
There should be 2 types of custom crm groups linkage Global setting: • Determines what groups are marked as Attached to ALL CRM contacts. • Represented as list of groups. Individual Contact record Attachment: • Determines group to certain contact linkage. 1 to 1. • Represented as list of Groups-to-Contact records. Saved custom crm group values for the contact should be saved as group-field-contact-value records. group-field-contact-value records should not be deleted on unassigning Global setting or Certain Contact record Attachment from the crm contact. Description • If custom CRM group is attached to Contacts via global setting then each contact should view that group in the bottom of the contact details page • If custom CRM group is attached to the certain Contact record via:• form submission • adding via button on contact detail view http://prntscr.com/orpcbb• Then view that groups in the bottom of the contact details page.
Linkage entities (each should have EDIT entity button and "Add Custom Fields" button https://prnt.sc/orpcbb): • Contacts • Form Submissions • Orders • Booking Subscriptions Group Displaying Rules: • Display custom group for the entity IF• Current entity type was added in the "Apply to" property of the CRM group settings. • OR • Custom group was checked in the "Add Custom Fields" setting of the current entity https://prnt.sc/orpcbb
• "Add Custom Fields" settings https://prnt.sc/orpcbb should be all unchecked by default. Admin user is the only one person that could check any of those custom groups.
Advanced CRM: Attach Custom field groups to web forms
Provide ability to choose Custom CRM Groups and attach them to the form. http://prntscr.com/thh94m Default layout builder should build all fields of each group similar to the form's custom fields. Name should be: [[GroupAlias]]_[[FieldAlias]] Example: Group alias: AccountInfo Field alias: Position Field: <input type="text" name="AccountInfo_Position">
Advanced CRM: Add custom CRM field groups to CRM record
CRM contact detail page should contain new button: “Add Custom Fields” Clicking on that button should show panel that allows to select existing custom CRM forms. When selecting a form and click save - that custom CRM group should be attached to the Contact (Certain Contact record Attachment). http://prntscr.com/thhakq
Advanced CRM: Liquid component tag for custom CRM fields
Add new component tag component type:"CRMContactCustomGroup": Pattern: {% component type:"CRMContactCustomGroup", groupAlias:"[[groupAlias]]", fieldAlias:"[[fieldAlias]]", entityType:"[[entityType]]", entityId:"[[contactId]]", collectionVariable:"", layout:"" %}
• groupAlias (required) - alias of the custom CRM group.• All group fields with their values should be set to the {{this.fields}} array of objects if fieldAlias is not set. Otherwise {{this.fields}} should contain only one element, being the object for the specified field set via fieldAlias.
• entityType (not required) - determines the CRM entity type to retrieve custom group for. Values can be:• form_submission • event_booking • order • contact (default, if no type set for the component)
• entityId (not required) - determines the CRM entity to retrieve custom group for• if entityType is contact• If field is empty - try use current logged in CRM contact id. - If no logged in users found return empty context item • If CRM contact has isDataUsingAllowed not equal to true than return empty context item
• else • If field is empty - return empty context item
• fieldAlias (not required) - alias of the CRM group field. Should be used to find a particular group field value for the CRM contact (determined by entityId and the group determined by groupAlias). • collectionVariable (not required) - works the same way as other modules. • layout (not required) - path to FTP file that will contain layout content for the data. • If specified empty string - do not render anything. • If not specified at all - render default virtual layout.
Advanced CRM: Toolbox - Liquid component tag for custom CRM fields
Add new item to toolbox: • CRM• CRM Contact Custom Group
Advanced CRM: Plan restrictions
All functionality with advanced CRM custom groups should be available starting from Pro plan. Add to menu: • CRM• Advanced CRM Groups
CRM Records as Datasource: System property for allowing using crm contact records
Add new system property to CRM Contact record: isDataUsingAllowed (bool) • label: Allow listing my contact data in the CMS • default value: false • can be set to true via edit account form (Add this field to the edit account form html that generates by toolbox) • can NOT be set to true via admin panel CRM records that has this checkbox ticked ON will be allowed to: • be assigned to module items (should help with the GDPR since this checkbox allows user to disallow using his record just by unchecking the checkbox on the profile page). • be used by liquid component for retrieving and listing contacts. • Add this property to the form builder, allowing to set it to TRUE on registration forms (http://prntscr.com/q89aht)
CRM Records as Datasource: Module item custom property - CRMRecord
Add new Module item property type: CRM record • property allows to assign any CRM record that has "isDataUsingAllowed=true" • holds id of crm contact record (similar to datasource). • switching "isDataUsingAllowed" to false should trigger removing that crm record id from all module items that have properties of CRM record type with that saved id.
CRM Records as Datasource: Liquid output of CRM records
Add new component tag component type:"CRMContacts": Pattern: {% component type:"CRMContacts", filterBy:"", filterValue:"", limit:"", offset:"", sortBy:"", sortOrder:"", collectionVariable:"", layout:"" %}
Component should filter, sort and return list of CRM contacts that has isDataUsingAllowed equal to true ONLY • filterBy (not required) - CRM Contact property name to perform filtering by. • filterValue (not required) - value to perform filtering by param set in filterBy. Similar to module component filtering. • limit (not required) - number of tags to be rendered (Default value is 10) • offset (not required) - number of contacts in the result list to skip retrieving start from (Default value is 0) • sortBy (not required) - any contact system properties (Default value is FirstName) • sortOrder (not required) - ASC or DESC (Default value is ASC) • collectionVariable (not required) - works the same way as other modules. • layout (not required) - path to FTP file that will contain layout content for the data. • If specified empty string - do not render anything. • If not specified at all - render default virtual layout.
• source (required param):• path - any path to FTP file that contains JSON as content. Example: '/some/path/filename.json' • url - any internal or external URL that returns JSON response. Example: 'https://some.domain/some_api/' • string - JSON string. Example: '{"some" : "value"}'
• collectionVariable (not required) - works the same way as in other components. • layout (not required) - path to FTP file that will contain layout content for the data. • If specified empty string - do not render anything. • If not specified at all - render default virtual layout.
Default virtual layout: {{this}} {{this}} variable contains the parsed json object. If parse error occurred {{this}} will be NULL 2) Component added to Toolbox (https://prnt.sc/s2pmv2): • Liquid Data• JSON Data
Allow slug max length to be 254 symbols instead of current 200
Add shipping address to order (system fields)
1) Add shipping address as system fields to the order in the admin Extend order model by adding shipping address as system fields http://prntscr.com/tet3te Separate address to the following fields and allow editing via order edit operation: • Shipping Address • Shipping City • Shipping State • Shipping ZipCode • Shipping country 2) Extend Order liquid object Extend Order liquid object by adding following fields: • shippingAddress• addressLine • city • state • zipCode • country
So they could be listed like • {{this.order.shippingAddress.addressLine}} • {{this.order.shippingAddress.zipCode}} • etc
Last sorting state saving for the module list view
Remember the latest sorting field and sorting direction for each module on list view http://prntscr.com/t97vsn Once admin user comes back to the module items list view in the admin - the sorting should be the exact same as it was saved earlier.
Re-send Invoice
1) Provide ability to re-send invoice email from the admin dashboard (on edit order page) to: - Order creator/customer (‘Email Invoice’ button) - Custom email (‘Send Test Email’ button): once clicked - shows text field to enter email address (pre-filled by current admin email)
Feature flags updates for v5.4
For Trial Sites: Flags moved to internal section AND set to enabled: • Advanced payment flow • Advanced URL manager • New liquid engine & nICE 2.0 For Live sites: Flags move to internal section AND set to enabled: • Advanced URL manager
Make reCaptcha to be required for users not logged in
1) Feature flag: Anti-spam protection Enables logic restriction that doesn't allow to submit any web form for not logged in users if the form doesn't include reCAPTCHA (v2 or v3) Apply restriction as part of validation if • form has no payment fields (if has - no need for forced reCAPTCHA) • user is not logged in (if user is logged in - no need for forced reCAPTCHA) 2) WARNING: The flag will be force enabled in 5.5 release (but it still could be temporarily disabled for certain sites on demand). So change your forms accordingly for 5.5 release. And in 5.6 this logic will be applied permanently.
Bug fixes4
Url (and all other system properties) names should be restricted for custom properties of the module
When creating custom properties, for any module, using a name of any system property the property should not be created since such alias in use. System should say “Property with specified name already exists” THIS FLOW SHOULD WORK FOR ALL SYSTEM PROPERTIES
Snippet should contain the same object within this variable that is accessible outside snippet. 1. Create snippet and write {{this}} http://prntscr.com/sos6mn 2. Create a Page and output that snippet http://prntscr.com/sos7qe 3. Create another page and write {{this}} Expected: The only difference between those 2 pages should be only in additional “params” property available in snippet this output http://prntscr.com/sos9nf Actual: Properties of this object shown incorrectly http://prntscr.com/thgqkk
• on upload new file show popup: “Are you sure you want to replace already uploaded file?”
• if `Is Downloadable Product == false`
• remove access to the file.
• If `true` restore access
Design https://prnt.sc/skhijv Downloadable products: Processing Logic 1) Add api to retrieve downloadable file • URL: `/api/get_order_file/[order_line_id]`
• If order is successfully paid (order pending price == 0) AND product has `Is Downloadable Product == true`
• Download file
• else; Show 404 page
2) If product has been deleted - delete file as well. On delete - show popup: “You have downloadable file attached to the item and it will be deleted with the item. Are you sure you want to delete this item?” Downloadable products: Shipping Options logic upgrade HIDE shipping options only if ALL products in shopping cart has: • `Enable Shipping == false` Return an undefined `Enable Shipping` value as `true` if: • `Is Downloadable Product == true` OR • `Is Gift Voucher == true` Otherwise it's `false` Downloadable products: Downloadable link for the order line liquid scope Add property `downloadableFileURL` to `order` line liquid object. Accessible everywhere that `order` liquid object is added to the liquid scope (thankyou page, invoice, workflow, supplier emails, etc). • Value is a downloadable link. • if product is not downloadable - value is `null` Modify thank you page and invoice email (default layouts) to show download link if order line is downloadable product Design https://prnt.sc/skhlt9 Downloadable products: Count downloads logic Add `Max Downloads Allowed` system field to product module: • type: `int` • default: `0` If value is > 0 • Allow verified downloading process not more times than `Max Downloads Allowed` for the order line (product['MaxDownloadsAllowed'] * orderlineQuantity) • If someone tries download file but gets 404 - DO NOT COUNT it as download attempt • Else; If admin downloads the file - allow them to download the file BUT DO NOT COUNT it as download attempt • Else; download the file and COUNT it as download attempt for the order line Else (value is 0 or empty) • Allow unlimited file downloading • COUNT it as download attempt for the order line Downloadable products: Downloadable link in admin Wrap the product name in `order -> products` tab with a link to downloadable file if it is a downloadable product.
Improvements4
Misc Improvements (5.3)
Ecommerce
This list of improvements is gathered from Treepl users' feedback from forum and support: • Ability to copy existing custom module "Pro" plan • Parent child module links in module settings • search keywords field to import/export • nICE color picker z index issue • Case Insensitive URL redirect param • Add option to disable default styles and scripts in Misc settings • Re-apply folder detail instead of page detail layout for folders • Add URL to order line
Ecommerce Improvements (5.3)
Ecommerce
This list of improvements is gathered from Treepl users' feedback: • Auto add this.ProductDataJsonHTML to product detail layout • Stripe customers in advanced payment logic • Attribute and attribute options ordering • Show number of products in shopping cart in the product • Link to order on gift voucher • Add link to order from Case, booking • Daily recurring subscriptions • Order Management Upgrade - final tweaks • Grouped products form improvement • Add tax in product order line • Out of stock - hide product • Instock logic review • Orders with subs - link order to form submission • API Get CatalogId based on the catalog module item id • Add Shop settings page and Format settings update • Country list management for shopping cart • Shipping and tax improvements • Bulk delete of booking subscriptions • Payment Fields Appearance Management • | set_money_format And | set_number_format upgrade
Manually Add Password To A CRM Record
CRM
1) Add ability to change password for the CRM contact record. When admin changing password - send `Password Changed` system email
2) Add new system email `Password Changed` • When saving email perform validation
• liquid output is required
• Liquid scope of this:
• siteUrl
• adminEmail
• newPassword
• member (object - all data of crm contact like it outputs in )
• Subject
• “Your password has been changed on by the admin”
• Content
• “Hello ,
Your password on () website has been changed to <strong></strong> by the admin ().
If you did not request this change, please contact your website administrator.”
"Today" Button For Release/Expiry Date Functionality
Custom Modules · UI/UX
Add a "Today" button on Release/Expiry Date fields for making inputting date easier, as in BC. https://prnt.sc/rvix5f
Other updates49
Module Duplication
Function restriction upgrade: Allow copying module starting from Pro plan
`ProductDataJsonHTML` to product detail layout
Exclusively for Product Module: Automatically add {{this.ProductDataJsonHTML}} to the product detail if there is no manual output inside the layout
Parent Child module links in module settings
Add ability to switch between parent and child module via links. Made them in the way that clearly shows what module is parent and what is child. Useful if you want to go to Blog post settings from blog settings. Design - https://prnt.sc/skhen8
Search keywords field
Added search keywords field to import/export
Downloadable products: System Properties
Add following fields to the system properties for Products module: • Enable Shipping
• (boolean)
• default `true` (preset `true` to all products that was created before this update)
• Is Downloadable Product
• (boolean)
• default `false`
• once `true` - show Product File
• Product File
• (file)
• Store file in a folder not accessible via ftp (as a result - not accessible by direct URL)
• Show new control "Product File" with:
• download (once clicked – allow user to download the file if an admin)
1) Add api to retrieve downloadable file • URL: `/api/get_order_file/[order_line_id]`
• If order is successfully paid (order pending price == 0) AND product has `Is Downloadable Product == true`
• Download file
• else; Show 404 page
2) If product has been deleted - delete file as well. On delete - show popup: “You have downloadable file attached to the item and it will be deleted with the item. Are you sure you want to delete this item?”
HIDE shipping options only if ALL products in shopping cart has: • `Enable Shipping == false` Return an undefined `Enable Shipping` value as `true` if: • `Is Downloadable Product == true` OR • `Is Gift Voucher == true` Otherwise it's `false`
Downloadable products: Downloadable link for the order line liquid scope
Add property `downloadableFileURL` to `order` line liquid object. Accessible everywhere that `order` liquid object is added to the liquid scope (thankyou page, invoice, workflow, supplier emails, etc). • Value is a downloadable link. • if product is not downloadable - value is `null` Modify thank you page and invoice email (default layouts) to show download link if order line is downloadable product Design https://prnt.sc/skhlt9
Downloadable products: Count downloads logic
Add `Max Downloads Allowed` system field to product module: • type: `int` • default: `0` If value is > 0 • Allow verified downloading process not more times than `Max Downloads Allowed` for the order line (product['MaxDownloadsAllowed'] * orderlineQuantity) • If someone tries download file but gets 404 - DO NOT COUNT it as download attempt • Else; If admin downloads the file - allow them to download the file BUT DO NOT COUNT it as download attempt • Else; download the file and COUNT it as download attempt for the order line Else (value is 0 or empty) • Allow unlimited file downloading • COUNT it as download attempt for the order line
Downloadable products: Downloadable link in admin
Wrap the product name in `order -> products` tab with a link to downloadable file if it is a downloadable product.
Stripe customers in advanced payment logic
Modify payment via stripe logic. • Add customer based on the `formData.Email` field to stripe if they don't exist. • Check if current card's fingerprint (taken from the token) is already added to this stripe's customer • If added - use this added card to process payment • else; add card source (token) to this customer and process payment
As a result if same customer submits several payments - it will always be as one single record in vendor's stripe account. And they will have attached list of non-repeated credit cards that is based on tokens provided while payment.
Attribute and attribute options ordering
Provide ability to change order of the attributes and options for products via drag-and-drop functionality, which applies the ordering to: • Admin UI interface • liquid object for attributes and options via `{% component type: "item_attributes" %}` • object returned for `productDataJSON` property • order line attributes object Hide drag-and-drop functionality on mobile devices.
Show number of products in all shopping carts
Ecommerce -> Product -> inventory: Show number of items added to all shopping cart sessions under the label of: `Added to shopping cart` Add to general product and product with variations screens: http://prntscr.com/riwxwb http://prntscr.com/rix0au
Link to order on gift voucher
Ecommerce -> Gift voucher edit page: • Add link to order near balance input (similar to the link to template on module item http://prntscr.com/rii7nh)
Add daily recurring subscriptions option to the secure zone. Modify subscription expiration extending logic: Add +5 hrs to secure zone expiration date (but not to the payment subscription) in order to avoid temporary loosing of the access while waiting for the IPN notification regarding successful payment
Order Management Upgrade
Split form submissions and booking subscriptions in orders detail page
Grouped products form improvement
Remove description field from the grouped product object. Leave display name only
1) Add following properties to the order line liquid object: • taxRate
• Shows decimal value of the tax rate
• unitTaxPrice
• Shows (unitprice*taxRate) numeric value
• unitTaxPriceHtml
• Shows (unitprice*taxRate) numeric value wrapped with holder compatible with ecomerce.js
• Add js calculation for this property
• totalPriceExcludingTax
• Shows (unitprice*quantity) numeric value
• totalPriceExcludingTaxHtml
• Shows (unitprice*quantity) numeric value wrapped with holder compatible with ecommerce.js
• Add js calculation for this property
• taxPercentHtml
• Shows percent value of the order line tax with % sign wrapped with holder compatible with ecommerce.js
• Add js calculation for this property once tax for order line is changed
• totalHtmlPrice rename property to totalPriceHtml
• On appstart - edit shopping cart, invoice, checkout thankyou pages fixing old property usage to the new one
• totalHtmlPriceExcludingTax rename property to totalPriceExcludingTaxHtml
Example of missing properties and its values: https://prnt.sc/rwvj2f These properties should be accessible wherever order line object occurs in liquid; ie: on orders and shopping cart, in invoice, workflow, supplier emails and on checkout thank you page.
2) Add following properties to order (see above Example Spreadsheet for calculation definition) • shippingPrice
If product in inventory tab has Out of stock property value equals to `hide product` (https://prnt.sc/rseiyi)
Add rule to remove such items from filtering and searching logic of the site.
When accessing by direct link - show 404
Instock logic review
Change the logic to NOT storing reserved for shopping cart items in In Stock property: • In Stock
• Always positive value or 0
• Pre-order
• Always positive or 0
• shows number of items that was bought after in stock value becomes 0
• Added to shopping cart
• add this property as display field to the inventory tab (https://prnt.sc/rq90pu) for both global inventory settings and each variation line and the total below.
• Always positive or 0
• shows number of items stored in all existed shopping cart sessions
• Return quantity when canceling order or destroying shopping cart:
Save form submission data to stripe metadata when performing a payment. Once stripe sends success callback - create form submission record based on data in metadata field
Add Shop settings page and Format settings update
1) Create groups on the `Settings -> Misc` page Admin Panel Settings • Enable text wrapping on a new line in the ace editor. • Enable 24 Hours Format in the Date Picker Recaptcha settings • Recaptcha V3 Score Shop settings • Shopping Cart Life Time (Default 24 hrs) Use this value to determine how long shopping cart could exist (use shoppingCart['lastUpdateDate'] property). Once time is exceeded - delete shopping cart. 2) Extend `Currency and Format` settings panel (Settings > Domains > Currency and Formatting) Add `Use Custom Number/Currency Format` checkbox (https://prnt.sc/rrnzsp) • If enabled - show customization layout with examples similar to this one (https://prnt.sc/re4w3m)
Apply using these settings in all places where format settings are used in the system (ie: All ...Html properties of the product, orderline, order, etc. and liquid filters that are relying on format settings Params to be listed in user friendly way: • CurrencyGroupSeparator (string) = "," • CurrencyGroupSizes (string) = new[] {2, 1, 2} CSV string of numbers. Determines pattern for Group sizes (from right to left. Last digit would be repeated)
• CurrencyDecimalSeparator (string) = "." • CurrencySymbol (string) = $"GRN" (Preset with the symbol of the selected currency) • CurrencyNegativePattern = 8 dropdown with UI friendly labels. As per these patterns: patterns • CurrencyPositivePattern = 2 dropdown with UI friendly labels. As per these patterns: patterns
Country list management for shopping cart
1) Add ability to choose what countries to show on the shopping cart. Add `allowedCountries` option to the {% component type:"countries" %} Value: • Comma separated list of country codes (eg: US,AU) • default value is empty string • if empty - show ALL countries • else; show only those countries that determined in the comma separated list Example: {% component type:"countries", collectionVariable:"", allowedCountries:"US,AU" %} 2) Add ability to select countries via multiselect dropdown in the component toolbox
nICE color picker z index issue
Would it be possible for the algorithm to have a minimum z index of at least 100. It seems like it's calculating it at 5 on any complex website, there are going to be items that are over that z-index.
Offline Credit Card Payment System page
NOTE: To be renamed “Deferred Order Payment” Create new system page • Offline Credit Card Payment Liquid scope of the page should include the `order` object (same as is accessible on checkout thank you page) Page should contain a new system form with: • payment fields for the current domains' payment gateway • hidden input for order id with preset orderId value via {{this.order.id}} Add to component toolbox ability to retrieve offline payment HTML form code • Ecommerce > Offline Payment Form
Offline Credit Card Payment Email
NOTE: To be renamed “Deferred Order Payment”
Add new System email • Offline Credit Card Payment
• Subject: Pay an Order #{{this.order.id}}
Liquid scope • siteURL
• order
• customer
• The CRM record that is attached to the order. Same as added in {{request.member}}
• offlinePaymentPageURL
• Required to be in the email content. Should contain domain that was saved within the order. Provide validation and do not allow to save content if email content does not contain {{this.offlinePaymentPageURL}} string
Offline Payments flow
NOTE: To be renamed “Deferred Order Payment” Provide ability to send Offline Credit Card Payment Email from the `Order -> Payments` tab (https://prnt.sc/rvjj8g) • Send Offline Credit Card Payment button
• Email should be triggered for the domain that is attached to the current order
Alternatively, provide ability to go directly to `Offline Credit Card Payment` system page URL (front-end) from this tab • Pay By Credit Card button
• link to system page should contain orderId
When submitting a form from the Offline Credit Card Payment system page • Validate payment data
• if error - show same error message as for the web forms
• else - proceed payment and
• if success attach it to the order that is referenced via hidden input
• Set order status to success
• add success payment line to `Order -> Payment` tab
• else - show error payment message.
Provide ability to set `redirectURL` param. Same as for general forms (form input field) Provide ability to use `jsonResponse=1` param. Same as for general forms
Password change in CRM
1) Add ability to change password for the CRM contact record. When admin changing password - send `Password Changed` system email
2) Add new system email `Password Changed` • When saving email perform validation
• {{this.adminEmail}} liquid output is required
• Liquid scope of this:
• siteUrl
• adminEmail
• newPassword
• member (object - all data of crm contact like it outputs in {{request.currentmember}})
• Subject
• “Your password has been changed on {{this.siteUrl}} by the admin”
• Content
• “Hello {{this.member.firstname}},
Your password on ({{this.siteUrl}}) website has been changed to <strong>{{this.newPassword}}</strong> by the admin ({{this.adminEmail}}).
If you did not request this change, please contact your website administrator.”
Bulk delete booking subscriptions
On `Event -> subscription` tab (https://prnt.sc/rq7cff) provide ability to • delete all button • select several items and click delete selected items
"Today" Button For Release/Expiry Date Functionality
Add a "Today" button on Release/Expiry Date fields for making inputting date easier, as in BC. https://prnt.sc/rvix5f
Payment Fields Appearance Management
1) Add ability to manage layout that is generated by payment systems (https://prnt.sc/rsfhq7): Added two tabs: • Settings (Current content) • Appearance (List of setting for the current payment gateway) Create list of fields based on the documentation below: • Stripe: https://stripe.com/docs/js/appendix/style • Eway: https://eway.io/api-v3/?csharp#secure-panel 2) Apply chosen appearance settings to the payment fields within all payment forms' layouts Modify {% component type:"payment_form_fields", formAlias:"{{this.alias}}" %} layout or payment script JS GET params for this task.
Case Insensitive URL redirect param
1) Add additional checkbox field to specify if url redirect is case sensitive or not. • Is Case Insensitive
• default value is true
• by default set once on app-start values of existed redirects to true
logic: • If value is true
• compare requested URL with saved redirect URL and ignore the letters case
• Request URL /Content will NOT trigger URL redirect /content => /new-content
2) Add column to list layout for Is Case Insensitive property 3) Add column to import/export URL redirects flow.
Control default styles and scripts
Provide ability to disable auto-added default CMS assets to the head section of pages. Under `Settings -> Misc => CMS Assets Management` 1) Global Settings Fields (and show which resources not to add to the head): • Main CSS • Ecommerce JS • Recaptcha JS • Payment JS 2) For the Content Template Provide same list of fields on the `Content Template` add/edit layout to override global defaults (ie: use global setting by default) 3) Implement logic to check CMS Assets Management settings in the Content Template (or in the Global Settings if Use global setting option is selected for the template). Based on the retrieved value either append appropriate styles and scripts html tags to the head or not.
Re-apply folder detail instead of page detail layout for folders
Check if there are Page Folder items that have applied detail layout with ID 1525 (Page Detail) If found - attach to them Folder Detail layout (ID 1519 ) and save item.
| set_money_format And | set_number_format upgrade
Modify liquid filters • set_money_format
• set_number_format
Parse argument the following way • If can be converted to long int
• determine argument as ID
• find format setting by ID
• Else
• determine argument as Name
• find format setting by Name
Add URL to order line
Add URL to order line liquid object. Redo `shopping cart` system page and `invoice` layouts to wrap product name with the link to the product.
Add .dwg format to the staticContent section
Add “.dwg” extension to the list of allowed to be accessed via URL (Static content list)
Order migration (old data to new)
Migrate order that was created not by Advanced Payment Flow to the latest version of the orders logic. Apply main order param for the orders that was created for recurring payments (secure zone subscriptions) according to the latest version of the orders logic .
this.order in workflow emails scope
Add this.order object (same as added in invoice email) to the workflow email liquid context if form has "Accept Payment" option enabled. If no order was created during form submission - set this.order to null
Add to cart - param for button text
Add buttonName param to: {% component type: "ecommerce_add_to_cart" %} {% component type: "ecommerce_buy_now" %} Example: {% component type: "ecommerce_add_to_cart", buttonName: "Add Me!!!" %} Default value is empty Replace in default layout: `Add to cart` text to `{{this.buttonName | default:"Add to cart"}}` Replace in default layout: `Buy now` text to `{{this.buttonName | default:"Buy now "}}`
Type Media module item property UX upgrade
Change the algorithm of opening file manager when clicking icon for Type Media module item property https://prnt.sc/sjsoxe: • if the property contains any file path - try to open file manager to that folder location • otherwise open root folder as it worked currently
Modify shopping cart object
https://prnt.sc/sapq1j 1) Add `eCommerceItemId` to the shopping_cart order-line object 2) Add attribute images to the order `options` object SOURCE: Use-case for having access to this data:
I had the requirement to display the chosen attribute option image in the cart, but had to do several more look ups and collection loops to retrieve it. Not directly having the product ID meant I had to look up the product via SKUCode instead which isn't as stable. But the item ID should always be available IMO.
Remove Product from cart data attribute selector instead of <tr> (ecommerce.js)
Modify the functionality, when removing product from cart, so it will try to find parent HTML element by data attribute `data-cms_cart_order_line_holder`. Add autoFix of the shopping cart layout on our template and sites created based on ecommerce template (for the backward compatibility.)
Rebuild module after import module items
Set to queue entire module rebuild when import module items process is finished
Priced ...HTML properties decimals after dot fix
PriceHTML and other ...HTML properties render to 4 decimals. Should render such number of decimals as configured in Format Settings attached to the current domain
Add Paginate items parameter for component type module, module_of_member
Add new parameter to the {% component type:"module" %} and {% component type:"module_of_member" %} • Parameter name
• enablePagination
• Default value
• true
• Not required (not show this param in toolbox if param is checked)
• Logic
• if false - do not apply pagination logic via get params. Return same items as it shown when no pagination params occured in URL
Order -> Payment tab UX improvement
View Total cost and pending cost on the page. When click pay by cash - automatically preset amount equal to pending cost Design: https://prnt.sc/skioca
12-24 hrs format switcher for admin datepickers
Add switcher between 12 and 24 hrs formats on datepickers on `Settings -> Misc` page. Datepickers hrs time format (select) (options): - 12 - 24 Applied to datepickers throughout admin.
Bug fixes26
Duplicating Event
When duplicating an event item Expected: It should not contain any subscriber. All already duplicated items' counters should be fixed on app start Actual: Duplicated item has same subscribers counter as original item has https://prnt.sc/rv91k4. SOURCE https://forum.treepl.co/t/duplicating-event-bug/1026
Go to Settings Blog and select Items List View http://prntscr.com/sbq62x After saving Folders icons are disappear as well as path to Blog Post settings http://prntscr.com/sbq6ms When showing settings tab CMS should return system modules parent-child linkage in order to not override it when saving other settings of the blog http://prntscr.com/sbqbz1
When deleting a tax sometimes we get Internal error:
The primary key value cannot be deleted because references to this key still exist. [ Foreign key constraint name = ForeignKey.ShippingOptionBase.TaxCode ]
Inventory - When Out of Stock hide button
• Setup inventory • Select “Show product but don't accept orders “ in “When Out of Stock” • This two buttons should be disabled http://prntscr.com/rh8o7n
Bugs from forum - Secure Zone Question
• Create custom module with the properties Multiple and String • Create 2 items and fill those fields with any text • Get export of those items • Change text in the cells to any numbers • Make import of the result file - error https://prnt.sc/ra8k6j
Bugs from slack - disappear product on Thank you page
• Go to products • Make several products to be disable http://prntscr.com/r2836j • Go to any enabled product -> Retailed Items tab and try to add those products that marked as disabled • Error http://prntscr.com/r282nc
Bugs from slack - import/export
A product export file re-imported presents ‘Internal Error’.
Bugs from slack - error when apply discount with currency DKK
• Add domain and add Country/Currency of “Denmark/DKK” • Create product • Create discount code with Type - Percent http://prntscr.com/qyebmc • When applying this discount an error occurred http://prntscr.com/qyec9b
Choose different shipping info
• Create shipping option • Go to product and add it to cart • Go to the shopping cart and select United State and the sipping option • Go to checkout • In another window open shopping cart and change country • Go to checkout – price should be recalculated
Bug from forum - Liquid code to list files from a particular directory
Add validation of these fields: Minimum Units and Maximum Units https://prnt.sc/riulyw when adding products to cart
Bug from client - import/export CRM
Add ability to edit Type SOURCE: I am seeing an "Excel row number: 2. Detail: Invalid member type." on all 20 lines I try to import to the CRM, but there is no "type" in the file? The only row that works is the first and they all look similar?
I guess it is something REALLY simple, but not sure? Normally I don't have any problems importing. The first line is exported from the CRM to have something to work from. https://prnt.sc/skj0vv
Bug from client - change logic Exclude from Catalogs
• Go to Shipping Option • Create new shipping option and set Exclude from Catalogs • Exclude from Catalogs should exclude this shipping option if shopping cart has at least one product that attached to any of the selected catalogs within this field http://prntscr.com/rwk7el
Bug from forum - Mandatory Custom Module Fields Reflect in User form
• Go to Workflow Emails • Change Name and click save • Changes are not applied http://prntscr.com/sbt63f
Search forms - doesn't display SKU Code, Seo title and Meta description
• Create search by module form http://prntscr.com/sbvllm • SKU Code, Seo title and Meta description fields are missed
Bug from Adam - not correct show price when set up 2 prices
• Create a product with 2 prices https://prnt.sc/skiqys • Attribute prices does not displayed with tax included even when the appropriate param is enabled https://prnt.sc/sdbsis
URL output {{request.request_url.href}} is fixed (was broken and accessible via incorrect alias: {{request.request_url.ref}})
“href” param is broken and outputs via “ref” instead. Output on the page {{request.request_url}} and here should be “href” http://prntscr.com/sgmgsj
Bug from Peter - edit name Catalogs
Change catalog name and click save Go to the list of the catalogs Catalog name is not changed http://prntscr.com/sh8xf5
2 updates
Improvements2
Performance Update and General Overhaul
General
Liquid 2.0 + nICE 2.0 polishing and finalization Overall system performance upgrade (up to 80% on pages with multitude of module items and components)
Treepl Portal: Upgrade Website
WebinOne Portal
Ability to upgrade a paid website, with difference in cost applied billed through PayPal or Stripe
21 updates
New features2
Ecommerce Template: "Furniture"
Templates
New ecommerce/Foundation/WCAG 2.1 compliant template:"Furniture"
eWAY Payment Gateway
Ecommerce
eWay Payment Gateway: Update Payment Gateway Settings Page in the admin 1) Add ability to select eWAY as a payment gateway in Settings > Payment > Gateway tab. If eWAY selected - show fields that are required for eWAY. If stripe selected - show stripe fields. http://prntscr.com/r5p0os 2) REMOVE IMAGE FIELD FROM THE STRIPE FIELDS 3) Required fields - Key - Secret - Password - Endpoint: Production, Sandbox eWay API key reference: http://prntscr.com/rcm99b eWay Payment Gateway: Integrate eWay API to Payment Flows Add eWAY payment API library to the system. Implement following payment flows: - single item payment (for "Advanced Payment" flag on and off) - item/event payment (for "Advanced Payment" flag on and off) - checkout payment For secure zone recurring subscriptions and eWAY payment gateway enabled for the country/currency: - Show validation message and stop processing form submit immediately: "Recurring payments are not allowed for eWAY payment Gateway yet." eWay Payment Gateway: Integrate eWAY API for payment forms frontend JS Apply eWAY apis to provide credit card fields via JS for payable forms in order to tokenize the card and pass token to the backend for charging process.
Apply backend auto-add js file script tag to the page similar to the stripe js (provide all required payment settings via get params to eway.js file) eWay Payment Gateway: New component for payment fields Add new component tag of type "payment_form_fields": {% component type:"payment_form_fields", formAlias:"[[formAlias]]" %}
- formAlias (required) - alias of the form
Single tag item context is described below: { "formAlias": 0, }
Default virtual layout: <div id="paymentFields_"></div> <input type="hidden" name="Payment_Data"/> <div id="paymentErrors_" role="alert"></div> Add this component to the default form layout that system generates for forms with payments instead of static html.
Improvements1
Ecommerce Additions
Ecommerce
• Tax price on product detail and in attribute component • Ability to see stock quantity for product variations with disabling of variations • Volume discount info available via Liquid • A button to restore all system pages and system emails to default
Other updates16
Email Domain Verification
Email Domain Verification released from beta flag into production
eWay Payment Gateway:Update Payment Gateway Settings Page in the admin
1) Add ability to select eWAY as a payment gateway in Settings > Payment > Gateway tab. If eWAY selected - show fields that are required for eWAY. If stripe selected - show stripe fields. http://prntscr.com/r5p0os 2) REMOVE IMAGE FIELD FROM THE STRIPE FIELDS 3) Required fields - Key - Secret - Password - Endpoint: Production, Sandbox eWay API key reference: http://prntscr.com/rcm99b
eWay Payment Gateway:Integrate eWay API to Payment Flows
Add eWAY payment API library to the system. Implement following payment flows: - single item payment (for "Advanced Payment" flag on and off) - item/event payment (for "Advanced Payment" flag on and off) - checkout payment For secure zone recurring subscriptions and eWAY payment gateway enabled for the country/currency: - Show validation message and stop processing form submit immediately: "Recurring payments are not allowed for eWAY payment Gateway yet."
eWay Payment Gateway:Integrate eWAY API for payment forms frontend JS
Apply eWAY apis to provide credit card fields via JS for payable forms in order to tokenize the card and pass token to the backend for charging process.
Apply backend auto-add js file script tag to the page similar to the stripe js (provide all required payment settings via get params to eway.js file)
eWay Payment Gateway:New component for payment fields
Add new component tag of type "payment_form_fields": {% component type:"payment_form_fields", formAlias:"[[formAlias]]" %}
- formAlias (required) - alias of the form
Single tag item context is described below: { "formAlias": 0, }
Default virtual layout: <div id="paymentFields_{{this.formAlias}}"></div> <input type="hidden" name="Payment_Data"/> <div id="paymentErrors_{{this.formAlias}}" role="alert"></div> Add this component to the default form layout that system generates for forms with payments instead of static html.
ATTENTION: this property required to be rendered on Detail or list layout, because treepl cms ecommerce js works based on it’s data. Otherwise add to cart, buy now buttons and in-stock calculations wouldn’t work.
Value is: <script> initEcommerceProductPriceVariations({{this.Id}}, {{this.ProductDataJson}}); </script>
Modify JS to: - calculate inStockHtml value based on selected attribute options and this.productDataJsonHTML Data (inventoryVariations)
- disable attribute options according to disabled variations in inventory and this.productDataJsonHTML Data (inventoryVariations)
- calculate priceHTML and priceWithTaxHtml based on this.productDataJsonHTML Data (quantityThreshold)
Unite custom menu API and default menu API in to the one API request Add properties to each menu item object: - type - id of the item - default view (for module)
Remove UI bug when items list requested several times in a row if fast clicking between different module list pages Desired result is speed improvement in the admin when: - initial admin panel load - module item list/tree view load
Ecommerce Improvements:Volume discount info to liquid
Add volume discount collection to this object of a module item that "is product" ONLY (module setting EnablePricing == true). Property: - volumeDiscount
Collection structure:
[ { "quantity" : 10. "price" : 200 }, ... ]
Ecommerce Improvements:Hide ecommerce items on lower site plans
1) If site plan is lower than ecommerce hide following items: • workflows: • Low stock notification Workflow
• system pages: • checkout • order-receipt • shopping_cart
• Setup logic on form submit if form.type == checkout • Show validation message and stop processing form submit immediately: "Checkout forms can not be processed on the current site plan."
2) If site plan is lower than pro hide following items: • system emails: • Invoice
• File Manager: • ability to secure folders
• Settings -> Payment: • menu item and pages
• Settings -> Domains: • CURRENCY AND FORMAT tab
• Events: • pricing tab
• FORM builder: • Hide ability to change form types (for new select generic, For existed non generic - not change) http://prntscr.com/rh6dxz
Ecommerce Improvements:Restore system pages and system email to default button
Add ”Restore to default” buttons to: - system pages - system emails
Ecommerce Improvements:Move Currency and Format tab to Domain settings
Move Currency and Format tab from Settings->Payment to Settings->Domains
Ecommerce Improvements:Disable Secure form submission folder feature
Disable Secure form submission folder feature. In one of the upcoming releases it will returned back with ability to configure what form should secure uploads and what should not.
Ecommerce Improvements:New component added for Cases
• collectionVariable (not required) - works the same way as other modules. • layout (not required) - path to FTP file that will contain layout content to be parsed. • If specified empty string - do not render anything. • If not specified at all - render default virtual layout.
• filterBy (not required) - default value is empty • Id • FormId • MemberId • FormName • CreatedDateTime
• filterValue (not required) • value to use in filtering condition
• filterCondition (not required) • equally (default) • less • more • lessEqually • moreEqualy • contains
• limit (not required) - number of items to get (default value is 10) • offset (not required) - number of items to skip before get (default value is 0)
Single tag item context is described below. If object = collection than this contains attributes property that holds the list of attributes ({{this.items}}) : List View: { "formId": 0, "memberId": 0, "id": 0, "formName": "", "dateSubmission": "" }
• currentMemberOnly (not required) - default true • if false get all orders of all users • otherwise get orders of current logged in crm member only (default is true)
• collectionVariable (not required) - works the same way as in type: module. • layout (not required) - path to FTP file that will contain layout content that need to be parsed. • If specified empty string - do not render anything. • If not specified at all - render default virtual layout.
• filterBy (not required) - Default value is empty • id • formId • memberId • caseId • name • invoiceNumber • invoiceDate • paymentType • AmountPending • AmountPaid • subTotalPrice • taxPercent • taxPrice • totalPrice
• filterValue (not required) • value to use in filtering condition
• filterCondition (not required) • equally (default) • less • more • lessEqually • moreEqualy • contains
• limit (not required) - number of items to get (default value is 10) • offset (not required) - number of items to skip before get (default value is 0)
Single tag item context is described below. If object = collection than this contains attributes property that holds the list of attributes ({{this.items}}) :
Detail View: { "id": 0, "formId": 0, "memberId": 0, "caseId": 0, "name": "", "invoiceNumber": "", "invoiceDate": "", "items" : [see Data Structure for this component (see v5.0 release notes)], "formatSetting" : [see Data Structure for this component (see v5.0 release notes)], "domainCountry" : [see Data Structure for this component (see v5.0 release notes)], "destinationCountry" : [see Data Structure for this component (see v5.0 release notes)], "shippingOption" : [see Data Structure for this component (see v5.0 release notes)], "discount" : [see Data Structure for this component (see v5.0 release notes)], "giftVoucher" : [see Data Structure for this component (see v5.0 release notes)], "paymentType" : "", "AmountPending" : 0 "AmountPaid" : 0 "subTotalPrice" : 0 "taxPercent" : 0, "taxPrice" : 0, "totalPrice" : 0 }
Ecommerce Improvements:Auto add this.ProductDataJsonHTML to product detail layout (will be released via hotpatch v5.1.1 on March 23)
Exclusively for Product Module: Automatically add {{this.ProductDataJsonHTML}} to the product detail if there is no manual output inside the layout
Module copy function restriction upgrade (will be released via hotpatch v5.1.1 on March 23)
Allow module copying starting Pro plan
Bug fixes2
BUG: Item Duplication of an already Duplicated Item
Admin Panel · Bugs · Pages and Templates
If you duplicate an item (from within the edit page), save it as a new item, then duplicate that item (still within the edit page), it actually duplicates the original/first item instead of the new one.
List of bug fixes
• Fixed BUG occurred on Item Duplication of an already Duplicated Item. (If you duplicate an item (from within the edit page), save it as a new item, then duplicate that item (still within the edit page), it actually duplicates the original/first item instead of the new one.) • Event module seems not to be able to "hide when full" • incorrect system fields data exported for Event module http://prntscr.com/rjqcnu • {% component type: "module_of_member" %} shows incorrect TotalItemsCount • Secured Home page should not be accessible if requested via “/” (https://forum.treepl.co/t/secure-zone-question/885) • Secure Zone Folders issue (http://prntscr.com/r93bzwhttps://forum.treepl.co/t/v-5-0-release-date-19-feb-2020-how-to-ability-to-assign-documents-to-a-secure-zone/925/3 ) • incorrect warning popup when change paid secure zone period • liquid error on site when use www • Fixed Duplicating of product with attributes and inventory • Liquid Time - fix %T (previously worked same way as %r)
eCommerce related:
• Disable Checkout button when applied price changes • add TaxPriceHtml to shoppingcartdata object • Fixed displaying of Recommended Retail Price https://prnt.sc/r7u7yq • Gift Voucher shows incorrect Currency in giftvoucher email • liquid error Component RelatedItem and Component GroupedItems • {{this.order}} is now accessible in workflow email content. • Product Detail layout improvement - removed price rounding when selecting attributes • Fixed incorrect calculating In Stock quantity when add product with attributes • Fixed incorrect priceHtml value displaying on product detail (previously shows 4 decimals) http://prntscr.com/rjpuq9 • form submissiondataobject doesn’t accessible in invoice email • Product Detail layout improvement - Inventory control (In Stock) • Fixed incorrect order prices displayed on thank you page
105 updates
New features2
BONUS: UK Data Center
Infrastructure
New data center: UK (London) More details in our blog post
eCommerce
Ecommerce
c1 Ecommerce: Catalogs Create new System module under eCommerce menu called "Catalogs" - allow creating Catalogs and Products on root level and inner level - has new ‘Simplified Tree View’ - has system field for a Thumbnail Image (media) Design: http://prntscr.com/r7gnqx c2 Ecommerce: Catalogs New item view type Add new view of items: • Simplified Tree View Extend Module -> Advanced Settings: • View Settings (add new checkbox) “Allow Items Simplified Tree View” • Default view (Add new option) “Simplified Tree View”
Simplified Tree View page for catalog view provides ability to: • Create new catalog on the root level • Edit existing catalog • Delete catalog • Move catalog under another catalog • Reorder catalog on the particular level • Create catalog under another catalog Design: http://prntscr.com/r7gotn c4 Ecommerce: Catalogs Advanced Module Settings -> Allow multiple parent items Add new module setting under Advanced Settings -> Allow multiple parent items
If this option of the child module is enabled - display Tab with the name of the Parent module (for child module item view) or the name of the Child module (for parent module item view).
Example: Module Catalogs is parent to Products. If Products module has Allow multiple parent items=true than product item page will contain Catalogs tab, and catalog item page will contain Products tab
Selecting multiple parents saves a list of the parent module items. List of parent module items determines the list of urls of which each will lead to the detail page of the item. p1 Ecommerce: Products New System module under eCommerce menu called "Products"
System properties: • Small Image (media) • Large Image (media) • On Sale (boolean) • Is Gift Voucher (boolean) • Product Weight (number) • Product Width (number) • Product Height (number) • Product Depth (number) • Enable Drop Shipping (boolean) • Supplier (CRM contact picker) • Unit Type (string) • Minimum Units (number) • Maximum Units (number) • Product Keywords (string) • Recurring Type (dropdown) • None • Daily • Weekly • Fortnightly • Monthly • Quarterly • Half Yearly • Yearly
p2 Ecommerce: Products Add/Edit Product Page Since product allows multiple parents - provide ability to see multiple urls for the module item. Design: http://prntscr.com/r7gqcj p3 Ecommerce: Products Default module property - SKU Code Add new default property ’SKUCode’ (string) to all modules. Add to liquid scope property ’SKUCode’
Show system property SKUCode on Add/Edit module item page -> settings page if • Advanced Settings -> Enable Inventory = true or • Advanced Settings -> Enable Price = true (Advanced settings hidden and restricted to change for now. Enabled for Event and Product modules only) p4 Ecommerce: Products > Prices Price entity list: Design: http://prntscr.com/rb0z9b
Display list of prices (price entities) based on Currency/country pairs. (Currency/country pairs can be achieved from list of domains and cultures and countries attached to them) List shows only price entities that are attached to active Currency/country pairs. If admin changes Currency/country pair for some domain but some module item already has attached price entity based on that Currency/country pair that was previously attached to the domain, than this price entity should not be visible but still saved in the db. So if admin sets back that currency/country pair to any domain, that module item will restore visibility of that price entity in the price list.
Price entity properties: • Currency (one of currency list) • Country (one of country list) • PriceList (list) • RetailPrice • SellPrice • Tax (one of tax codes filtered by PriceEntity Country setting) • priceForUserType (one of:) • Consumer • Wholesaler • may be more in the future
• VolumeDiscountPriceList (list) may be zero or many • Quantity • SellPrice
Liquid Scope Extending Module item liquid scope should be extended by property Price that should return price based on the current domain.
Searching and filtering impact Price property should be searched or filtered based on the current domain’s country/currency settings. p5 Ecommerce: Products > Attributes Add new module setting • Advanced Settings -> Enable Attributes (hidden and restricted to change for now. Available for Products module only) If option enabled - show ’Attributes’ tab in the Add/Edit module item page
Attributes list: Attributes provide ability to add/edit/delete product attributes and attribute options. Design: http://prntscr.com/rb16h8
Attribute entity: Attribute entity holds list of attribute options with their prices based on currency/country list from site domains.
Properties: • Name (string) • Attribute Type (one of) • dropdown • checklist • radiolist • numeric
• Value Type (one of) • fixed price
• Required (boolean) • AddToInventory (boolean) • Options (list) • Name • Image • PriceList (list) • Price • Currency (one of currency list) • Country (one of country list)
Searching and filtering impact Attributes and their options can not be searched or filtered via module component. p6 Ecommerce: Products > Inventory Design: http://prntscr.com/rb12ji
Inventory entity Clicking on Generate Variations (setting it to true) should hide InStock and PreOrder options and create variant products as per any attribute options that have AddToInventory = true. Set initial InStock value of the first variant product to the products stock level, where all others are 0. Sum of all insock values of all variant products should be set to Inventory.InStock property.
Clicking on Disable Variations (setting it to false) should show InStock and PreOrder options and remove variant products entirely. Both changes should be applied if user clicks save button ONLY. If user set Generate Variations = false than show confirmation window before saving: Are you sure you want to remove all product variations? OK CANCEL
Inventory entity properties and relations • Enabled (boolean) • Generate Variations (boolean) • WhenOutOfStock (one of) • Show [module alt name] but don't accept orders • Hide [module alt name] • Enable pre-ordering
• LowStockNotification (number) • InStock (number) • PreOrder (number) • Variations (list) • Title (string) • SKUCode (string) - UNIQUE between all variation Codes and all module item SKUCodes • InStock (number) • Enable (boolean) • AttributeOptionsVariation (one of variant products made by attribute options of attributes that have AddToInventory = true)
Searching and filtering impact Inventory data can't be searched or filtered for now. p7 Ecommerce: Products New component tag "item_attributes":
• moduleIdentifier (required param) - moduleName or moduleId. • itemId (required param) - id of the module item to get attributes from • object (not required param) - item or collection (Default). • collectionVariable (not required param) - works the same way as in other modules. • layout (not required param) - path to FTP file that will contain layout content to be parsed. • If specified empty string - do not render anything (suppress layout). • If not specified at all - render default virtual layout.
• sortBy (not required param) - any module item properties - Default is Id. • sortOrder (not required param) - ASC (Default) or DESC.
item context is described below. If object = collection (which is default) than this contains attributes property that holds the list of attributes (): • ecommerceItemId (number) - itemId that was set in the component params • attributes (list) • Id (number) • Name (string) • AttributeType (string) • ValueType (string) • Required (boolean) • AddToInventory (boolean) • Options (list) • Id (number) • Name (string) • Image (string) • PriceValue (number) • FormattedPrice (string) • Currency (object) • Code (string) • Symbol (string) • DigitalCode (string) • Name (string)
• Country (string) - country code
Default virtual layout can be seen/copied via FTP in ‘cms_assets’ folder. p8 Ecommerce: Module toolbox Add new toolbox items • eCommerce: • Catalogs list (default module items list toolbox for catalogs) • Products list (default module items list toolbox for products) • Related products • Grouped products • Product Attributes
File contains functions that supply: • Add to cart flow: Update item quantity, attributes, shopping cart widgets after adding to cart successfully • Enter Discount Code: Update shopping cart view based on applied Discount Code • Enter Gift Voucher: Update shopping cart view based on applied Gift Voucher • Clear Cart Flow: Update shopping cart view • Change shoppingCart Item quantity: Update shopping cart view based on applied item changes • Choose shipping: Update shopping cart view based on applied shipping option • Change Destination Country • Change Tax Code: Update shopping cart view based on applied tax
Logic should be based on layouts generated by • • • • Your Order item(s), Total: $0.00 View Cart Shopping cart is empty.
Linkage rules: <script src="/cms-assets/payment/ecommerce.js?v=[[cms_version]]"></script> should be added to head of the page when: • shopping cart system page is loaded • was parsed at least once Append to ecommerce.js 3 culture params Pass site culture settings to ecommerce.js for price calculation and JS output.
Fill thousands_separator, decimals_separator and decimals_count based on the culture of the site domain. Update table in eCommerce Update Custom Columns so user can select eCommerce related properties http://prntscr.com/r0keqv
Improvements1
Ability To Assign Documents To A Secure Zone
Member Area
Secure Zones: Files and Folders tab in secure zone Add new step to secure zones "Files and Folders" Provide ability to assign/unassign separate files or folders to/from secure zone. DESIGN: http://prntscr.com/r7d8m1 Secure Zones: Secured files and folders in file manager Provide ability to see and assign/unassign files and folders to/from secure zone(s) DESIGN: http://prntscr.com/r7d9w9 http://prntscr.com/r7da2c Secure Zones: Secured files and folders logic On each request to file after checking redirects, follow steps: • If current use is ADMIN user go to step 4 • Compare current request path (case insensitive) to ANY path of secured file. • If found - go to step 3 • If not found - check if current request path (case insensitive) contains ANY path of secured folder. • If found - go to step 3 • If not found - go to step 4
• Validate if ANY user's secure zone subscriptions contains AT LEAST ONE of the found entry secure zones. • If not contains redirect to 403 system page
• Allow file to be requested
Other updates68
Events:Merge event module to configuration of custom module with system properties
• Create System properties holder to the proto-module • Add event specific properties to the system module properties • Redo admin UI to use capacity, start end time and prices from system module properties • Restrict using names of system properties in any module custom properties section. • Already existed properties with the same name should be deleted and it’s values should be saved to the corresponded system properties
• Payment flow should use system module properties price instead of old event specific properties. • Liquid output should remain the same • Search indexes should save data from system properties instead of old event specific properties • JS calendar should work the same way as was before this change • Redo toolboxes
Events:Upgrade for Global Payments Flow
Set Allow pricing to Events module by default Transfer Event Price from system properties to Pricing table. Override system price property ‘Advanced Settings’ -> ’Enable Subscription’ checkbox added. When enabled (which is default): • show capacity field in module item page • allows event subscription logic to work for item
recaptcha v3 execution default JS improvement
Change default recaptcha V3 js code to the one specified in the file recaptcha v3 execution on form submit-min.js New code will execute recaptcha V3 validation once user triggers submit form event Submission will be longer, but this solution removes validation issues with the old code that gives you 2 minutes starting from the page loaded state to submit the form (validated token expired after 2 minutes). Old code launched validation on page load event.
Attention: Even if field is hidden if it has a value previously - it will not be erased on clicking save item
Recaptcha v3 validation score management
In Settings -> Misc Add ability to set Minimum validation score: • value should be between 0 and 1.0 • default value is 0.5 On webform validation if success check if validation score is greater or equals to the one set here.
Add keywords field for site search
Add default field to all modules: • Site Search Keywords • type: text Should contain CSV list of keywords.
When user will perform site search - apply searching by this new field as well as it currently does for name and description
Index writing/reading flow upgrade
Change the way reindex works: • launch reindex check each 2 seconds instead of 5 • stabilize index read/write operations so they will no longer conflict with each other (causing incorrect output via component when filtering by tags or categories) • Apply “reindex item” flow in site search similar to “reindex module item” instead of the WHOLE SITE SEARCH reindex (causing delays in component output when filtering by tags or categories) • When changing module settings - launch module reindex ONLY if module url was changed. • Optimize reindexing process to significantly reduce time for reindex module or reindex site search • Causing reduced speed of whole site (frontend and admin) since site is sharing same processor resources with the reindex process. • causing incorrect output via component when filtering by tags or categories
BUG fix: Check that reindex module flow takes ACTUAL documents. Not the cached ones.
Feature flags updates for 5.0-5.1
Remove from internal section flags listed below: • Advanced search • Date Time Management • Rebuild queue • Advanced multi-level categories • Customizable columns for module items view Move ’Email domain verification’ flag to Internal flags.
ps1Advanced Payment Flow:Advanced Payment feature flag
Feature flag: Advanced payment flow Improves payment flow using defined by the customer price formats and currencies attached to domain payment was made from.
New Payment Setting Page should contain tabs: Gateway: design: http://prntscr.com/rbhtr9 • Move old "payment gateway" page content to gateway tab • Remove Currency selector from gateway section. • show list of gateway settings assigned to country-currency allowed by site domains
• Edit button should display the same form with preselected fields • On clicking delete - display standard confirmation dialog box
Default setting will be pre-configured (which can not be edited or deleted). This format setting will be used as default if no format setting specified for the domain. Default settings: • Name: Default • Culture: English (United States) • Currency: USD • Number of digits after coma: 2
ps3Advanced Payment Flow:Extend Domains settings with "Currency and Price format" and "Country"
Add new component tag "domain_settings": {% component type:"domain_settings", domain:"", collectionVariable:"" %} • domain (not required param) - domain to retrieve settings for (current domain is default if param is empty) • collectionVariable (required param) - works the same way as other components.
collectionVariable context is an OBJECT described below: • Domain (string) • LandingPage (object) • Id (int) • Url (string) • Name (string)
• Country (object) • Name (string) - country code • Code (string) - country code
• FormatSetting (object) • Name (string) • Culture (string) • Currency (object) • Code (string) • Symbol (string) • DigitalCode (string) • Name (string)
• DecimalsQuantity (int)
ps5Advanced Payment Flow:Admin UI dates format improvement
Display dates in the admin using Default domain Format setting
ps6Advanced Payment Flow:Domain currency and format settings to the order
When creating an order, save currency and price format settings chosen for the domain the order was purchased from, to the order at the moment of purchase. So that if admin changes the currency and price format settings for the domain - the order will still keep those settings that were at the moment of purchase.
Add system field • FormType • Values: • Generic (default) • SingleItem • Checkout
Add formType property to the following liquid objects: • form context (applied in {% component type:"form" %}) • form submission data object {{ formSubmissionData }}
If Advanced Payment Feature flag is enabled – all payment forms (with selected Accept Payment property) start working via the new flow:
For any form type: IMPORTANT: Default html form template generates completely differently from the old one. Payment forms created earlier WILL NOT BE COMPATIBLE with the new flow since JS and backend logic was completely reworked for multiple payment methods and payment gateways.
If form type is ‘Generic’: http://prntscr.com/rbyrbh (old html template on the left side and new one on the right) • (1) Removed data attributes for order name and description. They will be set on the backend by the internal rules. • (2) PaymentType field was reworked to accept payment types not payment gateway as it wrongly did before. Renamed to Payment_Type and accept following options • CreditCard: Replacement of the old Stripe code. Gateway will be determined by the current domain. Stripe key, currency and other gateway details now passed via get params of the payment gateway js that is automatically attached to the head of the page if page contains at least one component type form with selected accept payment field • Free: Option that is accepted only if submitted amount is equal to 0. Submitting such form still creates order-form_submission pair. • Offline: Option that allows creating order in Awaiting Payment state. So you will be able to add offline payment on order in Payments tab that will change order state to Success
• (3) Payment fields that collect tokenized credit card data was reworked. In upcoming update (18 March) static html will be replaced by {% component type:"payment_form_fields", formAlias:"[[formAlias]]" %} that will have virtual layout that is same as on the right side in the screenshot above. This section will be used to output validation errors, set tokenized card data from payment provider and to display payment fields using capabilities that selected payment gateway give. • (4) Amount field was transformed to Payment_Amount field. Value of the this.paymentAmount will be set based on price param if form does not contain any secure zone with paid recurring subscriptions. If form contain such secure zone then price value will be overridden by sum of all paid subscriptions. • Examples of the form component: {% component type: "form", alias: "payment_form", price: "20.10" %}
If form type is ‘SingleItem’: http://prntscr.com/rbz6gd (compared to the generic type) • Form template generates an additional field Payment_ModuleItemId This field will be prefilled by the id of the item specified in form component moduleItemID or eventId param (value of this.moduleItemId will be set based on moduleItemID or eventId param) • Examples of the form component: {% component type: "form", alias: "payment_form", moduleItemID: "3065" %} or {% component type: "form", alias: "payment_form", eventId: "3065" %}
If form type is ‘Checkout’: http://prntscr.com/rbzkcs (compared to the generic type) • Form template includes fields for giftvoucher and shipping address details • Value of the this.paymentAmount will be set based on the checkout totalPrice value. • Examples of the form component: (no difference between checkout and simple form component. But form template will not be rendered if the site plan is lower than eCommerce) {% component type: "form", alias: "payment_form" %}
Guide to convert Event Payment forms html layout from old payment flow to new one:
1. Choose SingleItem form type.
2. Do manipulations described below referencing this screenshot: http://prntscr.com/rcjv8o (OLD on left | NEW on right)
(1) This part is unnecessary. Remove it.
(2) These attributes are unnecessary. Remove it.
(3) paymentType Select form field should be renamed to Payment_Type. Value should be CreditCard. Example: <option value="CreditCard">Credit Card</option>
(4) paymentData field should be replaced with: <div id="paymentFields_{{this.alias}}"></div> <input type="hidden" name="Payment_Data" /> <div id="paymentErrors_{{this.alias}}" role="alert"></div>
(5) Amount field name should be renamed to Payment_Amount. Value should be changed from {{paymentAmount}} to {{this.paymentAmount}}. "If" liquid code is unnecessary.
(6) "If" liquid code is unnecessary. eventId field should be renamed to Payment_ModuleItemId. Value should be changed to {{this.moduleItemId}}. allocations field should be renamed to Payment_ItemQuantity Add data-event_one_item_price="{{this.paymentAmount}}" data attribute to the field so it will be calculated by CMS payment js.
Advanced Payment Flow:Event payment logic redo
Redo event payment logic to ecommerce payment - single item flow • on form • in toolbox
Add new liquid filter: {{ numberVar | domain_number_format }} • Convert number to formatted string based on current domain Currency and format setting. Without currency related settings If liquid parsing is outside of domain scope - use default domain and it's settings. • else - do not change the variable
Add new liquid filter: {{ numberVar | domain_money_format }} • Convert number to formatted string based on current domain Currency and format setting. Including all currency related settings If liquid parsing works outside of domain scope - use default domain and it's settings. • else - do not change the variable
• When applied - • if variable is number - should convert number to money-formatted string based on country and format setting • else - do not change the variable
Note: The ID value to use for “formatSettingId” is currently not readily available and will be a fix for this soon.
• When applied - • if variable is number - should convert number to number-formatted string based on country and format setting • else - do not change the variable
Add new step to secure zones "Files and Folders" Provide ability to assign/unassign separate files or folders to/from secure zone. DESIGN: http://prntscr.com/r7d8m1
Secure Zones:Secured files and folders in file manager
On each request to file after checking redirects, follow steps: • If current use is ADMIN user go to step 4 • Compare current request path (case insensitive) to ANY path of secured file. • If found - go to step 3 • If not found - check if current request path (case insensitive) contains ANY path of secured folder. • If found - go to step 3 • If not found - go to step 4
• Validate if ANY user's secure zone subscriptions contains AT LEAST ONE of the found entry secure zones. • If not contains redirect to 403 system page
• Allow file to be requested
Make form submission files secure
On each request to file after checking redirects: • If request link pattern is like "/_form-submissions/*" • If current user is ADMIN user go to step 2 • redirect to 403 system page
• Allow file to be requested
c1Ecommerce:Catalogs
Create new System module under eCommerce menu called "Catalogs" - allow creating Catalogs and Products on root level and inner level - has new ‘Simplified Tree View’ - has system field for a Thumbnail Image (media) Design: http://prntscr.com/r7gnqx
c2Ecommerce:CatalogsNew item view type
Add new view of items: • Simplified Tree View Extend Module -> Advanced Settings: • View Settings (add new checkbox) “Allow Items Simplified Tree View” • Default view (Add new option) “Simplified Tree View”
Simplified Tree View page for catalog view provides ability to: • Create new catalog on the root level • Edit existing catalog • Delete catalog • Move catalog under another catalog • Reorder catalog on the particular level • Create catalog under another catalog Design: http://prntscr.com/r7gotn
Add new module setting under Advanced Settings -> Allow multiple parent items
If this option of the child module is enabled - display Tab with the name of the Parent module (for child module item view) or the name of the Child module (for parent module item view).
Example: Module Catalogs is parent to Products. If Products module has Allow multiple parent items=true than product item page will contain Catalogs tab, and catalog item page will contain Products tab
Selecting multiple parents saves a list of the parent module items. List of parent module items determines the list of urls of which each will lead to the detail page of the item.
p1Ecommerce:Products
New System module under eCommerce menu called "Products"
System properties: • Small Image (media) • Large Image (media) • On Sale (boolean) • Is Gift Voucher (boolean) • Product Weight (number) • Product Width (number) • Product Height (number) • Product Depth (number) • Enable Drop Shipping (boolean) • Supplier (CRM contact picker) • Unit Type (string) • Minimum Units (number) • Maximum Units (number) • Product Keywords (string) • Recurring Type (dropdown) • None • Daily • Weekly • Fortnightly • Monthly • Quarterly • Half Yearly • Yearly
p2Ecommerce:ProductsAdd/Edit Product Page
Since product allows multiple parents - provide ability to see multiple urls for the module item. Design: http://prntscr.com/r7gqcj
Add new default property ’SKUCode’ (string) to all modules. Add to liquid scope property ’SKUCode’
Show system property SKUCode on Add/Edit module item page -> settings page if • Advanced Settings -> Enable Inventory = true or • Advanced Settings -> Enable Price = true (Advanced settings hidden and restricted to change for now. Enabled for Event and Product modules only)
Display list of prices (price entities) based on Currency/country pairs. (Currency/country pairs can be achieved from list of domains and cultures and countries attached to them) List shows only price entities that are attached to active Currency/country pairs. If admin changes Currency/country pair for some domain but some module item already has attached price entity based on that Currency/country pair that was previously attached to the domain, than this price entity should not be visible but still saved in the db. So if admin sets back that currency/country pair to any domain, that module item will restore visibility of that price entity in the price list.
Price entity properties: • Currency (one of currency list) • Country (one of country list) • PriceList (list) • RetailPrice • SellPrice • Tax (one of tax codes filtered by PriceEntity Country setting) • priceForUserType (one of:) • Consumer • Wholesaler • may be more in the future
• VolumeDiscountPriceList (list) may be zero or many • Quantity • SellPrice
Liquid Scope Extending Module item liquid scope should be extended by property Price {{this.price}} that should return price based on the current domain.
Searching and filtering impact Price property should be searched or filtered based on the current domain’s country/currency settings.
p5Ecommerce:Products > Attributes
Add new module setting • Advanced Settings -> Enable Attributes (hidden and restricted to change for now. Available for Products module only) If option enabled - show ’Attributes’ tab in the Add/Edit module item page
Attributes list: Attributes provide ability to add/edit/delete product attributes and attribute options. Design: http://prntscr.com/rb16h8
Attribute entity: Attribute entity holds list of attribute options with their prices based on currency/country list from site domains.
Properties: • Name (string) • Attribute Type (one of) • dropdown • checklist • radiolist • numeric
• Value Type (one of) • fixed price
• Required (boolean) • AddToInventory (boolean) • Options (list) • Name • Image • PriceList (list) • Price • Currency (one of currency list) • Country (one of country list)
Searching and filtering impact Attributes and their options can not be searched or filtered via module component.
Inventory entity Clicking on Generate Variations (setting it to true) should hide InStock and PreOrder options and create variant products as per any attribute options that have AddToInventory = true. Set initial InStock value of the first variant product to the products stock level, where all others are 0. Sum of all insock values of all variant products should be set to Inventory.InStock property.
Clicking on Disable Variations (setting it to false) should show InStock and PreOrder options and remove variant products entirely. Both changes should be applied if user clicks save button ONLY. If user set Generate Variations = false than show confirmation window before saving: Are you sure you want to remove all product variations? OK CANCEL
Inventory entity properties and relations • Enabled (boolean) • Generate Variations (boolean) • WhenOutOfStock (one of) • Show [module alt name] but don't accept orders • Hide [module alt name] • Enable pre-ordering
• LowStockNotification (number) • InStock (number) • PreOrder (number) • Variations (list) • Title (string) • SKUCode (string) - UNIQUE between all variation Codes and all module item SKUCodes • InStock (number) • Enable (boolean) • AttributeOptionsVariation (one of variant products made by attribute options of attributes that have AddToInventory = true)
Searching and filtering impact Inventory data can't be searched or filtered for now.
New component tag "item_attributes": {% component type:"item_attributes", object:"[[object]]", module:"[[moduleIdentifier]]", itemId:"[[itemId]]", collectionVariable:"", layout:"", sortBy:"", sortOrder:"" %} • moduleIdentifier (required param) - moduleName or moduleId. • itemId (required param) - id of the module item to get attributes from • object (not required param) - item or collection (Default). • collectionVariable (not required param) - works the same way as in other modules. • layout (not required param) - path to FTP file that will contain layout content to be parsed. • If specified empty string - do not render anything (suppress layout). • If not specified at all - render default virtual layout.
• sortBy (not required param) - any module item properties - Default is Id. • sortOrder (not required param) - ASC (Default) or DESC.
item context is described below. If object = collection (which is default) than this contains attributes property that holds the list of attributes ({{this.attributes}}): • ecommerceItemId (number) - itemId that was set in the component params • attributes (list) • Id (number) • Name (string) • AttributeType (string) • ValueType (string) • Required (boolean) • AddToInventory (boolean) • Options (list) • Id (number) • Name (string) • Image (string) • PriceValue (number) • FormattedPrice (string) • Currency (object) • Code (string) • Symbol (string) • DigitalCode (string) • Name (string)
• Country (string) - country code
Default virtual layout can be seen/copied via FTP in ‘cms_assets’ folder.
p8Ecommerce:Module toolbox
Add new toolbox items • eCommerce: • Catalogs list (default module items list toolbox for catalogs) • Products list (default module items list toolbox for products) • Related products {% component type:"related_items" %} • Grouped products {% component type:"grouped_items" %} • Product Attributes {% component type:"attributes" %}
• Liquid Data • {% component type:"domain_settings" %}
CRM:Contact type field
New entity of ‘Contact Type’ with options: • Consumer • Wholesaler Extend CRM Contact entity by Type field. Set ’Consumer’ value to all CRM contact records by default: • on create contact • preset for all existed contacts
Ecommerce:Taxes
Ability to view list of taxes and perform create/edit and delete tax operations. Design: http://prntscr.com/rbjty8
Columns of the list view: • Name • Tax Percentage Amount • Country • Actions
Provide ability to pre-create taxes for countries (http://prntscr.com/rbjts6): • USA (see taxes on Acceptance criteria) http://prntscr.com/ovgi09 - clicking on the button should create set of tax codes for selected country if system has preset of taxes for that country.
Create/edit form: • Country (select). Options: • use the same list of countries that used for Domains settings ->"Country" • On add new tax - preselect the country that is attached to the main domain by default
• Tax Code (string) (required) • Tax Rate (number) - (type float) number of percent. Value should be between 0 and 100 including edges.
Ecommerce:Discount codes
Ability to view list of discount codes and perform create/edit and delete discount code operations. Design: http://prntscr.com/rbjuge
Columns of the list view: • Code • Type • Amount • Release Date • Expiry Date • Enabled • Actions
Create/edit form: • Code (string) (required) • Description (string). • Type (select). options: • Fixed Amount (used by default) • Percentage of Order • Free Shipping
• Amount (number) - (type float) discount amount. Value may represent an actual amount or percent of order. • Currency (select). options • use list of currencies that are applied to all domains of the site
• Min Order Cost Limitation (number) - (type float). • Expire after x redemptions (number) - (type int). Validate values to be integer and greater or equal to 0. • Catalogs (multi-select). Options: • list of ecommerce catalogs module items.
• Release Date (datetime) • Expiry Date (datetime) • Enabled (bool) - checked by default
Ecommerce:Gift Vouchers
Ability to view list of Gift Vouchers and perform create/edit and delete Gift Voucher operations. Design: http://prntscr.com/rbjuz8
Columns of the list view: • Name • Amount (show values with 3 letter currency code) • Balance (show values with 3 letter currency code) • Recipient • Enabled • Actions
Create/edit form:
Details tab: • Currency (select) - options: • use the same list of countries that used for Domains settings ->"Country"
• Name (string) (required) - unique value • Amount (number) - (type float). (required) • Balance (number) - (type float). • Type (select). Not selectable. Preselect value by default or based on initial value. Options: • Manual (default) • Via Shop
Buttons: • Email me - sends gift voucher system email to current logged in admin user. • Email Recipient - sends gift voucher system email to recipient in the form above.
Ecommerce:Gift Vouchers System Email
Add new system email Design: http://prntscr.com/rbjvhn • Name: Gift Voucher • Content: see screenshot
Liquid scope (this): • RecipientName - use the data from gift voucher -> recipient record • RecipientAddress - use the data from gift voucher -> recipient record (Email) • PurchaserName - TBD - this will be the full name from the CRM record that is assigned to the order that contains gift voucher product that creates this gift voucher and triggers the system email. Leave empty if gift voucher was created manually. • GiftVoucherCode - use the data from gift voucher -> Details record • GiftVoucherAmount - use the data from gift voucher -> Details record • GiftVoucherCurrency - object - use currency that is related with the gift voucher country • code • symbol • digitalCode • name
• Message - use the data from gift voucher -> recipient record • SiteUrl - protocol and site domain. Use the same logic as in "Secure Zone Login Details" EXAMPLE: { "Message": "test test test", "SiteUrl": "https://vlad.z.treepl.co", "GiftVoucher": { "Name": "GV431795", "Amount": 100.00000000, "Balance": 100.00000000, "Type": "ViaShop", "Currency": "$", "Enabled": true, "RecipientName": "test@gmail.com", "RecipientEmail": "test@gmail.com", "RecipientMessage": "test test", "CreatedDateTime": "0001-01-01T00:00:00", "UpdatedDateTime": "0001-01-01T00:00:00" }, "RecipientName": "test@gmail.com", "PurchaserName": "test2 test2", "PurchaserEmail": "test2@gmail.com", "GiftVoucherAmount": 1100.00000000, "GiftVoucherCode": "GV431795", "GiftVoucherCurrency": { "Code": "USD", "Symbol": "$", "DigitalCode": "840", "Name": "US Dollar" } }
Ecommerce:Shipping options
Ability to view list of Shipping options and perform create/edit and delete Shipping option operations. Design: http://prntscr.com/rbjxt3
Columns of the list view: • Name • Price (show values with 3 letter currency code) • Currency/Country • Actions
Create/edit form:
Details tab: • Name (string) (required) • Price (number) - (type float). (required) • Currency/Country (select) - options: • use pairs of country and currency that are retrieved from • list of currencies that are applied to all domains of the site • list of countries that are applied to all domains of the site
• Type (select). Options: (required) • User Defined (default)
• Tax Code (select). Options: • None (default) • list of discount codes for the selected country
• Width Limitations • Min (number) - (type float). • Max (number) - (type float).
• Height Limitations • Min (number) - (type float). • Max (number) - (type float).
• Depth Limitations • Min (number) - (type float). • Max (number) - (type float).
• Order Price Limitations • Min (number) - (type float). • Max (number) - (type float).
• Show Shipping option to (select) - options: • All (default) • Consumer • Wholesaler
• Limit Delivery to Following Countries (multi-select) • use the same list of all countries
• Exclude Shipping if Purchasing from these Catalogs (multi-select) • future list of catalogs. Leave empty for now.
eCommerce:JS oriented properties
Liquid properties created for all price related objects to correctly output HTML markup to work with JS functionality.
For example, where you might have an output for a products price value such as: {{this.price}} Output is just a value: 5.00 But for the shop JS functionality data attributes are required for correct updating of prices, etc. So formatted objects are available, eg: {{this.priceHtml}} Output is HTML: <span data-cms_product_data_price="[[itemId]]">[[ItemPrice]]</span>
eCommerce:JS and functionality
Create js function for ecommerce.js that will • collect item quantity • collect item attributes selected • trigger add to cart flow based on info collected above
Shopping cart:JS and functionality
Create js function for ecommerce.js that will • Enter Discount Code • Enter Gift Voucher • Clear Cart Flow • Change shoppingCart Item quantity • Choose shipping • Change Destination Country • Change Tax Code
Shopping cart:System page and default structure
Create new system page • Shopping Cart • URL: “/shopping_cart”
Default layout - inserts all JS and html code that will provide shopping cart functions http://prntscr.com/rbk9w0
Shopping Cart:ShippingOptions, TaxCodes and Country/Currency lists
Add new component tags:
{% component type:"countries", collectionVariable:"", layout:"" %} {% component type:"currencies", collectionVariable:"", layout:"" %} {% component type:"shipping_options", collectionVariable:"", layout:"" %} {% component type:"tax_codes", collectionVariable:"", layout:"" %} • collectionVariable (not required) - works the same way as other modules. • layout (not required) - path to FTP file that will contain layout content to be parsed. • If specified empty string - do not render anything. • If not specified at all - render default virtual layout.
collectionVariable context is an OBJECT described below:
Add new component tag component type:"shopping_cart":
{% component type:"shopping_cart", collectionVariable:"", layout:"" %} • collectionVariable (not required) - works the same way as in other modules. • layout (not required) - path to FTP file that will contain layout content to be parsed. • If specified empty string - do not render anything. • If not specified at all - render default virtual layout.
‘collectionVariable’ context is an OBJECT described below:
Add new component tag component type:"ecommerce_add_to_cart":
{% component type:"ecommerce_add_to_cart", itemId: "", collectionVariable:"", layout:"" %} • itemId (not required) - determines what item should be added to the cart once clicked • default - {{this.id}}
• collectionVariable (not required param) - works the same way as other modules. • layout (not required) - path to FTP file that will contain layout content to be parsed. • If specified empty string - do not render anything. • If not specified at all - render default virtual layout.
collectionVariable context is an OBJECT that is equal to module item selected by itemId param.
Add new component tag component type:"ecommerce_buy_now":
{% component type:"ecommerce_buy_now", itemId: "", collectionVariable:"", layout:"" %} • itemId (not required param) - determines what item should be added to the cart once clicked • default - {{this.id}}
• collectionVariable (not required param) - works the same way as in type: module. • layout (not required param) - path to FTP file that will contain layout content to be parsed. • If specified empty string - do not render anything. • If not specified at all - render default virtual layout.
collectionVariable context is an OBJECT that is equal to module item selected by itemId param.
Button should add item to cart and then redirect user to shopping cart.
Item Quantity:Component tag
Add new component tag component type:"ecommerce_item_quantity":
{% component type:"ecommerce_item_quantity", itemId: "", collectionVariable:"", layout:"" %} • itemId (not required) - determines what item should be added to the cart once clicked • default - {{this.id}}
• collectionVariable (not required) - works the same way other modules. • layout (not required) - path to FTP file that will contain layout content to be parsed. • If specified empty string - do not render anything. • If not specified at all - render default virtual layout.
collectionVariable context is an OBJECT that is equal to module item selected by itemId param.
File contains functions that supply: • Add to cart flow: Update item quantity, attributes, shopping cart widgets after adding to cart successfully • Enter Discount Code: Update shopping cart view based on applied Discount Code • Enter Gift Voucher: Update shopping cart view based on applied Gift Voucher • Clear Cart Flow: Update shopping cart view • Change shoppingCart Item quantity: Update shopping cart view based on applied item changes • Choose shipping: Update shopping cart view based on applied shipping option • Change Destination Country • Change Tax Code: Update shopping cart view based on applied tax
Logic should be based on layouts generated by • {% component type:"ecommerce_add_to_cart" %} • {% component type:"ecommerce_item_quantity" %} • {% component type:"item_attributes" %} • {% component type:"shopping_cart" %} Linkage rules: <script src="/cms-assets/payment/ecommerce.js?v=[[cms_version]]"></script> should be added to head of the page when: • shopping cart system page is loaded • {% component type:"ecommerce_add_to_cart" %} was parsed at least once
Append to ecommerce.js 3 culture params
Pass site culture settings to ecommerce.js for price calculation and JS output.
Fill thousands_separator, decimals_separator and decimals_count based on the culture of the site domain.
System page:Checkout page
Create new system page • Checkout • URL: “/checkout” Add Checkout Form to page and apply cms default styles. Form component: {% component type:"form", alias:"checkout_form", formType: "checkout" %}
Preset Checkout From
Create Checkout From. Alias checkout_form
Implement base styles for the form in /cms-assets/css/main.css
System page:Checkout thankyou page (Order Receipt)
Add system page • Order Receipt • URL: “/order-receipt” Show this page if form with type "checkout" is submitted (instead of form thankyou page). Provide liquid objects (this.formSubmissionData and this.order) those are required to build the page by design below: http://prntscr.com/rbkkcf
eCommerce:Search and filtering by price & parent id
Setup Advanced Search and filtering by • price • Save to index price based on currency/country pair • on search or filtering - take currency/country pair by current (or default) domain and combine to search criteria by price • Price determined as Numeric field. So in searching you can search price range via use of ‘prop_Price_Min’ and ‘prop_Price_Max’ params.
• parentId • save to index list of parentId's • on search - apply search by list of parent id's (similar to search by category when multiple categories applied)
Advanced Module Settings:Related "Module item"
Create setting that will allow module item to have list of related module items • Advanced Settings ->Enable related module items (hidden and restricted to change for now. Enabled for Products module only) If option enabled - view tab on add/edit item page:
Provide ability to • choose multiple module items of the same module. Chosen module items will be determined as RelatedModuleItemsList
Advanced Module Settings:Group "Module item"
Create setting that will allow module item to have list of related module items • Advanced Settings ->Enable module items grouping (hidden and restricted to change for now. Enabled for Products module only) If option enabled - view tab on add/edit item page:
Provide ability to: • choose multiple module items of the same module • choose which module item will be the main. • reorder module items list
Further details: Can sort grouped products ordering via drag-and-drop.
Always show main product as first item in list.
On change main product - set it's order position to first.
When trying to add product to group - if it's already added to any other group - show popup: "This item is already added to another group ("[[name of the main item in the group]]"). Are you sure you want to remove it from that group and add it here?"
When clicking yes: • if the product was main in another group - apply main flag to the first ordered item left in the group • if the group consist of 2 items - destroy that group since there is no need to exist a group with only one product
Module item Pricing tab upgrade
Provide UI upgrade that allows to see what price is edited right now (highlight editing price line). When choosing another country/currency value - highlight the actual pricing record
eCommerce:{% component type:"related_items" %}
Add new component tag component type:"related_items": {% component type:"related_items", object:"[[object]]", source:"[[moduleIdentifier]]", itemId:"[[itemId]]", limit:"[[limit]]", collectionVariable:"", layout:"", sortBy:"", sortOrder:"" %} • source (required) - moduleName or moduleId. • itemId (required) - id of the module item that has relations • object (not required) - item|collection • Default value is collection.
• limit (not required) - number of items to be rendered • Default is ALL.
• collectionVariable (not required) - works the same way as other modules. • layout (not required) - path to FTP file that will contain layout content to be parsed. • If specified empty string - do not render anything. • If not specified at all - render default virtual layout.
• sortBy (not required): • All module item properties • Default value is ’Name’.
Single tag item context is the same as for type:"module": Default virtual layout: <ul> {% for item in this.items %} <li> <a target="_blank" href="{{item.url}}" title="{{item.name}}">{{item.name}}</a> </li> {% endfor %} </ul>
eCommerce:{% component type:"grouped_items" %}
Add new component tag component type:"grouped_items": {% component type:"grouped_items", object:"[[object]]", source:"[[moduleIdentifier]]", itemId:"[[itemId]]", collectionVariable:"", layout:"" %} • moduleIdentifier (required param) - moduleName or moduleId. • itemId (required param) - id of the module item that has relations • object (not required param) - item|collection • Default value is collection.
• collectionVariable (not required param) - works the same way as in type: module. • layout (not required param) - path to FTP file that will contain layout content that need to be parsed. • If specified empty string - do not render anything. • If not specified at all - render default virtual layout.
Single tag item context is • the same as for type:"module". • should have one additional property IsMainGroupItem (boolean) that has value taken from module item grouping tab • Module items should be ordered by saved order from product Group Items tab.
Default virtual layout: <select> {% for item in this.items %} <option value="{{item.id}}" {% if this.id = item.id %}selected="selected"{% endif %}>{{item.name}}</option> {% endfor %} </select>
Bug fixes34
Advanced URL bug fix
I created pages in the root directory but then needed to create 2 sub folders (en-gb & fi). I moved the files into the en-gb folder but they also show in the root directory? • Expected • Items shown in "moved to" folder only
• Actual • Items shown in "moved to" folder AND in previous folder at the same time
Edit secure zone
Fixed Internal error bug (http://prntscr.com/r295iq) then changing secure zone type from free to paid and clicking save.
Delete last product from shopping cart
Now when deleting last product from the shopping cart – the page refresh state to Shopping Cart is empty automatically. No need to manually refresh the page
Change logic when choose another country on Shopping Cart
When selecting another country the shipping options will no longer disappear (if no country limitation option applied to the particular shipping options).
Not correct calculated pre-order variations
• Create product • Create attributes and generate variations • Set in-stock values (10 for each variation) • Go to product page and buy any product variation • Go back to product variations page Expected: • In-stock 9, Pre-order 0 for bought product variation Actual • In-stock 9, Pre-order 1 for bought product variation
• Create shipping option • Apply min items quantity param (for example 8) • Go to Product and add it to the cart • Go to shopping cart • Change item quantity to be • Expected result: shipping option shows right after change quantity event was triggered http://prntscr.com/qyd2qp Actual – you need to refresh the page to see that shipping option
Adding product with different attribute separately to cart
• Add product with attribute options white, black • Go to product and add it to cart with selected white option • Click again add to cart but with selected black option • Go to cart • Expected: two order lines that represent two different variations of the same product http://prntscr.com/qyd4nf Actual: one order line that represents the product but with quantity 2
Tax on shopping cart should change dynamically
Output the tax on the shopping cart http://prntscr.com/qydqbo . It should be changed dynamically when applying new tax (user should not refreshing the page to see the applied taxes) http://prntscr.com/qydqv2
Generate Inventory
• Create product • Go to the product detail page • Add it to cart • Go back to admin • Create attributes for this product • Go to inventory and click generate variations • Unexpected error – http://prntscr.com/quzx7q
In Stock showing when inventory disabled
If Enable inventory checkbox is not checked than In stock:0 should not be shown http://prntscr.com/qvjbxa
Discount code valued at more than the order total
Order totalPrice should not be less than 0 when applying amount discount that is bigger than totalCost of the order http://prntscr.com/qvjely
Not saving Catalogs in Discount Code
Catalogs restriction field in discount code not saving. http://prntscr.com/qv4k1k • Go to discount code • Select catalogs • Click save • Refresh the page • Unexpected result – catalogs not selected for the discount code
Gift Voucher doesn't work
• Create discount code • Apply it to the order • Unexpected result is error http://prntscr.com/qv4pc2
Removing Discount codes after applying him
• Create discount code • Apply it to the order • Delete discount code • Unexpected result is error http://prntscr.com/qws4hq
2 price in product
When product that has several prices is added to the cart – shopping cart shows incorrect price https://prnt.sc/qv4sqs
CRM Wholesaler
CRM Wholesaler type doesn't change logged in users Liquid 'Type' value, nor does it change product pricing to wholesaler when logged in.
Canonical links in product
Go to detail Product (product must be in several Catalogs) Open tab SEO and set canonical link http://prntscr.com/quyzkm absent name product AND when you change canonical link - must be preselected information - but now is empty http://prntscr.com/quz19h
Clearing the cart doesn’t restore instock value of the product. Expected: once clear cart action triggered – restore in-stock values for all product variations in the cart
Check 'Price' and 'PriceHtml'
A Product has Liquid values 'Price' and 'PriceHtml', but these appear to be the same (eg: 18.0000). The 'priceHtml' should be the country/currency "formatted price"
When price is added it breaks the product detail page with this "Liquid Error: Object reference not set to an instance of an object.""
Error when delete product
It seems that sometimes I am not able to add new products, when I press Save it gives me the classic "You have unsaved changes. Leave the page?" If I press OK I end up on the front page (Analytics)
Change this.name on detail product
Small thing and since all will change the product detail page it doesn't matter that much. The name of the product is "hardcoded" to be "Product 1". Should be {{this.name}} ?
Ecommerce release schedule• Products • Catalogs • Discounts • Taxes • Shipping • Gift vouchers • Related products • Shopping cart and checkout process
1 update
Improvements1
Treepl Portal: Monthly Billing
WebinOne Portal
Ability to bill by the month
13 updates
New features1
Sell Secure Zone Memberships
Ecommerce · Member Area
Secure Zone Subscription: Settings for recurring subscription Enable Paid Access control: • fields for paid Membership subscription:• Membership Fees Amount (Price) • Membership Renewal Rate (Recurring period)• Monthly • Yearly
• If Paid Access is selected, hide expiration date settings and show fields for Membership subscription and vice versa • on saving settings with changed recurring period - validate that there is no secure zone subscriptions in the system that used different, previous subscription period. If found - show error message.
Setting page (http://prntscr.com/q77nx4) Secure Zone Subscription: CRM Contact update Subscription page (http://prntscr.com/q77mxb) • Add Cancel subscription button near secure zones that have one. Once clicked - trigger Cancel Membership subscription flow • On successful canceling - remove all canceling links related to this subscription Secure Zone Subscription: Recurring Payment flow on form with secure zone submit Once form is submitted • Check if form has event subscriptions• if yes continue GENERAL Event payment FLOW • if no Check if form has attached secure zones• if yes• take formData.amount and assert it with SUM(sz.membershipPrice) for each secureZone => sz • if equals - proceed subscription • if no - show validation error message
• if no - continue GENERAL FLOW
Secure Zone Subscription: Cancel Membership subscription flow Once Cancel Membership subscription flow triggered: • check if subscription contains several secure zones• if found several - show attention popup and ability to continue or cancel • if not found - show Are you sure default popup, similar to the one that’s shown on delete flow.
• if user chooses to proceed further - cancel subscription in stripe and remove cancel subscription link. • Show successful canceling message Secure Zone Subscription: Form saving changes to assigned secure zones
On saving Form settings with changed secure zones list - validate that all secure zones have the same recurring period or have no recurring at all. If found different recurring period - show error message
Secure Zone Subscription: Sell membership form selector in toolbox Add new toolbox item (http://prntscr.com/pu6m4d) • Secure Zone• Sell Membership Form
Shows list of forms that have assigned secure zones WITH sell membership option enabled. On selecting a Form, show form tag with price attribute that corresponds to the SUM of all secure zones prices Example:
Secure Zone Subscription: Already subscribed membership price change Behavior for saving secure zone membership settings if there are already existing subscriptions in the system. 1) On disable membership or setting membership price lower than before - show popup: “You can't set price for membership lower than before since you have active subscriptions” [Cancel all memberships and save changes] [Cancel]
2) On setting membership price higher than before - show popup: “You have active subscriptions for this membership in the system. Should it be canceled?” [Leave all memberships and save changes] [Cancel all memberships and save changes] [Cancel]
• If Paid Access is selected, hide expiration date settings and show fields for Membership subscription and vice versa • on saving settings with changed recurring period - validate that there is no secure zone subscriptions in the system that used different, previous subscription period. If found - show error message.
Subscription page (http://prntscr.com/q77mxb) • Add Cancel subscription button near secure zones that have one. Once clicked - trigger Cancel Membership subscription flow • On successful canceling - remove all canceling links related to this subscription
Secure Zone Subscription:Recurring Payment flow on form with secure zone submit
Once form is submitted • Check if form has event subscriptions• if yes continue GENERAL Event payment FLOW • if no Check if form has attached secure zones• if yes• take formData.amount and assert it with SUM(sz.membershipPrice) for each secureZone => sz • if equals - proceed subscription • if no - show validation error message
• if no - continue GENERAL FLOW
Secure Zone Subscription:Cancel Membership subscription flow
Once Cancel Membership subscription flow triggered: • check if subscription contains several secure zones• if found several - show attention popup and ability to continue or cancel • if not found - show Are you sure default popup, similar to the one that’s shown on delete flow.
• if user chooses to proceed further - cancel subscription in stripe and remove cancel subscription link. • Show successful canceling message
Secure Zone Subscription:Form saving changes to assigned secure zones
On saving Form settings with changed secure zones list - validate that all secure zones have the same recurring period or have no recurring at all. If found different recurring period - show error message
Secure Zone Subscription:Sell membership form selector in toolbox
Shows list of forms that have assigned secure zones WITH sell membership option enabled. On selecting a Form, show form tag with price attribute that corresponds to the SUM of all secure zones prices Example: {% component type: "form", alias: "membership_form", price: "25.25" %}
Secure Zone Subscription:Already subscribed membership price change
Behavior for saving secure zone membership settings if there are already existing subscriptions in the system. 1) On disable membership or setting membership price lower than before - show popup: “You can't set price for membership lower than before since you have active subscriptions” [Cancel all memberships and save changes] [Cancel]
2) On setting membership price higher than before - show popup: “You have active subscriptions for this membership in the system. Should it be canceled?” [Leave all memberships and save changes] [Cancel all memberships and save changes] [Cancel]
module item list and tree view load speed in admin
pages load speed
Misc
"module_category_list" component improvements
Modifications:
Modify component type:"module_category_list" to set twice URL encoded category fullName to URL
this will allow to find categories that contain special characters (comma) in their names
On filtering or searching - apply twice URL decode functionality to category fullName in order to correctly split them by comma and not break categories that contain commas in their names.
Modify component type:"categories" to set to option values URL encoded category fullNames
Add two fields to Single category item context if Advanced multi-level categories flag is enabled:
Id
FullName
Beta
Advanced multi-level categories update
Force enable flag “Advanced multi-level categories”
NOTE: This feature flag activation may need a manual site index rebuild from the admin. If any module item lists on frontend used filtering by category – they may show nothing until index is rebuilt.
Bug
Advanced URL manager fixes
Core bugs that previously broke saving and duplication of module items when Advanced URL Manager was enabled has been fixed.
Bug
Corrupted images in file manager
When replacing image in file manager, image becomes corrupted
Filter by tag doesn't work - in collection (patch will force rebuild index process)
Bug
Site Search
Site search shows "Liquid Error: Object reference not set to an instance of an object"
14 updates
New features2
Advanced URL Management Part 1
General · Pages and Templates
Advanced URL Manager Part 1 Beta Feature needs turning on to use. Advanced URL Manager Allows setting multiple parent items to a single item in order to get several URLs leading to the item's detail page Advanced URL Manager Part 1: URL manager reconstruction Create custom URL manager that will improve Module and Module Items URL management. • Allows:• To set URL prefix to module that contains several slugs (http://prntscr.com/ov1ezq). Right now only one slug for the module URL is allowed (http://prntscr.com/ov1esj). Example: /eng/my-custom-module • To make module url to NOT HOLD that url to any module item. Right now module url occupies the url that is set on the settings page and no module item allowed to be created under the same url. Example: Module with url "/my-custom-module" should not occupy "/my-custom-module" URL. So user can create module item using slug "my-custom-module". • user to choose empty (root) url for module so it's items will have urls that starts from domain without prefix slug (http://prntscr.com/ov1gjq) • to set to any custom module a URL that is already used by any other module. But validate module items url to be UNIQUE between ALL global set of URL's of all module items.
• Item Full URL structure description due to points above:• /module/url-part/parent-item-url-slug/sub-parent-item-url-slug/item-url-slug • Where: Black part is module URL. Description: Can contain several url slugs. Should not actually reserve URL. That's why:• Can be the same as in any other module • Can be the same as already used full URL of any item • Can be empty
• Blue part is list of parent items slugs. Can contain several slugs. Slugs represent nested parent-child module item structure.
• Red part is module item slug
Advanced URL Manager Part 1: Ability to assign multiple URLs for a single content item Allow to assign multiple parent module items to the single module item in order to get multiple URLs for an item. Module Settings Add new module setting • Advanced Settings -> Allow multiple parent items If option of the child module is enabled - display Tab with the value of "name" setting of Parent (for child module item view) or Child (for parent module item view) module.
Example: • Module ’Catalogs’ is parent to ’Products’ • If ’Products’ module has ”Allow multiple parent items” = true than ’product item’ page will contain ’Catalogs’ tab And ’catalog item’ page will contain ’Products’ tab The tab content is multiple item selector https://prnt.sc/pn2ysg Selecting multiple parents should save list of the parent module items. List of parent module items determines the list of urls each of will lead to the detail page of the item.
Email Domain Verification
Emails · Workflow
Email domains verification: Email Domains Page Beta Feature turned on by default. Ability to verify domain with Amazon SES to use in "From" field in your email notifications. This avoids emails being rejected or delivered as spam. Add tabs to ‘Settings’ > ‘Domains’ • “Site Domains” tab As per current “Domains” page content. • “Email Domains” tab New page provide ability to: • view list of site domains with states:• verified • not verified • verification failed
• add new domain verification process • apply verification • delete domain
Email domains verification: Email validation on FROM fields • For all ’From’ field provide an indicator of the email verification (if using verified domain or not).• On changing email - run verification checking (js). • Places where From field occurs:• Each workflow email (Email notification -> Workflow Emails) • Each system email (Email notification -> System Emails) • Each module settings -> Autoresponder settings (Any module -> Settings -> Auto-response open-close) • Each form autoresponder (Any form-> Settings -> Auto-response) • Mailing List • Email Campaign • Create Email Toolbox
• When clicking on email verification indicator (unverified state) - show description of unverified domain and link to allowed verified domains• Clicking on the link will show all verified domains in toolbox panel.
Email domains verification: Email sender applying flow Setup new email sending flow (via amazon account). On each email sending - check From email • If email has verified domain - send via new email sender (amazon account) • Otherwise - send via old email sender
Beta Feature needs turning on to use. Advanced URL Manager Allows setting multiple parent items to a single item in order to get several URLs leading to the item's detail page
Advanced URL Manager Part 1: URL manager reconstruction
Create custom URL manager that will improve Module and Module Items URL management. • Allows:• To set URL prefix to module that contains several slugs (http://prntscr.com/ov1ezq). Right now only one slug for the module URL is allowed (http://prntscr.com/ov1esj). Example: /eng/my-custom-module • To make module url to NOT HOLD that url to any module item. Right now module url occupies the url that is set on the settings page and no module item allowed to be created under the same url. Example: Module with url "/my-custom-module" should not occupy "/my-custom-module" URL. So user can create module item using slug "my-custom-module". • user to choose empty (root) url for module so it's items will have urls that starts from domain without prefix slug (http://prntscr.com/ov1gjq) • to set to any custom module a URL that is already used by any other module. But validate module items url to be UNIQUE between ALL global set of URL's of all module items.
• Item Full URL structure description due to points above:• /module/url-part/parent-item-url-slug/sub-parent-item-url-slug/item-url-slug • Where: Black part is module URL. Description: Can contain several url slugs. Should not actually reserve URL. That's why:• Can be the same as in any other module • Can be the same as already used full URL of any item • Can be empty
• Blue part is list of parent items slugs. Can contain several slugs. Slugs represent nested parent-child module item structure.
• Red part is module item slug
Advanced URL Manager Part 1: Ability to assign multiple URLs for a single content item
Allow to assign multiple parent module items to the single module item in order to get multiple URLs for an item. Module Settings Add new module setting • Advanced Settings -> Allow multiple parent items If option of the child module is enabled - display Tab with the value of "name" setting of Parent (for child module item view) or Child (for parent module item view) module.
Example: • Module ’Catalogs’ is parent to ’Products’ • If ’Products’ module has ”Allow multiple parent items” = true than ’product item’ page will contain ’Catalogs’ tab And ’catalog item’ page will contain ’Products’ tab The tab content is multiple item selector https://prnt.sc/pn2ysg Selecting multiple parents should save list of the parent module items. List of parent module items determines the list of urls each of will lead to the detail page of the item.
Email domains verification: Email Domains Page
Beta Feature turned on by default. Ability to verify domain with Amazon SES to use in "From" field in your email notifications. This avoids emails being rejected or delivered as spam. Add tabs to ‘Settings’ > ‘Domains’ • “Site Domains” tab As per current “Domains” page content. • “Email Domains” tab New page provide ability to: • view list of site domains with states:• verified • not verified • verification failed
• add new domain verification process • apply verification • delete domain
Email domains verification: Email validation on FROM fields
• For all ’From’ field provide an indicator of the email verification (if using verified domain or not).• On changing email - run verification checking (js). • Places where From field occurs:• Each workflow email (Email notification -> Workflow Emails) • Each system email (Email notification -> System Emails) • Each module settings -> Autoresponder settings (Any module -> Settings -> Auto-response open-close) • Each form autoresponder (Any form-> Settings -> Auto-response) • Mailing List • Email Campaign • Create Email Toolbox
• When clicking on email verification indicator (unverified state) - show description of unverified domain and link to allowed verified domains• Clicking on the link will show all verified domains in toolbox panel.
Setup new email sending flow (via amazon account). On each email sending - check From email • If email has verified domain - send via new email sender (amazon account) • Otherwise - send via old email sender
- "/url/path/index.html" page to be always resolved under "/url/path/" URL.
eCommerce part 1
Ecommerce
Payment Settings: Currency and format settings Taxes Discount codes Gift vouchers Shipping options
Single Account Identity Provider (SSO)
General · Infrastructure · WebinOne Portal
Single Sign-On integration with admin: Login flow Change the login to Treepl admin flow to use Single Sign-On identity provider: When a user goes to /admin - check his logged in state on identity provider Check the logged in state on identity provider If logged in, redirect to the dashboard Otherwise, redirect to partner’s branded identity login page. If the login is successful, redirect to the site’s dashboard. Single Sign-On integration with admin: Reset password flow Add Restore Password link to the login form http://prntscr.com/pcyqxh Add Reset Password Page similar to login page (branded page). Fields: Email
Add Restore Password Confirm Page similar to login page (branded page). Fields: Password Confirm Password On successful restore password confirmation, redirect to the login page. Single Sign-On integration with admin: Invite user flow (invite/register) Redesign Add/edit admin user views: remove add/edit user and set password pages Add new user button will call a popup name field email field choose role field role field Edit users also calls a popup: Name and email - displayed as a text. choose role field reset password button For all existing admin users – show re-invite button that needs to be clicked by a partner in order to trigger invite admin flow with password reset email sent to the admin user in order to allow them to set a password. All the admin users that have not passed this flow will not be able to login to the cms admin. Single Sign-On integration with admin: Invite Admin User system email Create new System email Name Invite Admin User Content See Acceptance Criteria below Email liquid: should return Primary live domain or Default domain if site is trial should be replaced with the invitation link - Boolean. True is if an admin user has been created and false if just invited an existing one.
Design - http://prntscr.com/pcyrv1 Single Sign-On integration with admin: Restore Admin User Password system email Create new System email Name Restore Admin User Password Content See Acceptance Criteria below Email liquid: should be replaced with the link to set password page. Design - http://prntscr.com/pcysal Single Sign-On integration with admin: D elete admin user Clicking on delete admin user should launch un-invite flow on identity server.
Improvements3
Changes in Treepl's pricing plans/restrictions
General
Rename Pro+ plan to eCommerce Restrict for all plans lower than eCommerce and allow on eCommerce CRUD and list operations eCommerce Settings Tax Discount codes Gift vouchers Shipping options Customizable columns are available starting Business plan (Update existing restrictions) API integrations are now available starting Business plan (Add this new restriction for future use) Payable events, items, forms are available starting Pro plan (Add this new restriction and use it for) restrict Accept Payment button on the form builder (http://prntscr.com/oz4x0u) Payment gateways are available starting Pro plan (Add this new restriction and use it for Settings->payment page)
When starting from a Blank site, the default code inserted for the Content Template includes a restrictive
<title> element:<!DOCTYPE html><html><head>
<title>Release Notes | WebinOne</title><title>{ this['name'] }</title></head><body>{ pageContent }</body></html>I'd suggest removing the <title> element altogether since the system now handles document titles automatically and in accordance with the Name or Meta Title value.
Ability to sort domains by site name, url, status, expiration date and plan http://prntscr.com/papd0j
Site activation improvements
1) Ability to activate a domain without www: http://prntscr.com/pans0e 2) "Site type" step removed 3) Automatic nameservers check and ability to skip "checking NS" step and move to the final "Add A record"
Change the login to Treepl admin flow to use Single Sign-On identity provider: When a user goes to /admin - check his logged in state on identity provider Check the logged in state on identity provider If logged in, redirect to the dashboard Otherwise, redirect to partner’s branded identity login page. If the login is successful, redirect to the site’s dashboard.
Single Sign-On integration with admin:Reset password flow
Add Restore Password link to the login form http://prntscr.com/pcyqxh Add Reset Password Page similar to login page (branded page). Fields: Email
Add Restore Password Confirm Page similar to login page (branded page). Fields: Password Confirm Password On successful restore password confirmation, redirect to the login page.
Single Sign-On integration with admin:Invite user flow (invite/register)
Redesign Add/edit admin user views: remove add/edit user and set password pages Add new user button will call a popup name field email field choose role field role field Edit users also calls a popup: Name and email - displayed as a text. choose role field reset password button For all existing admin users – show re-invite button that needs to be clicked by a partner in order to trigger invite admin flow with password reset email sent to the admin user in order to allow them to set a password. All the admin users that have not passed this flow will not be able to login to the cms admin.
Single Sign-On integration with admin:Invite Admin User system email
Create new System email Name Invite Admin User Content See Acceptance Criteria below Email liquid: {{this.siteURL}} should return Primary live domain or Default domain if site is trial {{this.invitePasswordSetUrl}} should be replaced with the invitation link {{this.isNewUser}} - Boolean. True is if an admin user has been created and false if just invited an existing one.
Single Sign-On integration with admin:Restore Admin User Password system email
Create new System email Name Restore Admin User Password Content See Acceptance Criteria below Email liquid: {{this.restorePasswordUrl}} should be replaced with the link to set password page. Design - http://prntscr.com/pcysal
Single Sign-On integration with admin:Delete admin user
Clicking on delete admin user should launch un-invite flow on identity server.
Ecommerce New PlanPlans restrictions changes
Rename Pro+ plan to eCommerce Restrict for all plans lower than eCommerce and allow on eCommerce CRUD and list operations eCommerce Settings Tax Discount codes Gift vouchers Shipping options Customizable columns are available starting Business plan (Update existing restrictions) API integrations are now available starting Business plan (Add this new restriction for future use) Payable events, items, forms are available starting Pro plan (Add this new restriction and use it for) restrict Accept Payment button on the form builder (http://prntscr.com/oz4x0u) Payment gateways are available starting Pro plan (Add this new restriction and use it for Settings->payment page)
Payment Settings: Currency and format settings
Beta Feature: Title: Currency and price format settings Description: Improves payment flow using defined by the customer price formats and currencies associated with the domain the payment was made from.
Payment Settings: Currency and format setting:Modify "payment gateway" setting page to "payment settings" page
New Payment Settings Page should contain the tabs as follows: gateway Move old "payment gateway" page content to gateway tab Remove Currency selector from gateway section. currency and format Display list of added Payment Format settings to the system On clicking add button - display a form with the following fields allowing to add new Payment Format settings Name - (string) Culture - (select) list of cultures use list of cultures Get-All-Language-Country-Code-List-for-all-Culture-in-C---ASP-Net.aspx Language_Culture_Names,_Codes,_and_ISO_Values Currency - (select) Options: use table of currencies already set into the system in order to show currencies Number of digits after coma - (select) options: 0 1 2 3 4 5 6 Edit button should display the same form with preselected fields On clicking delete, display standard confirmation dialog box
Payment Settings: Currency and format setting:Default format setting
Pre-create one format setting - Default. Make it undeletable and not editable "default" format (no edit or delete buttons and no possibility to delete it via API). This format setting will be used as default format setting if no format setting specified for the domain. Use Name English (United States) Culture - (select) list of cultures English (United States) Currency USD Number of digits after coma 2
Payment Settings: Currency and format setting:Extend Domains settings by "Currency and Price format" and "Country"
New Domains Design: http://prntscr.com/pcyxy9 Setting "Currency and Price format" Show list of created "Currency and Price format" settings Use Default by default Setting "Country" Show list of countries (use list of countries that is used in the forms) Use United States by default
Payment Settings: Currency and format setting:Format rules for Format setting
Display dates in the admin using default domain Format setting
Payment Settings: Currency and format setting:Save domain currency and number format settings to the order
When creating an order - save currency and price format settings chosen for the domain purchase made from the order at the moment of purchase. So that if an admin changes the currency and price format settings for the domain, the order will still keep those settings that were at the moment of purchase
Payment Settings: Currency and format setting:Orders in admin list and detail view modification
Use saved currency and format settings in orders in order to display prices in order list and detail view:
Payment Settings: Currency and format setting:Invoice System Email modification
Use saved currency and format settings in orders in order to display prices in invoice email. Liquid changes: {{this.order.items}} {{item.price}} - no changes
{{item.TotalCost}} - no changes
{{item.formattedPrice}} - ADD new property. Apply price format and currency position settings saved in the order in order to retrieve formatted price string {{item.formattedTotalCost}} - ADD new property. Apply price format and currency position settings saved in the order in order to retrieve formatted price string
use currency that is saved in the order for the following properties:
{{item.currency.code}} - use currency that is saved in the order {{item.currency.symbol}} - use currency that is saved in the order {{item.currency.digitalCode}} - use currency that is saved in the order {{item.currency.name}} - use currency that is saved in the order
{{this.order.totalCost}} - no changes
{{this.order.formattedTotalCost}} - ADD new property. Apply price format and currency position settings saved in the order in order to retrieve formatted price string
use currency that is saved in the order for the following properties:
Payment Settings: Currency and format setting:Add liquid filter | domain_number_format
Add new liquid filter: Pattern: {{ numberVar | domain_number_format }} When applied - If variable is a number - should convert number to formatted string based on current domain Currency and format setting without currency related settings if liquid parsing works outside of domain scope, use default domain and its settings. otherwise - do not change the variable
Payment Settings: Currency and format setting:Add liquid filter | domain_money_format
Add new liquid filter: Pattern: {{ numberVar | domain_money_format }} When applied - If variable is a number - should convert number to formatted string based on current domain Currency and format setting including all currency related settings if liquid parsing works outside of domain scope - use default domain and its settings. otherwise- do not change the variable
Ecommerce Settings: TaxEcommerce -> Taxes Page
Ability to view list of taxes and perform create/edit and delete tax operations. Columns of the list view: Name Tax Percentage Amount Country Actions Provide ability to pre-create taxes for countries: USA http://prntscr.com/ovgi09 - clicking on the button should create set of tax codes for selected country if system has preset of taxes for that country. Create/edit form: Country (select). Options: use the same list of countries that was used for Domains settings ->"Country" On adding new tax - preselect the country that is attached to the main domain by default Tax Code (string) (required) Tax Rate (number) - (type float) number of percent. Value should be between 0 and 100 including edges.
Ability to view list of discount codes and perform create/edit and delete discount code operations. Columns of the list view: Code Type Amount Release Date Expiry Date Enabled Actions Create/edit form: Code (string) (required)
Description (string). Type (select).options: Fixed Amount (used by default) Percentage of Order Free Shipping Amount (number) - (type float) discount amount. Value may represent an actual amount or percentage of the order. Currency (select).options use list of currencies applied to all domains of the site Min Order Cost Limitation (number) - (type float). Expire after x redemptions (number) - (type int). Validate values to be int and greater or equal to 0. Catalogs (multi-select). Options: list of ecommerce catalogs module items. Release Date (datetime) Expiry Date (datetime) Enabled (bool) - checked by default
Ecommerce Settings: Gift vouchersEcommerce -> Gift Vouchers Page
Ability to view list of Gift Vouchers and perform create/edit and delete Gift Voucher operations. Columns of the list view: Name Amount (show values with 3 letter currency code) Balance (show values with 3 letter currency code) Recipient Enabled Actions Create/edit form: Details tab: Currency (select) - options: use the same list of countries that were used for Domains settings -> Country Name (string) (required) - unique value Amount (number) - (type float). (required) Balance (number) - (type float). Type (select). Not selectable. Preselect value by default or based on initial value. Options: Manual (default) Via Shop Enabled (bool) - checked by default Recipient tab: Name (string) (required) Email (string) (required) Message (string) (required) Buttons: Email me - sends gift voucher system email to the current logged in admin user. Email Recipient - sends gift voucher system email to the recipient in the form above.
Ecommerce Settings: Gift vouchersEcommerce -> Gift Vouchers System Email
Add new system email Name Gift Voucher Content see acceptance criteria Liquid scope (this): RecipientName - use the data from gift voucher -> recipient record RecipientAddress - use the data from gift voucher -> recipient record (Email) PurchaserName - this will be the full name from the CRM record that is assigned to the order that contains gift voucher product that creates this gift voucher and triggers the system email. Leave empty if gift voucher was created manually. GiftVoucherCode - use the data from gift voucher -> Details record GiftVoucherAmount - use the data from gift voucher -> Details record GiftVoucherCurrency - object - use currency that is related with the gift voucher country code symbol digitalCode name Message - use the data from gift voucher -> recipient record SiteUrl - protocol and site domain. Use the same logic as in "Secure Zone Login Details"
Ability to view list of Shipping options and perform create/edit and delete Shipping options operations. Columns of the list view: Name Price (show values with 3 letter currency code) Currency/Country Actions Create/edit form: Details tab: Name (string) (required)
Price (number) - (type float). (required)
Currency/Country (select) - options: use pairs of country and currency that are retrieved from list of currencies applied to all domains of the site list of countries applied to all domains of the site Type (select). Options: (required) User Defined (default) Tax Code (select). Options: None (default) list of discount codes for the selected country Settings tab: Handling Charge (number) - (type float). Additional Per Item Handling Charge (number) - (type float). Weight Limitations Min (number) - (type float). Max (number) - (type float). Width Limitations Min (number) - (type float). Max (number) - (type float). Height Limitations Min (number) - (type float). Max (number) - (type float). Depth Limitations Min (number) - (type float). Max (number) - (type float). Order Price Limitations Min (number) - (type float). Max (number) - (type float). Show Shipping option to (select) - options: All (default) Consumer Wholesaler Limit Delivery to Following Countries (multi-select) use the same list of all countries Exclude Shipping if Purchasing from these Catalogs (multi-select) future list of catalogs. Leave empty for now.
Image processor Fix
Fix imageprocessor When: upload image under the same name as one of the images in the folder via FTP or File Manager DO: remove all cached versions of the image. delete image from the folder via FTP or File Manager DO: remove all cached versions of the image. Load File Manager tab DO: load cached images instead of forced image resizing via URL random param (task for JS)
Export functionality redo
Modify export flow not to open in a new tab
Bug fixes3
Bug in file manager
Bug in the new file manager when opening longer code by the tree-view in a bigger browser window.
Workflow doesn't work on Business Plan
Go to client site, e.g. CLIENTSITE.com/admin/custom-workflow Workflow doesn't work
BUG: Liquid ‘capitalize’ filter
Treepl’s implementation of the Liquid capitalize filter actually does Title Case instead of the documented Capitalize function: https://shopify.github.io/liquid/filters/capitalize/ 1 Both case changes are handy though, so since Title Case is obviously possible I’d ask that a new custom Liquid filter be created called “titlecase” which does what the currently implemented capitalize filter does, then fix the current capitalize filter to work as per the Liquid docs.
13 updates
Improvements2
Custom Columns In List View
General · UI/UX
Customizable columns for module items view. Allows customized columns on custom and system modules list and tree views. Create new module settings page for editing columns settings. Showing preview of columns and ability to change their order position via drag and drop. If there are too many columns on the view - show horizontal scroll. When drag column to the right or left edge of the view - trigger auto scroll functionality in order to provide the ability to move that column out of visible columns area. Ability to go to add, edit and delete columns. Add/Edit view consists of the following settings: • Title - input field - name that will be viewed as column title. • Property - selector of system and custom properties of the module. • Column Width - input field - number of pixels that determines the column width. • Mobile Column Width - input field - number of pixels the determines the column width in mobile view. • Hide on mobile - checkbox The ‘Actions’ column will always be present and will be the last column in the view. Design: http://prntscr.com/ovpcpq New List/Tree view layout for custom columns: • All custom columns that reflects module properties should support sorting (ASC, DESC) by clicking column header. • When layout contains more columns than allowed by screen width - add horizontal scroll. • Move preview link and action icons (duplicate, edit, delete...) to one separate ‘Actions’ column fixed to the right of the table. • Allow columns resizing via dragging the edges of the column title. Design: http://prntscr.com/ovpd5m Tree View Layout: Merge columns of two modules by their names. Merging should take equal named columns and all unique child module columns (basically columns of tree view are ALWAYS child module table columns). Unique Parent module columns should be skipped. For each parent module item on tree view show empty cell is column attached to child module only. Example: Module 1 has Property 1, Property 2 and Name Module 2 has Property 1, Property 3 and Name
Module 1 is parent module to Module 2
Columns selected for Module 1 is Property 1, Property 2 and Name Columns selected for Module 2 is Property 1, Property 3 and Name
Result view on tree view of both modules: Module 1 or Module 2
| Name | Property 1 | Property 3 | |----------------------|-------------------|------------------| | Module 1 item | some value 1 | | | Module 2 item | some value 2 | some value 3 | Pagination Changes: 1) Display current page number as input with number value between prev and next buttons http://prntscr.com/o70umf. On change - show page that is entered in the input. 2) Duplicate pagination to the top of the table. Lowest plan allowed is ”Pro+” Add feature to the Admin User Roles: “Can Edit Module Items Columns Settings”
File System' API Endpoint (Component Tag) That Can List Files And Folders From The File Manager
File Manager · Open API
Add new component tag of type:"api", source:"File System" Pattern: • type:"api" system param • resource: ”File System” • collectionVariable: name of Liquid variable for object data. • folder (not required param): folder URL to retrieve files from (default value is "/" for root directory). Examples item context contains: • url (file URL) This component does not render any layout. If no collectionVariable specified - just skip the component processing. Added to Component Toolbox: 1) Add new toolbox group: "Liquid Data" • "File System" provides ability to build component type:"api", resource:"File System" 2) For folder selection use folder picker: • clicking on folder in picker modifies component code • clicking on icon next to folder modifies code and copies it to clipboard Lowest plan allowed is “Pro” Add feature to the Admin User Roles: Liquid Data • File System
Other updates8
Custom Columns In List View
Customizable columns for module items view. Allows customized columns on custom and system modules list and tree views. Create new module settings page for editing columns settings. Showing preview of columns and ability to change their order position via drag and drop. If there are too many columns on the view - show horizontal scroll. When drag column to the right or left edge of the view - trigger auto scroll functionality in order to provide the ability to move that column out of visible columns area. Ability to go to add, edit and delete columns. Add/Edit view consists of the following settings: • Title - input field - name that will be viewed as column title. • Property - selector of system and custom properties of the module. • Column Width - input field - number of pixels that determines the column width. • Mobile Column Width - input field - number of pixels the determines the column width in mobile view. • Hide on mobile - checkbox The ‘Actions’ column will always be present and will be the last column in the view. Design: http://prntscr.com/ovpcpq New List/Tree view layout for custom columns: • All custom columns that reflects module properties should support sorting (ASC, DESC) by clicking column header. • When layout contains more columns than allowed by screen width - add horizontal scroll. • Move preview link and action icons (duplicate, edit, delete...) to one separate ‘Actions’ column fixed to the right of the table. • Allow columns resizing via dragging the edges of the column title. Design: http://prntscr.com/ovpd5m Tree View Layout: Merge columns of two modules by their names. Merging should take equal named columns and all unique child module columns (basically columns of tree view are ALWAYS child module table columns). Unique Parent module columns should be skipped. For each parent module item on tree view show empty cell is column attached to child module only. Example: Module 1 has Property 1, Property 2 and Name Module 2 has Property 1, Property 3 and Name
Module 1 is parent module to Module 2
Columns selected for Module 1 is Property 1, Property 2 and Name Columns selected for Module 2 is Property 1, Property 3 and Name
Result view on tree view of both modules: Module 1 or Module 2
| Name | Property 1 | Property 3 | |----------------------|-------------------|------------------| | Module 1 item | some value 1 | | | Module 2 item | some value 2 | some value 3 | Pagination Changes: 1) Display current page number as input with number value between prev and next buttons http://prntscr.com/o70umf. On change - show page that is entered in the input. 2) Duplicate pagination to the top of the table. Lowest plan allowed is ”Pro+” Add feature to the Admin User Roles: “Can Edit Module Items Columns Settings”
Add new component tag of type:"api", source:"File System" Pattern: {% component type:"api", resource:"File System", folder:"[[folderUrl]]", collectionVariable:"[[variableName]]" %} • type:"api" system param • resource: ”File System” • collectionVariable: name of Liquid variable for object data. • folder (not required param): folder URL to retrieve files from (default value is "/" for root directory). Examples {% component type:"api", resource:"File System", folder:"/images/galleries/gallery 001", collectionVariable:"myVar" %} item context contains: • url (file URL) This component does not render any layout. If no collectionVariable specified - just skip the component processing. Added to Component Toolbox: 1) Add new toolbox group: "Liquid Data" • "File System" provides ability to build component type:"api", resource:"File System" 2) For folder selection use folder picker: • clicking on folder in picker modifies component code • clicking on icon next to folder modifies code and copies it to clipboard Lowest plan allowed is “Pro” Add feature to the Admin User Roles: Liquid Data • File System
Analytics dashboard settings
Remove condition that requires ’TrackingID’ for displaying analytics dashboard page. Only ‘ViewId’ is required (This change allows you to add Google js snippet yourself using desired custom options but still having an ability to see analytics in the dashboard)
Component type module_tag_list
Add new component tag of type:"module_tag_list" Pattern: {% component type:"module_tag_list", object:"[[object]]", module:"[[moduleIdentifier]]", parentItemId:"[[parentItemId]]", limit:"[[limit]]", collectionVariable:"", layout:"", sortBy:"", sortOrder:"" %}
• module (required param) - moduleName or moduleId. • parentItemId (not required param) - id of the module parent group to retrieve tagged items from • object (not required param) - item|collection (default is collection) • limit (not required param) - max number of tags to be rendered (default value is ALL) • collectionVariable (not required param) - liquid data variable • layout (not required param) - path to FTP file that will contain layout content to be parsed. If empty string - does not render anything. If not specified at all - render default virtual layout (see below). • sortBy (not required param): - Name (default) - ItemsCount • sortOrder (not required param): - ASC (default) - DESC item context contains: • Name • Url Pattern: [[parentItemUrl]]?prop_ModuleId=[[moduleId]]&prop_ParentId=[[parentItemId]]&prop_ItemTags=[[tagName (UrlEncoded) ]]
Example, using the following component tag with ‘parentItemId’: {% component type:"module_tag_list", module:"Blog Post", parentItemId:"1234" %} Where 1234 - is ID of the Blog "My Blog" URL output is: /my-blog?prop_ModuleId=1534&prop_ParentId=1234&prop_ItemTags=My%20Tag
Example, using the following component tag with no ‘parentItemId’: {% component type:"module_tag_list", module:"Blog Post" %} URL output is: ?prop_ModuleId=1534&prop_ItemTags=My%20Tag
• ItemsCount - number of module items tagged by this tag Default virtual layout: <ul> {% for item in this.items %} <li> <a href="{{item.url}}" title="{{item.name}}">{{item.name}} <span>({{item.itemsCount}})</span></a> </li> {% endfor %} </ul> VIRTUAL LAYOUT RETURNS ITEMS THAT HAVE itemsCount > 0 ONLY
Component type module_category_list
Add new component tag component type:"module_category_list" Pattern: {% component type:"module_category_list", object:"[[object]]", module:"[[moduleIdentifier]]", parentItemId:"[[parentItemId]]", limit:"[[limit]]", collectionVariable:"", layout:"", sortBy:"", sortOrder:"" %}
• module (required param) - moduleName or moduleId. • parentItemId (not required param) - id of the module parent group to retrieve categorized items from • object (not required param) - item|collection (default is collection) • limit (not required param) - max number of tags to be rendered (default value is ALL) • collectionVariable (not required param) - liquid data variable • layout (not required param) - path to FTP file that will contain layout content to be parsed. If empty string - does not render anything. If not specified at all - render default virtual layout (see below). • sortBy (not required param): - Name (default) - ItemsCount • sortOrder (not required param): - ASC (default) - DESC item context contains: • Name • Url Pattern: [[parentItemUrl]]?prop_ModuleId=[[moduleId]]&prop_ParentId=[[parentItemId]]&prop_ItemCategories=[[categoryName (UrlEncoded) ]]
Example, using the following component tag with ‘parentItemId’: {% component type:"module_category_list", module:"Blog Post", parentItemId:"1234" %} Where 1234 - is ID of the Blog "My Blog" URL output is: /my-blog?prop_ModuleId=1534&prop_ParentId=1234&prop_ItemCategories=My%20Tag
Example, using the following component tag with no ‘parentItemId’: {% component type:"module_category_list", module:"Blog Post" %} URL output is: ?prop_ModuleId=1534&prop_ItemCategories=My%20Tag
• ItemsCount - number of module items categorized by this category Default virtual layout: <ul> {% for item in this.items %} <li> <a href="{{item.url}}" title="{{item.name}}">{{item.name}} <span>({{item.itemsCount}})</span></a> </li> {% endfor %} </ul> VIRTUAL LAYOUT RETURNS ITEMS THAT HAVE itemsCount > 0 ONLY
Component type module_archive
Add new component tag component type:"module_archive" Pattern: {% component type:"module_archive", object:"[[object]]", module:"[[moduleIdentifier]]", parentItemId:"[[parentItemId]]", numberOfMonth:"[[numberOfMonth]]", collectionVariable:"", layout:"", sortBy:"", sortOrder:"" %} • module (required param) - moduleName or moduleId. • parentItemId (not required param) - id of the module parent group to retrieve categorized items from • object (not required param) - item|collection (default is collection) • numberOfMonth (not required param) - max number of months into the past to be rendered (default value is Eternity) • collectionVariable (not required param) - liquid data variable • layout (not required param) - path to FTP file that will contain layout content to be parsed. If empty string - does not render anything. If not specified at all - render default virtual layout (see below). • sortBy (not required param): - Date (default) • sortOrder (not required param): - ASC (default) - DESC
Item context contains: years (array) • Name - year (Example: 2018) • Url Pattern: [[parentItemUrl]]?prop_ModuleId=[[moduleId]]&prop_ParentId=[[parentItemId]]&prop_ReleaseDate_Min=[[periodStartDate]]&prop_ReleaseDate_Max=[[periodEndDate]]
Example, with parentItemID: {% component type:"module_archive", module:"Blog Post", parentItemId:"1234" %} Where 1234 - is ID of the Blog "My Blog" URL (for period of 2018): /my-blog?prop_ModuleId=1534&prop_ParentId=1234&prop_ReleaseDate_Min=2018-01-01&prop_ReleaseDate_Max=2018-12-31
Example, without parentItemID: {% component type:"module_archive", module:"Blog Post" %} URL (for period of 2018): ?prop_ModuleId=1534&prop_ReleaseDate_Min=2018-01-01&prop_ReleaseDate_Max=2018-12-31
• ItemsCount - number of module items in the year • Months (array) - Name - month (Example: August) - Url Pattern: [[parentItemUrl]]?prop_ModuleId=[[moduleId]]&prop_ParentId=[[parentItemId]]&prop_ReleaseDate_Min=[[periodStartDate]]&prop_ReleaseDate_Max=[[periodEndDate]] Example, with parentItemId: {% component type:"module_archive", module:"Blog Post", parentItemId:"1234" %} Where 1234 - is ID of the Blog "My Blog" URL (for period of August ): /my-blog?prop_ModuleId=1534&prop_ParentId=1234&prop_ReleaseDate_Min=2018-08-01&prop_ReleaseDate_Max=2018-08-31
Example, without parentItemId: {% component type:"module_archive", module:"Blog Post" %} URL (for period of August ): ?prop_ModuleId=1534&prop_ReleaseDate_Min=2018-08-01&prop_ReleaseDate_Max=2018-08-31
- ItemsCount - number of module items in the month Default virtual layout: <ul> {% for yearData in this.years %} {% for month in yearData.months %} <li> <a href="{{month.url}}" title="{{yearData.name}}-{{month.name}}">{{month.name}} {{yearData.name}} ({{month.itemsCount}})</a> </li> {% endfor %} {% endfor %} </ul> MODULE RETURNS ITEMS THAT HAVE itemsCount > 0 ONLY
Component type module searchScope extending
Component type module extended by param that allows using FULL search capabilities WITHOUT actual search via GET params (search form). Realization is described below: 1) Extend component type module with new param: • searchScope: "" 2) Parse content of search scope as JSON. If any exception occured while parsing - ignore this param. 3) Use retrieved object just like GET parameters from a search.
Priorities when several params and/or search via GET params occured: filterBy, FilterValue pair < searchScope < GET params if searching THIS module Example: Both options described below should show the same result • Option 1: URL /blog_1?prop_ModuleId=1534&prop_ReleaseDate_Min=2018-07-01&prop_ReleaseDate_Max=2018-07-31&prop_ParentId=1842&prop_ItemTags=tag1&prop_ItemTags=tag2&page=2
The Value column in the Site Information Module, shows the Field Type, instead of the Field Value.
Boolean value is ON instead of TRUE
A boolean form field now returns string “true” or “false” instead of “on” (changes made in liquid formSubmissionData object and on CRM -> form submission -> submission detail page). http://prntscr.com/ovp5e4
{{counter}} tag issue with ‘New Liquid Engine’
Counter tag in list layouts when ‘New Liquid Engine’ beta feature is enabled now renders as intended.
Random param not working when filtering by tag/category
Random attribute not working for Custom Modules when filtering by tags/categories. eg: {% component source: "My Module", layout: "List", filterBy: "ItemTags", filterValue: "Header", limit: "1", random: "true", type: "module" %}
Incorrect params rendering
Under the new Liquid rendering engine (beta feature), was not able to render custom params passed to a Snippet. The 'this' object only seems to reference the parent page/item and not the Snippet itself.
Using {{this.Params.foo}} to render the param did not work.
23 updates
New features1
New Email Accounts
WebinOne Portal
Add Email accounts tab on live site edit page (in portal.treepl.co) Design - http://prntscr.com/oh730f
Flow: • Check if live site domain exists in Treepl’s Open SRS account. • If exist – show email CRUD layout • If not – try create domain in the Open SRC account • On success - show email CRUD layout • On fail – show error popup message and try again button.
Email CRUD layout provides ability to: • Create email • Create domain alias • Create email alias • View list of email accounts and domain aliases • Shows storage of the particular email account • Delete email accounts • Delete domain alias • Delete email alias • Reset email password
Improvements2
BONUS: Advanced Multi-level Categories
Admin Panel · General
Advanced multi-level categories The feature allows creating multi-level categories.
+ New ‘ItemCategoryIdList’ property added to Liquid scope: New property stores comma separated list of category IDs (existing category property stores list of category Names)
Existing: New:
+ Convert Categories to nested categories On appstart if categories wasn't previously converted, for each category: • Get category name • Split it by "/" • Create new nested categories from split values
If the user created/changed the name of the category/subcategory and clicks anywhere but not on this button: http://prntscr.com/nodg1b changes should not be saved.
+ Ability to create/edit categories using the new interface when within a module item Design - http://prntscr.com/oh6i7v
If user wants to create/edit category tree by clicking here: http://prntscr.com/npvq9l the flow is the same as on the settings page.
If user wants to assign the category to the module there should be the dropdown: http://prntscr.com/npvqod where the level number will be indicated with (----).
+ Default Parent category setting For modules where you have access to its properties ("Edit Module">"Item Properties">"Default Properties") There will be the ability to specify the parent category to be used when creating/editing module items.
The default selection is the Root category level (value -1). if set to any category, than only the subcategories of the set category will be available to the module items (in both the Category field and the pop-out side panel as a tree of categories when clicking ‘Add new category button’.
+ Change import/export format for categories. Old format example: • Cat 1,Cat 2,SubCat 1 New format example: • /Cat 1;/Cat 2;/Cat 2/SubCat 1;
Change method type from "Get" to "Post"
+ Change logic for category filtration: • if filterBy is ‘itemCategories’ • Read filterValue as fullName • find category by fullName • find items by ItemCategoryIdList property of the module using retrieved category id. • if searching by ItemCategory - apply same logic as for filterBy
+ Addition of new component tag of type "categories" Component pattern:
• parentCategory (not required param) - id of the category to start selecting subcategories from. • Default value for parentCategory = -1. Means start selecting categories from root. • levelsDeep (not required param) - number of levels in-depth starting from parentCategory that need to be retrieved. • Default value for levelsDeep = -1. Means render all levels in-depth.
Example:
Renders virtual layout by pattern below: <option value="[[itemContext.fullName]]">[["----" x (itemContext.level-1)]][[itemContext.name]]</option>
NOTES: On generation of ‘search module form’ modification shown in ACCEPTANCE CRITERIA - see further below. Replicate the same to ‘create module form’ Replicate the same to ‘edit module form’
+ Component Toolbox shows category tree In the toolbox (for custom module, blogs, events, etc) when selecting filterBy ‘itemCategories’ - display options as flat tree in filterValue field in the format described below: • <option> label: "Category" or "---- Sub Category" or "-------- Sub Sub Category" depending on the level of the category (the deepest level has the most "----" prefix in front of the category name). • <option> value: "/category/sub category"
Contacts Import
CRM · WebinOne Portal
Import/Export flow. Fields: all contact fields: • Id (ignore on import) • First Name • Last Name • Email • Address • City • State • ZipCode • Country • Site • Phone • Status • Notes • Date Created • Date Updated (ignore on import) • Secure Zone • Secure Zone Expiration Date Example: http://prntscr.com/o1wy67 if there is no date in Secure Zone Expiration Date but there is secure zone name in Secure Zone field: - on create CRM contact; set 9999-Dec-31 - on edit CRM contact; do not edit existing expiration date Notes: Only ‘Secure Zone’ and ’Secure Zone Expiration Date’ cells will be imported for those additional secure zone rows added under a contact’s record (with no email address present). All other cells will be ignored in these rows.
Other updates10
Features moved out of Beta
These features work consistently now and have been implemented into the CMS: • Advanced Search • Date Time Management
NOTE: Any feature flag will go through this flow: • Round #1 (sprint release) – released in beta features (disabled by default so it won’t crash anything on the live sites. Partners are able to see if it operates properly on those sites and report any issues for us to fix. Partner is able to turn off the feature himself instantly. • Round #2 (1 or 2 sprints after round #1) – feature flag goes to internal section and set to true (checked). Partners are not able to uncheck it but can send a support ticket in case of some issues and we will disable it from our end and fix it • Round #3 (1 or 2 sprints after round #2) – feature flag will be deleted. Old logic will be removed from the code. The result is that feature adopts the new behavior on a permanent basis.
New Liquid engine &nICE v2.0
New Liquid engine & nICE 2.0
+ nICE v2.0: The ability to use style options like bold, italic, colors, etc in nICE editor interface. New styles interface is available for all content except for module item properties that don’t have a field type of ‘multiline’ or ‘WYSIWYG’ (ie: date/time fields, single line string fields, etc). NOTE: This feature requires valid HTML for proper nICE 2.0 operation in edit mode.
+ New Liquid engine: IMPORTANT: After enabling this feature, please check all site's custom liquid and JS implementations. In cases where you might output the collection variables as JSON (like ajax search result) the new Liquid engine renders the JSON object with camelCased property names. Example: The output will be different for old and new liquid engine: http://prntscr.com/oh7ytj
This feature flag will be available in beta for 2 sprints and then also will be auto-enabled for all sites.
Multi-level Categories
Advanced multi-level categories The feature allows creating multi-level categories.
+ New ‘ItemCategoryIdList’ property added to Liquid scope: New property stores comma separated list of category IDs (existing category property stores list of category Names)
+ Convert Categories to nested categories On appstart if categories wasn't previously converted, for each category: • Get category name • Split it by "/" • Create new nested categories from split values
If the user created/changed the name of the category/subcategory and clicks anywhere but not on this button: http://prntscr.com/nodg1b changes should not be saved.
+ Ability to create/edit categories using the new interface when within a module item Design - http://prntscr.com/oh6i7v
If user wants to create/edit category tree by clicking here: http://prntscr.com/npvq9l the flow is the same as on the settings page.
If user wants to assign the category to the module there should be the dropdown: http://prntscr.com/npvqod where the level number will be indicated with (----).
+ Default Parent category setting For modules where you have access to its properties ("Edit Module">"Item Properties">"Default Properties") There will be the ability to specify the parent category to be used when creating/editing module items.
The default selection is the Root category level (value -1). if set to any category, than only the subcategories of the set category will be available to the module items (in both the Category field and the pop-out side panel as a tree of categories when clicking ‘Add new category button’.
+ Change import/export format for categories. Old format example: • Cat 1,Cat 2,SubCat 1 New format example: • /Cat 1;/Cat 2;/Cat 2/SubCat 1;
Change method type from "Get" to "Post"
+ Change logic for category filtration: • if filterBy is ‘itemCategories’ • Read filterValue as fullName • find category by fullName • find items by ItemCategoryIdList property of the module using retrieved category id. • if searching by ItemCategory - apply same logic as for filterBy
+ Addition of new component tag of type "categories" Component pattern: {% component type:"categories", parentCategory:"[[parentCategoryId]]", levelsDeep:"[[numberOfLevelsToRender]]", collectionVariable:"[[variableName]]" %} • parentCategory (not required param) - id of the category to start selecting subcategories from. • Default value for parentCategory = -1. Means start selecting categories from root. • levelsDeep (not required param) - number of levels in-depth starting from parentCategory that need to be retrieved. • Default value for levelsDeep = -1. Means render all levels in-depth.
NOTES: On generation of ‘search module form’ modification shown in ACCEPTANCE CRITERIA - see further below. Replicate the same to ‘create module form’ Replicate the same to ‘edit module form’
+ Component Toolbox shows category tree In the toolbox (for custom module, blogs, events, etc) when selecting filterBy ‘itemCategories’ - display options as flat tree in filterValue field in the format described below: • <option> label: "Category" or "---- Sub Category" or "-------- Sub Sub Category" depending on the level of the category (the deepest level has the most "----" prefix in front of the category name). • <option> value: "/category/sub category"
New Email Accounts
Add Email accounts tab on live site edit page (in portal.treepl.co) Design - http://prntscr.com/oh730f
Flow: • Check if live site domain exists in Treepl’s Open SRS account. • If exist – show email CRUD layout • If not – try create domain in the Open SRC account • On success - show email CRUD layout • On fail – show error popup message and try again button.
Email CRUD layout provides ability to: • Create email • Create domain alias • Create email alias • View list of email accounts and domain aliases • Shows storage of the particular email account • Delete email accounts • Delete domain alias • Delete email alias • Reset email password
Contacts Import/Export flow
Import/Export flow. Fields: all contact fields: • Id (ignore on import) • First Name • Last Name • Email • Address • City • State • ZipCode • Country • Site • Phone • Status • Notes • Date Created • Date Updated (ignore on import) • Secure Zone • Secure Zone Expiration Date Example: http://prntscr.com/o1wy67 if there is no date in Secure Zone Expiration Date but there is secure zone name in Secure Zone field: - on create CRM contact; set 9999-Dec-31 - on edit CRM contact; do not edit existing expiration date Notes: Only ‘Secure Zone’ and ’Secure Zone Expiration Date’ cells will be imported for those additional secure zone rows added under a contact’s record (with no email address present). All other cells will be ignored in these rows.
Admin Roles - Import Contacts
Extend restrictions list for admin roles. New option under ‘Contacts’: • Can Import Contacts
If ’Can Import Contacts’ = false - disallow importing Contacts action for Admins with such roles. Existing configured roles have this disabled by default.
Multiple Workflows enabled on Business plan
Unlock Workflow notification Create / Read / Update / Delete operations for Business plan to enable multiple workflow capability. Now restricted only to having different Workflow Emails for those notification. (Multiple Workflow Emails remain only on Pro/Pro+ plans)
Ecommerce menu items
Set all sub items in Ecommerce menu as inactive: eCommerce • Products • Catalogs • Discount codes • Gift vouchers • Taxes • Shipping options
Added ability to re-index only one particular module http://prntscr.com/oh898g Useful for selectively re-indexing specific modules only or to resolve possible issues with specific module search.
Solution: Apply the Default Priority field value to any newly created item (http://prntscr.com/nvztgl ): - Front-end form • always - Admin add item form • always - Import process • if priority column wasn't specified or cell is empty
Force disabling from search engines for all trial sites
Force addition of <meta name="robots" content="noindex, nofollow"> meta tag (regardless of page property "Disable from search engines") for any page request under subdomain of *.treepl.co or *.trialsite.co
Solution: Apply the Default Priority field value to any newly created item (http://prntscr.com/nvztgl ): - Front-end form • always - Admin add item form • always - Import process • if priority column wasn't specified or cell is empty
BUG: {{this.member}} data does not output to system Invoice email
Custom module - Content Template changed upon front-end update
Steps to reproduce: • Create form for updating item from front-end • Go to custom module settings and change default content template http://prntscr.com/o4qaoz • Go to item and set any template (not default and not the one that is selected as default in module settings in step 2). • Go to front-end and click button Update Expected: • Template should not be changed Actual: • template was changed http://prntscr.com/o4qaym
Advanced search - doesn't search in blog
Fixed the issue that reindex process wasn’t indexing the items that where located in “folder/group” items (like posts in blogs or pages under some page folders).
Update item from front-end would clear info when update
Steps to reproduce: • Create module and item • Generate update item form • Remove from the html code any fields except of itemId • Place form to the page • Submit form from front end
Expected • All fields sending via the form updates the item properties. All properties that AREN’T added to the form should NOT be updated Actual • All properties that AREN’T added to the form ERASES the content of those item’s properties.
18 updates
New features3
Duplicate Existing Custom Module
Custom Modules
Duplicate module with: • settings • default properties • custom properties • layouts Allow selecting new name and url when clicking duplicate button.
Duplicate button located on Module Settings tab. http://prntscr.com/o3wjp2 Plan restriction for duplicate Custom Module: Pro+
Release Time
Custom Modules · General · Pages and Templates
Release *time* for blog posts, custom module items, pages etc. So instead of just a release date, also have the ability to choose a specific time the content is released.
Webform Autoresponders WYSIWYG
General · WYSIWYG Editor
Add WYSIWYG and ACE editor options to the Form -> Settings -> Autoresponder body.
System Flow: When user saves Settings - last selected editor should be saved as well. When user comes to the form setting page - last chosen editor should be applied to the Body field. If no editor was saved for the Form setting section - ACE editor should be chosen by default. Chosen editor should be saved to the particular form, not for all forms in general. When user clicks save the whole Settings section: • If WYSIWYG editor chosen AND previously was chosen ACE - show confirm message: Switching to WYSIWYG may corrupt some of your data. Confirm? - if clicked OK - continue saving process. - if clicked cancel - reject saving process.
Features above work constantly now and have been implemented.
Date and time fields
Date Time Management: Allows choosing time in date fields on custom and system modules.
Set time on add/edit module items
1) Provide ability to set time on date properties in the admin. Fields are: • system fields • Release Date • Expiration Date • Event Start Date • Event End Date • custom fields • any field with type = "Date Time"
2) Set default time for the date fields above if time not set - use 00:00:00 as default time when saving any of datetime properties above.
Save time on import/export items
Use time from the date fields in the excel columns to set date time in the timezone of the site. Fields are: • system fields • Release Date • Expiration Date • Event Start Date • Event End Date • custom fields • any field with type = "Date Time"
If not set to the datetime field - use 00:00:00 as default time.
Event calendar redo for date time
Modify calendar JS to use time part of the event start and event end date instead of relying on forcing 00:00:00 to the start date and 23:59:59 to the end date.
Liquid output for displaying timezone
Add new property to request object: "timezone" : { "label" : "string", "offset" : int }
Where label is a string value of the timezone name and offset is the difference in hours between UTC and current timezone
Example Output: "timezone" : { "label" : "(UTC-06:00) Central Time (US & Canada)", "offset" : -6 }
Example Liquid Usage: {{request.timezone.offset}} Would give value: -6
Duplicating of existing module
Duplicate module with: • settings • default properties • custom properties • layouts Allow selecting new name and url when clicking duplicate button.
Duplicate button located on Module Settings tab. http://prntscr.com/o3wjp2 Plan restriction for duplicate Custom Module: Pro+
WYSIWYG and ACE editor for form autoresponder with switcher
Add WYSIWYG and ACE editor options to the Form -> Settings -> Autoresponder body.
System Flow: When user saves Settings - last selected editor should be saved as well. When user comes to the form setting page - last chosen editor should be applied to the Body field. If no editor was saved for the Form setting section - ACE editor should be chosen by default. Chosen editor should be saved to the particular form, not for all forms in general. When user clicks save the whole Settings section: • If WYSIWYG editor chosen AND previously was chosen ACE - show confirm message: Switching to WYSIWYG may corrupt some of your data. Confirm? - if clicked OK - continue saving process. - if clicked cancel - reject saving process.
Bug fixes6
BUGS: User-Submitted Custom Module Items
BUG 1: Not sure that user-submitted CM items are honouring site timezone for release date and expiry date IN THE WEB FORM RESPONSE - actual dates in the admin and when later rendering on site are correct. (I’m testing with a Sydney timezone set) Release date is always different. Expiry is different when the date is set in the Create Item form, but not when ‘number of days till expiry’ is used or when left as default/no date set.
BUG 2: User-submitted items do not honour the expiry date ‘number of days’ value set in the modules default properties.
BUG 3: Expiry date fields are generated in the Create/Update Item forms even if expiry date is disabled from the CM default properties. (although they are removed if turned off from the Settings > Site User Permissions - but I’d think it should work the same in both cases?)
BUG 4: Expiration Date input in the Create/Update Item forms is added as a type=“text” input - suggest changing to a type=“date” (as per custom properties dateTime fields)"
(HOTFIX) Calendar toolbox builder - default options depended in Advanced Search flag
If Advanced search feature flag is enabled: • All - value = "0" • Ungrouped - value = "-1" Old logic (if flag is off) : • All - value = "-1" • Ungrouped - value = "[[hiddenRootItemID]]" http://prntscr.com/nux3hw
(HOTFIX) Calendar for Advanced search feature flag beta param
Modify calendar js and include file to use beta feature flag param. Set param to 1 if Advanced search feature flag is on.
(HOTFIX) Add Image Bug (not adding actual uploaded image path)
When adding an image to an image field using the image manager it would add an incorrect image reference.
URL Redirect - when using .html
Fix URL redirect to recognize such url’s ("/myurl.html" and "/myurl") as different urls. The fix allows creating redirect like "/myurl.html" => "/myurl"
BUGS: User-Submitted Custom Module Items
BUG 1: Not sure that user-submitted CM items are honouring site timezone for release date and expiry date IN THE WEB FORM RESPONSE - actual dates in the admin and when later rendering on site are correct. (I’m testing with a Sydney timezone set) Release date is always different. Expiry is different when the date is set in the Create Item form, but not when ‘number of days till expiry’ is used or when left as default/no date set.
BUG 2: User-submitted items do not honour the expiry date ‘number of days’ value set in the modules default properties.
BUG 3: Expiry date fields are generated in the Create/Update Item forms even if expiry date is disabled from the CM default properties. (although they are removed if turned off from the Settings > Site User Permissions - but I’d think it should work the same in both cases?)
BUG 4: Expiration Date input in the Create/Update Item forms is added as a type=“text” input - suggest changing to a type=“date” (as per custom properties dateTime fields)"
25 updates
New features1
Global Variables Builder
Admin Panel
The ability to have a "Site Setting" App, where it is possible to add settings for the client that one could then feed and use throughout the entire site. It could be things like logo, phone, email, address etc. With the ability to have the option of setting the liquid names/aliases so the tags are customisable. So instead of having for example something like one could specify an alias like http://prntscr.com/nuymj4
Improvements3
URL Redirects Import
General · SEO
Ability to Import/Export URL redirects using an .xlsx file.
BONUS: Form Fields Sorting
Forms
Sorting of form fields when making a form is reversed in the final layout.
Liquid Context Rendering
Liquid
New liquid object of …
Other updates15
Site speed increase
Performed CMS code optimization that slightly increase working speed of site pages (up to 15%).
Liquid Context Rendering
New liquid object of …
URL Redirects Import/Export
Ability to Import/Export URL redirects using an .xlsx file.
Global Variables (Site Information) Builder
The ability to have a "Site Setting" App, where it is possible to add settings for the client that one could then feed and use throughout the entire site. It could be things like logo, phone, email, address etc. With the ability to have the option of setting the liquid names/aliases so the tags are customisable. So instead of having for example something like {{siteInformation.companyContacts.webAddress}} one could specify an alias like {{si.cc.web}} http://prntscr.com/nuymj4
Toolbox -> Global variables (Site Information)
Add ability to get Site Information tags via the toolbox. Toolbox options: • Group dropdown • Property dropdown (shows only when group is selected) Two liquid tags then shown for selected property for full alias and short alias.
Secure Zone Subscriptions + Expiry dates
Added 2 system fields to the form builder relating to Secure Zones: • Secure Zone Expiry date • Secure Zone Expiry duration Creating the input fields: <input type="date" name="SZ_ExpiryDate"> <input type="number" name="SZ_ExpireAfterDays">: User is not able to save the form with two chosen options. If both options are present in the form the Expiry Date field will have priority.
Secure Zone Expiration Settings
Create a new option on the Secure Zone Page: • Expiration option • Not specified (could be set from the form); this option is selected by default. If selected - allow applying date chosen on the form. If no value sent with the form - apply 31-Dec-9999.
• Custom date; • if selected shows additional field type date. Apply to the form submission regardless of the Secure Zone Expiration field selected on the form.
• Number of Days. • if selected shows additional number field. Apply to the form submission regardless of the Secure Zone Expiration field selected on the form.
Add .kml, .kmz extension to allowed extension list
Now using the component toolbox you can generate the calendar include widget that will render calendar of events by category.
Import/Export of the detail layout
Now you can specify detail layout id in import and export file for module items.
Data Center displaying in the portal.
Fixed the displaying of the data center in the partner portal. Partner should be able to see the actual information of which data center the website is located.
Module lists in Admin to list by release date
Item lists in admin where release date is relevant now can be sorted by the release date column header.
Advanced search feature
Advanced search added to beta. This feature uses new module index that allows retrieving searched module items in module search faster. Current feature impacts: • Module Search load speed will be highly increased. • Filter by Event fields (such as start date end date price etc) will be highly increased. • Filter by url will be highly increased. • Added/edited module items via admin, frontent form or import functionality will be added to the index instantly (note – item may not be added to the index if reindex function is in process). • Events on the calendar will be loaded faster. ATTENTION: all features under beta will be released one or two sprints after their released sprint. Some of them may change the logic already implemented (by way of improvement). So check if these features impact your site before the full feature release.
If Advanced Search BETA feature is enabled: Toolbox -> Event -> Calendar generation will be changed: • Option “All“ will generate value = "0" • Option “Ungrouped“ will generate value = "-1" Old logic (if flag is off) : • Option “All“ will generate value = "-1" • Option “Ungrouped“ will generate value = "[[systemRootItemID]]" System will support both legacy version of the calendar and new version of the calendar.
Remove “Disable from site search” influence on MODULE specific search
Beta setting: Improved module search Removes the effect of "Disable from site search" property for module specific searches. Site search will not be affected by enabling this feature. "Disable from site search" property should only be used for Site Search.
Form fields that have options (ie: checkboxes, radios, dropdowns...) would have those options listed in reverse order in the generated layout http://prntscr.com/nu9kbr
Admin - List View Pagination
When updating a custom module item on page 20 for example it jumps back to page 1. Which is frustrating if wanting to update multiple items on page 20.
Module component tags configured with pagination would show total items count as the value in the ‘limit’ parameter. Should shown total items count. As a result generated pagination shows incorrect page numbers.
Event item showing on calendar before release date
Event item with release date in the future incorrectly shown on the calendar when it should not show at all until release date reached. http://prntscr.com/nuw0ca
33 updates
New features2
Multiple Domain Names
SEO
If the home page isn't set at all, there should be a customisable system page displayed. ‘Settings’ > ‘System Pages’ > “missing-home-page” Ability for the user to set up the default pages in the Domains list section via the admin dashboard. • If the page option is not set for any domain the default page should be used. • If the default page option is not set on the default page, there should be "Not Set" status.
If the visitor enters on the custom domain of the current website; • If the page for the domain is set the system displays the page as the landing page; • If the page for the domain is not set the system shows the page of the default domain; • If the page is not set on the default domain the system shows the system page.
Pause Clients Which Are Not Paying
WebinOne Portal
If a partner chooses the soft option: • There’ll be a banner placed on the home page where the explanation of the issue can be described. The visitor of the website can confirm it and the banner will disappear. Then the visitor can continue browsing the website; • Clients can't access the admin dashboard using their credentials and will get the message with the issue
If a partner chooses the hard option: • The website is blocked and will not display. Every page will display the block-page with the description of the issue. • Clients can't access the admin dashboard using their credentials and get the message with the issue
Improvements6
BONUS: Alternate Name Of Custom Module Item
Custom Modules
Admin is able to add the name for the "Create New" button on the "treeView" for modules:
BONUS: “Author” and “Added By” fields to include links to those CMS items
CRM
Add a link to the CRM record next to any “Added By” field. Add a link to the Author item next to any “Author” field.
BONUS: Change SEO Title To Meta Title In Liquid Properties
Liquid · SEO
{{this[‘MetaTitle’]}} Added and renders the same value as {{this[‘SEOTitle’]}}
BONUS: Duplicate, Download Files & Folders
File Manager
- Ability to download file from File Manager - Ability to download folder from File Manager (as a seperate zip file) - Ability to duplicate file and/or folder in File Manager - Files and folders to render in alphabetical order
BONUS: Expiry Dates For Subscriptions
Member Area
Default Expiry date for the Secure Zone. If any of the forms have a secure zone, but the expiry date for it isn't specified, the default expiry date should be 31-Dec-9999. System Page if the access to the Secure Zone is expired. If the expiry date of the contacts secure zone subscription is bigger than the set expiry date, the system should show the system page (403). The user should not be able to enter the secure zone by any means until the expiry date is less smaller than the current one.
Update Liquid To Include Date & Time Filters
Liquid
Added date filters: site_date {{ “now” | date }} outputs "09-Jan-2015" site_datetime {{ “now” | datetime }} outputs "09-Jan-2015 02:46 PM" date_utc {{ “now” | date_utc }} converts a date to UTC (assuming that the date is always given in the site’s timezone) date_add
myDate - filter input should be a date time object or a string convertible to a date time object amount - an integer number or a string convertible to an integer number representing the amount of date or time units to add (if positive) or to subtract (if negative) from the input date time object
datePart - a string representing the date or time parts to be added or subtracted. The allowed values are: • "year" • "month" • "day" • "hour" • "minute" • "second" • "millisecond"
E.g. using either one of the variables below:
and 3016-06-15 12:30:30Z will output 3016-06-15T12:30:30 2016-09-15 12:30:30Z will output 2016-09-15T12:30:30 2016-06-30 12:30:30Z will output 2016-06-30T12:30:30 2016-06-16 08:30:30Z will output 2016-06-16T08:30:30 2016-06-15 11:50:30Z will output 2016-06-15T11:50:30 2016-06-15 13:00:30Z will output 2016-06-15T13:00:30 2015-06-16T08:30:29.900 will output 2015-06-16T08:30:29.900 If one of the parameters is of an incompatible type or value, the filter will not alter the input.
Other updates12
Ability for partners to block the admin access and pause the websites for clients which are not paying.
If a partner chooses the soft option: • There’ll be a banner placed on the home page where the explanation of the issue can be described. The visitor of the website can confirm it and the banner will disappear. Then the visitor can continue browsing the website; • Clients can't access the admin dashboard using their credentials and will get the message with the issue
If a partner chooses the hard option: • The website is blocked and will not display. Every page will display the block-page with the description of the issue. • Clients can't access the admin dashboard using their credentials and get the message with the issue
Ability to add multiple domain names to a website and point to different landing pages.
If the home page isn't set at all, there should be a customisable system page displayed. ‘Settings’ > ‘System Pages’ > “missing-home-page” Ability for the user to set up the default pages in the Domains list section via the admin dashboard. • If the page option is not set for any domain the default page should be used. • If the default page option is not set on the default page, there should be "Not Set" status.
If the visitor enters on the custom domain of the current website; • If the page for the domain is set the system displays the page as the landing page; • If the page for the domain is not set the system shows the page of the default domain; • If the page is not set on the default domain the system shows the system page.
Update Liquid To Include Date & Time Filters
Added date filters: site_date {{ “now” | date }} outputs "09-Jan-2015" site_datetime {{ “now” | datetime }} outputs "09-Jan-2015 02:46 PM" date_utc {{ “now” | date_utc }} converts a date to UTC (assuming that the date is always given in the site’s timezone) date_add
myDate - filter input should be a date time object or a string convertible to a date time object amount - an integer number or a string convertible to an integer number representing the amount of date or time units to add (if positive) or to subtract (if negative) from the input date time object
datePart - a string representing the date or time parts to be added or subtracted. The allowed values are: • "year" • "month" • "day" • "hour" • "minute" • "second" • "millisecond"
E.g. using either one of the variables below:
and 3016-06-15 12:30:30Z will output 3016-06-15T12:30:30 2016-09-15 12:30:30Z will output 2016-09-15T12:30:30 2016-06-30 12:30:30Z will output 2016-06-30T12:30:30 2016-06-16 08:30:30Z will output 2016-06-16T08:30:30 2016-06-15 11:50:30Z will output 2016-06-15T11:50:30 2016-06-15 13:00:30Z will output 2016-06-15T13:00:30 2015-06-16T08:30:29.900 will output 2015-06-16T08:30:29.900 If one of the parameters is of an incompatible type or value, the filter will not alter the input.
Contact assignment to the Secure Zone.
Admin able to set/edit the expiry date of the secure zone for a contact The configuration can be managed in the contact setting - http://prntscr.com/nip1uq.
Default Expiry date for the Secure Zone.
If any of the forms have a secure zone, but the expiry date for it isn't specified, the default expiry date should be 31-Dec-9999.
System Page if the access to the Secure Zone is expired.
If the expiry date of the contacts secure zone subscription is bigger than the set expiry date, the system should show the system page (403). The user should not be able to enter the secure zone by any means until the expiry date is less smaller than the current one.
Change SEO Title To Meta Title In Liquid Properties
{{this[‘MetaTitle’]}} Added and renders the same value as {{this[‘SEOTitle’]}}
Timezone for form submissions
The form submission times in the CRM now showing time in site timezone.
Customise the “Create New” item name in modules
Admin is able to add the name for the "Create New" button on the "treeView" for modules:
Change current • 302 (Temporary redirect) status code to • 301 (Permanent redirect)
Bug fixes13
URL redirects with .html extension as source
Any url redirect that is added to the system with .html as the source url won’t redirect.
Another usability issue is that when you make a change to a url and go ‘back’ it takes you back to the first page of results every time and not just back to the page you were up to. It also defaults back to 20 results instead of 50.
Import/Export - doesn't react to Disable for site search
• Go to Galleries/Slider • Create slider • Export this item • In file add one item and change Disable for site search to True and save • Import this file • New item doesn’t have checked checkbox for Disable from site search
Change Timezone - event in calendar displays one day back
Custom Module and Event pagination no display results
When using Custom Module or Events search module with pagination, the paged views don’t show any items.
New Image manager not recognizing .jpg images
Image manager in WYSIWYG editor not displaying .jpg images in the file system and so cannot be selected.
New Image manager - breadcrumbs don't work correctly
Image manager in WYSIWYG editor not displaying breadcrumb/folder location correctly if reopening the image manager for a second time.
Create item from front end - change type
Expiration Date input in the Create/Update Item forms is added as a type=“text” input - suggest changing to a type=“date” (as per custom properties dateTime fields)
Business plan - disable advanced settings
Sites on Business plan had Advanced Settings enabled for Custom Modules when they should be disabled.
Set at Home and nICE
Page with ‘Set as Home Page’ enabled will revert to disabled if saved via nICE editor.
Default priority - doesn't save during import
• Go to custom module with Default priority http://prntscr.com/ndjzba • Create item – priority doesn’t get saved until clicking save on seo tab
New Image manager - show full breadcrumbs
• Go to Image manager WYSIWYG • Open folder with several folder inside - doesn’t show full path https://prnt.sc/nf57sh
Set up Time zone on create item in Custom module
User-submitted Custom Module items are not honouring site timezone for release date and expiry date IN THE WEB FORM RESPONSE - actual dates in the admin and when later rendering on site are correct. Initial response Release date is always different. Expiry is different when the date is set in the Create Item form, but not when ‘number of days till expiry’ is used or when left as default/no date set.
Create item from front end - expiry days issue
With ‘Expiry Days’ set for user submitted custom module (http://prntscr.com/nfs5pk) On item submission item is created with system default expiry date + expiry days - but should be calculated from today’s date http://prntscr.com/nfqq1b
25 updates
New features2
BONUS: Lawyer Template
Templates
New custom grid template "Lawyer" is available from Partner Portal for all types of users.
BONUS: Photography Template (Foundation)
Templates
New Foundation template "Photography" is available from Partner Portal for all types of users.
Improvements5
BONUS: Custom Module Import/Export
Custom Modules
Extended version of import/export file. Add “disable from site search” property to the import/export file
Beta feature: Activate by checking the ‘Advanced Module Import/Export’ flag in the Beta area.
BONUS: Edit & Re-shuffle Tags In Modules
Custom Modules
Add ability to edit "Tags" in modules. Add ability to reorder tags.
Code View In Custom Module WYSIWYG
Custom Modules · UI/UX · WYSIWYG Editor
For Custom Modules, the ability to switch to “Code View” in custom WYSIWYG fields.
Menu Layouts Inline With Other Modules
Admin Panel · Menus
Menu Layouts and layoutGroups management Add Menu layouts and layoutGroups management to the admin similar to other module layouts.
1) User should be able to create new layoutGroups Creating layoutGroup should create folder in "/Content/MenuLayouts/[menuAlias]/[layoutGroupName]" and create there 3 files with default content. 2) User should not be able to delete Default layoutGroup. 3) User should be able to edit any layout inside layout group. 4) Creating new menu should create "/Content/MenuLayouts/[menuAlias]/Default" folder and insert default layout there instead of the previous location "/_MenuLayouts/[menuAlias]". Menu LayoutGroups FTP changes FTP changes (for app start if _MenuLayouts" folder exist):
1) Copy "_MenuLayouts" folder from ftp root to "Content" folder. Rename it to "MenuLayouts": http://prntscr.com/n4ocag 2) Inside each menu alias named folder in "/Content/MenuLayouts/" folder - create Default folder. Move layout files from the "/Content/MenuLayouts/[menuAlias]" to "/Content/MenuLayouts/[[menuAlias]]/Default" folder. 3) Go through every layout "*.layout" file inside each "/Content/MenuLayouts/[[menuAlias]]/[[layoutGroup]]" folders and change the include string part like this: /_MenuLayouts/ to /Content/MenuLayouts// Add Menu LayoutGroups to liquid component Extend module component to use layoutGroup param:
If layoutGroup is empty string or null (parameter is not set) - use default. layoutGroup should work the way described below: • Find /Content/MenuLayouts///menu.layout file and parse it instead of old /_MenuLayouts//menu.layout • if file was not found - render empty string
Liquid changes: add layoutGroup to this scope
Update Import Templates To Allow "Disable From Site Search" For Items During Import
WebinOne Portal
Items imported into Treepl using Templates do not always need to be found by Site Search. By default, all imported Items are found by Site Search. In Use Cases where Items should not be searchable it is necessary to edit every Item after it is imported and check the Disable From Site Search check box. A number of partners have encountered this issue, some with large imports and others with many smaller imports. It is an issue that will affect all Partners who use Import Templates at some point. This issue could be fixed by adding a column to the Import Template to show whether the Item should be found by Site Search. The values could be True (searchable) or False (disable from site search). The Import Process could check the Disable From Site Search check box for that slide when the value was False. Go to forum post
Other updates10
Code View In Custom Module WYSIWYG
For Custom Modules, the ability to switch to “Code View” in custom WYSIWYG fields.
Menu Layouts and layoutGroups management
Add Menu layouts and layoutGroups management to the admin similar to other module layouts.
1) User should be able to create new layoutGroups Creating layoutGroup should create folder in "/Content/MenuLayouts/[menuAlias]/[layoutGroupName]" and create there 3 files with default content. 2) User should not be able to delete Default layoutGroup. 3) User should be able to edit any layout inside layout group. 4) Creating new menu should create "/Content/MenuLayouts/[menuAlias]/Default" folder and insert default layout there instead of the previous location "/_MenuLayouts/[menuAlias]".
Menu LayoutGroups FTP changes
FTP changes (for app start if _MenuLayouts" folder exist):
1) Copy "_MenuLayouts" folder from ftp root to "Content" folder. Rename it to "MenuLayouts": http://prntscr.com/n4ocag 2) Inside each menu alias named folder in "/Content/MenuLayouts/" folder - create Default folder. Move layout files from the "/Content/MenuLayouts/[menuAlias]" to "/Content/MenuLayouts/[[menuAlias]]/Default" folder. 3) Go through every layout "*.layout" file inside each "/Content/MenuLayouts/[[menuAlias]]/[[layoutGroup]]" folders and change the include string part like this: /_MenuLayouts/{{this.alias}} to /Content/MenuLayouts/{{this.alias}}/{{this.layoutGroup}}
Add Menu LayoutGroups to liquid component
Extend module component to use layoutGroup param:
{% component type: "menu", alias: "test", layoutGroup:"myCustomLayout" %} If layoutGroup is empty string or null (parameter is not set) - use default. layoutGroup should work the way described below: • Find /Content/MenuLayouts/{{this.alias}}/{{this.layoutGroup}}/menu.layout file and parse it instead of old /_MenuLayouts/{{this.alias}}/menu.layout • if file was not found - render empty string
Default value for layoutGroup should be "Default". New component parameters look like: {% component type: "menu", alias: "[[someAlias]]", layoutGroup: "[[selectedLayoutGroupName]]" %}
‘Delete all items’ button (improved UI)
Add button "Delete all items" to bulk action list on list-view of a module.
Confirm window should be the same as for existed bulk delete action.
If user leaves the page while deleting process still running - show alert message: Deleting items is still in process. It will continue after you leave this page.
Ability to change custom module custom property data types.
Add alert message when type change will cause irreversible data changes: WARNING: changing field type will cause data loss. Do you wish to proceed anyway?
Transformations are based on rules described in the documentation for Custom Modules.
Edit & Re-shuffle Tags In Modules
Add ability to edit "Tags" in modules. Add ability to reorder tags.
Image manager in wysiwyg
Ability to access the file manager for image placement within WYSIWYG tools.
Import/Export feature improvement
Extended version of import/export file. Add “disable from site search” property to the import/export file
Beta feature: Activate by checking the ‘Advanced Module Import/Export’ flag in the Beta area.
Bug fixes8
BUG: Site Search With Multiple Keywords
Bugs · General
Site search using more than one word as the search term is not returning any results, even with site reindexed.
BUG: “site.webmanifest” Files Not Supported
Bugs · General
"site.webmanifest" files are not accessible via their URLs and are therefore not usable by browsers and other applications.
Expected: When adding site.webmanifest file with content to ftp root. Go to /site.webmanifest url. Access file's content.
Actual: HTTP ERROR 404
Link Manager Changes Link Name
Bugs · General · WYSIWYG Editor
When using the Link Manager in the WYSIWYG editor for linking to a page, the Link Manager will overwrite the text selected as link with the name of the page. Example:
"This is my LINK"
Then select "LINK" and go to the Link Manager and choose "Page" and then choose a page called "Test".
Your link will now show: "This is my Test" instead of still showing: This is my LINK"
Release date issue on module items
When creating custom module item - its release date saved with incorrect hours. When click save again - date is changed again until release date is changed to +1 day.
Expected: Release and expiry date should be saved with time 00:00:00 in the site's timezone. Time part of the submitted datetime should be fully ignored - just force 00:00:00 in the site's timezone
Resaving should not change the time.
“site.webmanifest” Files Not Supported
"site.webmanifest" files are not accessible via their URLs and are therefore not usable by browsers and other applications.
Expected: When adding site.webmanifest file with content to ftp root. Go to /site.webmanifest url. Access file's content.
Actual: HTTP ERROR 404
Login to admin - can't access first few times
Issue with admin login not allowing access and returning to the login screen several times before finally allowing access.
Site Search With Multiple Keywords
Site search using more than one word as the search term is not returning any results, even with site reindexed.
Link Manager Changes the Link text
When using the Link Manager in the WYSIWYG editor for linking to a page, the Link Manager will overwrite the text selected as link with the name of the page. Example:
"This is my LINK"
Then select "LINK" and go to the Link Manager and choose "Page" and then choose a page called "Test".
Your link will now show: "This is my Test" instead of still showing: This is my LINK"
The ability to have a “cookie” set to remember when you click the toggle to collapse container? This way when you go back it is still set as collapsed? Or somewhere in a General Settings area where you can have it set to Auto Collapse (like a Global Setting).
Also the ability to apply this to the ‘Items Per Page’ pop-up menu? The default is 20 but if you change it to 50 then navigate to an item, when you go back to the list of items, only 20 are shown again.
Bug fixes2
Events Not Sorting By ‘EventDateStart’ And ‘EventDateEnd’
Bugs · Events
When using sortBy parameters in the component module for events, ‘EventDateStart’ and ‘EventDateEnd’ do not work to sort by those dates.
Saving Template Will “Postpends” A "-1"
Bugs · Pages and Templates
When saving Templates after within Content Template, it “postpends” a -1 after it. Even after -1 is removed it brings it back again.
If saving it again, adds a 2, saving it a third time adds a 3 etc.
Screen shot is after removing, saving, back to list view, saving, and it comes back again.
17 updates
New features1
WYSIWYG Editor - Image Manager
Admin Panel · WYSIWYG Editor
Need to have the ability to add Spacing and Image Compression options as well, similar to how Shopify handles this
Right now one need to manually go in and update Margins. Would also be good to assign a custom CSS class to images.
Improvements1
FTP Access to Templates Etc.
FTP
FTP access to Pages, Menus, Content Templates, Snippets, Web forms (!), Blogs + Blog Posts, Events and Event Groups, Banners (Ad rotators), Galleries/Sliders (Photo Galleries), Authors, FAQ's, Custom Modules, Workflow Emails, System Emails, Email Templates and System Pages
Other updates14
UPDATELiquid date filter - convert number to date
Now Liquid can convert numbers to date (interpreted as number of seconds from 1st Jan 1970). For example: {% assign newStartDateSeconds = 'now' | date: '%s'| minus: 1209600 %} {% assign newStartDate = newStartDateSeconds | date: '%e-%b-%Y' %}
Folder to check files in: /Content/ContentTemplates
File to check schema: .html
If Content template created in admin contains unaccessible symbols for file name - replace them with empty string ("") for file name (name of the template remains the same). Extend Content template with the same FTP Path variable as Pages has.
Managing functions are the same as for pages: • create file -> create template • delete file -> delete template • update file -> update template's content • rename file -> rename content template • All above vice versa
Managing Snippets through FTP
Add ability to manage Snippets via FTP.
Folder to check files in: /Content/Snippets
File to check schema: .html
If Snippet created in admin contains unaccessible symbols for file name - replace them with empty string ("") for file name (name of the Snippet remains the same). Extend Snippets with the same FTP Path variable as Pages has.
Managing functions are the same as for pages: • create file -> create Snippet • delete file -> delete Snippet • update file -> update Snippet's content • rename file -> rename Snippet (alias remain the same) • All above vice versa
Managing Email templates through FTP
Add ability to manage Email Template via FTP.
Folder to check files in: /Content/EmailTemplates
File to check schema: .html
If Email template created in admin contains unaccessible symbols for file name - replace them with empty string ("") for file name (name of the template remains the same). Extend Email template with the same FTP Path variable as Pages has.
Managing functions are the same as for pages: • create file -> create template • delete file -> delete template • update file -> update template's content • rename file -> rename Email template • All above vice versa
Managing Module Layouts through FTP
Add ability to manage Module Layouts via FTP.
Folder to check files in: /Content/ModuleLayouts/
File to check schema: .html
If Module Layout created in admin contains unaccessible symbols for file name - replace them with empty string ("") for file name (name of the Module Layout remains the same). Extend Module Layouts with the same FTP Path variable as Pages has.
Managing functions are the same as for pages: • create file -> create Module Layout (as list layout) • delete file -> delete Module Layout • update file -> update Module Layout's content • rename file -> rename Module Layout • All above vice versa
Managing Forms through FTP
Add ability to manage Forms via FTP.
Folder to check files in: /Content/Forms
File to check schema:
Managing System Pages through FTP
Add ability to manage System Pages via FTP.
Folder to check files in: /Content/SystemPages
File to check schema: .html
If System Pages created in admin contains unaccessible symbols for file name - replace them with empty string ("") for file name (name of the System Page remains the same). Extend System Pages with the same FTP Path variable as Pages has.
Managing functions are the same as for pages: • create file -> No Action (disallowed action for this type of item) • delete file -> No Action (disallowed action for this type of item) • update file -> update System Page's content (create file if it was deleted by ftp) • rename file -> No Action (disallowed action for this type of item) • All above vice versa
Managing System Emails through FTP
Add ability to manage System Emails via FTP.
Folder to check files in: /Content/SystemEmails
File to check schema: .html
If System Email created in admin contains unaccessible symbols for file name - replace them with empty string ("") for file name (name of the System Email remains the same). Extend System Emails with the same FTP Path variable as Pages has.
Managing functions are the same as for pages: • create file -> No Action (disallowed action for this type of item) • delete file -> No Action (disallowed action for this type of item) • update file -> update System Email's content (create file if it was deleted by ftp) • rename file -> No Action (disallowed action for this type of item) • All above vice versa
Managing Workflow Emails through FTP
Add ability to manage Workflow Emails via FTP.
Folder to check files in: /Content/WorkflowEmails
File to check schema: .html
If Workflow Email created in admin contains unaccessible symbols for file name - replace them with empty string ("") for file name (name of the Workflow Email remains the same). Extend Workflow Emails with the same FTP Path variable as Pages has.
Managing functions are the same as for pages: • create file -> create Workflow Email • delete file -> delete Workflow Email • update file -> update Workflow Email 's content • rename file -> rename Workflow Email (alias remain the same) • All above vice versa
Extend cookie life time after log in to secure zone from 30 min to 24hrs
Admin URL management improvement
• Remove # from url routes in admin • On login - redirect user to previous page (if user was redirected to login by the app). • If user goes via old urls with # - redirect him to the correct new styled URL
Liquid engine refactoring (ALPHA)
Refined and optimized Liquid Parsing process. Feature is in ALPHA state for now and under internal feature flag. Feature is disabled by default but we can manually enable it upon request for any of your trial sites if you wish to play with it.
Benefits of the feature: • Parsing process now goes starting from template instead of page content. • Liquid parsing speed is slightly increased.
Feature is incompatible with nICE for now (compatibility is under development).
Bug fixes1
Allow ‘Amount’ payment when Event Price is 0
When • Event Has Price field set to 0 • Form Has AcceptPayment field ON • Form Has AcceptEventSubscription field ON • Form submission data has Amount > 0 Than - proceed payment the same way as it does for event by event.price BUT use FormSubmissionData.Amount as Price
Design: http://prntscr.com/mu68eb Responsive calendar support for Events: • Create JS plugin that builds month based calendar for events • Add ajax query for events for current month and display them on the calendar • Calendar should be responsive Created new include file "/cms-assets/includes/event-calendar.inc". Add component toolbox option • Events->Calendar • Select event group:• all (all items) • ungrouped (items in the root level, outside of any group) • (name of any created event group) • ...
• show code: createEventCalendarHolder('treepl-calendar-71c3159c-be79-47bd-99f4-de5316a16bf8', 3185, 1);
Use Blank Template
Templates
Modify content template and email template wrapping behavior: • Assigned template field is number field • If number is int value > 0• Try find template by this ID. Apply found template to the content. • If template not found - go to step 4
• If number is int value == 0• Check for default template for this type of content. If found - Apply found template to the content. • If default template not found (or not provided) - go to step 4
• If number is int value == -1 or null (force apply -1 in this case if it happens while saving process)• Force apply Pseudo-template with the content: Backlog Documentation link in the admin Documentation link in the admin should be viewed only for partners: http://prntscr.com/mmlqzg
Backlog 'Do not use template' and 'use default' template behavior Modify content template and email template wrapping behavior: • Assigned template field is number field • If number is int value > 0• Try find template by this ID. Apply found template to the content. • If template not found - go to step 4
• If number is int value == 0• Check for default template for this type of content. If found - Apply found template to the content. • If default template not found (or not provided) - go to step 4
• If number is int value == -1 or null (force apply -1 in this case if it happens while saving process)• Force apply Pseudo-template with the content: {{pageContent}} - for the Content Templates {{this.emailContent}} - for the Email Templates
In Admin added 2 options when assigning Content Template and Email Templates: • Don't use template (value -1) • Use default template (value 0)
Backlog Event - Calendar Support Design: http://prntscr.com/mu68eb Responsive calendar support for Events: • Create JS plugin that builds month based calendar for events • Add ajax query for events for current month and display them on the calendar • Calendar should be responsive Created new include file "/cms-assets/includes/event-calendar.inc". Add component toolbox option • Events->Calendar • Select event group:• all (all items) • ungrouped (items in the root level, outside of any group) • (name of any created event group) • ...
• show code: createEventCalendarHolder('treepl-calendar-f19f4a50-db07-4ba7-b7c2-62b0dc65225b', 3185, 1);
Backlog Add "Parentname" To module Component • Add "templatename" to the module component to target the name of the template. • Add "parentname" to the module component to target the name of the parent item (that can be defined by parentid). • Add parenturl {% component source: "Page", layout: ""... { "id": 1832, "url": "", "parentid": 1833, "parentname": "Name of Parent", "parenturl": "/relative/url", "templatename": "Name of Template", "lastupdateddate": "2018-10-21T23:34:21","
Backlog Home Page Status Available In {{this}} Object Include the ‘Set as Home Page’ data within the {{this}} object so we have it available in Liquid. It can be helpful to know for setting certain conditions in the template; just some examples:
· Show a hero slider above content when on home page · Do not show a global subscription pop-up/modal window when on home page
Backlog Direct Link To CRM Form Submission Entry • Ability to grab direct link to CRM form submission entry from either the 'formsubmission' or workflow collections to place in workflow email. This is so that one can direct a workflow recipient straight to the Form submission in the admin console. Something like • {{this.formSubmissionData.crmContactLink}} • {{this.formSubmissionData.crmFormSubmissionLink}} • {{this.formSubmissionData.crmEventBookingLink}} • Add link to CRM contact from within the Form Submissions in the Admin: http://prntscr.com/mmlfnn (email address goes to CRM record, not a mailto: their email address)
Backlog Internal Custom Module Search The ability to search all items in Module List even with “Disable from Site Search” checked. “Disable from Site Search" should only be for the front end site only, and not internally. Looks like you lose search functionality within the custom module list when it is checked. https://treepl.co/images/public-roadmap/Internal-Custom-Module-Search.png
Backlog File Exports: Prepend Site URL And Postpend Date When exporting files add the site url to the beginning of the file name and the date to the end of the filename i.e. 'website.com-team-module-export-2018-12-30.xls'
Backlog Remove Event specific fields from Event Group module These fields should not be present and are used for Event items, not their groups: http://prntscr.com/mhi8h7
Backlog Global setting for enable/disable text wrapping on a new line Add a global setting that will enable/disable text wrapping on a new line in the ace editor. 'Settings' > 'Misc'
Backlog Keyboard shortcut to save content in ACE and WYSIWYG editors Apply CTRL+S/Command+S Shortcut Keys to save content when in ACE and WYSIWYG editors
Backlog Reindex site - checkstatus and disallow reindex when indexing in progress Apply loader and disabling of reindex site button in order to prevent multiple reindex process trigering. Button should be disabled even after page reloading. Once reindex is finished - remove the loader and activate reindex button. Design - http://prntscr.com/mu66s9
Backlog Show treepl cms version in the admin Show treepl cms version in the admin Design - http://prntscr.com/mu679j
Backlog Rename Documents to File Manager in WYSIWYG link manager Rename "Documents" title to "File Manager" in WYSIWYG link manager http://prntscr.com/mnbls0
Backlog Show Template and release date on module item list view Add columns to module item list view in Admin: • Template • Release Date Provide ability to sort by Release Date
Bug Empty google analytics view ID showing and missing http://prntscr.com/mgwu2g Fix bugs with head auto added items: • tag is missing • google analytics code should not be output if no tracking id is set in the analytics settings.
Bug OpenGraph Properties in Liquid not accessible `{{this.opengraphproperties}}` renders the sub-properties as JSON ok, but couldn't access those sub-properties directly, ie: `{{this.opengraphproperties.title}}`.
- for the Content Templates - for the Email Templates
In Admin added 2 options when assigning Content Template and Email Templates: • Don't use template (value -1) • Use default template (value 0)
Improvements5
Add "Parentname" To Component Source: “Page”
Pages and Templates
• Add "templatename" to the module component to target the name of the template. • Add "parentname" to the module component to target the name of the parent item (that can be defined by parentid). • Add parenturl {% component source: "Page", layout: ""... { "id": 1832, "url": "", "parentid": 1833, "parentname": "Name of Parent", "parenturl": "/relative/url", "templatename": "Name of Template", "lastupdateddate": "2018-10-21T23:34:21","
Direct Link To CRM Form Submission Entry
CRM · Liquid
• Ability to grab direct link to CRM form submission entry from either the 'formsubmission' or workflow collections to place in workflow email. This is so that one can direct a workflow recipient straight to the Form submission in the admin console. Something like • • • • Add link to CRM contact from within the Form Submissions in the Admin: http://prntscr.com/mmlfnn (email address goes to CRM record, not a mailto: their email address)
File Exports: Prepend Site URL And Postpend Date
Admin Panel · General
When exporting files add the site url to the beginning of the file name and the date to the end of the filename i.e. 'website.com-team-module-export-2018-12-30.xls'
Include the ‘Set as Home Page’ data within the {{this}} object so we have it available in Liquid.
\n\n
It can be helpful to know for setting certain conditions in the template; just some examples:\n \n · Show a hero slider above content when on home page\n · Do not show a global subscription pop-up/modal window when on home page
Ability to grab direct link to CRM form submission entry from either the 'formsubmission' or workflow collections to place in workflow email.\n This is so that one can direct a workflow recipient straight to the Form submission in the admin console. Something like
\n
\n\n
\n
{{this.formSubmissionData.crmContactLink}}
\n
{{this.formSubmissionData.crmFormSubmissionLink}}
\n
{{this.formSubmissionData.crmEventBookingLink}}
\n
\n\n
\n
Add link to CRM contact from within the Form Submissions in the Admin: http://prntscr.com/mmlfnn (email address goes to CRM record, not a mailto: their email address)
\n
\n
\n
\n\n
Backlog
\n
\n
\n\n
Internal Custom Module Search
\n
\n
\n\n
The ability to search all items in Module List even with “Disable from Site Search” checked.
\n\n
“Disable from Site Search\" should only be for the front end site only, and not internally.
\n\n
Looks like you lose search functionality within the custom module list when it is checked.
Global setting for enable/disable text wrapping on a new line
\n
\n
\n\n
Add a global setting that will enable/disable text wrapping on a new line in the ace editor.
\n\n
'Settings' > 'Misc'
\n
\n
\n\n
Backlog
\n
\n
\n\n
Keyboard shortcut to save content in ACE and WYSIWYG editors
\n
\n
\n\n
Apply CTRL+S/Command+S Shortcut Keys to save content when in ACE and WYSIWYG editors
\n
\n
\n\n
Backlog
\n
\n
\n\n
Reindex site - checkstatus and disallow reindex when indexing in progress
\n
\n
\n\n
Apply loader and disabling of reindex site button in order to prevent multiple reindex process trigering. Button should be disabled even after page reloading.
\n\n
Once reindex is finished - remove the loader and activate reindex button.
google analytics code should not be output if no tracking id is set in the analytics settings.
\n
\n
\n
\n\n
Bug
\n
\n
\n\n
OpenGraph Properties in Liquid not accessible
\n
\n
\n\n
`{{this.opengraphproperties}}` renders the sub-properties as JSON ok, but couldn't access those sub-properties directly, ie: `{{this.opengraphproperties.title}}`.
The ability to search all items in Module List even with “Disable from Site Search” checked. “Disable from Site Search" should only be for the front end site only, and not internally. Looks like you lose search functionality within the custom module list when it is checked. https://treepl.co/images/public-roadmap/Internal-Custom-Module-Search.png
'Do not use template' and 'use default' template behavior
Modify content template and email template wrapping behavior: • Assigned template field is number field • If number is int value > 0• Try find template by this ID. Apply found template to the content. • If template not found - go to step 4
• If number is int value == 0• Check for default template for this type of content. If found - Apply found template to the content. • If default template not found (or not provided) - go to step 4
• If number is int value == -1 or null (force apply -1 in this case if it happens while saving process)• Force apply Pseudo-template with the content: {{pageContent}} - for the Content Templates {{this.emailContent}} - for the Email Templates
In Admin added 2 options when assigning Content Template and Email Templates: • Don't use template (value -1) • Use default template (value 0)
Backlog
Event - Calendar Support
Add "Parentname" To module Component
• Add "templatename" to the module component to target the name of the template. • Add "parentname" to the module component to target the name of the parent item (that can be defined by parentid). • Add parenturl {% component source: "Page", layout: ""... { "id": 1832, "url": "", "parentid": 1833, "parentname": "Name of Parent", "parenturl": "/relative/url", "templatename": "Name of Template", "lastupdateddate": "2018-10-21T23:34:21","
Home Page Status Available In {{this}} Object
Include the ‘Set as Home Page’ data within the {{this}} object so we have it available in Liquid. It can be helpful to know for setting certain conditions in the template; just some examples:
· Show a hero slider above content when on home page · Do not show a global subscription pop-up/modal window when on home page
• Ability to grab direct link to CRM form submission entry from either the 'formsubmission' or workflow collections to place in workflow email. This is so that one can direct a workflow recipient straight to the Form submission in the admin console. Something like • {{this.formSubmissionData.crmContactLink}} • {{this.formSubmissionData.crmFormSubmissionLink}} • {{this.formSubmissionData.crmEventBookingLink}} • Add link to CRM contact from within the Form Submissions in the Admin: http://prntscr.com/mmlfnn (email address goes to CRM record, not a mailto: their email address)
Internal Custom Module Search
The ability to search all items in Module List even with “Disable from Site Search” checked. “Disable from Site Search" should only be for the front end site only, and not internally. Looks like you lose search functionality within the custom module list when it is checked. https://treepl.co/images/public-roadmap/Internal-Custom-Module-Search.png
File Exports: Prepend Site URL And Postpend Date
When exporting files add the site url to the beginning of the file name and the date to the end of the filename i.e. 'website.com-team-module-export-2018-12-30.xls'
Remove Event specific fields from Event Group module
These fields should not be present and are used for Event items, not their groups: http://prntscr.com/mhi8h7
Global setting for enable/disable text wrapping on a new line
Add a global setting that will enable/disable text wrapping on a new line in the ace editor. 'Settings' > 'Misc'
Keyboard shortcut to save content in ACE and WYSIWYG editors
Apply CTRL+S/Command+S Shortcut Keys to save content when in ACE and WYSIWYG editors
Reindex site - checkstatus and disallow reindex when indexing in progress
Apply loader and disabling of reindex site button in order to prevent multiple reindex process trigering. Button should be disabled even after page reloading. Once reindex is finished - remove the loader and activate reindex button. Design - http://prntscr.com/mu66s9
Show Template and release date on module item list view
Add columns to module item list view in Admin: • Template • Release Date Provide ability to sort by Release Date
Bug fixes2
Empty google analytics view ID showing and missing
http://prntscr.com/mgwu2g Fix bugs with head auto added items: • tag is missing • google analytics code should not be output if no tracking id is set in the analytics settings.
OpenGraph Properties in Liquid not accessible
`{{this.opengraphproperties}}` renders the sub-properties as JSON ok, but couldn't access those sub-properties directly, ie: `{{this.opengraphproperties.title}}`.
30 updates
New features2
BONUS: Advanced Link Manager inside WYSIWYG Editor
General · WYSIWYG Editor
In the WYSIWIG editor on pages or any other location where a url / link is may be added (blog, page edits, custom modules ) - - "browse to url" - link option to open in a popup - add "title" tag to url links
">
Match Date Format To Site's Time Zone
Admin Panel
On site creation process, save selected timezone to the site. On the site use saved timezone for all date based variables.
Improvements4
BONUS: Enable/Disable All Pages/Module Items for Search Engines
SEO
SEO: Added two buttons under 'Pages search engines settings:' • Enable all • Disable all Both do one time action - either enables or disables "Show this page for search engines" option in every system and custom module item. http://prntscr.com/mlipzc On click show confirmation message: • Are you sure you want to enable all pages for search engines? • Are you sure you want to disable all pages for search engines?
Collapse, And/Or Pre-collapse Content Boxes
UI/UX
Ability to collapse/expand content boxes in pages / templates / modules, etc. https://prnt.sc/mgi9l7
Implement Emmet In The ACE Editor
Admin Panel
Emmet is a system that allows coders to write shorthand and have it expanded when you push the tab key. It can save a lot of typing when writing web pages. Eg. you type 'p' and then press 'tab' and you get:
, or you type 'div.wrapper' and 'tab' you get:
You can even do more advanced things like creating multiple instances with nested objects. Here is an code playground of Emmet implemented in Ace (Go ahead and type p +tab on an empty line or ul>(li.item>a)*5 plus tab. ) https://ace.c9.io/demo/emmet.html Here is the documentation for Emmet https://docs.emmet.io/abbreviations/syntax/
Rename "seoTitle" To "metaTitle"
Blogs · Custom Modules · Pages and Templates · UI/UX
Module Item -> SEO tab: Rename "seoTitle" to "metaTitle" for consistency and accuracy.
Other updates19
Custom module items: Inheriting default settings on import/create from frontend
Use custom module settings on events below. -> Settings -> 'Secure Zones' • Select Secure Zones -> Item Properties -> 'Default Properties' • Default Template • Disable All Items From Site Search Therefore, new imported items will inherit Custom Module setting. So if you have "Disable from Site Search" checked - all new imported items will have "Disable from Site Search" checked (already existing items will not be affected). System flow: • Import Process: • IF items are new (create process): • If item template column is not specified: Set item template to "Default Template" setting of the module • Set Items' "Disable All Items From Site Search" property using value of the "Disable All Items From Site Search" setting of the module • Assign Items to Secure Zones that are Selected in the "Secure Zones" setting of the module http://prntscr.com/mgctf9
• If Update Process • process remains the same as it is right now
• Create module item from frontend (public create item API): • Set item template to "Default Template" setting of the module • Set Item's "Disable All Items From Site Search" property using value of the "Disable All Items From Site Search" setting of the module • Assign Items to Secure Zones that are Selected in the "Secure Zones" setting of the module http://prntscr.com/mgctf9
Datetime oriented by site Timezone
On site creation process, save selected timezone to the site. On the site use saved timezone for all date based variables.
SiteSearch index rebuild function
Added Rebuild Index button to the header of the admin http://prntscr.com/mlioin Clicking on it will trigger background process that will rebuild search index that is used by site search and custom module search
Global 'Show this page for search engines' button
SEO: Added two buttons under 'Pages search engines settings:' • Enable all • Disable all Both do one time action - either enables or disables "Show this page for search engines" option in every system and custom module item. http://prntscr.com/mlipzc On click show confirmation message: • Are you sure you want to enable all pages for search engines? • Are you sure you want to disable all pages for search engines?
Increase restore_password/activate_account token lifetime from 30 min to 24h (allowed secure zone users not respond longer on restore password emails. Especially make sense if restore password was triggered manually by the admin)
File creation during copy page bugfix
Fixed issue caused during copying of a page: page file was not created.
Add search form to Component Manager + search by trpEvents fields
Add Events -> Search Form item to the Component Manager http://prntscr.com/mgimch Provide same iterface as for the Custom Module search form (except for selecting module since Event is the only module available for the section) Generated search form should contain Event specific fields and be able to search by them: • prop_Price_Min (text input) • prop_Price_Max (text input) • prop_EventStartDate_Min (text input) • prop_EventStartDate_Max (text input) • prop_EventEndDate_Min (text input) • prop_EventEndDate_Max (text input) • prop_AllowMultipleSubscriptionPerEmail (checkbox) • prop_HideWhenFull (checkbox) • prop_Capacity_Min (text input) • prop_Capacity_Max (text input) • prop_Allocation_Min (text input) • prop_Allocation_Max (text input)
Implement Emmet In The ACE Editor
Emmet is a system that allows coders to write shorthand and have it expanded when you push the tab key. It can save a lot of typing when writing web pages. Eg. you type 'p' and then press 'tab' and you get:
, or you type 'div.wrapper' and 'tab' you get:
You can even do more advanced things like creating multiple instances with nested objects. Here is an code playground of Emmet implemented in Ace (Go ahead and type p +tab on an empty line or ul>(li.item>a)*5 plus tab. ) https://ace.c9.io/demo/emmet.html Here is the documentation for Emmet https://docs.emmet.io/abbreviations/syntax/
Collapse, And/Or Pre-collapse Content Boxes
Ability to collapse/expand content boxes in pages / templates / modules, etc. https://prnt.sc/mgi9l7
Rename "seoTitle" To "metaTitle"
Module Item -> SEO tab: Rename "seoTitle" to "metaTitle" for consistency and accuracy.
WYSIWYG - Image and links titles
Add ability to set/edit titles for links and alt text for Images inside the WYSIWYG
Extend meta description symbols limitation
Extend meta description symbols limitation to 1000
Inactive state for module items (by dates)
Display inactive state on items list and tree view: Item is inactive when currentDate < Release date or currentDate > Expiry date
WYSIWYG - URL browser for links
Add ability to choose URL for links from: • Built-in modules (Pages, Blogs, etc.) and Custom Module items • Documents (File Manager)) • external url Similar to BC widget: http://prntscr.com/mgiv0i
Improve load speed of the pages
Pages that uses many liquid components now loads faster.
Rollback overriden params in modules
When rendering module inside layout of the another module - params variable should not be overriden by the nested module. Example On any page:
Inside "List" layout of the "Example" module:
Inside "List" layout of the "Example 2" module: any string
Expected: • myValue Any StringAny String myValue Any StringAny String myValue Any StringAny String Actual • myValue Any StringAny String
Any StringAny String
Any StringAny String
Bug fixes5
ACE editor cut of JS content
Steps: • Enter code below to the page • Before
After
• click save Expected: • Before
After
Actual: • Before
Allow create sites under trialsite.co
Sites under trialsite.co now creating properly(previously was created under treepl.co domain)
Empty Google Analytics view ID showing
Google Analytics code will not be viewed if no tracking id is set in the analytics tab.
Liquid: Roll back number filter
" | number" filter is restored(previously was accidently removed from filters).
Allow event start date to be set to past
When saving Event: Expected: • Start Date can be set to the past. Actual • Validation error: The event has already ended.
32 updates
New features3
Canada (Central) Data Center
Infrastructure
Ability to create sites on Canada (Central) data center. Existing live and trial sites of Treepl Partners from Canada will be transferred by our admins upon request.
Booking Records
CRM · Events
CRM -> Booking Subscriptions created by an Event Form submission If formData.eventId is not null - trigger eventSubscription flow: • Set allocations from formData.allocations. If value is empty or "<1" then set allocations=1 • Validate Event Subscription (separate task created with the description) • If event has price not null and ">0" then trigger event payment flow• if payment is succeed • use standard form's redirect/output flow • Otherwise show payment error message from the payment flow
• Otherwise - create event booking record from formData info and use standard form's redirect/output flow CRM -> Booking Subscription Permissions and Menu integration
Payable Events, Items, Forms
Custom Modules · Ecommerce · Events
- Ability to create events - Ability to create event subscriptions - Ability to create forms with payments - Payments go through Stripe
Improvements1
reCAPTCHA v3 Support
Forms · Member Area
• Recaptcha v3 now a new button in the Form -> form builder. • Disallow - recaptcha v2 and recaptcha v3 to be selected together for a form (validation upon save)
Other updates24
Event Groups and Events (CRUD)
Create two nested system modules (Event Group and Event) similar to the blog structure (Blog and Blog Post). Event Group module created in order to help grouping events rather than keeping them all in one single list. Although, you're still able to view events in one list. For this reason List View was set as default layout (with ability to switch to Tree View http://prntscr.com/mf70zr Unlike the blog and blog posts - events are allowed to be created in the root level of Event Groups and events (Blog post can’t be created in the root level only in the blog for example).
Event module has event specific fields: • Date From • Date To • Capacity: (number) • Hide when full: (boolean) • Price : (number) • Allow multiple subscription per one email: (boolean)
CRM -> Booking Subscriptions created by an Event Form submission
If formData.eventId is not null - trigger eventSubscription flow: • Set allocations from formData.allocations. If value is empty or "<1" then set allocations=1 • Validate Event Subscription (separate task created with the description) • If event has price not null and ">0" then trigger event payment flow• if payment is succeed • use standard form's redirect/output flow • Otherwise show payment error message from the payment flow
• Otherwise - create event booking record from formData info and use standard form's redirect/output flow
Form -> Event subscription validation
Event Subscription Validation: • Check event exists by formData.eventId:• if not found, alert: Event with such id does not exist
• Check event is still available:• not disabled • Current Date is between EventDateStart and EventDateEnd (if EventDateEnd is empty - use EventDateStart with time 23:59:59) • Current Date is between ReleaseDate and ExpiryDate (same way as used now in custom modules), alert: The event you are subscribing for is not available
• Check capacity and allocation requested. Messages:• if capatity = current event allocation, alert: The event is full • elseif capatity < (currentEventAllocation + formData.allocation), alert: The event hasn't enough seats. Only [[capatity-currentEventAllocation]] seats left.
• Check Allow multiple subscription per one email• If Allow multiple subscription per one email option is false and formData.email is already subscribed to the event, alert: You already subscribed to this event
Events
Permissions and Menu integration
CRM -> Booking Subscription
Permissions and Menu integration
CRM -> Orders section
Permissions and Menu integration
Component box -> Events
• List of Events and Event Groups (same as for module items but with such fields as capacity, price etc) • Event Subscription Form• List of Events to choose from. Default option is "For detail layout" which gives the form a value as {{this['id']}}. Example: {% component type: "form", alias: "[[formAlias]]", eventId: "{{this['id']}}" %} • list of forms (that has acceptEventSubscription field enabled). • Once user selects form and an event item, show code for copying, example: {% component type: "form", alias: "payment_form", eventId: 1939 %}
Settings -> Payment Settings
Payments Gateways Section (also added to Permissions and Menu integration) Gateway (select) options: • Stripe
Payments Gateway - Section [Stripe]
Stripe Settings: • Key (required) (string) • Currency (string) (Default USD) • Image (string) (with upload widget like http://prntscr.com/mbx4v0 Tooltip: A relative or absolute URL pointing to a square image of your brand or product. The recommended minimum size is 128x128px.The supported image types are: .gif, .jpeg, and .png Specified image will be shown here http://prntscr.com/mf7c8a
Form -> Form builder -> 'Accept Payment' and 'Accept Event Subscription' buttons
Option to add 'Accept Payment' and 'Accept Event Subscription' to the form on form builder section • Accept Event Subscription, generates the below code before the • Accept Payment, generates the below code inside the element:<label for="PaymentType">Payment Type</label> <select id="PaymentType" name="paymentType"> <option data-currency="" data-image="" data-key="" value="stripe">Stripe</option> </select> <input type="hidden" name="paymentData" value=""> <label for="Amount">Amount</label> {% if paymentAmount == null %} {% assign paymentAmount = params.price | default: 0 %} {% endif %} <input type="text" id="Amount" name="Amount" value="{{paymentAmount}}" data-trp_price="{{paymentAmount}}">
<script src="https://checkout.stripe.com/checkout.js"></script> <script src="/cms-assets/js/payment.js"></script> Therefore: If form has “Accept Payment” field selected – you can specify price in component tag: {% component type: "form", alias: "[[formAlias]]", price: "20" %}
Add file payment.js and main.css to /cms-assets directory
Create/Update files: • /cms-assets/js/payment.js (for payment flow in general and stripe flow in particular) • /cms-assets/css/main.css (minified version of the default styles) NOTE: All files in /cms-assets folder could be overridden by treepl team via sprint updates. So don’t make any changes in those files. If you want to change something that is affected by those files – add them to your own files or remove default scripts and styles from desired pages.
Payment Form Processing Logic
Payment flow • If Form Payment type:• Event:• Get event.price • get totalAmount = event.price * allocations
• General:• get totalAmount = formData.Amount
• Payment process:• If formData.paymentType == 'stripe'• Get token from formData.paymentData • Verify totalAmount with token • If success - end flow • else - show message: Payment is failed: [[error message from stripe]]
System Email -> Invoice
Create new System Email that should be sent on successful payment
{{this.order}} liquid object contains • {{this.order.id}} • {{this.order.MemberEmail}} • {{this.order.MemberId}} • {{this.order.MemberLink}} (link to admin to CRM -> Order -> particular order) • {{this.order.Link}} • {{this.order.items}} collection of objects. Object ({% for item in this.order.items %}):• {{item.entityid}} • {{item.entityType}} (Event, Form) • {{item.name}} • {{item.price}} (totalCost/quantity) • {{item.quantity}} • {{item.totalCost}} • {{item.currency.code}} • {{item.currency.symbol}} • {{item.currency.digitalCode}} • {{item.currency.name}}
On form submission process: • If payment• Check for name="customInvoiceId" field.• If found Email by that id - use that content for invoice • If not found or name="customInvoiceId" is null - send default System Email -> invoice
• Recaptcha v3 now a new button in the Form -> form builder. • Disallow - recaptcha v2 and recaptcha v3 to be selected together for a form (validation upon save)
Add form related scripts only if they are required
Scripts should be automatically added before ONLY if there is at least one form that requires it. • recaptchav2•
Upgrade liquid filters to the latest version of the liquid library
This fixed some issues like: • Divided_by will no longer be integer division. {{3 | divided_by : 2}} will be 1.5 instead of 1 as it was before • Sort filter now can sort simple arrays (not only array of objects by object’s field as it was before) {% assign arr = "c,d,a,b" | split: ","| sort | join: "," %} {{arr}} now returns a,b,c,d • Added sort_natural filer (case insensitive sorting) Filter list now is (bolded items are new): • Array Filters:• join • first • last • concat • map • reverse • size • sort • sort_natural • uniq
If custom menu consist only from empty items force redirect to menu configurator not the login screen.
Add datasource name and datasource url to the item liquid data
Add datasource name and datasource url to the item liquid data: • {{this.dataSourcePropertyAlias}} - ID as it is now • {{this.dataSourcePropertyAlias_name}} - name of the datasource item OR null (if no item found by dataSourcePropertyAlias ID). • {{this.dataSourcePropertyAlias_url}} - url of the datasource item OR null (if no item found by dataSourcePropertyAlias ID).
Convert Author image custom property from type Text to type Media
Convert Author image custom property from type Text to type Media (without losing currently saved values)
Search custom modules by parentId and url slug
Add ability to search custom modules using • prop_Slug (equals rule) • prop_Url (contains rule) • prop_ParentId (add by default to search form html under prop_ModuleId with value "":• "-1" means the parent module's root folder id. • Empty means skip this filter
Create new module - disable save button while saving
While creating a custom module when clicked save once Save button should become inactive. If validation errors occurs - enable button
Bug fixes4
Default gallery layout wasn't patched
In Gallery/Slider Layouts -> Default List now creates correctly functioning layout code:
First login (after some time past) to the site admin issue
When admin user tried to login to the admin panel (after some time past) - it just keeps looping the login page (first time). After refresh the page login works fine
Can't save page when its ftp html file name contains Capital letters
After creating an HTML page via the File Manager an error would be thrown if attempting to later save that page via the admin 'Pages' section.
Liquid engine – recursion fix
• In menu sub item layout (/_MenuLayouts//sub_items.layout) • if replace {% for item in currentItem.items %} with {% for item in this.items %} • would result in infinite recursion that dramatically slowed down the site
14 updates
New features3
Admin Menu Configurator
Admin Panel
Add ability to customize order, visibility and names of admin panel menu items.
Admin User Custom Restrictions
Admin Panel
Admin User Roles CRUD Add ability to create, delete, update and view list of roles. Each role detail layout provides a list of permissions based on the current site plan. Admin Users - permissions setup Ability to set admin user role for every Admin User created. Admin user can't setup role to themselves. No admin user can edit/delete partner admin account.
Advanced Admin Search
Admin Panel · UI/UX
Add ability to filter admin menu items by keyword
Improvements1
_is_mobile_ Liquid Detection
Liquid
Suggestion for {{request.request_data.is_mobile}} to become {{request.request_data.device_class}} with the output being 'mobile|tablet|desktop|...' as this will provide greater flexibility and future scalability as more device types could be added in over time. eg: 'tv|watch|glasses|car|spaceship|...'.Much like in BC we have {{globals.visitor.deviceClass}} giving us 'desktop|tablet|phone'.
The {{request.request_data.is_mobile}} just gives us a 'true|false' to whether it's mobile or not.I feel that the BC way is more flexible and future-proof.Just knowing whether a device is or is not a mobile is somewhat limiting and the distinction of what "mobile" actually means is becoming blurred.Suggestion for the {{request}} objects to be simplified and become:'request.data''request.url'At present they are a little redundant like so:'request.request_data''request.request_url'
Other updates8
Admin User Roles CRUD
Add ability to create, delete, update and view list of roles. Each role detail layout provides a list of permissions based on the current site plan.
Admin Users - permissions setup
Ability to set admin user role for every Admin User created. Admin user can't setup role to themselves. No admin user can edit/delete partner admin account.
Admin menu configurator
Add ability to customize order, visibility and names of admin panel menu items.
Change of custom menus and role restrictions with site plan upgrade/downgrade
• Plan Upgrade: • Change site plan permission
• Plan Downgrade • Change site plan permission • Go through all admin user's roles and remove all permissions that is not exist in the current site plan permission
• New Module added • Add new permission node to site plan permission
• Existing module deleted • Remove permission node from site plan permission
• User Roles • Go through all admin user's roles and remove permission for that module if such exists.
Advanced admin search
Add ability to filter admin menu items by keyword
{{this.formSubmissionData}} on thank you page
Added support for {{this.formSubmissionData}} to get access to formSubmissionData object the same way as now does {{formSubmissionData}} {{formSubmissionData}} should also work as it does now for backward compatibility. Custom thank you pages (by use of 'redirectURL' parameter) will also support both data tags.
User friendly mailchimp error messages
Change "The resource submitted could not be validated. For field-specific details, see the 'errors' array." error message http://prntscr.com/m2iqt3
To like: "Validation error: [Error key]: [error message] ..."
System Pages and Emails default UI
Created folder in File Manager/FTP: /cms-assets Added here .css, .js, etc. that are needed for system pages and system emails. Default system pages and emails on blank site include:
• System pages • 404 • Email Confirmation • Forbidden • Form Submission Results • Request Reset Password • Request Reset Password Result • Reset Password • Unauthorized
• Galleries • Layout markup and js (with fancybox)
• System Emails • Password Retrieve Email • Secure Zone Login Details • Workflow Notification • Confirm Email Notification
• Forms • Email Notification (autoresponder)
Bug fixes2
Author column duplication in export bug
Repro Steps • Go to any custom module. • Enable authors in Properties section • Go to items list • Create item • Call export • Call export • Call export Expected • All 3 export files should contain only one Author column Actual • Each next file has one more Author header column
Custom module search bug
Search by custom module form requires &paginatedModule=[[module_id]] param in order to paginate Repro Steps • Go to page • Insert module search form via toolbox (check Display Pagination checkbox) • Save the page • Go to page • Click search • Go to second page • Remove &paginatedModule=[[module_id]] from the URL
Expected: • &prop_ModuleId=[[module_id]] is enough to determine module Actual: • &prop_ModuleId=[[module_id]] is ignored, still waiting for &paginatedModule=[[module_id]]
13 updates
New features1
Mailchimp API Integration Stage 2
Marketing
Mailchimp API integration: Email Campaigns Added 4 tabs for email campaign: • Settings • Name (100characters) • Mailing List • Schedule Delivery • One time Campaign • Schedule delivery
• Email info • From Name(100 characters) • FromEmail(100 characters) • Subject(150 characters) • Preview Text(150 characters)
• Content • Preview(with ability to send test email)
Campaign can be changed between statuses: Draft -> Sent (One time Campaign sent) Draft -> Scheduled (Campaign scheduled) Scheduled -> Draft (Campaign unscheduled) Scheduled -> Sent (Schedule delivery Campaign sent)
Saving ability works only in Draft state. Sent state doesn't allow any saving or unscheduling options. Scheduled state allows unscheduling of the campaign (on preview tab). Mailchimp API integration: Send Email Campaign Provided ability to send campaign • Instantly (if Settings - Schedule Delivery - One time Campaign setting selected and send button is triggered) • On specific time scheduled in campaign settings (if Settings - Schedule Delivery -Schedule deliver settings are set and send button is triggered) Mailchimp API integration: Send Test Email Campaign Provided ability to send test campaign to the specific email addresses Email Marketing -> Campaign -> Toolbox for email content Provided a toolbox with tags for email campaign content
Other updates7
Mailchimp API integration: Email Campaigns
Added 4 tabs for email campaign: • Settings • Name (100characters) • Mailing List • Schedule Delivery • One time Campaign • Schedule delivery
• Email info • From Name(100 characters) • FromEmail(100 characters) • Subject(150 characters) • Preview Text(150 characters)
• Content • Preview(with ability to send test email)
Campaign can be changed between statuses: Draft -> Sent (One time Campaign sent) Draft -> Scheduled (Campaign scheduled) Scheduled -> Draft (Campaign unscheduled) Scheduled -> Sent (Schedule delivery Campaign sent)
Saving ability works only in Draft state. Sent state doesn't allow any saving or unscheduling options. Scheduled state allows unscheduling of the campaign (on preview tab).
Mailchimp API integration: Send Email Campaign
Provided ability to send campaign • Instantly (if Settings - Schedule Delivery - One time Campaign setting selected and send button is triggered) • On specific time scheduled in campaign settings (if Settings - Schedule Delivery -Schedule deliver settings are set and send button is triggered)
Mailchimp API integration: Send Test Email Campaign
Provided ability to send test campaign to the specific email addresses
Email Marketing -> Campaign -> Toolbox for email content
Provided a toolbox with tags for email campaign content
Partner Portal: Disable Save button after start creating site process
Save button now disables when site creating process is triggered
Liquid consistancy in emails
• Body,Subject, FromEmail, FromName should be parsed by liquid: • Forms -> Autoresponder • Forms -> Workflow Emails • Custom module item created from frontend -> Autoresponder • Custom module item created from frontend-> Workflow Emails
• Context that passed for rendering Body should be also passed to email template: • Forms -> Autoresponder • Forms -> Workflow Emails • Custom module item created from frontend -> Autoresponder • Custom module item created from frontend-> Workflow Emails
Partner Portal: Support Ticket Form
Created menu items "Support" that leads to the page with the form. On submit – if you are logged into codeproduction.co – your ticked will be created. If you are not logged in – you will be redirected to the login form. After successful submit of the login form – ticked will be created.
Bug fixes5
Sitemap is outputting disabled items
Sitemap will not add “disabled” module items. Module items classified as “Disabled” are: • Enable checkbox is false • Release date is greater than current date • Expiry date is less than current date
Clicking on the same particular custom module in menu bug
When in a Custom Module showing list items, and you click on the same Custom module menu again, it doen't go to a blank screen any more -http://prntscr.com/lunwel
Over 4000 characters in form data crashes form submit
Fixed form submit error when submitting over 4000 characters (in sum between all form fields).
Filtering by tags and categories doesn't work
Fixed filtering by tags and categories via module search form. Previously result were: Liquid Error: Invalid cast from 'System.String' to 'System.Collections.Generic.IEnumerable`1
nICE duplicates $ symbol in the content
If content contains "$1" or single "$" - after save dollar symbol doesn't duplicate multiple times.
40 updates
New features2
Global Preview Button
Admin Panel
Added "Home" button to admin header bar (next to the partner logo) that opens the home page in a new tab.
Mailchimp API Integration Stage 1
Marketing
Mailchimp API integration. Added new section: 'Email marketing' > 'API provider'. This allows you to setup Mailchimp API credentials (API key) that are required for integrated email marketing functions. API key can be retrieved on this page from the mailchimp account https://us19.admin.mailchimp.com/account/api/ (us19 in the url is datacenter that can be different for your account, so may need to replace this with your account’s datacenter) Mailchimp API integration: Mailing Lists Added new section 'Email Marketing' > 'Mailing Lists'. Section provides the ability to perform Create, Read, Update and Delete actions (CRUD operations). When a Mailing List is added, updated or deleted – it will be automatically added, updated or deleted in the linked mailchimp account (using API credentials in 'Email Marketing' > 'API Provider'). Currently one way push from Treepl CMS to Mailchimp (two way sync will come later). Mailchimp API integration: Subscribe/Unsubscribe user event. If a user subscribes or unsubscribes from a mailing list via Mailchimp, the event is pushed to Treep CMS to unsubscribe the CRM contact from the appropriate mailing list. • If mailing list does not exist in Treepl CMS - skip action (Example - mailing list was deleted via admin but the user unsubscribes after the mailing list was deleted). • If the CRM contact does not exist - skip action (Example - user was deleted via admin but actual the user unsubscribes after their CRM record was deleted) Mailchimp API integration: CRM Contact mailing lists management. Added ability to view subscriptions via the CRM contact record, as well as subscribe and unsubscribe them to/from mailing lists. Also added same ability in the 'Mailing List' > 'Subscribers' section.
Improvements5
Change "Email Notification" To "Auto-response"
Emails
"Email Notification" title, in the forms settings page, is now more correctly changed to "Auto-response".
Default Datepicker
UI/UX
Date fields will be generated by the system using default datepicker (on content forms when form layout is generating by the system and when generating create/update module item forms).
Module Settings On System Modules
Blogs
System Modules now have settings and properties available to access (found under the gear icon), which include: • Blogs • Blog posts • Banners • FAQ's • Galleries • Authors Available on Pro+ plans only.
More Settings On Google Analytics Page
Analytics
Added more data from Google Analytics available through the API: • "When do your users visit?" https://prnt.sc/lp0xxy • "How are your active users trending over time?" http://prntscr.com/luj9zn
Refine ReCaptcha For Mobiles
Forms
Default form layout generator now generates reCaptcha’s code in compact mode for mobile using liquid conditional statement (utilising the 'data-size="compact"' attribute). A form label is also now added to the markup.
Other updates21
Alternative Domain For Trial Sites
Added ability to choose an alternative domain for new trial sites (trialsite.co) rather than the current "treepl.co" domain.
Mailchimp API integration.
Added new section: 'Email marketing' > 'API provider'. This allows you to setup Mailchimp API credentials (API key) that are required for integrated email marketing functions. API key can be retrieved on this page from the mailchimp account https://us19.admin.mailchimp.com/account/api/ (us19 in the url is datacenter that can be different for your account, so may need to replace this with your account’s datacenter)
Mailchimp API integration: Mailing Lists
Added new section 'Email Marketing' > 'Mailing Lists'. Section provides the ability to perform Create, Read, Update and Delete actions (CRUD operations). When a Mailing List is added, updated or deleted – it will be automatically added, updated or deleted in the linked mailchimp account (using API credentials in 'Email Marketing' > 'API Provider'). Currently one way push from Treepl CMS to Mailchimp (two way sync will come later).
Mailing Lists subscriptions in Forms.
In 'Content' > 'Forms': • Added system form field "Mailing Lists" (checkbox list). When clicking on it opens window with the full list of all mailing lists and ability to select which mailing list(s) will be added to the form • The selected mailing lists are then output automatically in the form's layout when first generated: <label for="MailingLists">Subscribe To</label> <input type="checkbox" id="MailingLists1" name="MailingLists" value="[[list1 id]]">[[List1 Name]] <input type="checkbox" id="MailingLists2" name="MailingLists" value="[[list2 id]]">[[List2 Name]] <input type="checkbox" id="MailingLists3" name="MailingLists" value="[[list3 id]]">[[List3 Name]] • Once form is submitted - CRM contact record will be added to all selected lists. • 'MailingLists' property added to the {{formSubmissionData}} object for liquid as well as the 'CRM' > 'Form Submissions' entity.
Mailchimp API integration: Subscribe/Unsubscribe user event.
If a user subscribes or unsubscribes from a mailing list via Mailchimp, the event is pushed to Treep CMS to unsubscribe the CRM contact from the appropriate mailing list. • If mailing list does not exist in Treepl CMS - skip action (Example - mailing list was deleted via admin but the user unsubscribes after the mailing list was deleted). • If the CRM contact does not exist - skip action (Example - user was deleted via admin but actual the user unsubscribes after their CRM record was deleted)
Mailchimp API integration: CRM Contact mailing lists management.
Added ability to view subscriptions via the CRM contact record, as well as subscribe and unsubscribe them to/from mailing lists. Also added same ability in the 'Mailing List' > 'Subscribers' section.
More settings on Google Analytics dashboard.
Added more data from Google Analytics available through the API: • "When do your users visit?" https://prnt.sc/lp0xxy • "How are your active users trending over time?" http://prntscr.com/luj9zn
Refine reCaptcha For Mobiles
Default form layout generator now generates reCaptcha’s code in compact mode for mobile using liquid conditional statement (utilising the 'data-size="compact"' attribute). A form label is also now added to the markup.
Default Datepicker.
Date fields will be generated by the system using default datepicker (on content forms when form layout is generating by the system and when generating create/update module item forms).
Settings area available for System Modules.
System Modules now have settings and properties available to access (found under the gear icon), which include: • Blogs • Blog posts • Banners • FAQ's • Galleries • Authors Available on Pro+ plans only.
Show correct IP Address for Data Center.
When activating a site in the Partner Portal, the relevant data center's IP address is displayed for use in your DNS.
Change "Email Notification" To "Auto-response".
"Email Notification" title, in the forms settings page, is now more correctly changed to "Auto-response".
Global site preview button.
Added "Home" button to admin header bar (next to the partner logo) that opens the home page in a new tab.
{{request.device_type}} property.
Added 'device_type' property to request object {{request.device_type}}. Returns device type: • Desktop • Tablet • Mobile
SEO OG image tag improvement.
System will automatically prepend "https://[current Domain]" to the path of the selected image when setting the OG tag properties under the SEO tab for various items.
Pagination for Custom Module items was slightly reworked: • Component tag now defines what module should be paginated via a URL parameter 'ModuleId' that adds to the system generated page links when the module is rendered. If it matches the module defined in 'source:"moduleName"' than pagination will be applied. Otherwise - ignore pagination. • Extended the default generated pagination HTML markup to define moduleId in pagination links. • Pagination will be applied always. Not only if 'displayPagination: "true"' for the modules defined in URL parameter 'ModuleId'. • 'displayPagination: "true"' parameter should ONLY define if component tag should output self-generated pagination HTML or not.
Redirect to 'Unauthorized' system page if login failed.
On login process if the user failed to login, the system will redirect them to the 'Unauthorized' system page instead of redirecting to the home page with "/?login=failure" appended to the URL.
Bug fixes12
Double forward slash in URL when adding an item
Fixed double forward slash appending to the preview URL when creating new page/module item: http://prntscr.com/lue4cl
{{FormSubmissionData}} in autoresponders when creating a new item is not consistent
Submission data in autoresponders when creating new item now works correctly: • <pre>{{formSubmissionData}}</pre> - works case insensitive. • {{this.formSubmissionData}} - woking with or without the 'this' object. • {{this.formSubmissionData}} and {{this.member}} are now accessible in Email template for autoresponder when creating new module item. • Fixed empty object being returned if module had no custom properties, so system properties still accessible for general formSubmissionData object.
Custom Modules Search by categories, tags and checklists doesn't work properly.
Search by multiple categories, tags or checklist property values now works correctly and no longer results in a Liquid Error: Invalid cast from 'System.String' to 'System.String[]'
Opening custom module items in new tab goes to admin dashboard.
Opening custom module items in new tab now works as expected rather than redirecting to the admin dashboard.
Canonical link empty causing liquid error.
Fixed page crash if canonicalLink is empty (http://prntscr.com/lqz9vv) causing Liquid Error: This operation is not supported for a relative URI. Now no <link rel="canonical"> tag displayed on the page if value of the canonicalLink property is empty or not a valid URL.
Can't add www. to domain in 'SEO' -> 'Primary Domain'
This field for setting the primary site domain now allows any subdomain to be entered, including www.
Disabled page renders blank document.
When attempting to load a disabled page a completely blank document was rendered. Now system renders a 404 page.
Date comparison via module components not working.
Date fields can now be filtered in {% component type: "module" ... %} via 'filterBy' and 'filterValue' attributes, including: • Release data • Expiry date • Any date custom field If 'filterBy' is set to a date type field: • System will try parsing 'filterValue' as date. • If value is a date then compare it to the item’s date value (EXCLUDING the time component of the date value). Comparison rule is only “equals” to, so it's looking for an exact match. • If system can't parse 'filterValue' then filtering is ignored.
Nice editor - $[number] text bug
Texts that contain $ sign and a number next to it (eg: $2) no longer brakes text after saving.
Item without a detail layout shows completely blank document.
404 page is now displayed when an item’s detail layout has type “List” (or no layouts with type "Detail" are present or the default "Detail" layout has been saved as a "List" type).
Bug with rendering SEO Title.
SEO/meta title now renders by the system under the following conditions: • If <head> section already has <title> tag, than the system will not do anything, allowing custom title tag to display based on your own logic. • If <head> section of the page has no <title> tag than the system will add it populate the value firstly with the SEO title value or secondly using the item's name (if SEO title value is empty).
Item URL preview not updating correctly.
Item’s preview URL (shown under item’s URL field) is now displaying correctly when creating a new item and when editing existing and updating it's parent folder (resulting in URL change).
Framework: Foundation 6.5 Full nICE compatibility MORE DETAILS
Improvements9
Alternative Domain For Trial Sites
WebinOne Portal
Ability to create trial sites under an alterntative "trialsite.co" domain. Currently, you are only able to create trial sites under "treepl.co" domain. THIS IS A TEMPORARY SOLUTION BEFORE "BRANDED DOMAIN" FEATURE IS AVAILABLE
BONUS: Advanced URL Redirects
SEO
Ability to create redirects to external sites or other domains of the current site. Ability to create redirects from URL's that contain file extension (.asp, .php, etc.) but not .htm and .html If you want to setup a redirect from "/some/url.htm" to any other, just create a new URL redirect using "/some/url" (excluding ".htm" extension) in FROM field. Such setup will cause a redirect either from "/some/url" or "/some/url.htm" or "/some/url.html".
BONUS: Create/Update Media Files In A Custom Module Item By Logged In Users
Custom Modules
Convert Media type field to <input type="file" name="prop_[[media_property_alias]]"> on forms that are retrieved by Components toolbox. All files will be uploaded and stored in "/media_images/[[module_id]]/[[item_id]]/[[filename]]"
BONUS: Extra Slash At The End Of URL
SEO
Remove general rule of adding "/" in the end of every URL. All file URL's that list in the ‘Pages’ layout display as a folder structure ie. /contact/ instead of /contact so they are harder to copy/paste. With the url having a "/" at the end, the problem here is that with and without the slash are actually two different urls. We don’t want multiple versions of a url spidered in search engines if customers accidentally copy/paste it with a "/" when there shouldn’t be one. Just aiming for clean urls thats all.
BONUS: Image manager in WYSIWYG
UI/UX
Ability to add images from the WYSIWYG editor, instead of copying the code to the code editor. All files uploaded through WYSIWYG editor will be stored in a separate "uploaded_images" folder on FTP.
BONUS: <head> Section Extra
SEO · UI/UX
"Meta Tags" is now "<head> section extra" and is powered by ACE editor. Minor label text changes.
BONUS: Primary Domain Management
SEO · UI/UX
"Primary Domain" field validation prevents from saving strings that don't match domain pattern. If "Primary Domain" field is empty and "Enable automation of sitemap.xml" is enabled, the validation error would appear.
Extra CRM Contact Fields
CRM
New contact fields: - Status (text) - Notes (textarea) Fields can be used in a form builder.
Properties Categories To Become Global
Blogs · Custom Modules
Modules > Properties > 'Categories' become global (like in BC) while 'Tags' remain unique per module.
7 updates
New features2
BONUS: Duplicate Button
General
Ability to duplicate any existing 'Page', 'Content Template', 'Custom Module item', 'menu' etc.
BONUS: Duplicate Form
Forms
Ability to duplicate any existing form.
Improvements5
Add, Edit And Delete Custom Modules Items (Frontend)
Custom Modules · Member Area
Ability to Add, Edit And Delete Custom Module Items for logged in users. Ability to setup Add, Edit Or Delete module item permissions for particular Custom Module Ability to setup autoresponder when new module item created by logged in user.
Automation Of Sitemap.xml
SEO
Add an automatic sitemap.xml listed for each site and refreshed every 24 hours. If we can make selections about importance of each page ie. priority and change frequency that would be ideal with the last modified date automatically updated. The sitemap needs to be setup with all urls being the ‘default’ domain ie. either the www or non-www.
This should include all pages, products, blog posts, custom modules (detailed view only) and media downloads if possible. Do not include FAQs, Galleries/Sliders, Banners, Forms, Snippets, Content Templates, Menu Bars as these don’t generally have a full page dedicated to them.
BONUS: FTPS
FTP
- Switching from FTP to FTPS NOTE: Login process is the same as it has been. However, you may need to change Protocol or Encryption setting in your FTP client of choice when using saved/favorited connections.
BONUS: Show “Enabled/Disabled” In “Pages”
General · UI/UX
Show if a page is enabled or disabled to better handle individual page visibility.
For example in the same way as in menus.
Pre-setup Default Workflow Notifications
Workflow
All sites (with any plan) get a default workflow: - Name: "Inquiry Workflow" - "Inquiry Workflow" can not be deleted - "Inquiry Workflow" can not be renamed
Workflow restrictions for "Essential" and "Business" plans: - Disabled add/edit/delete options for all workflows other than "Inquiry Workflow" - Disabled "Email Marketing" > "Emails" section - Disabled workflow triggering on form submissions for all workflows other than "Inquiry Workflow" - "Settings" > "Workflow" section shows only "Inquiry Workflow" - All workflows are available in "Content" > "Forms" > "Any Form" -> "Settings" Section (workflow dropdown)
14 updates
New features6
Add Basic Open Graph Fields
SEO
Option to set Basic Open Graph http://ogp.me/ for every site page, detailed custom module pages, overall blog pages, blog posts (article og), products, media downloads (structured properties) if possible.
Include a robots.txt file on all website templates that allows for spidering of whole site.
Link Manager
General · UI/UX
All link/file selection field types throughout the admin. Like a 'link manager' type widget, similar to in BC. For example in 'menus', this will give the ability to select a link in the "link manager", instead of manually typing it in.
Primary Language On Site
SEO
Include option to set the primary language on a site.
Site Activation Billing
WebinOne Portal
Integrate billing as a first step of activating the site from trial to live.
Ability to import/export items (parent or child) in a tree view. All items are imported/exported to/from the level where you perform the action.
Default Home Page Setup
General · SEO
Abbility to setup any page as a home page. As a result the "/" URL will render that selected page.
Disable Content From Site Search
General · SEO
Ability to disable certain content from site search functionality as it is currently bringing up results like list items, galleries etc. that don’t have a whole page dedicated to them.
Email Template For Autoresponders
Forms
Ability to assign email templates to autoreponders
File Manager In Templates And Snippets
File Manager · UI/UX
The ability to access file manager in templates and snippets like in a normal page.
"text type" to "media type"
Blogs · Galleries/Sliders · UI/UX
In blogs and slides, make "text type" image source properties to become "media type" for easier image management.
Title On Admin Pages
Admin Panel
Remove the title of the admin pages, so it doesn't say "Treepl".
Title Tag In Menu Items
Menus · SEO
‘Title’ tag for the menu items - For improved SEO.
Allow menu items to have a tooltip added and only show target, id and class fields if they aren’t empty like how BC renders menu bar items.
15 updates
New features8
Secure Zones
Member Area
Ability to:• Create secure zones • Assign content to secure zones • Assign secure zones to registered users
AU + EU Data Centers
Infrastructure
Ability to create sites on AU (Sydney) and EU (Frankfurt) data centers. Planned for October 10th release.
Visual In-Context Editor (nICE) v1.0
General · UI/UX
Will be rolled out only to paid Treepl Partners. WARNING: some Treepl Partners may get it earlier.
Sitemap in XML
SEO
- sitemap.xml is generated by request (separate button). - Sitemap management (code editor).
BONUS: Custom Workflows
CRM · Forms
Ability to setup custom workflow notifications to Admin Users and/or manually added emails.
BONUS: System Pages
Admin Panel · General
- "Settings" > "System Pages" - adding a separate section for customizing system pages. -"404" and "Form Submission Results" pages will be moved to this section. New system pages: "Forbidden" (secure zone access denied page), "Email Confirmation", "Request Reset Password", "Request Reset Password Result", "Reset Password", "Unauthorized".
"| number" Filter For Liquid
Liquid
New filter for formatting: - Format: {{variable | number: "[thousands separator]","[decimal point]","[decimals count]"}}
Social meta tags appear in the <head></head> of a webpage.
Improvements7
BONUS: Edit Template From The Page
Pages and Templates · UI/UX
Allow navigation ("Edit" link) from the page to the template page directly.
BONUS: "Last Updated" Date Of Module Item
Blogs · Custom Modules · Pages and Templates
"Last Updated" date tracking and accessibility through liquid tag: {{ this.LastUpdatedDate }}
BONUS: Menus Improvement
Menus
- Splitting Menu properties (Name, Alias) and Menu builder into 2 separate tabs to remove extra white space - Remove "Save" and "Delete" from "Menu builder" tab
BONUS: "Save and New" and Delete buttons
UI/UX
- "Save and New" button next to "Save" on Snippets and Custom Module items - Move delete button to the right bottom of the editing page
Branded Background Image Caching
UI/UX · WebinOne Portal
Make the branded background image for the login page to cache.
Liquid Tag Insertion, Copying and Displaying
Custom Modules · Liquid · UI/UX
Module > Layouts > Properties (aka Toolbox) Ability to: • Copy liquid tag • Insert liquid tag into last cursor position inside the layout • See Liquid tag in a plain view next to the property name for easy reference
Split Up Elements Into Sections
UI/UX
Split up elements of the system and Custom Module items into sections
4 updates
New features3
Manage Through FTP: Pages
FTP
- All pages of the site available via FTP - Ability to create, delete or update pages via FTP
Custom Module Items Import + Export
Custom Modules
Ability to import and export Custom Module items through the admin.
Custom Module Items Search
Custom Modules
- Ability to develop search by Custom Module items using search forms
Improvements1
BONUS: Multiple Files Deletion In File Manager
File Manager · UI/UX
- Allow multiple files to be selected for deletion in tile view - Double-click on on item opens it for editing
9 updates
New features4
BONUS: Dine&Wine Template
Templates
Dine&Wine template is available now in the Partner Portal (trial partner portal as well).
CRM CRUD operations
CRM
Ability to manually create, update, and delete CRM records (contacts, form submissions).
Force Download Handler
General
- Ability to specify "force download" behavior assigned to a certain media content link. - If link matches the pattern than the content will be dowloadable to the site users regardless of the media content mime type. Pattern: <link_to_media_content>?downloadable=1 Example: File: /images/fruits/apple.png Force Download Link: /images/fruits/apple.png?downloadable=1 As the result the apple.png media file will be downloaded and not rendered in the browser.
WYSIWYG/Code Editor Switcher
Admin Panel · General · Pages and Templates · Snippets · UI/UX · WYSIWYG Editor
- New Code Editor (ACE code editor) integrated on every page, snippet, item - The "WYSIWYG/Code Editor" switcher saves preferred editing method for each page, snippet, item - Removing "Code View" from the WYSIWYG Adding this feature will resolve auto code cleanup issue in the WYSIWYG editor (you will have to use the Code Editor for all the advanced liquid or HTML code)
Improvements3
Advanced Custom Property Editing
Custom Modules · UI/UX
- Options builder for dropdown, checklist, radiolist property types - Ability to change property types without loosing already saved data in the items
File Upload Type Field
Forms
- Ability to add custom form field for uploading files in forms - Uploaded files are available through FTP (/_form_submissions/<formID>/<submissionID>)
New Property Type: Media
Custom Modules
- New property in Custom Modules - Media field type - Calling out the File Manager with ability to insert image path right into the text field that is associated with the media type field - "Make downdloadable" button that enables forced download action of the file instead of rendering in the browser (image, PDF etc.)
Bug fixes2
Enable Release Expiry
Exclude items from rendering in lists through custom module compontent tag if: - Item is not "Enabled" - Current date is not in between "Release Date" and "Expiry Date"
String Comparison in Liquid
- Ability to compare strings using ">" and "<" operators (just like in BC)
7 updates
New features1
URL redirects
SEO
Ability to setup custom URL redirects.
Improvements4
Activate site
WebinOne Portal
Automatic activation of a trial site into live site under end-client domain.
Dashes In Slugs
Blogs · Custom Modules · Pages and Templates · UI/UX
All generated pages, blog posts and custom modules URLs to use dashes instead of underscores.
More Liquid in autoresponders
Forms
Ability to render Liquid in "From Name", "From Email" and "Subject" fields. Currently liquid is only rendered in "Body"
Unsaved Data Alert
Admin Panel · UI/UX
When you leave editing any content item without saving changes, the alert message appears with an option of saving the changes prior to leaving the page.
Bug fixes2
Filter By DataSource
Liquid module component doesn't filter by DataSource field
Liquid Components In Autoresponders
Component modules do not work properly in autoresponders.
4 updates
New features2
Forms
Forms
- Full stack form builder - reCAPTCHA v2 - Custom layouts - Custom autoresponder layouts supporting Liquid
Simple CRM
CRM
- CRM Contacts from form submissions - Form submission records
Improvements1
Instant site creation
WebinOne Portal
- Ability to create a trial site instantly - Ability to duplicate trial and live sites Note: all live site duplicates will be created as new trial sites
Bug fixes1
Filtering by category
Filtering a custom module by category doesn't work.
No releases match your search.
Login to vote
This area is exclusive for WebinOne Partners only. This is not your login to WebinOne Portal. To log in into WebinOne Portal go to: portal.WebinOne.co
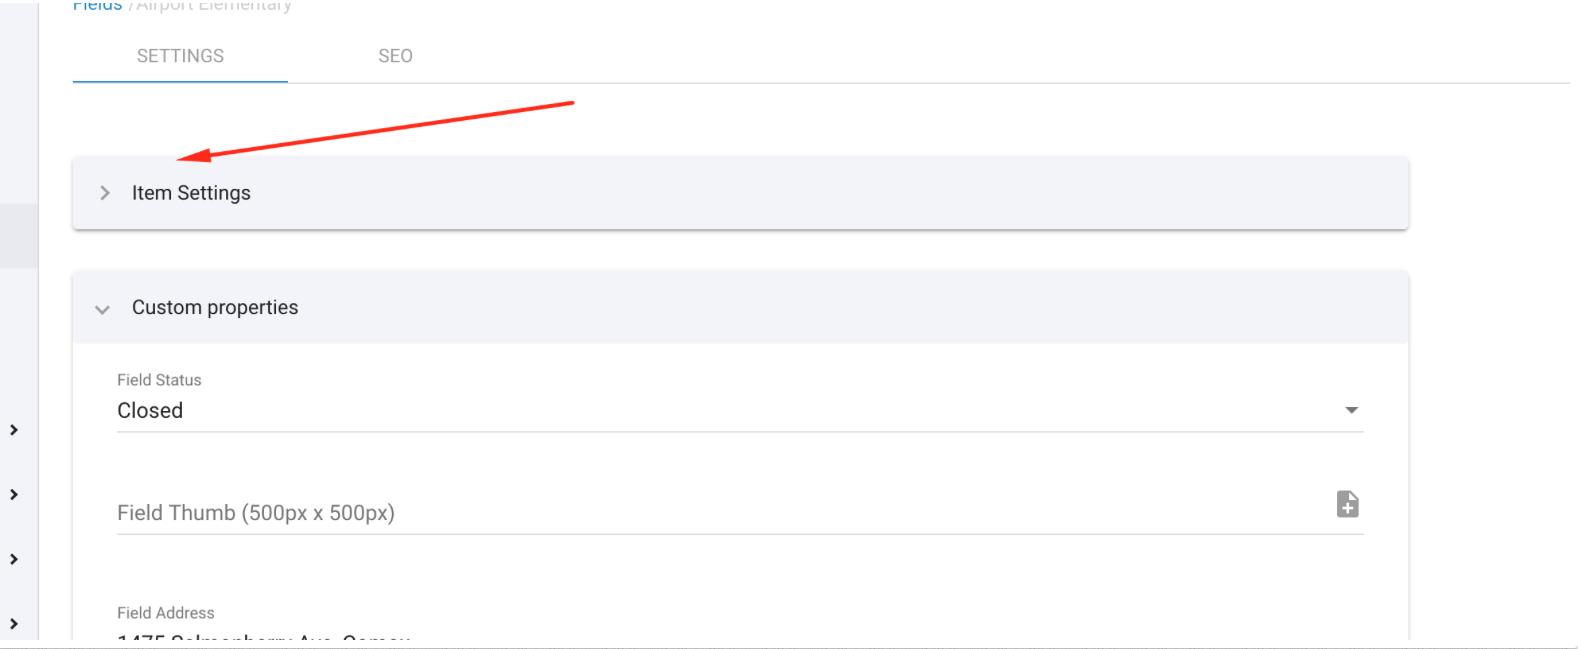
 ">
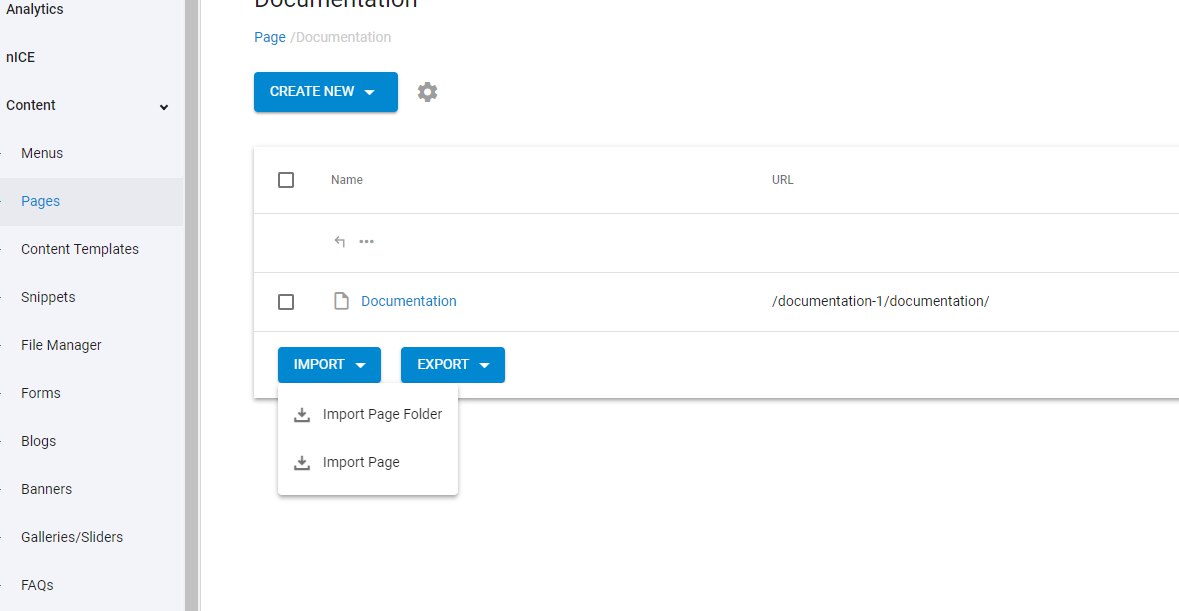

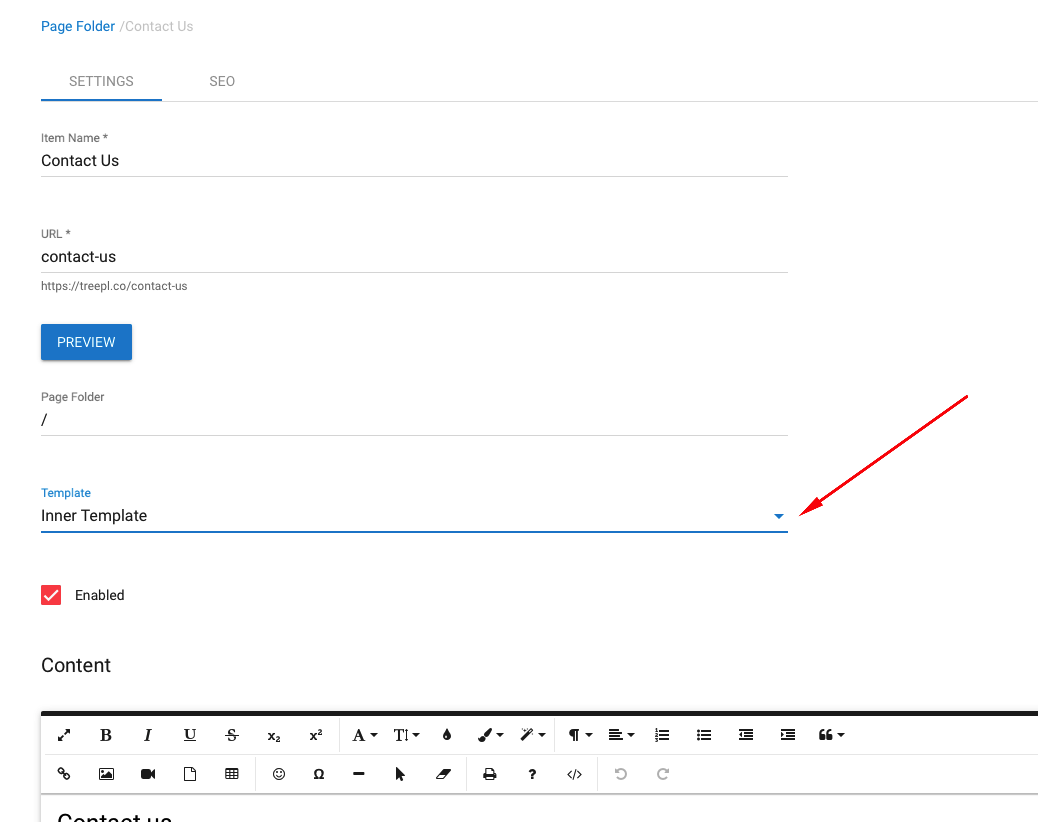 Allow navigation ("Edit" link) from the page to the template page directly.
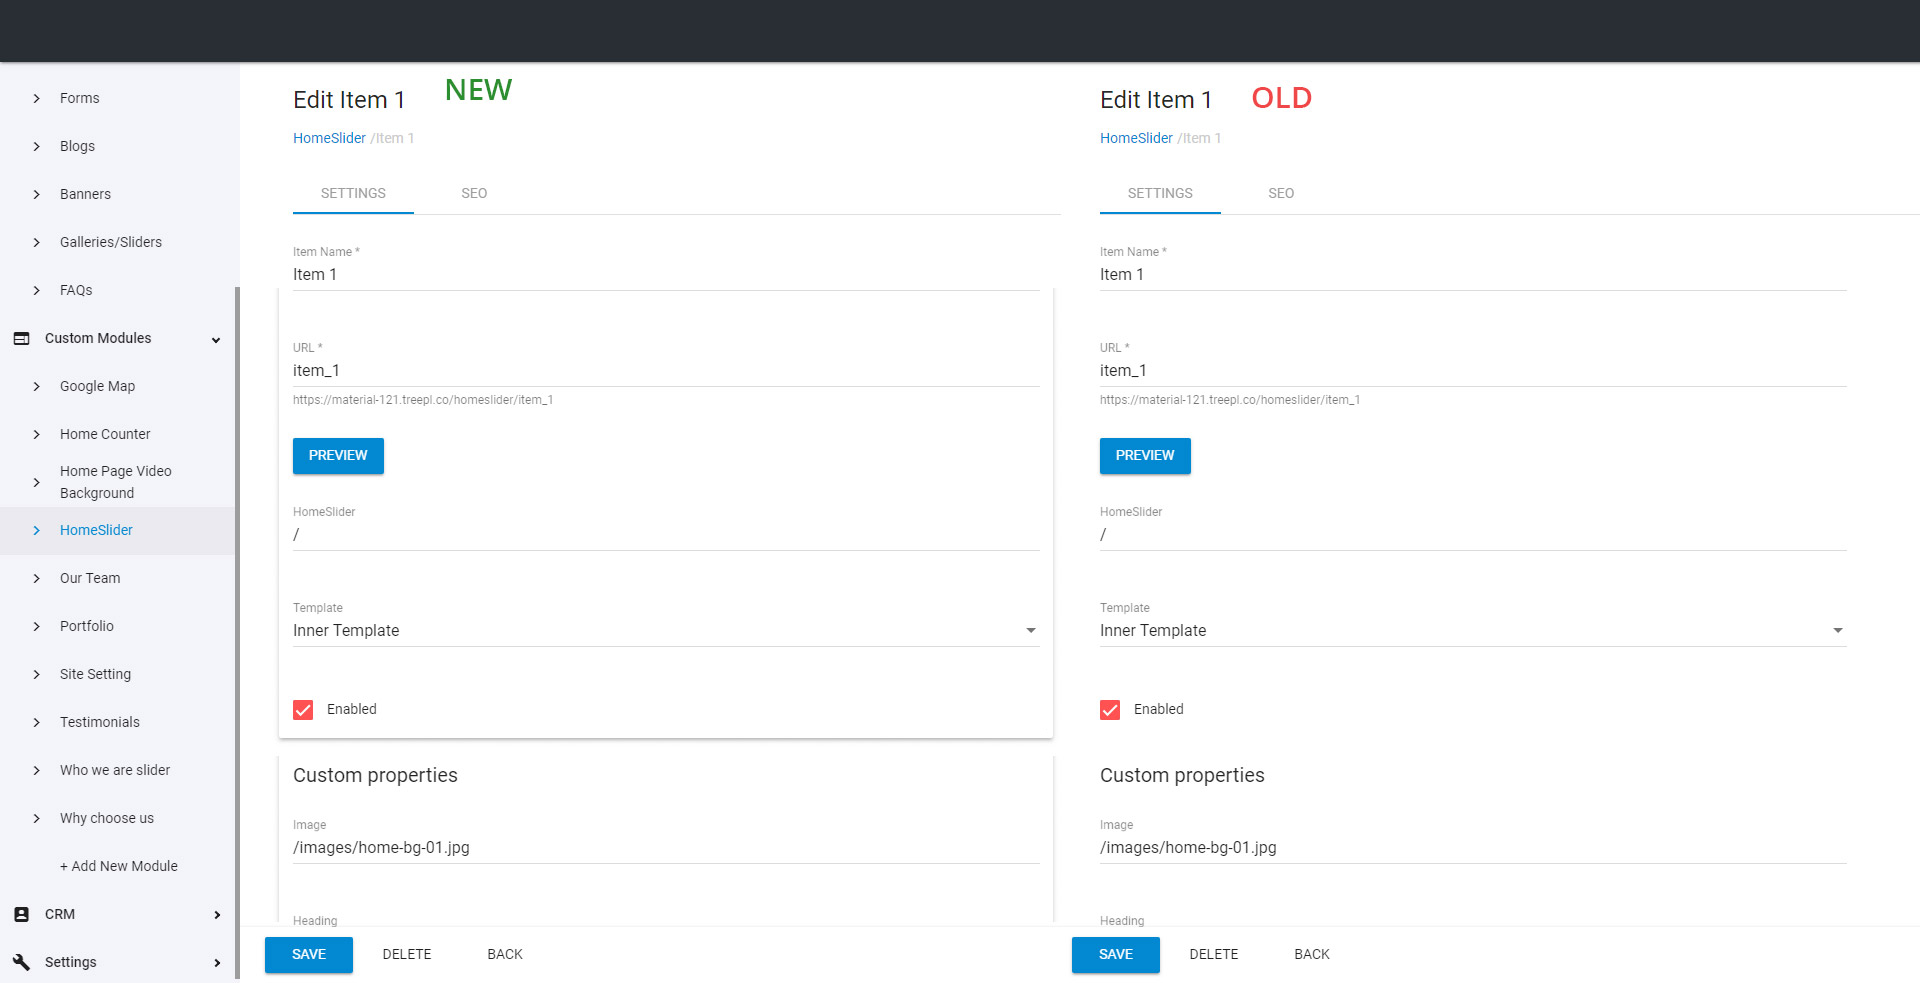 Split up elements of the system and Custom Module items into sections